
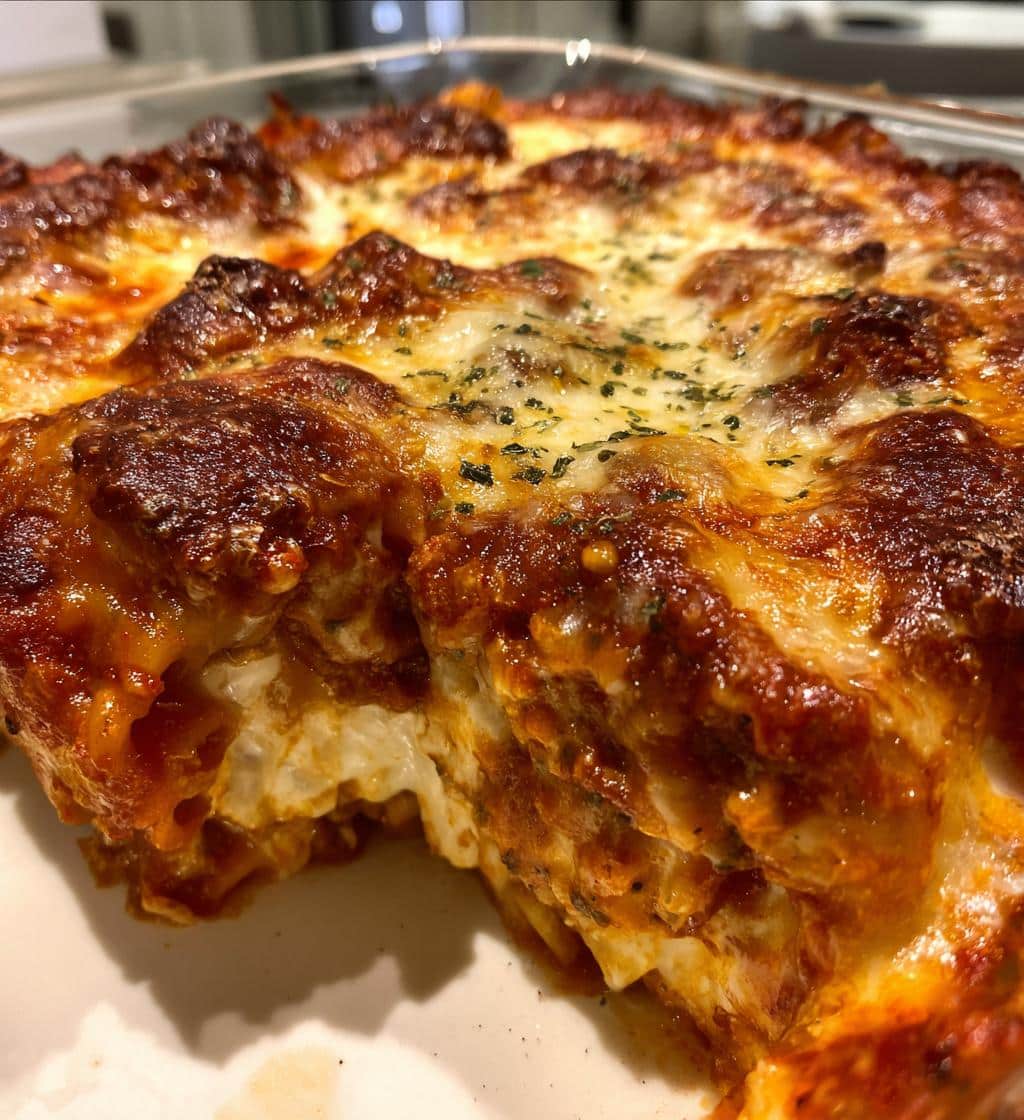
Baked Ziti is a beloved Italian-American dish, offering hearty comfort in every bite. This classic pasta recipe features tender ziti pasta, rich marinara sauce, and a generous blend of cheeses, all baked to golden perfection. It’s the ideal family dinner, perfect for special gatherings or a cozy weeknight meal, bringing warmth to any table.
Key Takeaways
- Baked Ziti is a comforting, cheesy pasta dish perfect for family dinners.
- Preparation involves cooking pasta, mixing sauce, layering cheese, and baking.
- Customization options include adding meat, vegetables, or gluten-free pasta.
- It’s an excellent make-ahead meal and stores well for future enjoyment.
This dish satisfies deeply. Warm pasta layers bring joy. Rich cheese melts perfectly. It’s a true crowd-pleaser. Enjoy this comforting, hearty, simple meal.
About this Baked Ziti Recipe
What makes it comforting?
This easy baked ziti recipe truly embodies comfort food. Its inherent warmth comes from layers of tender ziti pasta generously coated in a rich, savory tomato sauce and abundant melted cheese. The blend of creamy ricotta, gooey mozzarella, and sharp Parmesan creates a harmonious texture and flavor profile that feels like a warm hug. It’s a dish that evokes nostalgia, often associated with family gatherings and cozy evenings. The aroma filling your kitchen as it bakes is a promise of the delightful, hearty meal to come, making it a perfect choice for those seeking a fulfilling and satisfying dinner. Each forkful is a celebration of simple, wholesome ingredients coming together to create something truly special and deeply comforting.
How long does it take?
Preparing and baking this cheesy baked ziti requires a reasonable amount of time, making it achievable for a weeknight meal while still feeling like an indulgent treat. Typically, the active preparation time, including cooking the pasta and mixing the sauce, ranges from 25 to 35 minutes. This involves boiling the ziti, sautéing any aromatics for the sauce, and assembling the layers. The baking time itself usually takes around 30 to 40 minutes in the oven, allowing the cheeses to melt, bubble, and achieve a beautiful golden crust. So, from start to finish, you can expect this delicious Italian-American dish to be ready on your table in approximately 60 to 75 minutes. This cooking time can vary slightly based on your oven and how quickly you assemble the layers, but it’s a relatively straightforward process that yields impressive results for a comforting family dinner.
Ingredients for Baked Ziti
Pantry staples needed
Crafting a truly delicious homemade ziti begins with a selection of readily available pantry staples. You’ll need dry ziti pasta, of course, a sturdy tubular pasta that holds up well to baking. For the sauce base, gather canned crushed tomatoes, often combined with tomato paste for depth, along with aromatic vegetables like onion and garlic. Don’t forget olive oil for sautéing, and a few basic seasonings such as dried oregano, basil, salt, and black pepper to enhance the flavor. A splash of red wine or a pinch of sugar can also be added to balance the acidity of the tomatoes, if desired. These foundational ingredients create the rich, savory backdrop for your ziti casserole, ensuring every bite is bursting with traditional Italian flavor. Having these on hand makes preparing this hearty meal incredibly simple and convenient.
Cheeses for pure comfort
No cheesy baked ziti recipe is complete without a generous trio of cheeses that melt into an incredibly comforting, gooey masterpiece. The star of the show is often ricotta cheese, providing a creamy texture and mild, slightly sweet counterpoint to the savory tomato sauce. It’s usually mixed with an egg and some herbs to create a flavorful, spreadable layer. Next up is low-moisture, shredded mozzarella cheese, which delivers that iconic stretch and gooeyness when baked, forming delicious pockets throughout the dish. Finally, freshly grated Parmesan cheese (or Pecorino Romano for a sharper kick) adds a salty, nutty, and umami depth, forming a beautiful golden crust on top. Some recipes also call for provolone or fontina for added complexity. This combination ensures every forkful is loaded with cheesy goodness, truly making it a comfort food classic. For more cheesy inspiration, check out our creamy baked mac and cheese.
Preparing Your Ziti Pasta
Cooking the pasta right
The key to a perfect baked ziti recipe starts with properly cooked pasta. Since the ziti pasta will continue to cook in the oven, it’s crucial to boil it al dente. This means cooking it for 1-2 minutes less than the package instructions recommend. The pasta should still have a slight bite to it, as it will absorb moisture and soften further while baking in the sauce. Overcooked pasta will become mushy and lose its structural integrity in the casserole. Once cooked, drain the ziti thoroughly, but do not rinse it. Rinsing removes the starch that helps the sauce cling to the pasta, which is essential for a cohesive and flavorful dish. You can even reserve a little pasta water to thin your sauce if it becomes too thick. Ensuring your ziti pasta is cooked just right sets the foundation for delicious, firm layers.
Mixing the sauce
The heart of any great baked ziti recipe is its sauce. While a high-quality jarred marinara can be a fantastic shortcut, a homemade sauce elevates this comfort food classic to another level. Begin by sautéing minced garlic and diced onions in olive oil until softened and fragrant. Add your crushed tomatoes, tomato paste, and a selection of Italian herbs like oregano, basil, and a bay leaf. Simmer the sauce gently for at least 20-30 minutes, allowing the flavors to meld beautifully. If adding meat, brown it with the onions and garlic before adding tomatoes. Once your sauce is ready, combine a portion of it with your al dente ziti pasta, ensuring every piece is evenly coated. This step is vital for preventing dry pasta and guarantees that each bite is infused with savory, rich tomato flavor. You want the pasta to be well-dressed but not drowning, ready for its cheesy layers.
Building Cheesy Baked Ziti Layers
First ziti layer
Assembling the layers for your cheesy baked ziti is where the magic truly begins. Start by spreading a thin layer of your prepared tomato sauce (without pasta) on the bottom of a 9×13-inch baking dish. This prevents the pasta from sticking and creates a flavorful base. Next, spoon about half of your sauce-coated ziti pasta evenly over the base layer. Ensure the pasta is spread out relatively flat to allow for even baking and distribution of cheese. On top of this first pasta layer, dollop half of your ricotta cheese mixture (if using a ricotta blend with egg and herbs), distributing it in small spoonfuls across the ziti. This creamy element is crucial for moisture and flavor. Finally, sprinkle generously with about a third of your shredded mozzarella and a quarter of your grated Parmesan. This methodical layering ensures every forkful contains a delightful mix of pasta, sauce, and cheese.
Adding more cheese
Once the first layer is complete, it’s time to repeat the process to build up the rich, hearty texture of your baked ziti. Add the remaining sauce-coated ziti pasta on top of the first cheesy layer, spreading it out evenly. Then, distribute the rest of your ricotta mixture (if applicable) over this second pasta layer. Now comes the moment to add even more cheese for pure comfort! Sprinkle the majority of your remaining shredded mozzarella and Parmesan over the ricotta and ziti. You want a substantial cheese layer that will melt into a luscious, gooey blanket. Some people like to reserve a small amount of mozzarella and Parmesan for the very top, adding it during the last 10-15 minutes of baking for an extra golden crust. This strategic layering ensures your family dinner will be packed with cheesy goodness from bottom to top, making this easy baked ziti a true crowd-pleaser.
Baking Your Ziti to Perfection
Oven temperature settings
Achieving the perfect baked ziti requires attention to oven temperature. Most baked ziti recipes call for a baking temperature between 350°F (175°C) and 375°F (190°C). A temperature of 375°F is often ideal, as it allows the casserole to heat through thoroughly, the sauces to bubble, and the cheeses to melt beautifully without drying out the pasta or burning the top too quickly. If your ziti is assembled from cold (e.g., a make-ahead dinner), you might start it at a slightly lower temperature like 350°F for the first 20 minutes, then increase to 375°F to ensure it heats evenly to the center. Always preheat your oven fully before placing the dish inside to guarantee consistent cooking and to prevent the ziti from sitting in a cooling oven.
When ziti is done
Knowing when your baked ziti is done ensures a perfect, comforting result. Typically, a 9×13-inch dish of ziti will bake for 30 to 40 minutes, depending on the oven temperature and whether the ingredients were at room temperature or cold when assembled. You’ll know it’s ready when the sauce is visibly bubbling vigorously around the edges and through the pasta layers. The top cheese layer should be beautifully melted, golden brown, and slightly bubbly. For an extra crisp, golden crust, you can place the ziti under the broiler for the last 2-3 minutes, watching it very carefully to prevent burning. A quick internal temperature check with a food thermometer should register at least 165°F (74°C) in the center, confirming it’s heated through. This assures your hearty meal is cooked to perfection.
Serving Your Baked Ziti Comfort
Resting before serving
Once your baked ziti emerges from the oven, bubbling and golden, the temptation to dig in immediately is strong. However, allowing your ziti pasta bake to rest for 10-15 minutes before serving is a crucial step for the best presentation and eating experience. This resting period allows the hot cheese and sauce to set, preventing a messy, soupy consistency when you cut into it. The flavors also have a chance to meld further, making each spoonful even more delicious. Covering the dish lightly with foil during this time helps retain heat. Think of it like resting a steak; it just makes everything better. This simple act ensures your cheesy baked ziti holds its shape, making serving much easier and more appealing for your family dinner.
Best side dishes
A hearty baked ziti is often a complete meal on its own, but pairing it with complementary side dishes can elevate your family dinner. A simple, crisp green salad with a light vinaigrette is a classic choice, offering a refreshing contrast to the richness of the pasta. Garlic bread or crusty Italian bread is almost mandatory for soaking up any extra sauce and adding a satisfying crunch. For a vegetable side, steamed or roasted broccoli, asparagus, or green beans provide a fresh, healthy accompaniment. Consider making a batch of our crispy cauliflower for another delicious option. These sides help balance the meal, making your baked ziti experience truly enjoyable and well-rounded, showcasing why it’s a comfort food classic.
Nutrition Facts for Baked Ziti
Calories and protein
Understanding the nutrition facts for baked ziti can help in fitting this comfort food classic into your dietary needs. While specific values vary greatly depending on ingredients and portion sizes, a typical serving of baked ziti is generally considered a calorie-dense meal. It can provide a substantial amount of energy due to the pasta, cheeses, and often, any added meat. For protein, baked ziti is usually a good source, primarily from the cheese (ricotta, mozzarella, Parmesan) and any ground beef or sausage incorporated into the sauce. A standard serving can contribute a significant portion of your daily protein intake, making it a satisfying and hearty meal that supports muscle repair and growth.
Fats and carbs info
Baked ziti is also notable for its carbohydrate and fat content. The pasta itself is the primary source of carbohydrates, providing energy for daily activities. Choosing whole wheat ziti can increase the fiber content, which aids digestion and can help with satiety. Fats in baked ziti primarily come from the cheeses and any olive oil used in the sauce, as well as from ground meats if included. These fats contribute to the dish’s rich flavor and creamy texture. While delicious, being mindful of portion sizes is always a good strategy, especially for those tracking fat and carb intake. This easy baked ziti can be adapted to be lighter by using lean meats or reduced-fat cheeses, offering versatility for various dietary preferences. For more versatile dinner ideas, explore our dinners category.
Tips for Best Baked Ziti
Preventing dry pasta
A common pitfall in making baked ziti is ending up with dry pasta. To prevent this, ensure your ziti pasta is well-coated in sauce before layering. Don’t be shy with the sauce! Also, slightly undercooking the pasta (al dente) before baking allows it to absorb more liquid in the oven without becoming mushy. Another effective tip is to add a little extra liquid, like water or broth, to your sauce if it appears too thick. Covering the baking dish with foil for most of the baking time traps steam, keeping the pasta moist and ensuring it cooks evenly. Remove the foil only for the last 10-15 minutes to allow the cheese to brown. These simple steps ensure your homemade ziti remains wonderfully tender and saucy throughout, making every bite a delight.
Getting golden cheese
The hallmark of a truly appealing cheesy baked ziti is a beautifully golden-brown, bubbly top layer of cheese. To achieve this, use a good quality low-moisture mozzarella, which melts smoothly and browns nicely. Freshly grated Parmesan cheese also adds a lovely golden hue and sharp flavor. As mentioned, covering the dish with foil for the initial baking period prevents the cheese from burning prematurely. For the last 10-15 minutes, remove the foil to expose the cheese directly to the oven’s heat. If your cheese isn’t browning as much as you’d like, you can briefly place the dish under the broiler for 1-3 minutes. Watch it constantly, as broiler temperatures are intense and can burn cheese quickly. This technique guarantees a gorgeous, irresistible crust for your comfort food classic.
Customizing Your Baked Ziti
Adding meat or veggies
One of the best aspects of this easy baked ziti recipe is its versatility. You can easily customize it to suit your preferences or what you have on hand. For a heartier, more protein-rich meal, consider adding cooked ground beef, Italian sausage, or even shredded chicken to your tomato sauce. Brown the meat thoroughly before simmering with the sauce ingredients. If you’re looking to increase your vegetable intake, sautéed mushrooms, bell peppers, spinach (wilted and squeezed dry), or zucchini can be folded into the sauce or layered with the pasta. These additions not only boost nutrition but also add extra texture and flavor, making each family dinner unique. For more meat-focused recipes, consider our ground turkey and peppers recipe.
Gluten-free swaps
For those with dietary restrictions, turning this traditional pasta recipe into a gluten-free baked ziti is straightforward. The most important swap is using a high-quality gluten-free ziti pasta. Many brands offer excellent gluten-free options made from corn, rice, or legumes that hold their shape well during baking. Be sure to cook gluten-free pasta according to package directions, often slightly less than al dente, as it can sometimes become softer more quickly. All other ingredients—tomato sauce, cheeses, and seasonings—are typically naturally gluten-free. Always double-check labels, especially for sauces and spice blends, to ensure no hidden gluten. With these simple adjustments, everyone can enjoy this comforting, cheesy baked ziti as a delicious family dinner, ensuring no one misses out on this Italian-American dish.
Make-Ahead Baked Ziti Dish
Assembling ahead
Baked ziti is an excellent make-ahead dinner option, perfect for busy weeknights or feeding a crowd. To assemble ahead, prepare the pasta and sauce as directed, then layer everything in your baking dish up to 24 hours in advance. Cover the dish tightly with plastic wrap and aluminum foil to prevent it from drying out, and refrigerate. When ready to bake, remove it from the refrigerator about 30 minutes to an hour before baking to allow it to come closer to room temperature. This prevents the baking dish from cracking in a hot oven and helps ensure even cooking. Making it ahead allows flavors to meld further, often resulting in an even more delicious and cohesive final product. For other great make-ahead meals, check out our cheesy chicken and rice casserole.
Baking from cold
If you’re baking your assembled ziti directly from the refrigerator without letting it sit out, you’ll need to adjust the baking time. Increase the total baking time by about 15-20 minutes, or until the casserole is bubbling hot throughout. It’s often a good idea to start with the foil on for the entire initial baking period (say, 30-40 minutes at 375°F/190°C), and then remove the foil for the last 15-20 minutes to brown the cheese. This method ensures the interior heats thoroughly without the top burning. Always confirm the internal temperature reaches 165°F (74°C) for food safety. Baking from cold is a convenient way to enjoy a hearty meal with minimal effort on the day of serving, showcasing the versatility of this easy baked ziti recipe.
Storing Leftover Baked Ziti
Refrigerator storage
Properly storing leftover baked ziti ensures you can enjoy this delicious comfort food classic for several days. Once the ziti has cooled completely to room temperature (within two hours of baking), transfer it to an airtight container. If the baking dish has a lid, you can simply cover it tightly. Store the leftover baked ziti in the refrigerator for up to 3-4 days. It’s important to keep it well-sealed to prevent it from drying out and absorbing other odors in the fridge. This makes it an ideal choice for meal prepping, providing quick and satisfying lunches or dinners throughout the week. The flavors often deepen overnight, making the leftovers just as enjoyable, if not more so, than the freshly baked dish.
Reheating properly
Reheating baked ziti correctly is key to maintaining its delicious texture and flavor. For individual servings, the microwave works well. Place a portion on a microwave-safe plate, cover it loosely, and heat on high for 2-3 minutes, stirring halfway through, until heated through. For larger portions or an entire pan, the oven is best. Preheat your oven to 300-325°F (150-160°C). Cover the ziti with foil to prevent drying, and bake for 20-30 minutes, or until warmed through. You can remove the foil for the last few minutes if you want to re-crisp the cheese. Adding a splash of water or extra sauce before reheating can also help restore moisture to your hearty meal. Avoid overheating, as this can make the pasta mushy and dry out the sauce. Follow these tips for a perfectly reheated cheesy baked ziti.
Common Baked Ziti Questions
Freezing baked ziti
Baked ziti freezes exceptionally well, making it a fantastic option for future meals or emergency dinners. You can freeze it either unbaked or baked. To freeze unbaked, assemble the entire dish in a freezer-safe aluminum pan, cover it tightly with foil, and then an additional layer of plastic wrap. Label and freeze for up to 3 months. When ready to bake, thaw it in the refrigerator overnight and bake as directed, possibly adding extra time if still partially frozen. To freeze baked ziti, allow it to cool completely, then portion it into individual freezer-safe containers or wrap the entire pan well. Freeze for up to 3 months. Thaw in the fridge and reheat in the oven or microwave. Freezing a batch of this easy baked ziti is a smart way to always have a comforting family dinner on hand. Want more recipe inspiration? Visit our Pinterest page or follow us on Instagram for daily ideas!
Best cheese choices
While the classic trio of ricotta, mozzarella, and Parmesan is undeniably the go-to for cheesy baked ziti, you have options to customize. For the ricotta layer, some prefer a blend that includes an egg, parsley, and a pinch of nutmeg for added flavor and stability. When it comes to mozzarella, low-moisture, part-skim shredded mozzarella melts beautifully without releasing too much water. Fresh mozzarella can also be used, but it might make the dish a bit wetter. For the hard cheese, Parmesan is traditional, but Pecorino Romano offers a saltier, tangier profile that many enjoy. A provolone layer can add an extra depth of flavor and stretch. Experimenting with different cheese combinations allows you to tailor this comfort food classic to your exact taste, ensuring your pasta recipe is perfectly suited for your family dinner preferences.