
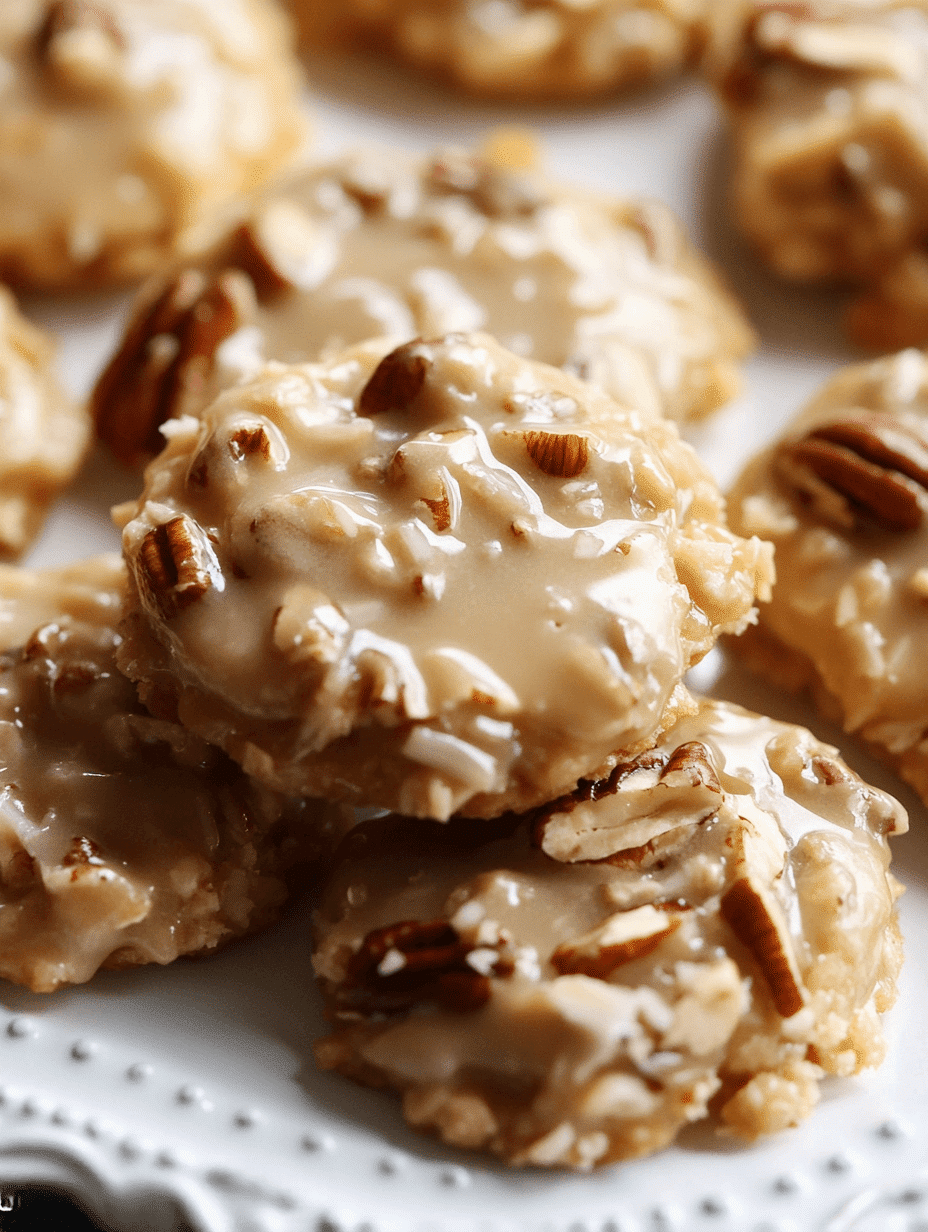
No-bake praline offers a wonderfully simple way to create a classic sweet treat. These delightful confections combine buttery richness with the crunch of pecans and tropical coconut flavor. Perfect for a quick dessert, they require minimal fuss, making them ideal for any home baker.
Key Takeaways
- Prepare your workspace and ingredients efficiently for a smooth praline making process.
- Utilize common pantry staples and star flavors like coconut and pecan for rich taste.
- Toasting nuts and coconut enhances depth of flavor significantly.
- Achieve the right consistency by carefully melting butter and sugar, then combining all ingredients.
- Proper dropping and setting ensures perfectly shaped and cooled praline clusters.
- Store no-bake praline correctly to maintain freshness and enjoy longer.
- Experiment with flavor variations and add-ins to personalize your easy dessert.
Sweet treats bring joy. No-bake praline is incredibly easy. It satisfies cravings quickly. A delightful sweet snack for everyone. Enjoy this simple recipe today.
Get Ready to Make Tasty Praline
Creating your own batch of delicious no-bake praline starts with proper preparation. This ensures a smooth and enjoyable cooking process, leading to perfect, creamy pecan praline every time. Whether you’re a seasoned candy maker or a beginner looking for an easy dessert, setting the stage correctly is paramount. This simple recipe minimizes stress and maximizes your enjoyment in the kitchen, resulting in a delightful homemade candy that everyone will love.
Prepare Your Workspace Easily
Before you even think about melting butter, take a few minutes to organize your kitchen. Clear your countertops, ensuring you have enough space for all your ingredients and equipment. Line a baking sheet with parchment paper or a silicone mat; this will be crucial for dropping your hot praline mixture later, preventing sticking and making cleanup a breeze. Having everything within arm’s reach makes the process more efficient, allowing you to focus on the delicate steps of creating this wonderful sweet snack. A well-prepared area contributes significantly to the success of your quick treat.
Gather All Recipe Ingredients
The next step is to gather all the necessary ingredients. Read through the entire candy recipe once or twice to familiarize yourself with the steps and quantities. Measure out your sugar, butter, milk, vanilla extract, pecans, and coconut. This “mise en place” approach means you won’t be scrambling for an ingredient in the middle of cooking, especially when the mixture requires constant attention. Having everything pre-measured and ready will make the combining stages much smoother, ensuring your no-bake praline sets up beautifully with that desirable creamy texture. For more fantastic dessert ideas, check out our desserts category.
Essential Ingredients for No-Bake Praline
The beauty of no-bake praline lies in its straightforward ingredient list, primarily featuring common items you likely already have in your kitchen. These foundational components come together to create a rich and satisfying sweet snack, perfect for any occasion. This simple recipe highlights how minimal ingredients can yield maximum flavor, especially when focusing on the quality of your star flavors.
Basic Pantry Staples Needed
For your no-bake praline, you’ll need granulated sugar, unsalted butter, milk (whole milk or evaporated milk works best for richness), and pure vanilla extract. These basic pantry staples form the creamy, sweet base of your pecan praline. The sugar provides the sweetness and structure, while butter adds richness and helps with the smooth texture. Milk contributes to the creaminess, and vanilla extract enhances all the flavors, giving it that classic homemade candy taste. Using good quality vanilla can make a noticeable difference in the overall flavor profile of your easy dessert. Consider exploring other simple homemade treats like these Butterfinger Balls for more quick dessert inspiration.
Star Flavors: Coconut, Pecan
The distinguishing flavors in this particular no-bake praline come from shredded coconut and crunchy pecans. Toasted pecans add a deep, nutty flavor and a satisfying crunch that contrasts beautifully with the soft, sweet praline base. Shredded coconut introduces a tropical sweetness and an additional layer of texture, making this a true coconut praline sensation. For an authentic Southern pralines experience, choosing fresh, high-quality pecans is key. These star flavors are what truly make this a special holiday sweets item or an anytime family favorite quick treat.
Toast Nuts and Coconut First
One of the most crucial steps to elevating the flavor of your no-bake praline is to properly toast the nuts and coconut. This simple process brings out a deeper, more aromatic profile from both ingredients, transforming them from merely good to truly spectacular. Toasting adds a rich, roasted quality that can’t be achieved otherwise, ensuring your pecan praline has an unparalleled depth of flavor. It’s a small step that yields significant culinary rewards for your homemade candy.
Toasting Pecans for Flavor
Toasting pecans is straightforward and makes a world of difference. Spread your raw pecan halves or pieces in a single layer on a dry baking sheet. You can toast them in a preheated oven at 350°F (175°C) for 5-8 minutes, or on the stovetop in a dry skillet over medium heat for 3-5 minutes. Whichever method you choose, watch them carefully and stir frequently to prevent burning. You’re looking for a fragrant, slightly darkened nut. Once toasted, immediately remove them from the heat to a cool plate to stop the cooking process. This step is fundamental for achieving the best flavor in your sweet snack. For more nutty dessert ideas, you might enjoy these Peanut Butter Brownie Swirl Cookies.
Optional Coconut Toasting Steps
While optional, toasting the shredded coconut can enhance the overall flavor and texture of your coconut praline. Spread the shredded coconut in a thin layer on a baking sheet. Bake in a preheated oven at 300°F (150°C) for about 5-10 minutes, stirring every few minutes, until it turns golden brown and becomes fragrant. Alternatively, toast it in a dry skillet over medium-low heat, stirring constantly, until lightly golden. Be extremely careful, as coconut can burn very quickly due to its natural oils. This light toasting adds a delightful crispness and a more pronounced tropical note, making your no-bake praline even more irresistible and a truly special easy dessert. Remember to let it cool completely before adding it to the mixture.
Melt Butter and Sugar Mixture
The foundation of a perfect no-bake praline lies in the precise melting and combining of the butter and sugar mixture. This stage is where the magic truly begins, transforming simple ingredients into the creamy, sweet base that defines this classic candy recipe. Careful attention to temperature and stirring ensures a smooth consistency, preventing a grainy texture and promising a delightful, melt-in-your-mouth experience. This initial step is vital for a successful quick treat.
Combine Wet Ingredients Smoothly
In a large, heavy-bottomed saucepan, combine the granulated sugar, butter, and milk. A heavy-bottomed pan is recommended as it distributes heat more evenly, reducing the risk of scorching. Place the saucepan over medium heat. Stir continuously as the butter melts and the ingredients begin to merge. The goal here is to create a homogenous mixture before it comes to a boil. This smooth combination of wet ingredients is the first step towards achieving that desired creamy texture for your no-bake praline. Consistency at this stage is key to avoiding issues later on. For other creamy creations, see our recipe for Quick Italian Cream Cake.
Dissolving Sugar on Heat
Continue to stir the mixture gently but consistently as it heats up. The main objective during this phase is to ensure that all the sugar crystals completely dissolve. If the sugar isn’t fully dissolved, your praline can turn out grainy instead of smooth. Bring the mixture to a rolling boil, stirring just enough to keep it from sticking to the bottom of the pan. Once boiling, allow it to cook without stirring for a specific duration, usually around 1-2 minutes for no-bake versions, or until it reaches the soft-ball stage (235-240°F or 113-116°C) if you’re using a candy thermometer. This process creates the caramel-like base for your pecan praline, making it a truly authentic homemade candy. For more information on candy making and sugar crystallization, you can visit the Praline Wikipedia page.
Combine No-Bake Praline Ingredients
Once your butter and sugar mixture has reached the correct temperature and consistency, the exciting part begins: incorporating the remaining ingredients to form your delectable no-bake praline. This stage requires quick action and thorough mixing to ensure all flavors are well distributed and the praline sets correctly. It’s the final push towards creating a perfect sweet snack that boasts both creamy texture and crunchy pecans.
Stir in Vanilla and Add-ins
Remove the saucepan from the heat immediately. This is a critical step to prevent further cooking and ensure the praline sets with the right texture. Quickly stir in the vanilla extract. Vanilla adds a wonderful aroma and rounds out the sweetness of the praline, making it more complex and inviting. Then, swiftly add your toasted pecans and toasted coconut (if using). If you’re experimenting with flavor variations, now is the time to add any other inclusions like chopped nuts, dried fruit bits, or even a hint of spice. The heat from the sugar mixture will warm them through, helping them to meld with the overall flavor profile of your coconut praline. Ensure everything is ready to go as this mixture starts to thicken fast.
Mix Until Well Combined
With all your ingredients in the pot, stir vigorously and quickly until everything is thoroughly combined. The mixture will start to thicken and lose its glossy sheen as it cools slightly. You’ll notice it becoming more opaque and a little grainy-looking, which is exactly what you want for no-bake praline. The goal is to incorporate all the pecans and coconut evenly, ensuring every bite of your easy dessert has the perfect balance of flavors and textures. Don’t overmix, but ensure there are no dry spots. As you mix, be mindful that the clock is ticking; this mixture sets relatively quickly, so be prepared to drop it onto your prepared sheet almost immediately after mixing. This step is crucial for holiday sweets and other quick treats where timing is everything.
Drop and Set Your Pralines
The moment has arrived to transform your warm, fragrant no-bake praline mixture into individual, ready-to-eat candies. This stage requires a bit of speed and precision, as the mixture will begin to set quickly as it cools. Achieving beautifully shaped clusters is part of the charm of homemade candy, and with a little practice, you’ll master this step, resulting in perfect pecan praline every time. It’s the final step before you can enjoy this delightful sweet snack.
Spoon Onto Prepared Sheet
Working quickly, use a spoon (or a small cookie scoop for more uniform pieces) to drop spoonfuls of the warm praline mixture onto your parchment-lined or silicone mat-covered baking sheet. Aim for clusters that are roughly 1.5 to 2 inches in diameter. Try to work swiftly and consistently, as the mixture will thicken and harden in the saucepan. If it becomes too stiff to scoop, you can gently warm it over very low heat for a few seconds, but be careful not to cook it further. The goal is to create distinct, appealing mounds of your easy dessert that will solidify into perfect coconut praline treats.
Allow Clusters to Cool
Once all your praline mixture has been spooned onto the sheet, the hardest part is waiting! Allow the clusters to cool completely and set at room temperature. This usually takes about 30-60 minutes, depending on the warmth of your kitchen and the size of your pralines. As they cool, the pralines will firm up, developing their characteristic slightly crumbly yet creamy texture. Resist the urge to touch or move them prematurely, as this can affect their shape and texture. Once fully cooled and firm, they can be easily peeled off the parchment paper. Your homemade candy is now ready to be enjoyed! For inspiration on presenting your quick treat, check out Carina Recipes on Pinterest.
Serve Your Delicious Coconut Praline
After all your efforts in preparing, mixing, and setting, the best part of making no-bake praline is finally serving and enjoying your delicious creation. These sweet snacks are incredibly versatile, perfect for personal indulgence, sharing with loved ones, or as a charming addition to any gathering. The rich flavor and satisfying crunch of your homemade candy are sure to impress.
How to Enjoy Praline Candy
No-bake praline candy is a delightful treat on its own. Its creamy texture and crunchy pecans make for a satisfying bite any time of day. You can arrange them on a dessert platter for guests, pack them in decorative boxes as thoughtful holiday sweets, or simply keep a stash for yourself as a reward after a long day. They also make a fantastic garnish for ice cream, cupcakes, or other desserts, adding both texture and a burst of flavor. This easy dessert is a true family favorite for a reason.
Great with Coffee or Tea
One of the most classic ways to enjoy coconut praline is alongside a warm beverage. The sweetness and richness of the praline pair beautifully with the slight bitterness of a freshly brewed cup of coffee or a comforting mug of tea. Imagine a quiet afternoon, a steaming cup, and a few pieces of your homemade candy – pure bliss! The praline melts ever so slightly in your mouth as you sip, creating a harmonious blend of flavors. It’s a simple pleasure that elevates an ordinary coffee break into a luxurious moment, making this quick treat an ideal companion to your daily ritual. For other delicious main course recipes, visit our main course page.
Storing No-Bake Coconut Pecan Praline
Proper storage is key to maintaining the freshness, texture, and flavor of your no-bake coconut pecan praline. These delicious homemade candies are a true labor of love, and you’ll want to ensure they remain as enjoyable as possible for as long as possible. With the right approach, your easy dessert will retain its creamy texture and crunchy pecans, ready for when a craving strikes.
Airtight Container Storage
Once your no-bake praline clusters are completely cooled and firm, transfer them to an airtight container. Layering them between sheets of parchment paper can help prevent sticking, especially if you have several layers. Store the container at room temperature in a cool, dry place away from direct sunlight and heat. Stored this way, your pecan praline will typically remain fresh and delicious for up to 1-2 weeks. This method is ideal for quick consumption and ensures the best creamy texture, making it a perfect quick treat for spontaneous indulgence.
Refrigeration for Longer Keep
If you wish to extend the shelf life of your coconut praline, refrigeration is an excellent option. Place the airtight container in the refrigerator. In the fridge, your no-bake praline can last for up to 3-4 weeks. Be aware that refrigeration can sometimes alter the texture slightly, making them firmer, but they will still be incredibly tasty. Before serving, it’s often best to let them sit at room temperature for 10-15 minutes to allow them to soften slightly and for their full flavors to emerge. This is especially useful if you’ve made a large batch of holiday sweets and want them to last throughout the festive season. You can also explore Carina Recipes on Instagram for more food storage tips.
Handy Tips for Perfect Pralines
Achieving the perfect no-bake praline is a combination of good ingredients and careful technique. Even though it’s an easy dessert, paying attention to a few key details can elevate your homemade candy from good to truly exceptional. These handy tips focus on common pitfalls and best practices, ensuring your pecan praline has the ideal creamy texture and rich flavor every time.
Watch Consistency of Mixture
The consistency of your sugar mixture is paramount for successful no-bake praline. After boiling the sugar, butter, and milk, and removing it from the heat, the mixture needs to be stirred until it starts to thicken and lose its sheen. This typically takes a few minutes of vigorous stirring. You’re looking for a slightly grainy, opaque appearance, and a feeling that it’s just beginning to resist your spoon. If you drop it too soon, the praline might not set properly; if you wait too long, it could become too hard or crumbly to scoop. Practice makes perfect with this quick treat, so pay close attention to the visual and tactile cues.
Pecan Toasting Best Practices
As discussed earlier, toasting your pecans significantly boosts their flavor, making your pecan praline more aromatic and delicious. Always use a dry pan or baking sheet, without any added oil. When toasting on the stovetop, keep the heat at medium-low and stir constantly to ensure even browning and prevent burning. For oven toasting, spread them in a single layer and check frequently. The moment they become fragrant and lightly golden, remove them from the heat immediately, as nuts can continue to cook and burn even after being taken out of the oven or off the stove. Let them cool completely before adding them to your praline mixture for the best crunch and flavor. For further reading on the culinary uses of pecans, you can check out the Pecan Wikipedia page.
Explore Praline Flavor Variations
While the classic no-bake coconut pecan praline is undeniably delicious, one of the joys of homemade candy is the freedom to experiment with different flavor variations. This allows you to personalize your easy dessert, catering to different tastes and making it a unique sweet snack for any occasion. Don’t be afraid to get creative and put your own spin on this family favorite.
Corn Syrup Substitutions
Many traditional praline recipes use corn syrup to help prevent sugar crystallization and achieve a smoother texture. If you want to try incorporating it, you can substitute a portion of the granulated sugar (e.g., replace 1/4 cup of sugar with 1/4 cup of light corn syrup) in the initial boiling mixture. This can result in a slightly chewier, less grainy texture for your pecan praline. However, for a true no-bake praline, often the recipe is designed to work without it, focusing on specific stirring techniques to control crystallization. Experiment with small batches to find your preferred creamy texture. Sometimes, simpler is better for a quick treat.
Add a Chocolate Drizzle
For an extra touch of indulgence, consider adding a chocolate drizzle to your cooled no-bake pralines. Melt your favorite chocolate (dark, milk, or white) using a double boiler or in the microwave. Once melted and smooth, use a spoon or a piping bag with a very small tip to artisticially drizzle the chocolate over the set praline clusters. Allow the chocolate to set completely before storing. This simple addition not only enhances the flavor profile by adding a rich chocolatey note but also makes your holiday sweets look even more appealing. It’s an easy way to elevate this simple recipe into a gourmet-looking treat, perfect for any special gathering. Your coconut praline will thank you.
Quick Look at Praline Nutrition
No-bake praline, while a delightful sweet snack and an easy dessert, is generally considered an indulgence. As with most candy recipes, it is high in sugar and fat. A single serving typically contains a significant amount of calories, primarily from the sugar and butter, along with some healthy fats from the pecans and coconut. Pecans do offer some beneficial nutrients like fiber, antioxidants, and healthy monounsaturated fats. Coconut also provides some fiber and medium-chain triglycerides. However, due to the high sugar content, these are best enjoyed in moderation as part of a balanced diet. It’s a treat meant to be savored rather than a staple food. Enjoy your homemade candy responsibly.
Why You’ll Love This No-Bake Treat
There are countless reasons why this no-bake praline recipe will become a new family favorite. Firstly, its simplicity is unmatched; no complex baking skills or specialized equipment are required, making it an ideal easy dessert for any occasion. The satisfaction of creating such a delicious homemade candy with minimal fuss is incredibly rewarding. Secondly, the combination of rich, buttery sweetness with the satisfying crunch of toasted pecans and the tropical hint of coconut is simply irresistible. This coconut praline offers a complex flavor profile that appeals to nearly everyone.
Furthermore, it’s a quick treat perfect for last-minute cravings or unexpected guests. The speed at which you can whip up a batch means you’re never far from a delightful sweet snack. It’s also incredibly versatile, allowing for fun flavor variations and additions, ensuring you can customize it to your liking. Whether you’re making holiday sweets or just need a comforting treat, this simple recipe delivers consistent deliciousness. The creamy texture combined with crunchy pecans makes every bite a memorable one. This no-bake praline is more than just a candy; it’s a sweet, comforting experience waiting to be enjoyed.