
White Christmas fudge is a delightful confection, perfect for holiday celebrations. This easy homemade fudge recipe delivers a creamy, sweet treat that’s simple to make. Get ready to create a festive dessert that everyone will adore, making your holiday gatherings even more special with this classic Christmas candy.
Key Takeaways
- Prepare your baking dish and gather simple ingredients for easy fudge making.
- Master cooking and stirring techniques for smooth, creamy fudge.
- Incorporate delicious additions like vanilla, nuts, and marshmallows.
- Learn proper chilling, cutting, and serving methods for perfect squares.
- Discover essential tips to prevent mistakes and ensure firm, delicious results.
- Understand storage options and nutritional facts for this festive sweet treat.
Making fudge is a rewarding process. Simple steps yield delicious results. This recipe guides you through. Enjoy creating a delightful sweet. Share your homemade Christmas candy.
Getting Ready for White Christmas Fudge
Prepare Your Baking Dish
The foundation of perfect homemade fudge begins with proper preparation of your baking dish. For most fudge recipes, an 8×8 or 9×9 inch square pan is ideal, providing the right thickness for delightful squares. Always line your chosen pan with parchment paper, allowing an overhang on two sides to create “handles.” These parchment handles are incredibly helpful for lifting the entire block of chilled fudge out of the pan, making cutting a breeze. A light coating of cooking spray or butter on the parchment paper can provide an extra layer of non-stick insurance, ensuring your delicious treat releases cleanly. This initial step is often overlooked but is absolutely crucial for presentation and ease of handling, much like preparing any baking dish for a rich dessert like snickerdoodle cobbler, where easy removal ensures beautiful servings.
Selecting the correct pan size directly impacts the final thickness and texture of your white Christmas fudge. A pan too large might result in thin, crumbly fudge, while one too small could lead to overly thick pieces that are difficult to cut evenly. Take a moment to ensure your parchment paper lies flat against the bottom and sides of the pan, preventing any fudge mixture from seeping underneath. This meticulous preparation sets the stage for a smooth, stress-free fudge-making experience, allowing you to focus on the cooking without worrying about sticky situations later on. A well-prepared dish guarantees a professional finish, making your festive sweets look as amazing as they taste.
All the Fudge Ingredients You Need
List of Simple Items
Creating luscious white Christmas fudge doesn’t require an extensive list of obscure items. In fact, one of the charms of this easy fudge recipe is its reliance on readily available, simple ingredients. The core components typically include quality white chocolate (chips or chopped bars work well), sweetened condensed milk, and a touch of butter. These three items form the creamy, melt-in-your-mouth base that makes this sweet treat so irresistible. For flavor, vanilla extract is a must, adding a warm, aromatic depth that complements the sweetness of the chocolate. Optional additions like chopped nuts (pecans, walnuts, or almonds are popular choices) or mini marshmallows can introduce wonderful textural contrasts and visual appeal, truly making it a festive Christmas candy.
The quality of your ingredients, especially the white chocolate, significantly impacts the final taste and texture of your homemade fudge. Opt for a good brand of white chocolate that you enjoy eating on its own, as its flavor will shine through. Avoid “white baking chips” that don’t contain cocoa butter, as these may not melt or set as smoothly, resulting in a less creamy fudge. Sweetened condensed milk provides the necessary sweetness and binding, so ensure you grab the sweetened variety, not evaporated milk. The beauty of this fudge-making process lies in its simplicity; with just a few choice items, you can create a truly memorable holiday dessert that’s rich, decadent, and perfect for sharing.
Cooking and Melting Your Fudge
Combine Ingredients Smoothly
The heart of making white Christmas fudge lies in the careful cooking and melting of your ingredients. To begin, combine your white chocolate, sweetened condensed milk, and butter in a heavy-bottomed saucepan or a double boiler. If using a saucepan, set it over low to medium-low heat. The goal here is gentle, even heating to prevent scorching the chocolate, which can seize and become grainy. Gradually, the butter will melt, and the chocolate chips will begin to soften. At this stage, it’s vital to continually stir the mixture. A silicone spatula or wooden spoon works best for this, ensuring you scrape the bottom and sides of the pan to integrate all components thoroughly.
Stirring Techniques for Success
Achieving a perfectly smooth and creamy fudge hinges on proper stirring techniques. Once your ingredients are in the pan, stir constantly and patiently. Don’t rush the process by increasing the heat too much; this is a common pitfall that leads to burnt chocolate and a grainy texture. The mixture will transition from separate ingredients to a thick, glossy, homogeneous mass. Keep stirring until all the chocolate is fully melted and the mixture is smooth, with no lumps of chocolate remaining. This usually takes about 5-10 minutes, depending on your heat source and pan. Once the mixture is perfectly smooth and has thickened slightly, remove it immediately from the heat. This careful attention to heat and constant stirring is just as important in dessert making as it is when creating savory dishes that require precise heat control, such as a crispy parmesan chicken with a rich garlic sauce, where even heating prevents burning and ensures a perfect finish. The smoothness achieved at this stage is what gives white Christmas fudge its signature creamy texture, making every bite a delight.
Folding in Fun Additions
Add Vanilla and Nuts
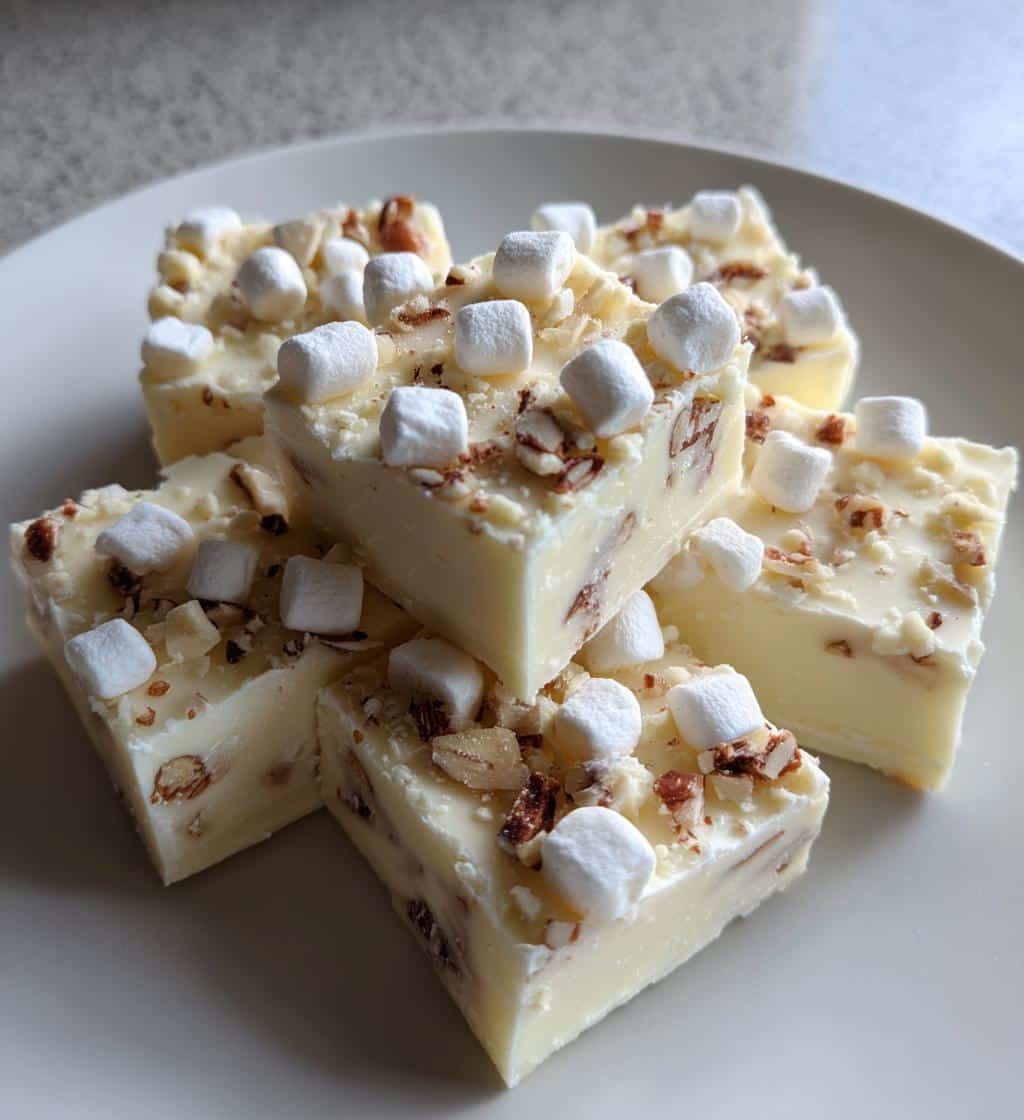
Once your fudge base is smooth and has been removed from the heat, it’s time to infuse it with additional flavors and textures. The first essential addition is vanilla extract. Stir in a good quality vanilla extract; its aromatic warmth beautifully complements the sweet richness of the white chocolate. If you’re incorporating nuts, such as chopped pecans, walnuts, or almonds, this is the perfect moment to do so. Add the desired amount of nuts and fold them into the warm fudge mixture. The residual heat will help them adhere and distribute evenly throughout the creamy base, adding a delightful crunch that contrasts with the smooth fudge. Ensure they are fully integrated but avoid overmixing, which can break them down too much.
Gently Mix Marshmallows
For an extra festive and chewy element, mini marshmallows are a fantastic addition to white Christmas fudge. If you’re including marshmallows, wait until the fudge has cooled for a few minutes (about 5-10 minutes) before gently folding them in. Adding them too early to very hot fudge can cause them to melt completely and disappear into the mixture, altering the intended texture. By allowing the fudge to cool slightly, the marshmallows will retain their shape and softness, creating pockets of gooey sweetness. Use a gentle folding motion to distribute them evenly without crushing them. The goal is to incorporate them just enough so that they are dispersed throughout the fudge but still distinct. This delicate handling ensures your white Christmas fudge has a varied and enjoyable texture, making each square an exciting sweet treat.
Chilling Your White Christmas Fudge Right
Pour and Spread Evenly
After all the ingredients are beautifully combined and any delightful additions folded in, the next crucial step for flawless white Christmas fudge is to pour and spread the mixture evenly into your prepared baking dish. Carefully transfer the warm fudge mixture into the parchment-lined pan. Use an offset spatula or the back of a spoon to gently spread the fudge from edge to edge, ensuring a smooth, uniform surface. An even thickness is key for consistent texture and attractive squares when it’s time to cut. Take your time with this step, making sure there are no air pockets and the top is as level as possible. This attention to detail will pay off when your fudge sets beautifully, ready to be enjoyed.
Crucial Setting Time
Once your fudge is spread evenly, it enters its most important phase: the chilling and setting time. Transfer the pan to the refrigerator and allow it to chill undisturbed for at least 2-4 hours, or ideally, overnight. This crucial setting time allows the ingredients to firm up completely, transforming the molten mixture into solid, sliceable fudge. Resist the temptation to check it too often or rush the process. If the fudge is not adequately chilled, it will be too soft and sticky to cut cleanly, potentially crumbling or losing its shape. A fully set fudge will be firm to the touch and easily lifted from the pan using the parchment paper handles. Patience during this stage is the secret to achieving perfectly firm, neat squares of this delicious confectionery, ready for serving. Proper chilling ensures the delightful texture that makes white Christmas fudge so irresistible.
How to Cut and Serve Fudge
Achieve Neat Squares
Once your white Christmas fudge has thoroughly chilled and is firm to the touch, it’s time to transform it into neat, inviting squares. First, use the parchment paper overhangs to lift the entire slab of fudge out of the pan and place it on a clean cutting board. For the cleanest cuts, use a large, sharp knife. A popular trick is to run your knife under hot water, wipe it dry, and then make a cut. Repeat this hot-water-and-wipe process for each cut. This helps to melt through the fudge cleanly, preventing sticking and crumbling. Begin by trimming the edges for perfectly straight lines, then proceed to cut the fudge into your desired square or rectangular sizes. Aim for uniform pieces, as this enhances presentation, especially for a festive Christmas candy. Precise cuts ensure every piece looks as good as it tastes.
Serving Suggestions
White Christmas fudge is a versatile sweet treat that can be served in many delightful ways. It’s best enjoyed at room temperature, as this allows its creamy texture and rich flavors to truly shine. Arrange the squares on a festive platter for a holiday gathering, perhaps alongside other cookies or candies. For a charming touch, you can place each piece in a small mini-cupcake liner or wrap them individually in cellophane with a ribbon for gifting. Consider sprinkling the tops with a pinch of sea salt for a sweet-and-salty contrast, or a dusting of edible glitter for extra holiday sparkle. Fudge also pairs wonderfully with a cup of coffee or a glass of milk. Whether presented simply or adorned with extra flair, these neat squares are always a welcome addition to any dessert table, making it a beloved dessert category staple.
Best Tips for Amazing Fudge
Use Quality Chocolate
The foundation of truly amazing white Christmas fudge lies in the quality of your ingredients, especially the chocolate. Investing in good quality white chocolate chips or bars will significantly impact the flavor and texture of your homemade fudge. High-quality chocolate melts more smoothly, incorporates better into the mixture, and delivers a superior taste. Avoid generic white baking chips that may contain less cocoa butter, as these can result in a grainy texture and a less satisfying flavor. Think of it as the core of your sweet treat; a better base means a better overall product.
Prevent Burning on Heat
One of the most common pitfalls in fudge making is burning the chocolate or the milk solids, which can ruin the entire batch. To prevent this, always use low to medium-low heat and a heavy-bottomed saucepan or a double boiler. The goal is to melt the ingredients gently and gradually. Constant stirring is non-negotiable; never leave the mixture unattended on the stove. Scrape the bottom and sides of the pan frequently to ensure even heating and to prevent any part of the mixture from sticking and scorching. This careful attention to heat management ensures a smooth, creamy consistency without any burnt flavor. For more fantastic cooking and baking advice, visit our Pinterest page.
Ensure Fudge Firmness
Achieving the perfect fudge firmness is crucial for easy cutting and a pleasant eating experience. The most common reason for soft fudge is not cooking it long enough or not allowing sufficient chilling time. Ensure your fudge mixture reaches the appropriate temperature (if using a candy thermometer, typically 234-237°F or 112-114°C for soft ball stage, although many no-bake recipes rely on condensed milk for setting). After cooking, the chilling period in the refrigerator is essential; allow at least 2-4 hours, or preferably overnight, for the fudge to set completely. If your fudge seems too soft after chilling, it might need more time, or the initial cooking lacked enough heat to trigger proper setting. Patience and proper temperature control are the keys to a no-fail fudge with ideal firmness.
Storing Your Delicious Fudge
Air Tight Container
To preserve the freshness, flavor, and texture of your delicious white Christmas fudge, proper storage is paramount. The enemy of fudge is air, which can cause it to dry out, crystallize, or absorb unwanted odors. Therefore, always store your homemade fudge in an airtight container. A good quality plastic container with a secure lid, or even a glass container with a tight seal, will work perfectly. If stacking layers of fudge within the container, place a sheet of parchment paper or wax paper between each layer to prevent sticking and to maintain their neat appearance. This simple step ensures your sweet treat remains as delicious as the day it was made, ready to be enjoyed or shared.
Room or Fridge Freshness
Deciding between room temperature or refrigerator storage depends on your immediate plans and desired shelf life. For short-term storage (up to 1-2 weeks), white Christmas fudge can be kept at cool room temperature in an airtight container, away from direct sunlight or heat sources. This often yields a softer, more traditional fudge texture. However, for extended freshness or if your kitchen is particularly warm, storing the fudge in the refrigerator is recommended. Refrigerated fudge will stay fresh for 2-3 weeks. Be aware that chilled fudge will be firmer, so it’s often best to let it come to room temperature for about 15-30 minutes before serving to achieve that desirable creamy consistency. Always ensure the container is tightly sealed to protect against moisture absorption and to keep your festive sweets tasting their best.
Make Ahead White Christmas Fudge
Prepare for Gatherings
White Christmas fudge is an ideal holiday dessert for making ahead, offering convenience and reducing stress during busy festive seasons. Preparing your homemade fudge recipe in advance allows ample time for it to set properly, often resulting in a superior texture. It also frees up valuable kitchen time on the day of your gathering, letting you focus on other dishes or simply enjoying your guests. You can easily make a batch (or several!) a week or two before your event. Once fully set and cut, store the fudge in an airtight container at room temperature or in the refrigerator, following the guidelines for freshness. This forward-thinking approach makes holiday entertaining much smoother, ensuring you always have a delightful sweet treat ready to share. Planning ahead for delightful desserts like our quick Italian cream cake is always a great strategy for any event.
Freezing for Longer Storage
For even longer preservation, white Christmas fudge freezes exceptionally well. This makes it a fantastic option for creating a large batch well in advance or for savoring your favorite festive sweets over several months. To freeze, ensure the fudge is completely cooled and cut into squares. Wrap individual pieces tightly in plastic wrap, then place them in a freezer-safe, airtight container or heavy-duty freezer bag. This double-layer protection prevents freezer burn and maintains the fudge’s quality. Frozen fudge can last for up to 2-3 months. When you’re ready to enjoy, simply transfer the desired amount of fudge from the freezer to the refrigerator overnight, or let it thaw at room temperature for a few hours. This method ensures you always have a delicious homemade fudge recipe ready, perfect for impromptu gatherings or personal indulgence.
Fixing Common Fudge Mistakes
What if Fudge is Soft?
One of the most common frustrations in fudge making is ending up with fudge that is too soft or doesn’t set properly. If your white Christmas fudge turns out soft and gooey instead of firm and sliceable, there are usually a few culprits. Often, it means the mixture wasn’t cooked long enough, or it didn’t reach a high enough temperature to evaporate sufficient moisture and trigger proper crystallization. Another reason could be an incorrect ratio of ingredients, perhaps too much liquid or not enough setting agent like white chocolate. Sometimes, simply not allowing enough chilling time is the issue; ensure it’s refrigerated for at least 4 hours, or preferably overnight.
If you find your batch of homemade fudge is too soft, don’t despair! It might be salvageable. One popular method is to gently re-melt the soft fudge in a saucepan over very low heat or in a double boiler, stirring constantly. You can then try to add a little more white chocolate or a small amount of powdered sugar to help it firm up. Continue to cook and stir the mixture, paying close attention to its consistency as it thickens. Once it reaches a firmer consistency, pour it back into your prepared pan and chill it thoroughly again. While it might not have the exact original texture, this often helps to achieve a more acceptable firmness, transforming your soft fudge into a delicious sweet treat that’s closer to perfection.
Nutritional Facts of This Treat
Calories Per Square
As a rich and creamy fudge, white Christmas fudge is, by nature, a sweet treat enjoyed in moderation. While exact nutritional facts can vary based on specific ingredients and portion sizes, it’s generally a calorie-dense dessert. Each square of this delicious homemade fudge recipe will typically contain a significant amount of calories, primarily from its sugar and fat content. The main ingredients like white chocolate, sweetened condensed milk, and butter contribute to its indulgent nature. When planning to enjoy this festive Christmas candy, it’s helpful to consider it a delightful occasional indulgence rather than a regular part of your diet. Portion control becomes key to enjoying its wonderful flavor without overconsuming.
Important Dietary Notes
Beyond calories, there are a few important dietary notes to consider regarding white Christmas fudge. It is inherently high in sugar and saturated fat, making it less suitable for individuals managing blood sugar levels or watching their cholesterol intake. For those with specific dietary restrictions, note that traditional recipes contain dairy. While some ingredients might be gluten-free, cross-contamination is possible if not prepared in a dedicated environment. It’s always best to check ingredient labels if you have allergies or sensitivities. Enjoying this creamy fudge means savoring a small portion and appreciating it for the special holiday dessert that it is. Balancing such treats with a varied diet rich in fruits, vegetables, and lean proteins ensures overall healthy eating habits, allowing you to indulge responsibly in this wonderful sweet.
Why Love White Christmas Fudge?
There are countless reasons to adore white Christmas fudge, making it a perennial favorite during the holiday season. Its undeniable appeal begins with its creamy, melt-in-your-mouth texture that is simply irresistible. This easy homemade fudge recipe also boasts a beautiful, pristine white color, making it a visually stunning addition to any festive dessert table, truly embodying the spirit of a “White Christmas.” Beyond its aesthetic charm, the flavor profile is rich and comforting, a perfect blend of sweet white chocolate and vanilla that evokes a sense of holiday warmth.
What truly sets this no-fail fudge apart is its versatility and the joy it brings. It’s incredibly simple to make, requiring minimal cooking skills but delivering maximum impact. You can customize it with various additions like cranberries, pistachios, or sprinkles to match your festive theme, transforming it into a personalized Christmas candy. White Christmas fudge is also an excellent gift idea; homemade treats always convey thoughtfulness and care. Whether you’re preparing it for a family gathering, a cookie exchange, or simply to enjoy at home, this creamy fudge promises to be a memorable sweet treat. This delightful dessert is a fantastic addition to any holiday spread, similar to how versatile items on our desserts category can brighten up a meal. For daily deliciousness, follow us on Instagram!