
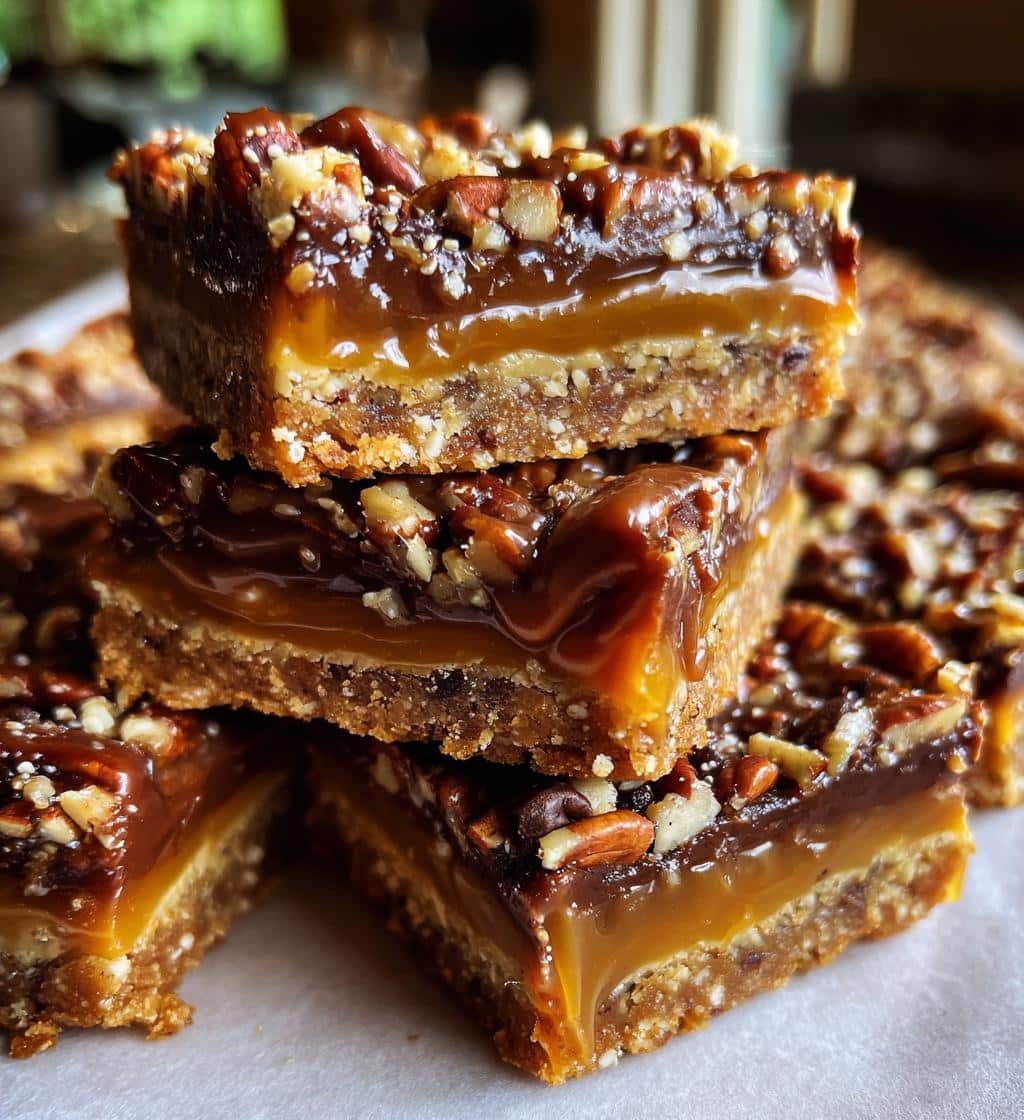
Turtle Bars are a truly delightful sweet squares, a perfect blend of crunchy crust, gooey caramel, rich chocolate, and toasted pecans. This simple dessert is incredibly satisfying and surprisingly easy to make. Whether you need a quick sweet treat or a standout dish for gatherings, these homemade bars are always a family favorite.
Key Takeaways
- Learn how to make classic turtle bars from scratch with simple steps.
- Master crafting a perfect graham cracker crust, gooey caramel, and rich chocolate layers.
- Gain valuable tips for optimal baking, cooling, and achieving clean, precise slices.
- Discover practical advice on ingredient substitutions and effective storage methods.
These bars offer pure indulgence. They are simple to prepare. Each bite delivers sweet harmony. A truly irresistible caramel dessert. Share this crowd-pleasing chocolate pecan treat.
Discovering the Magic of Turtle Bars
Turtle Bars are a beloved confection inspired by the classic turtle candy, which combines the rich flavors of chocolate, caramel, and pecans. This dessert translates that iconic taste into an easy-to-manage bar form, making it a fantastic choice for home bakers. The magic truly lies in the harmonious interplay of textures and tastes: the buttery crunch of the graham cracker crust, the smooth, sticky sweetness of the caramel, the melt-in-your-mouth richness of the chocolate, and the satisfying nutty bite of toasted pecans. It’s a symphony of flavors that appeals to almost everyone, making these bars a standout among desserts.
What makes this treat special?
What sets Turtle Bars apart is their incredible balance. Unlike many single-note sweet treats, these bars offer a complex sensory experience. The slight saltiness often found in the caramel beautifully counters the sweetness of the chocolate, while the pecans add an earthy depth and crucial textural contrast. This combination creates a truly memorable and satisfying taste that keeps people coming back for more. It’s a sophisticated flavor profile packed into an accessible format, showcasing why this simple dessert has enduring popularity.
A beloved dessert explained
The concept of Turtle Bars stems from their namesake candy, celebrated for its delicious amalgamation of core ingredients. When transformed into bars, this concept becomes even more versatile and perfect for sharing. A homemade turtle bar recipe often involves a straightforward process, making them an ideal project for bakers of all skill levels looking for a delightful and impressive sweet squares. Their popularity at potlucks, family gatherings, and holiday events speaks volumes about their universal appeal and consistent ability to bring joy to any occasion. They are, without a doubt, a classic for a reason.
Why You’ll Love These Turtle Bars
There are countless reasons why Turtle Bars quickly become a go-to for anyone seeking a delightful treat. Beyond their irresistible flavor, they offer practical advantages that make them a favorite in any kitchen. From their straightforward preparation to their versatile appeal, these bars tick all the boxes for a truly beloved dessert. Share your baking journey and get more sweet ideas by visiting our Pinterest page.
Quick and easy to make
Despite their gourmet appearance and decadent taste, this turtle bar recipe is surprisingly easy baking. The steps are simple and don’t require any advanced culinary techniques. Most of the time involved is passive, such as chilling and setting, which means you can achieve impressive results with minimal hands-on effort. This makes them a perfect quick sweet for busy weekdays or when you need a crowd-pleasing treat without spending hours in the kitchen. They are a testament to how simple ingredients can create extraordinary homemade bars.
Delicious flavor blend
The flavor blend in these bars is truly exceptional. It’s a masterful combination of textures and tastes that dance on your palate. The buttery graham cracker crust provides a crunchy foundation, while the rich, gooey caramel offers a luscious, chewy core. Layered with generous amounts of melting chocolate and crunchy, toasted pecans, each bite delivers a harmonious explosion of sweet, nutty, and slightly salty notes. This chocolate pecan treat is designed to satisfy every sweet craving, creating an unforgettable sensory experience.
Perfect for any occasion
Whether it’s a casual family dessert, a celebratory party, a holiday gathering, or just a treat for yourself, Turtle Bars fit seamlessly into any event. Their robust structure makes them easy to transport, and their universal appeal ensures they’re always a hit. They can be dressed up with a sprinkle of sea salt or served simply, proving to be incredibly versatile. These bars are not just a dessert; they are a reliable, crowd-pleasing option that consistently brings smiles and satisfaction, embodying true dessert inspiration.
Gathering Ingredients for Turtle Bars
One of the beauties of this turtle bar recipe is that it relies on readily available ingredients you might already have in your pantry. There’s no need for exotic or hard-to-find items, making this an accessible and convenient sweet squares project. A quick trip to your local grocery store, or perhaps just a rummage through your cupboards, is usually all it takes to get started on these delicious treats. Being prepared with the right components ensures a smooth and enjoyable baking process, leading to perfect homemade bars every time.
Simple items you’ll need
For the classic graham cracker crust, you’ll need graham cracker crumbs, granulated sugar, and melted butter. These three components form the sturdy and flavorful base of your bars. For the rich caramel layer, you’ll typically use a store-bought caramel sauce or make your own with butter, brown sugar, milk, and vanilla extract. The chocolate component usually involves semi-sweet chocolate chips or chopped chocolate, providing that signature gooey richness. Finally, toasted pecan halves or pieces are essential for the nutty crunch and authentic turtle flavor. These simple items combine to create an incredible flavor blend.
Essential pantry staples
Many of the ingredients for Turtle Bars are common pantry staples, which simplifies the preparation process. Graham crackers, butter, sugar, and chocolate chips are often found in well-stocked kitchens, especially those that enjoy baking. If you frequently make desserts like these, having these items on hand means you’re always just a few steps away from whipping up a batch of these delectable bars. You can even experiment with other dessert ideas like Peanut Butter Brownie Swirl Cookies using similar baking basics. Ensuring you have fresh pecans will contribute significantly to the overall taste and texture of your chocolate pecan treat, delivering the best possible results.
Step-by-Step Turtle Bars Recipe Guide
Embarking on the creation of these delicious Turtle Bars is an exciting prospect. Following a clear, step-by-step process ensures that each layer is perfectly prepared and contributes to the overall success of this amazing caramel dessert. Precision in these initial stages sets the foundation for the irresistible homemade bars you’re about to create. Don’t forget to check out our Instagram page for more baking inspiration and tips!
Preheat oven to 350°F
The very first step in any baking endeavor, and especially for your Turtle Bars, is to properly preheat your oven. Set your oven to 350°F (175°C). This allows the oven to reach and maintain the correct temperature throughout the baking process, ensuring even cooking and optimal texture for your crust and topping. An accurately preheated oven is crucial for achieving that perfectly baked graham cracker crust and preventing your bars from being undercooked or overbaked. Give it ample time to come to temperature before putting anything inside.
Prepare your baking dish
While your oven preheats, it’s time to prepare your baking dish. For Turtle Bars, a 9×13-inch baking pan is ideal. To ensure easy removal and clean slices, line the pan with parchment paper, leaving an overhang on the longer sides. This overhang acts as a sling, allowing you to lift the entire batch of bars out of the pan once cooled. Lightly grease the parchment paper and the exposed sides of the pan with cooking spray or butter. This preparation prevents sticking and makes the cutting process significantly easier, contributing to beautifully presented sweet squares.
Crafting the Perfect Graham Cracker Crust
The foundation of any good bar dessert is its crust, and for Turtle Bars, a well-made graham cracker crust is paramount. It provides the crucial crunchy counterpoint to the gooey layers above, adding both texture and a subtly sweet, buttery flavor. Taking the time to craft this layer correctly will elevate your homemade bars from good to truly exceptional. This base is what anchors all the delicious flavors to come, making it a critical component of your caramel dessert.
Mixing crumbs and melted butter
Start by finely crushing your graham crackers. You can do this by placing them in a Ziploc bag and crushing them with a rolling pin, or for a quicker method, pulse them in a food processor until fine crumbs form. You’ll need about 1 ½ to 2 cups of crumbs, depending on how thick you prefer your crust. In a medium bowl, combine the graham cracker crumbs with granulated sugar. Then, pour in the melted unsalted butter. Mix thoroughly until all the crumbs are moistened and resemble wet sand. This ensures that the crust will bind together properly and achieve a uniform texture, preventing it from crumbling excessively when cut. A good mix is the first step to creating a delicious and sturdy base for your chocolate pecan treat.
Pressing crust into the pan
Once your crumb mixture is ready, pour it into the prepared 9×13-inch baking dish. Use the bottom of a flat glass or a measuring cup to firmly and evenly press the mixture across the bottom of the pan. Pay special attention to the edges to ensure the crust is uniform in thickness. A well-pressed crust will hold its shape beautifully and provide a stable base for the subsequent layers of gooey caramel and rich chocolate. This step is vital for the structural integrity of your turtle bar recipe, ensuring that each sweet square remains intact and visually appealing. An even press is key for easy baking and a delightful finish.
Layering Flavors: Chocolate, Caramel, Pecans
This is where the Turtle Bars truly come to life, transforming from a simple crust into a decadent chocolate pecan treat. The strategic layering of these three primary ingredients creates the signature taste and texture that makes these bars so incredibly popular. Each component plays a vital role in building a complex flavor profile that is both rich and satisfying. Mastering this layering technique ensures your homemade bars deliver that authentic, mouth-watering experience. If you enjoy layered desserts, you might also like our recipe for Quick Italian Cream Cake.
Adding chocolate chips
After your crust is pressed and possibly pre-baked (if your recipe calls for it), it’s time for the first layer of decadence: chocolate. Sprinkle about 1 ½ to 2 cups of semi-sweet chocolate chips evenly over the entire surface of the crust. The heat from the oven will gently melt these chips, forming a delicious, gooey chocolate layer that binds perfectly with the other ingredients. While semi-sweet is traditional, you can also experiment with milk chocolate chips for a sweeter bar or dark chocolate chips for a richer, more intense chocolate flavor, catering to your personal preference for this easy baking project.
Drizzling rich caramel sauce
Next comes the luscious caramel. Carefully drizzle about 1 cup of rich caramel sauce over the chocolate chips. You can use a good quality store-bought caramel sauce or, if you’re feeling ambitious, a homemade caramel. Ensure the caramel is warm enough to be pourable but not so hot that it completely melts the chocolate chips prematurely. A spoon or a squeeze bottle can help distribute the caramel evenly. This layer is crucial for the signature gooeyness and adds a buttery, sweet depth that defines a true caramel dessert. The caramel will marry beautifully with the chocolate as it bakes.
Topping with crunchy pecans
Finally, complete your masterpiece with the crunchy element: pecans. Evenly sprinkle 1 to 1 ½ cups of pecan halves or chopped pecans over the caramel layer. Toasted pecans are highly recommended as they enhance the nutty flavor and provide a wonderful textural contrast to the soft caramel and melted chocolate. The pecans will become slightly embedded in the caramel during baking, ensuring they stay put. This final topping not only adds visual appeal but also delivers that satisfying crunch, making each bite of your turtle bar recipe a perfect blend of gooey, chewy, and crispy.
Baking Your Irresistible Turtle Bars Treat
With all the delicious layers assembled, your Turtle Bars are now ready for their transformation in the oven. Proper baking is key to achieving that perfect balance of textures – a firm crust, gooey center, and slightly toasted pecans. It’s an exciting stage where all the prepared ingredients coalesce into an irresistible sweet squares. Understanding the correct cook time and what visual cues to look for will ensure your homemade bars come out perfectly, ready to be enjoyed as a crowd-pleasing dessert.
Cook time and temperature
Place your baking dish into the preheated 350°F (175°C) oven. The typical bake time for Turtle Bars is between 20 to 25 minutes. The exact time can vary slightly depending on your oven and the thickness of your caramel layer. It’s important not to overbake, as this can lead to a hard caramel layer rather than a delightfully chewy one. Keep an eye on the bars during the last few minutes of baking to ensure they reach the optimal consistency without becoming too dry or brittle, maintaining that luscious caramel dessert quality.
What to look for
During baking, you’ll notice a few key indicators that your Turtle Bars are ready. The chocolate chips should be fully melted and slightly bubbly, and the caramel layer should appear soft and glistening. The edges of the crust might turn a light golden brown, and the pecans on top will look lightly toasted and fragrant. If you gently jiggle the pan, the center should be mostly set, with just a slight wobble. Once these signs are evident, your chocolate pecan treat is likely done. Remove them from the oven to cool, as they will continue to set as they rest.
Cooling and Cutting Turtle Bars Perfectly
Patience is a virtue, especially when it comes to cooling and cutting your Turtle Bars. This critical phase is often overlooked but is absolutely essential for achieving beautifully structured and cleanly sliced sweet squares. Rushing this step can result in gooey, misshapen bars that stick to the pan and crumble, detracting from all your hard work. By allowing adequate cooling time, you ensure the caramel sets properly, and the chocolate firm enough for neat, attractive portions of your homemade bars. This also contributes to the optimal texture of your caramel dessert.
Let bars set completely
Once out of the oven, it’s crucial to let your Turtle Bars cool completely at room temperature for at least 2-3 hours. For an even firmer set, especially in warmer environments, you can then transfer them to the refrigerator for an additional 30-60 minutes. This cooling period allows the gooey caramel to firm up and the chocolate to set, making the bars much easier to handle and cut. Attempting to slice them while still warm will result in a sticky mess, as the caramel and chocolate will be too soft. Proper setting ensures that each square holds its shape perfectly.
Slicing into delicious squares
After the bars have fully cooled and set, use the parchment paper overhangs to carefully lift the entire slab out of the baking pan and place it on a cutting board. For the cleanest cuts, use a large, sharp chef’s knife. For even more precision, run the knife under hot water and wipe it clean between each cut, especially if the caramel starts to stick. This technique prevents dragging and ensures crisp edges, creating attractive individual sweet squares. Cut into your desired size, typically 2×2 inch squares, to yield about 24 bars. These perfectly portioned chocolate pecan treats are now ready to be served and enjoyed as a quick sweet or an impressive dessert for any gathering.
Smart Tips for Amazing Turtle Bars
While the basic turtle bar recipe is straightforward, a few clever tips can elevate your homemade bars from good to truly amazing. These small adjustments and techniques can significantly impact the flavor, texture, and presentation of your chocolate pecan treat, ensuring that every batch is a resounding success. Incorporating these smart strategies will not only enhance your baking experience but also guarantee an even more irresistible caramel dessert for your friends and family. Explore more delicious baking inspiration on our site, like these fun Funnel Cake Bites.
Using dark chocolate
For a more sophisticated and less sweet flavor profile, consider using dark chocolate chips or chopped dark chocolate instead of semi-sweet. The slight bitterness of dark chocolate provides a beautiful counterpoint to the rich, sugary caramel and balances the overall sweetness of the bars. This creates a deeper, more complex chocolate pecan treat that appeals to those who prefer less intense sugary desserts. Experiment with different percentages of cocoa solids to find your ideal balance; a 60-70% dark chocolate works wonderfully without overpowering the other flavors.
Getting clean cuts
Achieving perfectly clean cuts is essential for presentation. Beyond cooling the bars completely, try these tricks: use a very sharp knife and wipe the blade clean after each cut with a warm, damp cloth. For truly immaculate slices, chill the bars in the refrigerator for at least an hour (or even in the freezer for 15-20 minutes) before cutting. The colder the bars, the cleaner the cuts will be, as the caramel and chocolate will be firmer and less prone to sticking and smudging. Pressing down firmly and slicing through in one swift motion also helps create neat, uniform sweet squares.
How to Store Leftover Turtle Bars
While Turtle Bars are often devoured quickly, it’s always good to know how to store any leftovers to maintain their freshness and delicious texture. Proper storage ensures your homemade bars remain a delightful treat for days to come, preventing them from drying out or becoming overly sticky. Follow these simple guidelines to keep your quick sweets tasting as good as they did on day one, making sure every chocolate pecan treat is enjoyed to its fullest potential.
Keeping them fresh
To keep your Turtle Bars fresh, store them in an airtight container at room temperature for up to 3-4 days. For extended freshness, especially if your kitchen is warm, or if you prefer a firmer bar, refrigerate them. When refrigerated, they will last for up to a week. The cool temperature helps prevent the chocolate from blooming and keeps the caramel from becoming too soft, preserving the perfect balance of flavors and textures in your caramel dessert. Always ensure they are completely cooled before storing to prevent condensation.
Best storage containers
The best storage containers for Turtle Bars are airtight containers with tight-fitting lids. Plastic or glass food storage containers work wonderfully. If layering the bars, place a piece of parchment paper between each layer to prevent them from sticking together. This is especially helpful if the caramel is still slightly tacky. For longer-term storage, Turtle Bars freeze exceptionally well. Wrap individual bars or small stacks tightly in plastic wrap, then place them in a freezer-safe airtight container or bag. They can be frozen for up to 2-3 months. Thaw at room temperature or in the refrigerator before serving for an easy baking solution whenever a craving strikes.
Quick Nutrition Facts for Each Bar
When indulging in delicious treats like Turtle Bars, it’s natural to wonder about their nutritional content. While exact figures depend on precise ingredients and serving sizes, we can provide some general information. These homemade bars are undeniably a decadent caramel dessert, meant to be enjoyed in moderation. Knowing the basic facts can help you make informed choices, especially if you’re mindful of your dietary intake for this particular chocolate pecan treat.
Calorie count per serving
As a rich dessert, Turtle Bars are generally calorie-dense. A typical serving (one 2×2 inch square) can range anywhere from 180 to 250 calories, depending on the amount of butter, sugar, chocolate, and pecans used in the turtle bar recipe. Factors like the type of chocolate (milk vs. dark) and the fat content of the caramel can also influence the final calorie count. These are estimates, and for precise nutritional information, it is best to use a recipe calculator with your specific ingredients.
Basic dietary information
In addition to calories, Turtle Bars are typically high in sugar and fat due to the caramel, chocolate, and butter components. They also provide some dietary fiber and healthy fats from the pecans, though these are balanced by the other ingredients. These bars are generally not suitable for those following low-sugar, low-fat, or gluten-free diets (unless specific substitutions are made). They are an indulgent treat best enjoyed occasionally as part of a balanced diet, offering a wonderful taste experience as a delightful sweet squares option.
Easy Substitutions for Your Turtle Bars
One of the joys of baking this turtle bar recipe is its flexibility. While the classic combination of chocolate, caramel, and pecans is divine, you can easily customize these homemade bars to suit different preferences or dietary needs. These easy substitutions offer fantastic opportunities for baking inspiration, allowing you to put your unique twist on this beloved caramel dessert. Don’t hesitate to experiment and create your own signature chocolate pecan treat version.
Swapping out pecans
If pecans aren’t your favorite, or if you have an allergy, there are many delicious alternatives. Walnuts, almonds, or even cashews can provide a similar nutty crunch and flavor profile. For a completely nut-free option, consider using pretzels for a salty crunch, or seeds like pumpkin or sunflower seeds for a different texture. You could also incorporate shredded coconut for a tropical twist. Each substitution will give your easy baking project a unique character, transforming the familiar sweet squares into something new and exciting.
Trying different chocolate options
The type of chocolate you use can significantly alter the taste of your Turtle Bars. While semi-sweet is traditional, milk chocolate chips will yield a sweeter, creamier bar. Dark chocolate, as mentioned, provides a richer, less sweet experience. For a fun variation, try white chocolate chips, which offer a distinct, buttery sweetness that pairs wonderfully with caramel. You could even mix and match different types of chocolate within the same batch for a layered flavor. Feel free to chop up your favorite chocolate bar instead of using chips for a gourmet touch, adding a sophisticated element to your delicious treats.