
Thai peanut chicken offers a fantastic blend of savory, sweet, and tangy flavors, making it a beloved choice for dinner. This easy weeknight meal features tender chicken coated in a rich, creamy peanut sauce, perfect for a satisfying and flavorful home cooking experience. Learn how to create this popular dish effortlessly.
Key Takeaways
- Learn to make an irresistible creamy peanut sauce from scratch.
- Master cooking chicken to perfection for this dish.
- Discover easy ways to customize the flavor profile.
- Get tips for storing and reheating leftovers safely.
- Prepare a delicious meal in about 30 minutes.
This dish combines simple ingredients. It creates bold, comforting flavors. The sauce is truly the star. Tender chicken absorbs every bit. A truly satisfying meal.
Craving Thai Peanut Chicken? Here’s Why!
The allure of Thai peanut chicken lies in its captivating balance of tastes and textures. It brings together succulent pieces of chicken with a rich, velvety peanut sauce that’s both savory and subtly sweet, often with a hint of tang and a gentle warmth from spices. This dish is not just incredibly flavorful; it’s also remarkably satisfying and relatively simple to prepare, making it a favorite for home cooks seeking a delicious and comforting meal without extensive effort. Many find it an excellent choice for an easy weeknight meal idea because it delivers complex flavors quickly.
The secret to its wide appeal is the harmonious blend of ingredients often found in Asian cuisine, transforming everyday chicken into an extraordinary culinary experience. Whether you’re a fan of bold flavors or looking for a dish that feels special yet approachable, this creamy peanut chicken recipe ticks all the boxes. It’s perfect for those evenings when you want something comforting but also exciting, providing a delightful escape into the world of Thai-inspired flavors right in your own kitchen.
Ingredients for Thai Peanut Chicken
Chicken and Sauce Components
To create the perfect Thai peanut chicken, selecting the right ingredients is key. For the chicken, we recommend using boneless, skinless chicken breasts or thighs, cut into 1-inch pieces. Thighs tend to stay juicier, but breasts cook faster and are leaner. The star of the show, the creamy peanut sauce, relies on several foundational items. You’ll need natural creamy peanut butter (avoid hydrogenated oils if possible for best texture and flavor), soy sauce (low-sodium is often preferred), rice vinegar for a touch of tang, and a sweetener like honey or brown sugar. A dash of sesame oil adds depth, while fresh ginger and garlic provide aromatic warmth. Some recipes also incorporate a splash of coconut milk for extra creaminess and a subtle tropical note.
Garnishes and Oil
Garnishes are crucial for adding both visual appeal and a burst of fresh flavor to your finished dish. Finely chopped roasted peanuts offer a delightful crunch and reinforce the peanut flavor. Fresh cilantro, chopped, adds a bright, herbaceous counterpoint. Sliced green onions are also an excellent addition for a mild oniony zest. For cooking the chicken, a neutral oil with a high smoke point, such as vegetable oil, canola oil, or avocado oil, is ideal for achieving a beautiful golden-brown sear without imparting unwanted flavors. These oils help brown the chicken just right, forming a flavorful crust before it’s coated in the rich sauce. This combination of quality ingredients ensures your Thai peanut chicken is truly spectacular.
Making the Creamy Peanut Sauce
Mixing All Sauce Items
The heart of our Thai peanut chicken recipe is, undoubtedly, the creamy peanut sauce. Crafting it is surprisingly simple and comes together quickly. In a medium bowl, combine your natural creamy peanut butter, soy sauce, rice vinegar, honey or brown sugar, sesame oil, minced fresh ginger, and minced garlic. For an authentic touch, you might also include a squeeze of lime juice for brightness or a small amount of chili garlic sauce if you prefer a slight kick. Whisk all these ingredients together thoroughly until the mixture is completely smooth and well-combined. If the sauce appears too thick, you can thin it out with a tablespoon or two of warm water, chicken broth, or coconut milk until it reaches your desired pourable consistency. Remember, you want it thick enough to coat the chicken but thin enough to meld into the dish gracefully.
Taste the sauce and adjust seasonings as needed. This is your chance to make it perfect for your palate. Want it sweeter? Add more honey. Prefer more tang? A bit more rice vinegar will do the trick. A pinch of salt might enhance the overall flavor profile. Once satisfied, set your glorious peanut sauce aside. This preparation step can even be done in advance, making your quick dinner even quicker when it’s time to cook. Just store it covered in the refrigerator until ready to use.
Cooking the Chicken Just Right
Browning Chicken in Pan
Achieving perfectly cooked chicken is vital for a truly delicious Thai peanut chicken. Start by heating your chosen cooking oil in a large skillet or wok over medium-high heat. Ensure the pan is hot before adding the chicken, which helps create that desirable sear. Add your diced chicken pieces to the hot pan in a single layer, making sure not to overcrowd the skillet. Overcrowding can lower the pan’s temperature, steaming the chicken instead of browning it, which prevents the development of flavorful caramelization. If necessary, cook the chicken in batches.
Let the chicken cook undisturbed for 3-4 minutes on one side until it develops a beautiful golden-brown crust. This browning not only adds visual appeal but also significantly deepens the flavor profile through the Maillard reaction. Flip the chicken pieces and cook for another 3-4 minutes on the other side, or until they are cooked through and no longer pink in the center. Once cooked, remove the chicken from the pan and set it aside. You might notice some flavorful bits stuck to the bottom of the pan; these will contribute greatly to the sauce when it’s added later. For another delicious chicken recipe, consider making an easy honey garlic chicken, which also benefits from proper browning.
Coating Chicken in Peanut Sauce
Pouring Sauce Over Chicken
Once your chicken is beautifully browned and cooked, it’s time to introduce the star of the dish: the creamy peanut sauce. If you removed the chicken from the pan, you can return it now. Reduce the heat to low or medium-low. Carefully pour the prepared peanut sauce directly over the cooked chicken in the skillet. Stir gently to ensure every piece of chicken is thoroughly coated in the rich, aromatic sauce. The goal here is an even distribution, allowing the flavors to penetrate the chicken deeply. The warmth from the pan will help the sauce to loosen slightly and cling perfectly to the chicken pieces. This step transforms plain cooked chicken into the luscious Thai peanut chicken you’re aiming for.
Simmering for Flavor
After coating, bring the sauce to a gentle simmer. This is a crucial step for melding all the flavors together and allowing the sauce to thicken slightly. Let it simmer for 3-5 minutes, stirring occasionally. Be careful not to let it boil vigorously, as this can cause the peanut butter to separate or the sauce to become too thick too quickly. The simmering process allows the chicken to absorb the complex flavors of the ginger, garlic, soy sauce, and peanut butter, creating a harmonious and deeply satisfying dish. You’ll notice the sauce becoming glossier and more inviting. This careful simmering ensures that your flavorful meal is truly integrated, making each bite a rich experience. For other main course ideas, visit our main course category page.
Serving Your Thai Peanut Chicken
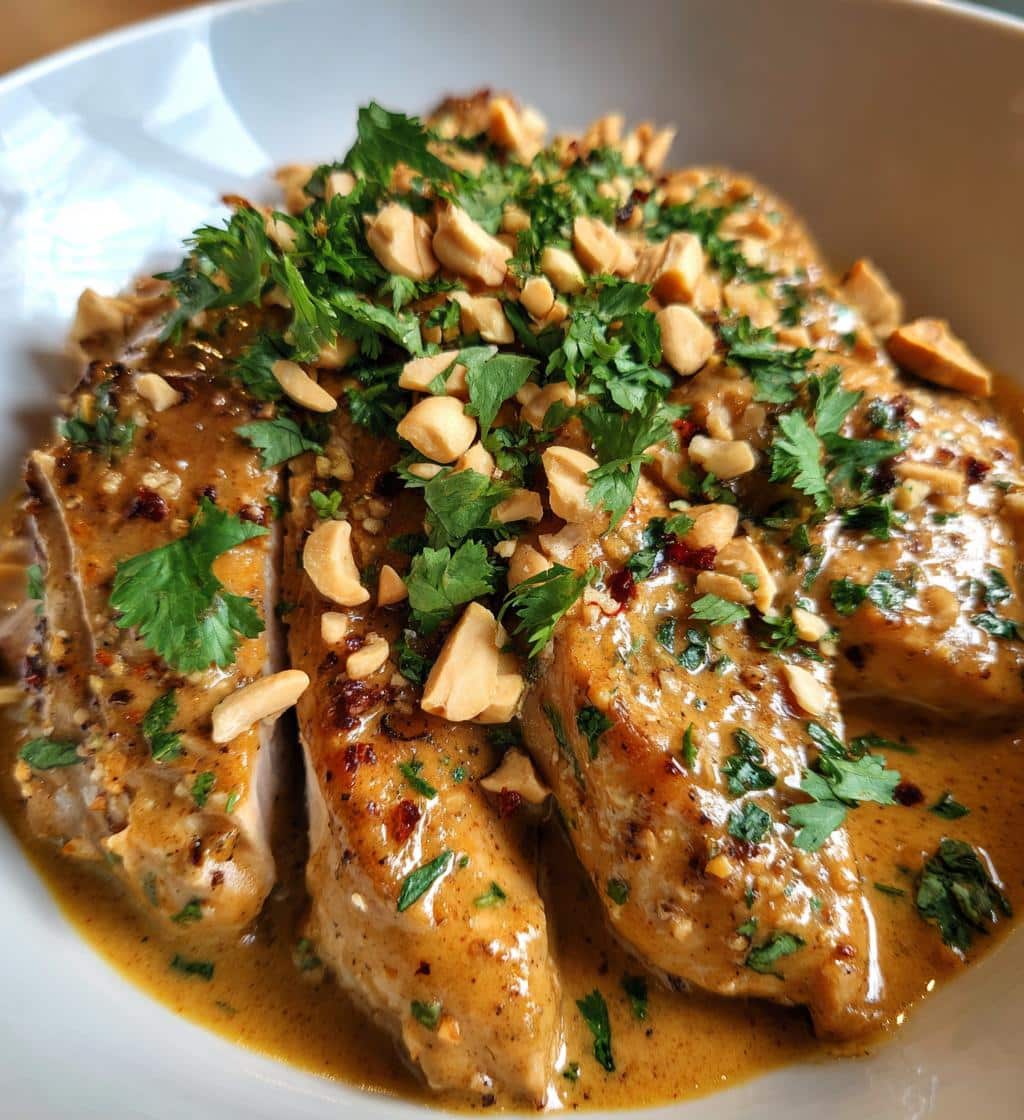
Garnish with Peanuts and Cilantro
The presentation of your Thai peanut chicken is almost as important as its taste. Once the chicken and sauce have finished simmering, transfer it to serving plates or a large platter. This is where your garnishes come into play. A generous sprinkle of freshly chopped roasted peanuts adds a wonderful textural contrast and enhances the nutty flavor profile. Equally important is a liberal scattering of fresh cilantro leaves, which provides a bright, refreshing counterpoint to the richness of the peanut sauce. For an extra pop of color and a mild oniony bite, consider adding thinly sliced green onions. These simple additions elevate the dish from good to truly restaurant-worthy, making every serving of this delicious chicken a feast for the eyes and the palate.
Pairing Suggestions
Thai peanut chicken is incredibly versatile and pairs well with a variety of side dishes. The most common accompaniment is fluffy steamed jasmine rice, which perfectly soaks up the extra sauce. For a healthier option, consider serving it with brown rice or quinoa. Steamed or stir-fried vegetables, such as broccoli florets, snap peas, bell peppers, or carrots, make excellent additions, adding nutrients and a refreshing crunch. A simple cucumber salad with a light vinaigrette can also provide a refreshing balance to the rich sauce. If you’re looking for other savory poultry dishes, you might enjoy our fiery dragon chicken. For more culinary inspiration, follow us on Instagram, where we share many delicious recipes and pairing ideas.
Ways to Customize Your Flavor
One of the joys of cooking at home is the ability to tailor dishes to your exact preferences. Thai peanut chicken is a fantastic canvas for flavor customization, allowing you to create a dish that perfectly suits your taste buds. Don’t be afraid to experiment!
Adjusting Sweetness and Tang
The balance of sweet and tangy is crucial in Thai-inspired dishes. If you prefer a sweeter profile, add a bit more honey, brown sugar, or even a touch of maple syrup to your sauce. Taste as you go, adding small amounts until it’s just right. For more tang, increase the amount of rice vinegar or add a squeeze of fresh lime juice. Lime juice also adds a bright, zesty note that can lift the entire dish. This fine-tuning ensures your Thai peanut chicken hits all the right notes for your personal preference.
Adding a Spicy Kick
For those who love a bit of heat, incorporating a spicy kick is easy. A teaspoon or two of Sriracha, chili garlic sauce, or a pinch of red pepper flakes can be stirred into the peanut sauce during its creation. If you want a more nuanced heat, a finely minced fresh red chili (like bird’s eye chili) can be added with the ginger and garlic. Start with a small amount and increase to your desired level of spice. This can transform your easy weeknight meal into a more adventurous culinary experience.
Protein and Butter Swaps
While chicken is traditional, this recipe is adaptable. You can easily substitute chicken with shrimp, tofu, or even pork tenderloin for different protein options. For those with peanut allergies or who simply want a different flavor, almond butter or cashew butter can be used in place of peanut butter. Keep in mind that the flavor profile will change slightly, but it will still be a delicious creamy sauce. You can also swap out regular butter for a different type if a recipe calls for it, though this specific recipe focuses on a peanut-based sauce. We’re always sharing new recipes and ideas on our Pinterest account, so check it out for more inspiration!
Storing Thai Peanut Chicken Leftovers
One of the many benefits of making a generous batch of Thai peanut chicken is having delicious leftovers for future meals. Proper storage ensures your dish remains fresh, safe, and just as enjoyable as the first serving, making it an excellent candidate for meal prep.
Fridge Storage Details
Once your Thai peanut chicken has cooled to room temperature (within two hours of cooking), transfer it to an airtight container. This helps prevent bacterial growth and keeps the chicken from drying out. Store the container in the refrigerator for up to 3-4 days. When storing, you might notice the sauce thickens slightly upon chilling; this is normal and will loosen up during reheating. Labeling your container with the date can help you keep track of its freshness, ensuring you consume it within the recommended timeframe.
Freezing for Longer
For longer storage, Thai peanut chicken freezes surprisingly well. Again, ensure the dish is completely cooled before freezing. Place it in a freezer-safe airtight container or heavy-duty freezer bags. If using bags, try to remove as much air as possible to prevent freezer burn. It can be stored in the freezer for up to 2-3 months. Thaw frozen leftovers overnight in the refrigerator before reheating. This method allows you to enjoy your delicious chicken much later, perfect for those busy days when cooking from scratch isn’t an option. Remember to always ensure food is piping hot when reheating.
Reheating for Another Delicious Meal
Reheating your Thai peanut chicken correctly ensures that it tastes just as wonderful as it did on the first day. The goal is to heat it through evenly without drying out the chicken or burning the sauce.
Stovetop Reheating
The stovetop is often the best method for reheating Thai peanut chicken, as it allows for better control over the temperature and consistency of the sauce. Transfer the leftovers to a skillet or saucepan. Add a splash of water, chicken broth, or coconut milk (1-2 tablespoons per serving) to help loosen the sauce as it heats. Warm over medium-low heat, stirring occasionally, until the chicken is heated through and the sauce is bubbling gently. This method helps restore the sauce’s original creamy texture.
Loosening Thick Sauce
It’s common for the peanut sauce to thicken significantly when chilled. Don’t worry! As mentioned, adding a small amount of liquid – water, broth, or coconut milk – while reheating on the stovetop will help bring it back to its desired consistency. Start with a little, stir, and add more if needed until the sauce is smooth and coats the chicken beautifully. This ensures your flavorful chicken remains juicy and the sauce rich.
Microwave Option
For a quicker reheating option, the microwave can be used. Place a single serving of Thai peanut chicken in a microwave-safe dish. Add a tablespoon of water or broth and cover loosely. Heat on medium power for 1-2 minutes, then stir. Continue heating in 30-second intervals, stirring between each, until heated through. Be mindful not to overheat, as this can dry out the chicken. While convenient, the stovetop usually yields a superior texture for the sauce. Always ensure the internal temperature reaches 165°F (74°C) for food safety.
Nutrition Details for This Dish
Understanding the nutritional aspects of your meals is an important part of a balanced diet. Thai peanut chicken, depending on the ingredients and portion sizes, can be a relatively healthy chicken option. While specific calorie counts and macronutrient breakdowns will vary based on the exact recipe and brands of ingredients used, we can provide a general overview.
Per Serving Breakdown
Typically, a single serving of Thai peanut chicken (without rice) provides a good source of protein from the chicken, which is essential for muscle repair and growth. The peanut butter contributes healthy fats and some fiber, though it also adds calories. Soy sauce and rice vinegar contribute minimal calories but add sodium, so opting for low-sodium versions is often recommended. Fresh ginger and garlic offer various health benefits, including anti-inflammatory properties and antioxidants, without adding significant calories. If served with white rice, the carbohydrate content will be higher, while brown rice will offer more fiber. Vegetables added to the dish will boost vitamin and mineral content.
To make this dish even healthier, you can:
- Use lean chicken breasts.
- Opt for natural peanut butter with no added sugar or oils.
- Control portion sizes of the peanut sauce, as it can be calorie-dense.
- Serve with a generous portion of steamed or lightly stir-fried non-starchy vegetables.
- Consider using a low-sodium soy sauce.
- For more information on the benefits of healthy fats from peanuts, you can refer to the Wikipedia page on Peanuts.
This dish can easily fit into a balanced diet when prepared mindfully, offering a delicious and satisfying meal without compromising on flavor for your home cooking.
Quick Prep and Cook Times
One of the most appealing aspects of Thai peanut chicken, especially for busy individuals and families, is its efficiency in the kitchen. This recipe is designed to deliver maximum flavor in minimal time, making it an ideal choice for a quick dinner.
Total Time at 30 Minutes
From start to finish, you can realistically expect to have this delicious Thai peanut chicken on your table in approximately 30 minutes. This includes a brisk 10-15 minutes for preparation – dicing the chicken, mincing garlic and ginger, and whisking together the sauce ingredients. The actual cooking time for the chicken and simmering it in the sauce takes another 15-20 minutes. This makes it a perfect solution for an easy weeknight meal when time is precious but you still crave something wholesome and flavorful. The speed doesn’t compromise on taste, proving that incredible home cooking doesn’t always require hours of effort.
Servings for Four
This recipe is typically designed to yield four generous servings, making it perfect for a family dinner or for preparing meals for a couple with planned leftovers. If you’re cooking for more people, simply scale up the ingredients proportionally. The beauty of this dish is its adaptability; it’s just as easy to double the recipe for a larger gathering or for those who love to have extra for meal prep throughout the week. Having extra servings means you can enjoy this flavorful chicken again without any additional cooking, saving you even more time later.
Handy Tips for Best Results
To ensure your Thai peanut chicken turns out perfect every time, keep these practical cooking tips in mind. Small details can make a big difference in the final taste and texture of your dish.
Pan Heat for Browning
When cooking the chicken, it’s crucial to use a sufficiently hot pan. Ensure your skillet or wok is heated over medium-high heat with your chosen oil shimmering before you add the chicken pieces. A hot pan allows the chicken to sear quickly, creating a beautiful golden-brown crust (the Maillard reaction) that adds depth of flavor. If the pan isn’t hot enough, the chicken will steam rather than brown, resulting in a less appealing texture and flavor. Avoid overcrowding the pan; cook the chicken in batches if necessary to maintain consistent heat and achieve optimal browning. This step is fundamental for achieving tender, flavorful chicken that stands up to the rich sauce.
Don’t Rush Simmering
Once the sauce is added to the chicken, resist the urge to rush the simmering process. A gentle simmer for 3-5 minutes is ideal. This allows the flavors to meld beautifully and the sauce to thicken just enough to coat the chicken without becoming overly sticky or dry. Rushing this step means the chicken won’t fully absorb the sauce’s aromatic qualities, and the overall dish might taste less integrated. Patience here will be rewarded with a deeply flavorful and satisfying meal. For other recipes that require careful simmering, check out our Southern-style collard green and potato stew.
Generous Garnish
While often seen as an afterthought, garnishes are integral to the full Thai peanut chicken experience. Don’t be shy with them! A generous sprinkle of chopped roasted peanuts not only adds a delightful crunch but also reinforces the primary flavor. Fresh cilantro brightens the dish with its herbaceous notes, cutting through the richness of the peanut sauce. Sliced green onions provide a mild, fresh oniony flavor and a touch of color. These additions aren’t just for looks; they contribute significantly to the texture and overall freshness of the dish, making each bite more exciting and well-rounded. It’s the perfect finishing touch to your delicious chicken.