
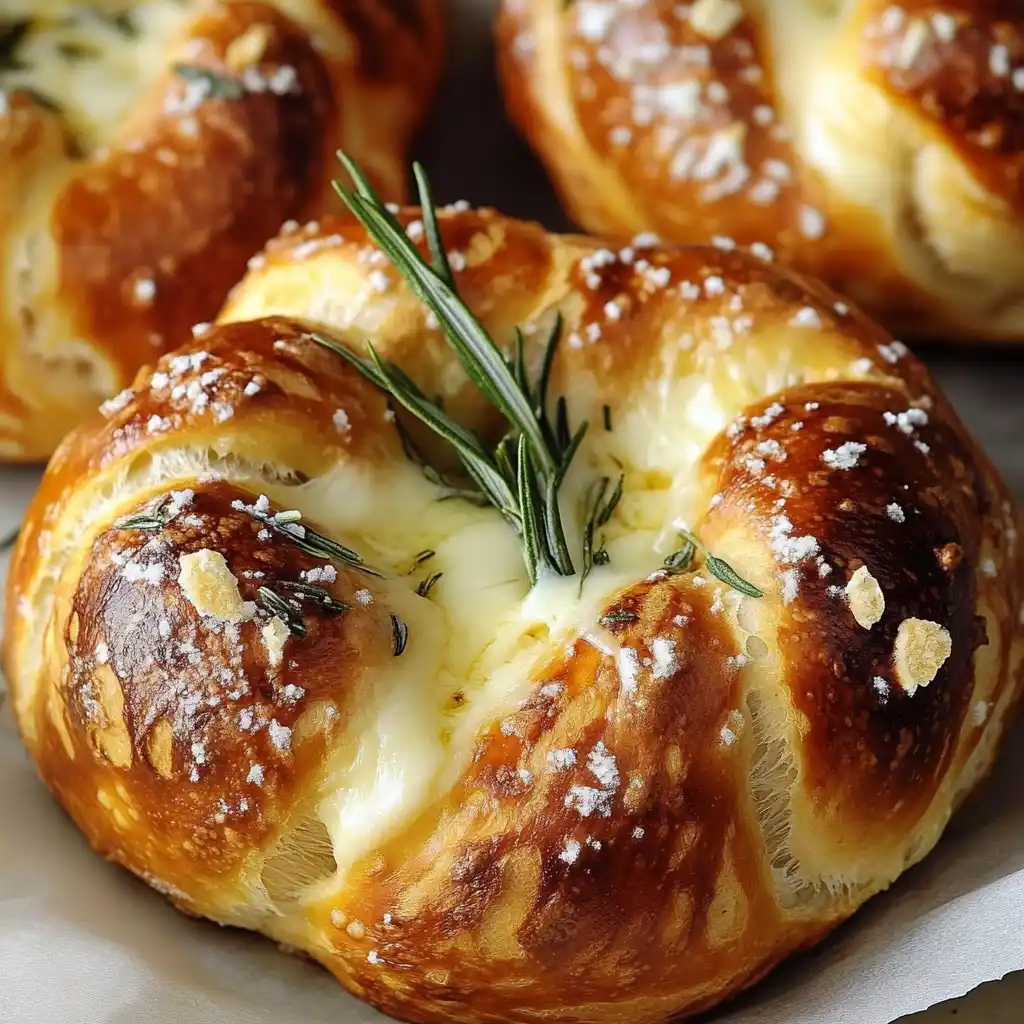
Homemade Mozzarella Stuffed Pretzels offer a delightful twist on a classic snack, combining savory baked dough with gooey, melted cheese. This easy recipe guides you through each step, ensuring you achieve perfect soft pretzels. Ideal for gatherings or a satisfying treat, these cheesy pretzels are sure to become a family favorite.
Key Takeaways
- Homemade pretzel dough is simpler to make than you think.
- The baking soda bath is crucial for authentic pretzel flavor and texture.
- Proper sealing of mozzarella sticks prevents cheese leaks during baking.
- These stuffed pretzels are versatile, great for snacks, parties, or even a light meal.
Making pretzels is a rewarding process. Freshly baked dough smells amazing. Gooey cheese adds a delicious surprise. You’ll love sharing these treats. Homemade is always best.
Making These Mozzarella Stuffed Pretzels
Why You’ll Crave This Recipe
Homemade Mozzarella Stuffed Pretzels are a game-changer for anyone who loves savory snacks and comfort food. Imagine biting into a perfectly golden, chewy soft pretzel, only to discover a warm, gooey center of melted mozzarella cheese. This isn’t just a snack; it’s an experience. The combination of the slightly salty, malty pretzel exterior with the rich, creamy cheese interior creates an irresistible flavor and texture contrast that will keep you reaching for more. Forget about store-bought options; nothing compares to the fresh, warm goodness of pretzels made right in your kitchen. This recipe simplifies the process, breaking down each step to make it accessible for bakers of all skill levels, ensuring that even first-timers can achieve bakery-quality results.
These cheesy pretzels are perfect for countless occasions. Whether you’re hosting a game day party, planning a cozy movie night, or simply looking for a fun project to do with family, this easy recipe delivers. The aroma of freshly baked pretzel dough filling your home is an immediate mood booster, and the smiles on everyone’s faces when they taste these warm treats are priceless. Beyond the incredible taste, there’s a unique satisfaction in creating something so delicious from scratch. This recipe provides a wonderful opportunity to engage in the art of baking, offering a rewarding culinary adventure that culminates in truly delectable homemade pretzels. The blend of textures and tastes ensures these won’t just be a snack, but the snack everyone asks for. You can even consider them a delightful appetizer before a heartier meal like our Creamy Baked Mac and Cheese.
Gather Your Pretzel Making Ingredients
Before you embark on your pretzel-making adventure, ensure you have all your ingredients ready. This simple step, often overlooked, makes the entire process smoother and more enjoyable. For the pretzel dough, you’ll need all-purpose flour, warm water, active dry yeast, a touch of granulated sugar (to activate the yeast), and salt for flavor. The water temperature is crucial here; it should be warm enough to activate the yeast (around 105-115°F or 40-46°C) but not too hot, which could kill it. As for the star of the stuffing, grab some low-moisture part-skim mozzarella sticks. These work best because they contain less water, preventing the cheese from becoming overly watery and seeping out during baking.
For the all-important baking soda bath, you’ll need baking soda and a large pot of water. This bath is what gives pretzels their distinct chewy crust and golden-brown color, so don’t skip it! Finally, for the finishing touches, prepare an egg (for an egg wash) and some coarse pretzel salt or sea salt for sprinkling. Having everything measured out and within reach, often referred to as “mise en place” in the culinary world, helps prevent last-minute scrambling and ensures a more relaxed baking experience. For another fantastic main course idea that utilizes fresh ingredients, check out our Crispy Parmesan Chicken with a Rich Garlic Sauce.
How to Make Pretzel Dough
The heart of any good pretzel is its dough. Making homemade pretzel dough from scratch might seem intimidating, but it’s surprisingly straightforward and incredibly rewarding. The process involves a few key steps that, when followed carefully, result in a soft, pliable dough that’s perfect for shaping and stuffing. Patience is a virtue in baking, especially when working with yeast, as it needs time to do its magic. This simple mixture of flour, water, yeast, sugar, and salt will transform into the chewy, airy base for your delectable mozzarella stuffed pretzels.
Mixing and Kneading the Dough
Begin by combining the warm water and sugar in a large mixing bowl, then sprinkle the active dry yeast over the top. Let this sit for about 5-10 minutes until it becomes foamy, indicating the yeast is active. Next, add the flour and salt, mixing with a wooden spoon or a stand mixer with a dough hook until a shaggy dough forms. Turn the dough out onto a lightly floured surface and knead for 8-10 minutes. Kneading develops the gluten in the flour, which gives pretzels their characteristic chewiness. The dough should become smooth, elastic, and slightly tacky but not sticky. This physical action of kneading is not just functional but can also be quite therapeutic, connecting you directly to the food you’re preparing.
Giving Dough Time to Rise
Once kneaded, lightly grease a clean bowl with a little oil. Place the dough ball in the bowl, turning it once to coat, then cover it with plastic wrap or a clean kitchen towel. Allow the dough to rise in a warm, draft-free place for about 1 to 1.5 hours, or until it has doubled in size. This rising period, known as proofing, is essential. It allows the yeast to ferment, creating air pockets that contribute to the dough’s light and airy texture. Don’t rush this step; a slow, steady rise yields the best flavor and structure for your soft pretzels. You can observe the dough’s progress, watching it slowly expand and become plump, signaling it’s ready for the next exciting phase of shaping.
Shaping and Stuffing Homemade Pretzels
The fun really begins when you start shaping and stuffing your homemade pretzels. This is where your individual creativity can shine, though a consistent technique will yield the best results for perfectly cooked and contained mozzarella. The goal is to create a robust casing for the cheese, ensuring it melts beautifully inside without oozing out prematurely. This section focuses on achieving that ideal shape and secure stuffing.
Rolling Out Dough Ropes
After your dough has risen, gently punch it down to release the air. Divide the dough into equal portions; typically, about 8-12 pieces depending on how large you want your pretzels. On a lightly floured surface, take one piece of dough and roll it into a long, thin rope, approximately 18-20 inches (45-50 cm) long. Aim for an even thickness throughout the rope, as this ensures uniform baking. If the dough resists rolling, let it rest for a few minutes to allow the gluten to relax, then try again. The length allows for good coverage of the cheese stick and sufficient dough for the classic pretzel twist.
Wrapping Mozzarella Sticks
Now for the stuffing! Take one mozzarella stick and center it on one end of a dough rope. Carefully wrap the dough around the mozzarella stick, pinching the seams firmly to seal the cheese inside. It’s crucial that the cheese is completely enclosed to prevent leakage during baking. Once the mozzarella stick is encased, continue rolling the dough rope around it, maintaining the thickness and making sure the seam is tightly sealed. Then, form the traditional pretzel shape: make a “U” shape with the dough rope, cross the ends twice, and bring them back down to press onto the bottom curve of the “U.” This creates the iconic pretzel knot, holding the cheese securely. You can find visual guides on Pinterest to help master this classic pretzel shape!
The Important Baking Soda Bath
The baking soda bath is arguably the most crucial step in making authentic soft pretzels. It’s what gives them their distinctive deep golden-brown color, that characteristic chewy crust, and a unique, slightly tangy flavor that sets them apart from regular bread. Without this bath, your pretzels would simply bake up like breadsticks, lacking the classic pretzel identity. Understanding its purpose will help you appreciate this simple yet transformative step.
The science behind the baking soda bath is fascinating. When pretzels are dipped into a solution of boiling water and baking soda, the alkaline baking soda (sodium bicarbonate) reacts with the surface of the dough. This reaction creates a higher pH on the dough’s exterior, which significantly accelerates the Maillard reaction during baking. The Maillard reaction is a chemical process between amino acids and reducing sugars that gives browned food its distinctive flavor. This is the same reaction responsible for the delicious crust on roasted meats or the color of toasted bread. The higher pH from the baking soda bath allows this browning to occur much more quickly and deeply, resulting in that iconic pretzel color and texture.
To prepare the bath, bring a large pot of water to a rolling boil. Carefully add a significant amount of baking soda – typically ½ cup to 1 cup per 8-10 cups of water. The water will foam up, so use a large pot to prevent overflow. Once dissolved, reduce the heat to a simmer. Gently lower one or two shaped pretzels into the simmering bath using a slotted spoon or spatula. Let each pretzel simmer for about 30 seconds per side. Over-dipping can result in a soapy taste, while under-dipping won’t achieve the desired crust. After their quick dip, carefully remove the pretzels, letting excess water drip off, and place them on a parchment-lined baking sheet. This preparation is a defining characteristic of true pretzels, a tradition even documented on Wikipedia’s pretzel page.
Baking Your Golden Brown Pretzels
After the vital baking soda bath, your pretzels are ready for their final transformation in the oven. This baking stage is where they achieve their beautiful golden-brown hue and develop the perfect texture – a delightful contrast between a chewy crust and a soft, airy interior, all while melting the mozzarella into a gooey, savory surprise. Proper baking technique ensures these Homemade Mozzarella Stuffed Pretzels are nothing short of perfection.
Egg Wash and Salt Sprinkle
Before baking, an egg wash is applied. This simple step involves whisking one egg with a tablespoon of water and brushing it generously over the entire surface of each pretzel. The egg wash contributes to the pretzel’s glossy, golden finish, enhancing its visual appeal and creating a surface that beautifully adheres to the coarse salt. Immediately after applying the egg wash, sprinkle a generous amount of coarse pretzel salt or sea salt over each pretzel. The large granules of pretzel salt are traditional and provide that signature salty crunch, perfectly balancing the richness of the mozzarella cheese inside. Don’t be shy with the salt; it’s a key component of the authentic pretzel experience.
Achieving Perfect Color
Preheat your oven to a high temperature, typically around 400-425°F (200-220°C). The high heat is essential for a quick bake that creates the desired chewy crust without drying out the interior. Bake the pretzels for about 12-15 minutes, or until they are deeply golden brown. Keep a close eye on them, as oven temperatures can vary, and they can go from perfectly golden to over-baked quickly. The intense heat combined with the baking soda bath’s effects will ensure a rich, appetizing color. Once baked, transfer the pretzels to a wire rack to cool slightly before serving. While they are delicious warm, giving them a few minutes to set helps the cheese firm up slightly, making them easier to handle. These make for excellent appetizers at any gathering.
Top Tips for Best Pretzels
Achieving bakery-quality Homemade Mozzarella Stuffed Pretzels consistently involves a few key techniques and a bit of patience. These tips are designed to help you avoid common pitfalls and ensure every batch you make is as delicious and perfectly textured as the last. From sealing the cheese to allowing adequate rise time, these pointers are your secret weapons for pretzel success.
Sealing Mozzarella Sticks Well
The most critical aspect of stuffing pretzels with cheese is preventing leakage. A burst pretzel with melted cheese all over your baking sheet is disappointing! To avoid this, ensure that when you wrap the dough around the mozzarella stick, you pinch the seams very firmly. Don’t just press lightly; really work the dough together to create a solid seal. Any tiny gap can become an escape route for molten cheese. Also, ensure the mozzarella sticks are completely thawed but still firm if you’re using frozen ones. If they are too cold or too warm, they can be harder to work with and seal effectively. Doubling up the dough layer in some spots around the cheese can also add an extra layer of protection, particularly at the ends of the mozzarella stick.
Don’t Rush Dough Rising
Patience is paramount when it comes to yeast dough. The rising time, or proofing, allows the yeast to ferment and develop flavor and texture. Rushing this step by placing the dough in too warm an environment or cutting the rising time short will result in dense, less flavorful pretzels. A properly risen dough will be light, airy, and more pliable, making it easier to shape and contributing to the soft interior texture of the finished pretzel. Find a warm, draft-free spot for your dough – perhaps inside a turned-off oven with the light on, or simply on a kitchen counter in a warm room. If your kitchen is cool, the rise might take a bit longer than the recipe suggests, so always go by visual cues (doubled in size) rather than strictly by the clock. For another recipe that benefits from careful preparation, try our Easy Honey Garlic Chicken.
Get Creative with Your Pretzels
While the classic Homemade Mozzarella Stuffed Pretzels are undeniably delicious, there’s plenty of room to experiment and customize your creations. Pretzel dough is a versatile canvas, and with a little imagination, you can adapt this recipe to suit various tastes and occasions. Don’t be afraid to step beyond the traditional and explore new flavor combinations.
Try Different Cheese Fillings
Mozzarella is a fantastic choice for its melt-factor and mild taste, but why stop there? Consider other cheeses that melt well. Provolone or a mild cheddar can offer a sharper, more pronounced cheese flavor. For a spicy kick, try stuffing with pepper jack cheese. If you’re feeling adventurous, smoked gouda or even a blend of cheeses can add depth and complexity. Just ensure the cheese you choose has a relatively low moisture content to minimize leakage during baking. You could also experiment with adding a tiny bit of cooked chopped jalapeño or some herbs like chives or basil along with the cheese for an extra layer of flavor. The key is to select cheeses that become wonderfully gooey when heated, transforming your stuffed pretzel into a unique treat. The versatility of mozzarella, for instance, makes it a popular choice.
Sweet or Savory Toppings
Beyond cheese, the world of pretzel toppings is vast. For a savory twist, consider everything bagel seasoning instead of just coarse salt. Garlic powder, onion powder, or a sprinkle of Parmesan cheese before baking can add an extra layer of umami. If you’re really looking to impress, brush the baked pretzels with melted garlic butter for an indulgent finish. On the sweeter side, after baking, you could brush them with melted butter and then sprinkle with cinnamon sugar for a dessert-style pretzel. A drizzle of chocolate sauce or a cream cheese glaze could also turn these into an unexpected sweet treat. Think about what flavors you love and how they might complement the chewy pretzel dough.
Make Ahead and Storing Pretzels
Homemade Mozzarella Stuffed Pretzels are always best enjoyed fresh and warm, straight from the oven. However, there are certainly ways to prepare them in advance or store leftovers, ensuring you can savor their deliciousness even when time is tight. Knowing how to properly manage your pretzel production means you can enjoy these treats with minimal fuss.
If you want to make the dough ahead of time, you can prepare it up to the point of its first rise. After kneading, place the dough in a greased bowl, cover it tightly with plastic wrap, and refrigerate it overnight or for up to two days. When you’re ready to use it, remove the dough from the fridge and let it come to room temperature for about 30-60 minutes before punching it down and proceeding with shaping. Alternatively, you can shape the pretzels, including the mozzarella stuffing, and even give them the baking soda bath. After the bath, place them on a parchment-lined baking sheet and freeze them until solid. Once frozen, transfer them to an airtight freezer bag. When ready to bake, you can bake them from frozen (without thawing), simply adding a few extra minutes to the baking time, or until golden brown and the cheese is melted.
For storing baked pretzels, allow them to cool completely. Store them in an airtight container at room temperature for up to 1-2 days. Reheating them in a toaster oven or a regular oven at a low temperature (around 300°F/150°C) for a few minutes will help restore some of their warmth and chewiness. Microwaving is generally not recommended as it can make them tough. For longer storage, baked pretzels can also be frozen. Wrap them individually in plastic wrap, then place them in a freezer-safe bag for up to 1-2 months. Reheat from frozen in the oven.
Serving Suggestions for Pretzels
Homemade Mozzarella Stuffed Pretzels are fantastic on their own, but they truly shine when paired with the right accompaniments. Whether you’re serving them as a party snack, a casual lunch, or a hearty appetizer, the right dip or side can elevate the entire experience, adding another layer of flavor and enjoyment.
Best Dips for Pretzels
Dips are essential for pretzel enjoyment! For a classic pairing, a grainy mustard (like whole grain or Dijon) is a natural choice. Its tangy, slightly spicy notes cut through the richness of the cheese and pretzel dough beautifully. A warm cheese sauce, such as a cheddar or nacho cheese dip, creates an incredibly indulgent double-cheese experience. Marinara sauce is another excellent option, transforming your stuffed pretzels into mini pizza-like bites, especially if you added some Italian herbs to the dough. For something creamy, a simple sour cream and chive dip or even a ranch dressing can provide a cool contrast. If you prefer a sweet and savory combo, a honey mustard dip offers a delightful balance. Think about the flavors you enjoy with pizza or cheese sticks, as those often translate well to these cheesy pretzels. Consider making a variety of dips for guests to choose from, like our rich and creamy Ground Turkey and Peppers which would pair well as a main dish if you used the pretzels as an appetizer.
Beyond dips, these pretzels can be served alongside a simple green salad for a light meal, or as part of a larger spread of appetizers. They are especially popular at gatherings, game nights, or as a fun after-school snack for kids. The warmth of the melted mozzarella makes them comforting and satisfying.
Why You’ll Crave These Pretzels
The appeal of Homemade Mozzarella Stuffed Pretzels goes far beyond their delicious taste; it’s about the entire sensory experience and the satisfying comfort they bring. Once you make these, you’ll understand why they become a recurring request in your home, cementing their place as a cherished favorite.
Firstly, the fresh-baked aroma alone is enough to draw anyone into the kitchen. The scent of yeast dough baking, mingled with the promise of melting cheese, creates an irresistible anticipation. Then there’s the texture: the perfect exterior chewiness from the baking soda bath, giving way to a soft, fluffy interior. But the real magic happens when you bite into the center and discover that warm, gooey, stretchy mozzarella. This surprise factor makes every pretzel a delightful adventure. It’s the perfect balance of salty and savory, with just enough richness to be incredibly satisfying without being overly heavy.
Moreover, there’s a deep satisfaction in making these from scratch. The process itself is a rewarding culinary journey, from mixing the pretzel dough to watching it rise, shaping each piece, and finally seeing them emerge golden and irresistible from the oven. This hands-on creation adds a layer of appreciation to every bite. These aren’t just snacks; they’re an expression of homemade goodness and a testament to the joy of baking. They satisfy that craving for something hearty, cheesy, and utterly comforting, making them a treat you’ll genuinely look forward to enjoying time and time again. Don’t forget to share your creations on platforms like Instagram to inspire others!
Enjoy Your Homemade Mozzarella Pretzels!
Congratulations! You’ve successfully navigated the rewarding process of creating your very own batch of Homemade Mozzarella Stuffed Pretzels. From mixing the simple pretzel dough to mastering the crucial baking soda bath and achieving that perfect golden-brown crust, you’ve transformed basic ingredients into an extraordinary treat. Now comes the best part: enjoying the fruits of your labor.
These warm, cheesy pretzels are more than just a snack; they are a testament to the joy of home baking and the simple pleasure of indulging in something truly delicious made with your own hands. Serve them immediately, while the mozzarella is still wonderfully melted and gooey. Gather your favorite dips, call your family and friends, or simply savor them quietly as a well-deserved personal treat. Each bite offers a harmonious blend of chewy, salty pretzel and rich, creamy cheese that is incredibly satisfying.
Remember, baking is as much about the process as it is about the final product. Embrace the journey, learn from each step, and take pride in what you’ve created. Whether this is your first time making pretzels or you’re a seasoned baker, these Mozzarella Stuffed Pretzels are designed to bring smiles and warm memories. So go ahead, pull one apart, watch that cheese stretch, and truly enjoy your homemade masterpiece. You’ve earned this delicious reward.