
Cottage Cheese Chips are a delightful and innovative way to enjoy a guilt-free snack. They offer a fantastic low-carb, protein-rich alternative to traditional fried chips, perfect for anyone seeking a healthier option without sacrificing flavor or satisfying crunch. This easy recipe provides a quick preparation method for a truly homemade treat.
Key Takeaways
- Cottage cheese chips are a healthy, low-carb, and protein-rich snack.
- They are simple to prepare with minimal ingredients and tools.
- Achieving crispiness requires thin spreading and proper baking/cooling.
- Customization with various seasonings and dips enhances flavor.
- Proper storage ensures freshness for enjoyment later.
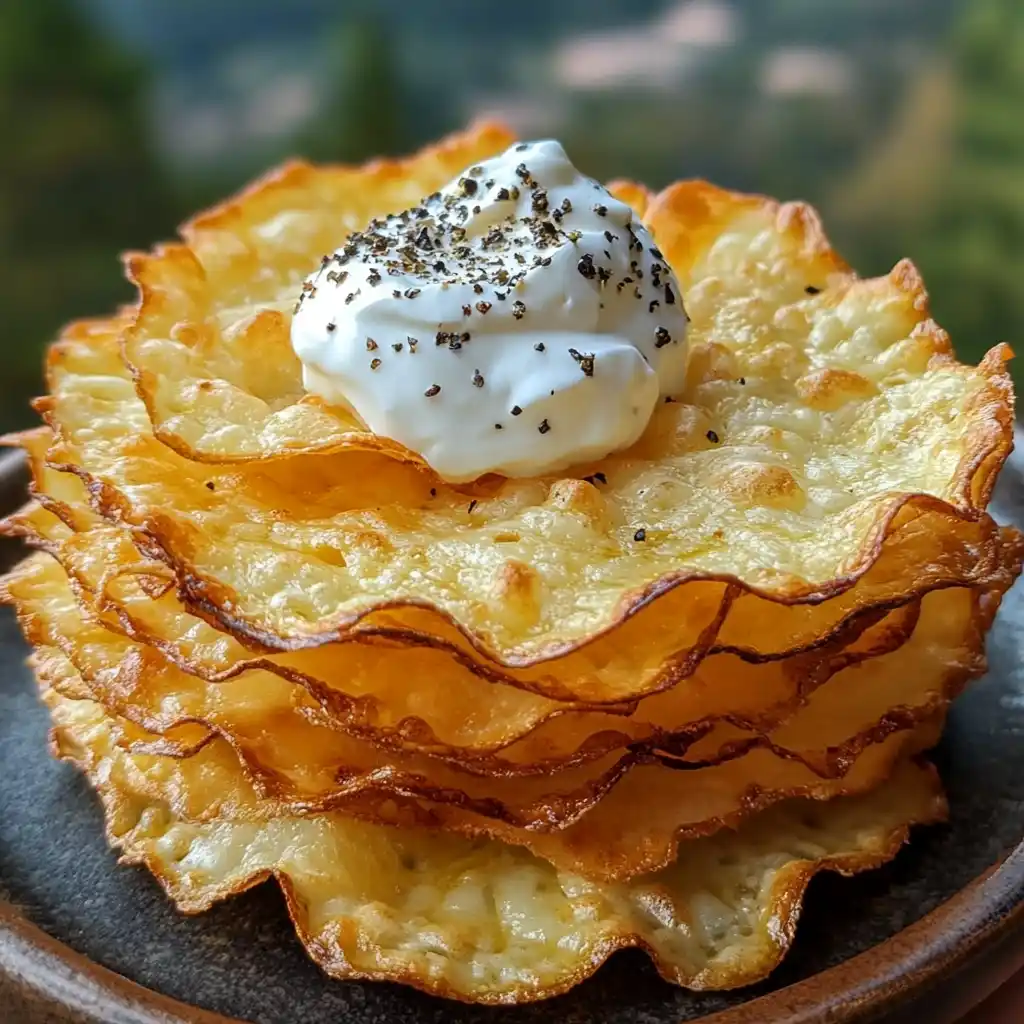
These savory chips are a game-changer. They satisfy cravings deliciously. Enjoy a healthy, cheesy crunch. So simple to make at home. A perfect snack for any time.
Guilt-Free Snacking: Cottage Cheese Chips
In today’s fast-paced world, finding snacks that are both delicious and align with health goals can be a challenge. Enter cottage cheese chips – a revolutionary way to satisfy your cravings without the guilt. These homemade chips leverage the inherent texture and mild flavor of cottage cheese, transforming it into a surprisingly crispy, flavorful bite. They stand out as a smart choice for anyone looking to reduce carbohydrate intake while boosting protein consumption. The versatility of cottage cheese as a base allows for endless flavor customization, making these chips a delightful addition to any snack repertoire. Forget processed options; these chips are fresh, wholesome, and incredibly satisfying, proving that healthy snacking doesn’t have to mean sacrificing taste.
Why make these healthy chips?
Opting to make cottage cheese chips at home brings a multitude of benefits, starting with their impressive nutritional profile. Unlike conventional potato chips that are often high in unhealthy fats and simple carbohydrates, cottage cheese chips are a powerhouse of protein and naturally lower in carbs. This makes them an excellent choice for those following low-carb diets, or simply looking for a snack that provides sustained energy and satiety. The protein content helps keep you feeling fuller for longer, curbing the urge for less healthy alternatives. Furthermore, by making them yourself, you have complete control over the ingredients, avoiding artificial additives, excessive sodium, and preservatives often found in store-bought options. This allows for a truly clean eating experience, supporting your well-being without compromise. It’s a simple swap that yields significant health rewards.
Quick and easy preparation
One of the most appealing aspects of cottage cheese chips is their straightforward and minimal preparation time. You don’t need advanced culinary skills or an array of specialized equipment to whip up a batch. The process primarily involves mixing a few simple ingredients, spreading them thin, and baking until golden and crispy. This ease makes them a perfect last-minute snack solution or a convenient option for meal prepping healthy bites for the week. From start to finish, you can have a batch of warm, savory chips ready in under 30 minutes, allowing you to enjoy a freshly baked treat whenever the craving strikes. The simplicity of this recipe encourages even novice cooks to get into the kitchen and create something delicious and nutritious without fuss.
The Appeal of Healthy Snack Chips
The quest for healthy snack chips often leads to disappointment, with many so-called “healthy” alternatives still containing hidden sugars, excessive sodium, or processed ingredients. Cottage cheese chips break this mold by offering a genuinely wholesome alternative that doesn’t compromise on the satisfying crunch and flavor typically associated with fried snacks. Their appeal lies in their ability to deliver a satisfying snacking experience while adhering to healthier dietary principles. They’re not just a substitute; they’re an enhancement to your snacking habits, providing nutrients that contribute positively to your diet. For inspiration on other savory dishes, consider trying this ground turkey and peppers recipe.
Low-carb alternative to traditional chips
Traditional potato chips, while undeniably tasty, are notorious for their high carbohydrate content and often minimal nutritional value. For individuals monitoring their carb intake, such as those following ketogenic or low-glycemic diets, these snacks are usually off-limits. Cottage cheese chips offer a fantastic solution, providing a much-needed crunch and cheesy flavor without the carb overload. Made primarily from cottage cheese, which is rich in protein and low in carbohydrates, these chips fit perfectly into a health-conscious eating plan. They serve as an excellent vehicle for dips and can be seasoned in countless ways, making them a versatile and exciting replacement for their carb-heavy counterparts. This shift allows you to enjoy the ritual of snacking without derailing your nutritional goals, making healthy eating more accessible and enjoyable. It’s truly a game-changer for anyone seeking a guilt-free crunch.
Simple Ingredients for Cottage Cheese Chips
The beauty of cottage cheese chips lies in their simplicity, requiring only a handful of common ingredients to create a truly delicious and healthy snack. You won’t need to scour specialty stores for obscure items; most of what you need is likely already in your pantry or readily available at any grocery store. This accessibility makes the recipe highly approachable for anyone eager to try a new, healthier snack option. Focusing on fresh, quality ingredients will yield the best flavor and texture for your homemade chips, highlighting the natural goodness of each component. Think about how these simple components can create a crispy texture, a delightful change from softer snacks.
Main items you will need
The foundation of these chips starts with cottage cheese. Opt for full-fat cottage cheese if you desire a richer flavor and slightly more pliable texture, but low-fat versions work perfectly well too. Beyond the main ingredient, you’ll typically need an egg, which acts as a binder, helping the cottage cheese hold its shape and achieve that desired crispiness. A small amount of flour or cornstarch can also be added to enhance the binding and provide a slightly firmer chip, though it’s optional depending on your preference for carb content. Some recipes may also suggest a touch of grated Parmesan cheese to intensify the savory, umami notes, creating an even more irresistible flavor profile. These basic components create a canvas for flavor, ready for your personalized touch.
Essential seasonings for flavor
While cottage cheese and a binder form the structural base, seasonings are where the magic truly happens, elevating these chips from plain to powerfully flavorful. Salt and black pepper are non-negotiable staples, providing the fundamental savory notes. From there, the possibilities are vast. Garlic powder and onion powder are excellent choices for a classic savory profile, adding depth without overpowering the delicate cheesy base. For a slight tang and a hint of color, a dash of paprika or smoked paprika can be wonderful. If you enjoy a bit of heat, a pinch of cayenne pepper or chili powder will deliver a delightful kick. Don’t be afraid to experiment with your favorite dried herbs like dill, chives, or oregano. The right combination of seasonings will transform your healthy snack into a truly addictive treat, making every bite exciting.
Essential Tools for Making Chips
Making cottage cheese chips doesn’t require a kitchen full of gadgets, which adds to their appeal as an easy, accessible snack. The tools you’ll need are likely already staples in most home kitchens, making the preparation process incredibly straightforward and hassle-free. Having the right basic equipment ensures a smooth baking experience and contributes significantly to achieving that coveted crispy texture. With just a few simple items, you’ll be well on your way to enjoying a batch of fresh, homemade cottage cheese chips. This emphasis on simplicity extends to every aspect of the recipe, ensuring it remains approachable for cooks of all skill levels.
Preparing your baking sheet
The baking sheet is your primary canvas for these chips, and proper preparation is key to preventing sticking and promoting even crisping. Always line your baking sheet with parchment paper. This non-stick surface is crucial for two reasons: it ensures that the thinly spread cottage cheese mixture doesn’t adhere to the pan, making removal easy, and it helps the chips cook evenly, resulting in a consistent crispy texture. Avoid using aluminum foil directly, as the mixture might stick. If you don’t have parchment paper, a non-stick baking mat is an excellent alternative. Lightly greasing the parchment paper with a tiny bit of cooking spray can add an extra layer of protection, especially if you’re concerned about ultra-thin chips sticking. This small step makes a big difference in the final outcome and cleanup.
Oven temperature settings
The oven temperature plays a critical role in transforming the soft cottage cheese mixture into crispy chips. A relatively low to moderate temperature, typically around 300-350°F (150-175°C), is ideal. This temperature allows the moisture in the cottage cheese to gradually evaporate without burning the thin edges of the chips. Baking at too high a temperature can lead to quickly browned outsides with soft, unbaked centers, preventing the desired crispiness. Conversely, too low a temperature might extend the baking time excessively without achieving that perfect golden crunch. Always preheat your oven thoroughly before placing the baking sheet inside to ensure consistent heat from the start. This careful approach to oven temperature is fundamental for achieving a perfectly baked, evenly crispy batch of cottage cheese chips, much like getting the right temperature for baking delicious baked goods or savory dishes like this cheesy chicken and rice casserole.
Combining Ingredients for Best Flavor
Achieving the best flavor and texture for your cottage cheese chips begins with how you combine the ingredients. It’s not just about tossing everything together; a thoughtful mixing process ensures that all the wonderful seasonings are evenly distributed and the cottage cheese base is perfectly prepared for baking. This attention to detail in the initial steps will directly impact the deliciousness and consistency of your final product. Take your time during this stage to really incorporate everything well, setting the stage for perfectly seasoned, savory chips that will delight your taste buds. This careful blending is much like perfecting the sauce for a savory main, ensuring every bite is flavorful.
How to mix cottage cheese well
Start by placing your cottage cheese in a medium-sized mixing bowl. If your cottage cheese has very large curds and you prefer a smoother chip, you can gently mash it slightly with a fork or pulse it briefly in a food processor, but avoid over-processing as you still want some texture. Next, add your egg (if using) and all your chosen seasonings. This is the moment to be generous with flavors! Using a spatula or spoon, fold the ingredients together thoroughly. The goal is to ensure that every bit of cottage cheese is coated with the seasonings, creating a harmonious flavor profile in each chip. Mix until everything is well incorporated and you see no dry spots of seasoning powder. This meticulous mixing guarantees that every chip will be bursting with the savory taste you intended, making them irresistible. The consistency should be spreadable but not watery, ready for the next step of shaping.
Shaping Your Cottage Cheese Chips
The shaping stage is crucial for the success of your cottage cheese chips. This is where you determine their final texture and how evenly they will bake. The key to achieving that satisfying crispiness lies in creating thin and uniform pieces. Any inconsistencies in thickness can lead to some chips being perfectly crispy while others remain soft or even burn. Taking a little extra time here will pay off immensely, ensuring a batch of uniformly delightful chips. Precision in this step will lead to a professional-looking and consistently delicious result, much like shaping perfect peanut butter brownie swirl cookies.
Creating thin, even circles
Once your cottage cheese mixture is perfectly seasoned, it’s time to transfer it to your prepared baking sheet. Using a small spoon, such as a teaspoon, or a small offset spatula, scoop dollops of the mixture onto the parchment-lined sheet. The trick is to then spread each dollop as thinly and evenly as possible into circular shapes, or any shape you prefer. Think of spreading it like thin pancake batter. The thinner the layer, the crispier your chips will be. Aim for about 1-2 millimeters thick. Leave ample space between each chip, as they will slightly expand during baking, and good air circulation is vital for crisping. Overcrowding the baking sheet can trap steam, preventing the chips from drying out and becoming crunchy. If you have a large batch, consider baking in multiple rounds or using two baking sheets to ensure proper spacing. This meticulous spreading technique is the secret to achieving those coveted delicate and brittle chips.
Baking for Ultimate Crispy Texture
The baking process is perhaps the most critical stage in transforming your humble cottage cheese mixture into genuinely crispy chips. It’s a delicate balance of time and temperature, designed to slowly dehydrate the cheese while developing a beautiful golden color and firm texture. Patience and careful observation during this phase are paramount. Rushing the baking or using incorrect settings can result in chewy, undercooked chips, or burnt, brittle ones. With the right approach, you’ll unlock the full potential of this innovative snack, achieving that satisfying snap with every bite.
Oven time and temperature guide
Preheat your oven to approximately 325-350°F (160-175°C). This moderate temperature range allows for gradual moisture evaporation without scorching the thin chips. The baking time will vary depending on your oven and the thickness of your chips, but typically ranges from 20 to 30 minutes. Begin checking your chips around the 15-minute mark. You want them to turn a light golden brown and appear dry. If they seem soft in the middle, they need more time. Some recipes suggest a lower temperature for a longer time (e.g., 275°F / 135°C for 40-50 minutes) for maximum dehydration and crispiness, mimicking a slow oven-drying process. Experiment to find the sweet spot for your oven and desired crispness. If baking multiple sheets, rotate them halfway through for even cooking.
Knowing when chips are done
Determining when your cottage cheese chips are perfectly done requires a keen eye. Look for a uniform golden-brown color across the entire surface of each chip. The edges should appear slightly darker and feel firm to the touch. When you carefully lift a chip with a spatula, it should be stiff and not bend or flop. If they still feel soft or pliable, they need more time in the oven. Remember that chips will crisp up further as they cool, so it’s better to err on the side of slightly underdone and let them air dry than to burn them. Keep a close watch, especially during the last 5-10 minutes, as they can go from perfectly golden to burnt very quickly due to their thinness. Once they’ve reached that ideal crispy point, remove them from the oven promptly.
Cooling Your Chips for Crispiness
While the baking process is crucial for removing moisture and initiating crispness, the cooling phase is equally important for developing the final, satisfying crunch of your cottage cheese chips. Many homemade snacks, especially those baked thin, rely on cooling to firm up completely. Skipping or rushing this step can leave you with chips that are warm and pliable rather than delightfully brittle. Treat cooling as an integral part of the cooking process; it’s the final touch that ensures your efforts in the oven truly pay off, delivering a snack that feels professionally made.
Importance of cooling completely
Once your cottage cheese chips emerge from the oven, they will still be somewhat pliable. This is normal. The magic of true crispiness often happens as they cool and any residual moisture evaporates. Transfer the baked chips from the hot baking sheet to a wire cooling rack immediately. Arranging them in a single layer on the rack allows air to circulate around all sides, facilitating even cooling and preventing them from becoming soggy. Allowing them to cool completely at room temperature is essential; this process lets them firm up and achieve their maximum crispiness. If you bite into them too soon, you might find them chewy rather than crunchy. Give them at least 15-20 minutes, or longer if your kitchen is humid, before storing or serving. This simple step is the final secret to achieving that perfect, satisfying snap.
Enjoying Your Cottage Cheese Chips
Once your cottage cheese chips have cooled to perfection, it’s time for the most enjoyable part: savoring your homemade, healthy snack! These chips are incredibly versatile, serving as a delicious standalone treat or a perfect accompaniment to a variety of meals and dips. Their mild, savory flavor makes them an excellent canvas for different pairings, allowing you to tailor your snacking experience to your mood or the occasion. Whether you prefer a simple, classic approach or love to experiment with bold new flavors, these chips are ready to impress. Don’t forget to share your creative combinations on social media platforms like Pinterest!
Pair with your favorite dips
Cottage cheese chips are an ideal vehicle for a wide array of dips, enhancing their flavor and adding another layer of texture. Classic options like homemade salsa or guacamole are fantastic, offering fresh, vibrant contrasts to the cheesy chips. A creamy Greek yogurt dip, seasoned with herbs like dill and chives, provides a cool and tangy complement. For a rich, savory experience, consider a warm spinach and artichoke dip or a flavorful cheese sauce. Hummus, tzatziki, or even a simple sour cream and onion dip can also be delightful choices. The sturdy yet crispy nature of these chips means they hold up well to dipping, making them perfect for parties or a relaxed evening snack. The possibilities are truly endless, inviting you to experiment and find your perfect pairing.
Creative topping ideas
Beyond dips, you can also elevate your cottage cheese chips with creative toppings, transforming them into mini appetizers or a more substantial snack. Consider a sprinkle of finely grated Parmesan or a sharp cheddar immediately after they come out of the oven for an extra layer of cheesy goodness that melts beautifully. A dusting of chili flakes or smoked paprika can add a vibrant color and a gentle kick. For a fresh touch, finely chopped fresh herbs like parsley, chives, or cilantro can be sprinkled over the cooled chips just before serving. You could even create “nacho-style” cottage cheese chips by adding a dollop of seasoned ground meat, a drizzle of sour cream, and a sprinkle of jalapeños. These toppings not only add visual appeal but also introduce new textures and flavors, making each bite an exciting adventure.
Customize Your Cottage Cheese Flavors
One of the most exciting aspects of making cottage cheese chips at home is the complete freedom to customize their flavors. The simple base provides a versatile canvas, allowing you to experiment with a wide range of seasonings and spices to suit your personal preferences. Don’t feel limited to basic salt and pepper; think of your spice rack as a playground for culinary creativity. This ability to tailor the taste means you can create a unique snack every time, preventing flavor fatigue and ensuring these healthy chips always feel exciting and new. From savory to spicy, the possibilities are vast for enhancing your next batch. Explore more culinary inspiration on our Instagram page.
Adding a spicy kick
For those who love a bit of heat, infusing your cottage cheese chips with a spicy kick is incredibly easy and satisfying. Incorporate cayenne pepper, red pepper flakes, or a dash of your favorite chili powder directly into the cottage cheese mixture before baking. Adjust the quantity to match your desired level of spice, starting with a small pinch and adding more as needed. Smoked paprika can also add a delightful warmth and depth of flavor along with its subtle heat. For an extra layer of complexity, consider a sprinkle of chipotle powder, which brings a smoky, earthy spiciness. Alternatively, you can add a few drops of hot sauce to the mixture, ensuring it’s well-mixed to distribute the heat evenly. The contrast of the creamy cottage cheese with a vibrant spicy flavor creates a truly memorable snack experience, perfect for livening up any gathering.
Experimenting with herbs
Herbs are fantastic for adding fresh, aromatic dimensions to your cottage cheese chips. Dried herbs, in particular, blend beautifully into the mixture. Classic options like dried oregano, thyme, and rosemary impart a Mediterranean feel, while dill weed and chives offer a lighter, fresher note. Italian seasoning blends are also an excellent shortcut for a complex herbal flavor. For a more unique twist, try a pinch of dried sage or a mix of herbs de Provence. When using dried herbs, crush them slightly between your fingers before adding them to release their aromatic oils, maximizing their flavor impact. Fresh herbs can also be used, though it’s best to finely chop them and add them towards the end of the baking process or as a garnish after cooling to preserve their vibrancy. Experimenting with different herbs can transform a simple snack into a gourmet treat, showcasing the incredible versatility of cottage cheese chips.
Keeping Your Chips Fresh
To fully enjoy the delightful crispiness and flavor of your homemade cottage cheese chips, proper storage is essential. While they are undoubtedly best enjoyed fresh from the oven, you can certainly prepare a larger batch and store them for later enjoyment. The key is to protect them from moisture and air, which are the main culprits behind stale or soggy chips. With a few simple storage tips, you can extend their freshness and maintain that coveted crunch, ensuring your healthy snack remains delicious for days. Consider these tips for other items, such as chicken bacon ranch tater tot casserole, where freshness is key.
Proper storage for leftovers
Once your cottage cheese chips have completely cooled, transfer them to an airtight container. This barrier is crucial for keeping out humidity, which will quickly turn crispy chips soft. You can store them at room temperature for up to 3-4 days. For slightly longer storage, placing the airtight container in the refrigerator can extend their shelf life by a day or two, though they might lose a little bit of their crispness due to the colder, potentially more humid environment. To revive any chips that have softened slightly, simply spread them on a baking sheet and pop them back into a preheated oven at 300°F (150°C) for 5-10 minutes until they crisp up again. This re-crisping technique works wonders, making your leftovers taste almost as good as freshly baked, ensuring no delicious chip goes to waste.
Quick Recipe for Cottage Cheese Chips
Here’s a concise overview to help you quickly whip up a batch of these delightful, guilt-free snacks. This recipe provides a straightforward method, ensuring you can enjoy healthy, crispy cottage cheese chips with minimal fuss. It’s the perfect culmination of all the tips and techniques discussed, bringing together ease of preparation with incredible flavor. Get ready to enjoy a satisfying crunch that’s both nourishing and delicious, a truly fantastic snack option for any time of day or even as an appetizer before a hearty meal like easy honey garlic chicken.
Prep and cook times
- Prep Time: 10-15 minutes (includes mixing and spreading)
- Cook Time: 20-30 minutes (depending on oven and thickness)
- Cooling Time: 15-20 minutes (essential for crispiness)
- Total Time: Approximately 45-65 minutes
Servings and key ingredients
- Yields: Approximately 2-3 servings (varies based on chip size)
- Key Ingredients:
- 1 cup cottage cheese (full-fat recommended for best texture)
- 1 large egg (optional, but helps with binding)
- 1/2 teaspoon garlic powder
- 1/2 teaspoon onion powder
- 1/4 teaspoon paprika (smoked or regular)
- Salt and black pepper to taste
- Optional: 1-2 tablespoons grated Parmesan cheese for extra flavor