
Make the best patty melts today with our simple, satisfying recipe. This classic diner sandwich combines seasoned beef patties, tangy caramelized onions, and melted Swiss cheese between buttered rye bread. Learn our secret sauce for a truly unforgettable comfort food meal that’s perfect for a quick lunch or savory dinner.
Key Takeaways
- Master the art of crafting juicy beef patties for patty melts.
- Learn to create a delicious secret sauce to enhance your sandwich.
- Achieve perfectly grilled rye bread and melted cheese every time.
- Discover versatile options for customizing your patty melts.
- Get tips for storing and reheating leftovers safely.
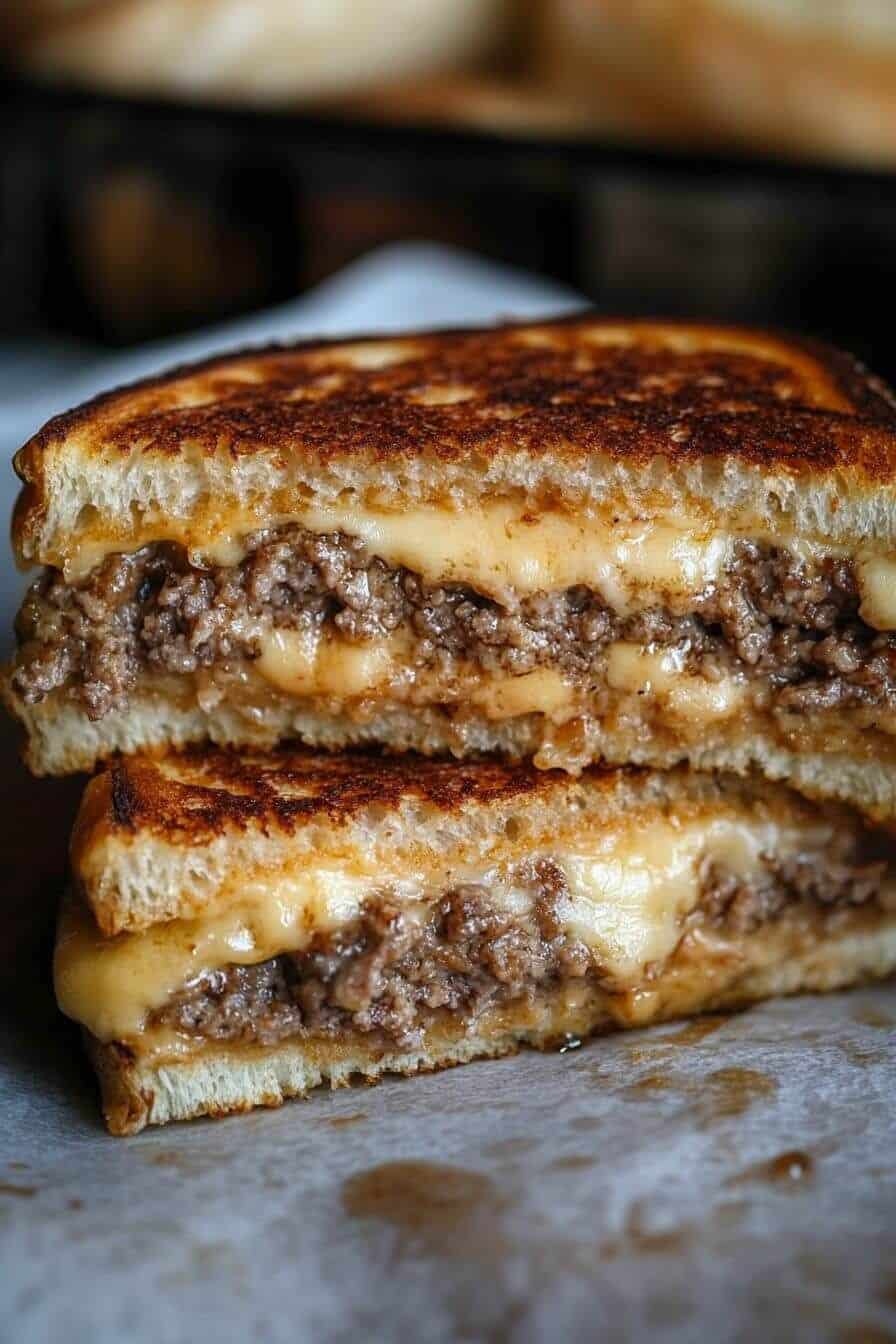
The patty melt is a true American classic. It blends burger goodness with grilled cheese. Simple ingredients create big flavors. A griddle-cooked delight awaits you. Enjoy this savory, satisfying sandwich.
Make The Best Patty Melts Today
Crafting a truly exceptional patty melt is a rewarding culinary experience. This beloved classic diner sandwich, known for its harmonious blend of savory beef, melted cheese, and crisp, buttery rye bread, can easily be replicated at home with fantastic results. Our comprehensive approach will guide you through each step, ensuring your homemade patty melts rival those from your favorite greasy spoon. Pay attention to the details, like perfectly seasoned beef patties and the ideal griddle temperature, to achieve that signature golden-brown crust and gooey interior. This recipe focuses on delivering maximum flavor and texture, making it a perfect choice for a hearty meal or a satisfying quick lunch. It’s a straightforward process that yields incredibly delicious main course results, proving that comfort food doesn’t have to be complicated.
Quick Look: Prep and Cook Time
Getting a delicious patty melt on the table doesn’t require an entire afternoon. With a little organization, you can have these savory sandwiches ready in under an hour. Expect about 20 minutes for preparation, which includes forming your beef patties, gathering all your ingredients, and mixing the secret sauce. The cooking time for grilling the patties and assembling the melts will typically take another 20-25 minutes. This makes the patty melt an excellent option for busy weeknights when you’re craving something substantial and satisfying without a lot of fuss. Its efficiency is part of its charm as a truly delicious home-cooked meal.
Servings: Just Right for Three
This patty melt recipe is perfectly portioned to serve three hungry individuals. Each person gets a generously sized, flavorful sandwich that’s substantial enough to be a complete meal. If you’re cooking for more, simply double the ingredients to accommodate a larger group. The beauty of this recipe lies in its scalability, allowing you to adjust quantities easily without compromising on taste or quality. Whether it’s a family dinner or a gathering with friends, these classic diner sandwiches are sure to be a crowd-pleaser, delivering warmth and flavor with every bite. Consider adding a simple side to round out your meal.
Gather Ingredients for Your Melts
The foundation of a superb patty melt lies in selecting the right ingredients. Quality components will shine through in the final product, contributing to that authentic, rich flavor you crave. Before you start cooking, ensure all your items are prepped and ready to go. This mise en place approach streamlines the cooking process, making your journey to melt perfection smoother and more enjoyable. Think about fresh bread, good ground beef, and sharp cheese to truly elevate this American comfort food classic. Having everything at your fingertips prevents last-minute scrambling and allows you to focus on the technique.
Essential Meats and Cheeses
For the quintessential patty melt, certain ingredients are non-negotiable. You’ll need about 1 pound of ground beef, preferably an 80/20 lean-to-fat ratio, which offers the perfect balance of juiciness and flavor. This fat content helps keep the beef patties moist and tender as they cook on the griddle. As for cheese, traditional Swiss cheese is the gold standard, known for its nutty flavor and excellent melting properties. You’ll want about 6 slices to ensure two gooey layers per sandwich. For the bread, rye bread is the classic choice, providing a distinct savory and slightly sour counterpoint to the rich beef and cheese. Choose a sturdy rye bread that can hold up to grilling without falling apart, ideally a marbled or pumpernickel rye for extra depth of flavor. These core ingredients are what give a patty melt its signature character and make it such a beloved sandwich.
Pantry Staples for Flavor
Beyond the core components, several pantry staples are crucial for building complex flavors in your patty melt. You’ll need a good quality unsalted butter for buttering the bread and cooking the patties, ensuring a golden, crispy exterior. Yellow onion is indispensable, as caramelized onions are a hallmark of the classic diner sandwich. A medium onion, thinly sliced, will yield enough sweet, tender onions for three melts. For seasoning the beef patties, basic salt and black pepper are fundamental, allowing the natural beef flavor to shine. Our secret sauce requires mayonnaise, ketchup, Dijon mustard, a dash of Worcestershire sauce, and a pinch of paprika, creating a tangy, savory condiment that ties everything together. Don’t forget a few slices of cooked bacon for the sauce, adding a smoky, salty kick that makes the sauce truly special. Having these items on hand ensures every bite is packed with deliciousness.
Crafting Your Perfect Beef Patties
The heart of any patty melt is, undoubtedly, the beef patty itself. Achieving the right texture and flavor in your beef patties is critical for a successful sandwich. This isn’t just about cooking ground beef; it’s about shaping it correctly and seasoning it judiciously to complement the other ingredients. A well-prepared patty will be juicy, flavorful, and firm enough to stand up to grilling between slices of bread. Think of these beef patties as mini steaks, deserving of careful attention to detail. This focus on the patty is what truly elevates a good patty melt recipe to a great one, ensuring a satisfying bite every time.
Forming Patties for Bread
When forming your beef patties for a patty melt, remember that their shape is as important as their size. Unlike traditional burger patties, which are typically round, patty melt patties should be shaped to fit your rye bread. Divide your pound of ground beef into three equal portions. Gently form each portion into an oval or rectangular shape that closely matches the dimensions of your bread slices. Aim for patties that are about ½ inch thick. Don’t overwork the meat, as this can lead to tough patties. A light touch ensures a tender, juicy result. Creating a slight indentation in the center of each patty can also help prevent them from bulging in the middle during cooking, ensuring even thickness. This attention to detail in forming your patties will make all the difference when assembling your classic diner sandwich.
Seasoning for Best Flavor
Properly seasoning your beef patties is crucial for an incredibly flavorful patty melt. Simplicity is often key here, allowing the natural taste of the beef to shine. After forming your patties, generously season both sides with salt and freshly ground black pepper. Don’t be shy with the seasoning; remember that some will cook off. For an extra layer of savory depth, you can lightly dust them with a pinch of garlic powder or onion powder, though this is optional. Avoid adding too many other spices directly into the meat mixture, as the secret sauce and caramelized onions will provide additional flavor dimensions. The goal is to enhance, not overpower, the rich beef. Letting the seasoned patties rest for a few minutes before cooking allows the flavors to meld, contributing to melt perfection. This simple step ensures your beef patties are the best they can be.
How to Cook Patty Melts Right
Cooking your patty melts properly is where the magic truly happens. It’s about achieving that perfect balance of a juicy beef patty, deeply caramelized onions, gooey melted cheese, and golden, crispy bread. The key is consistent heat and careful monitoring. A large griddle or a heavy-bottomed skillet is your best friend here, allowing for even cooking and a beautiful sear on both the meat and the bread. Don’t rush this process; patience will be rewarded with a superior sandwich that embodies true comfort food. This section guides you through ensuring every component is cooked to its optimal state before assembly.
Cooking Patties to Perfection
Start by heating a large griddle or skillet over medium-high heat. Add a tablespoon of butter or a neutral oil, letting it melt and coat the surface. Once hot, carefully place your seasoned beef patties onto the griddle. Cook for 3-4 minutes per side for medium-rare, or longer if you prefer them more well-done. You’re looking for a beautiful brown crust to develop on both sides. As they cook, resist the urge to constantly press down on them; this squeezes out valuable juices. Instead, let them sear undisturbed to build that delicious Maillard reaction crust. For the best juicy beef patties, consider their thickness and adjust cooking times accordingly. While the patties cook, you can begin to sauté your thinly sliced yellow onions in a separate pan with a touch of butter until they are deeply caramelized and tender, a process that usually takes 15-20 minutes over medium-low heat. These sweet, savory onions are crucial for the classic patty melt flavor profile.
Setting Aside Cooked Meat
Once your beef patties are cooked to your desired doneness, carefully remove them from the griddle and set them aside on a plate. It’s a good idea to loosely tent them with foil to keep them warm while you prepare the rest of the sandwich components. This resting period also allows the juices within the patty to redistribute, ensuring every bite is as juicy and flavorful as possible. While the patties rest, you can use the same griddle to prepare the bread and melt the cheese, infusing them with any leftover savory goodness from the cooked meat. This efficient use of your cooking surface helps deepen the flavors and ensures a seamless transition to the final assembly of your delicious patty melts.
Make The Best Secret Sauce
A truly exceptional patty melt isn’t complete without a fantastic secret sauce. This creamy, tangy condiment acts as the perfect flavor bridge, tying together the rich beef, sweet caramelized onions, and savory cheese. It adds a layer of moisture and a burst of complementary tastes that elevate the sandwich beyond just its basic components. Our secret sauce recipe is simple to prepare but delivers a complex flavor profile that will have everyone asking for the recipe. This component is key for achieving melt perfection, contributing significantly to the savory dinner experience.
Mixing Sauce Ingredients Smooth
To create your irresistible secret sauce, start with a medium bowl. Combine ½ cup of good quality mayonnaise, 2 tablespoons of ketchup, 1 tablespoon of Dijon mustard, and ½ teaspoon of Worcestershire sauce. Add a small pinch of paprika for a subtle smoky note and a touch of color. Whisk all these ingredients together until the mixture is completely smooth and well-combined. Ensure there are no lumps, especially from the Dijon, to achieve a consistently creamy texture. Taste and adjust seasonings as needed; you might want a little more salt or pepper depending on your preference. This base forms the backbone of your savory patty melt sauce, offering a harmonious blend of creamy, sweet, and tangy notes. It’s a quick and easy step that makes a significant impact on the overall flavor of your homemade meal.
Adding Chopped Cooked Bacon
For an extra layer of savory depth and a delightful textural element, consider folding in some finely chopped cooked bacon into your secret sauce. Cook 2-3 slices of bacon until crispy, then drain excess fat and chop them into small, bite-sized pieces. Allow the bacon to cool slightly before stirring it into your prepared sauce. The smoky, salty crunch of the bacon adds an unexpected but incredibly welcome dimension to the sauce, making it even more addictive. This step is optional but highly recommended for those who appreciate a richer, more complex flavor profile in their classic diner sandwich. The bacon addition truly transforms the sauce, pushing it towards melt perfection and distinguishing your patty melts from the ordinary. You can also get creative with other additions, like finely minced pickles or chives, but the bacon is a true winner for our patty melt recipe.
Building Your Delicious Patty Melts
The assembly phase is where all your carefully prepared components come together to form the ultimate patty melt. This step requires a bit of precision and speed, as you’ll want to build and grill your sandwiches while all ingredients are still warm. The goal is to create a sturdy, yet pliable, sandwich that will grill evenly and hold its shape. Attention to how you layer your ingredients will ensure every bite delivers that perfect balance of flavors and textures, making it a truly delicious and satisfying main course.
Buttering Bread for Grilling
Properly buttering your rye bread is crucial for achieving that signature golden-brown, crispy exterior. Spread a generous, even layer of softened unsalted butter on one side of each slice of rye bread. Don’t be shy – the butter is essential for both flavor and texture. This creates a rich, toasty crust that contrasts beautifully with the soft interior. Ensure the butter covers the entire surface to prevent uneven browning. This step is similar to preparing a grilled cheese sandwich, but with the added depth of flavor from the rye bread. The butter also helps to prevent the bread from drying out during the grilling process, keeping it moist and appealing.
Layering Cheese and Patty
Now, it’s time to build your melts. On the unbuttered side of three slices of rye bread, place a slice of Swiss cheese. The cheese should extend close to the edges to ensure maximum melt. Next, carefully place one of your warm, cooked beef patties on top of the cheese. Dollop a generous spoonful of your delicious secret sauce onto the patty, spreading it evenly. Then, pile a portion of your sweet caramelized onions on top of the sauce. Finally, top the onions with another slice of Swiss cheese and cover with the remaining three slices of rye bread, buttered-side out. This layering sequence ensures the cheese is directly next to the bread, allowing it to melt beautifully and bind the sandwich together during grilling. The warm patty helps kickstart the melting process, making for perfect melt perfection.
Grilling Melts to Golden Perfection
The final stage of preparing your patty melts involves grilling them to that irresistible golden-brown perfection. This step is about achieving a crisp, buttery exterior on the rye bread while ensuring the Swiss cheese inside becomes gloriously gooey and melted. It’s a delicate balance that requires medium heat and constant attention. A properly grilled patty melt is a thing of beauty, a classic diner sandwich that promises savory satisfaction with every bite. The griddle cooking method truly shines here, transforming simple ingredients into a gourmet experience.
Cooking Until Cheese Melts
Place your assembled patty melts, buttered-side down, onto the preheated griddle or skillet over medium heat. Cook for 4-6 minutes per side, or until the bread is a deep golden brown and the cheese is completely melted and oozing. The key is to use medium heat; too high and the bread will burn before the cheese has a chance to melt through, too low and the bread might dry out. You want a slow, steady heat that encourages caramelization on the bread and gentle melting of the cheese. Peek at the underside occasionally to monitor the browning. If you have a griddle press, it can help encourage even contact and melting. The sight of that perfectly melted swiss cheese is a sign you’re nearing patty melt perfection.
Pressing Gently for Crispness
For an even crisper exterior and to ensure all the components are nicely fused, gently press down on the patty melts with a spatula during the last minute or two of cooking on each side. Don’t press too hard, as this can squeeze out the delicious juices from the beef patty. The aim is a light, firm pressure that ensures good contact between the bread and the cooking surface, promoting uniform browning and a satisfying crunch. This gentle pressing also helps to compact the sandwich slightly, making it easier to handle and eat. Once both sides are beautifully golden and the cheese is thoroughly melted, your patty melts are ready. Remove them from the griddle and prepare for a truly delicious experience. This technique contributes to the overall texture and integrity of your homemade patty melt recipe.
Serving The Best Patty Melts
After all your hard work, presenting your perfectly crafted patty melts is the final step. Serving them correctly enhances the dining experience, allowing the flavors to settle and ensuring an enjoyable, mess-free meal. A few simple considerations can make a big difference in how your classic diner sandwich is perceived and enjoyed. This section focuses on maximizing the enjoyment of your melt perfection, whether it’s for a quick lunch or a savory dinner. Thoughtful presentation elevates this comfort food to a restaurant-quality dish.
Resting Before You Slice
Just like with a steak, allowing your patty melts to rest for a minute or two after coming off the griddle is beneficial. This short resting period allows the heat to equalize throughout the sandwich and helps the cheese to set slightly, preventing it from oozing out excessively when you slice it. It also lets the juices in the beef patty settle, ensuring a more tender and moist bite. Place the melts on a cutting board, and after a brief rest, slice each sandwich in half diagonally. This classic diner cut makes them easier to handle and shows off all the beautiful layers inside. A sharp knife is essential for a clean cut, preserving the integrity of your delicious patty melts.
Ideas for Side Dishes
While a patty melt is substantial enough to be a meal on its own, pairing it with the right side dish can truly complete the comfort food experience. Classic choices include a generous serving of crispy French fries, onion rings, or a simple dill pickle spear. For something lighter, a fresh green salad with a vinaigrette dressing provides a refreshing contrast to the richness of the sandwich. Coleslaw is another fantastic option, offering a creamy, tangy crunch. If you’re looking for something a bit heartier, a small bowl of creamy baked mac and cheese makes an indulgent pairing. Whatever you choose, aim for a side that complements the savory and rich flavors of your patty melt recipe without overpowering them. This helps create a well-rounded and deeply satisfying meal, perfect for any occasion.
Keep Patty Melts Fresh Later
Sometimes, despite their deliciousness, you might find yourself with leftover patty melts. Don’t worry, they can be stored and reheated while largely maintaining their savory appeal. Proper storage is key to food safety and preserving flavor. While a freshly made patty melt is always best, knowing how to manage leftovers means you can enjoy this comfort food again later, perhaps as a quick lunch the next day. These tips will help you keep your homemade patty melt recipe fresh and enjoyable.
Storing Leftover Melts Safely
To store leftover patty melts, first allow them to cool completely to room temperature. This is crucial to prevent condensation, which can make the bread soggy. Once cool, wrap each half or whole sandwich tightly in plastic wrap, then place them in an airtight container. This double layer of protection helps to keep air out and moisture in. Store the wrapped melts in the refrigerator for up to 2-3 days. For longer storage, you can individually wrap them in foil and then place them in a freezer-safe bag or container, where they can last for up to one month. Label with the date to keep track of freshness. Separating the components (patties, onions, cheese, bread) before assembly can sometimes lead to better reheating results, but storing the assembled sandwich is also perfectly fine for short periods.
Reheating Tips for Taste
Reheating a patty melt requires a gentle approach to prevent the bread from becoming too hard and the patty from drying out. The best method for reheating is often in a skillet or a griddle over medium-low heat. Place the patty melt directly on the dry pan, cover with a lid, and heat for about 5-7 minutes per side, or until the cheese is melted and the sandwich is warmed through. The lid helps to trap steam, re-softening the bread and melting the cheese. Another option is using a toaster oven or conventional oven preheated to 350°F (175°C). Wrap the patty melt in foil and bake for 10-15 minutes, or until hot. Avoid the microwave if possible, as it tends to make the bread soggy and the patty rubbery. These methods help ensure your reheated patty melt recipe retains its original melt perfection.
Make The Best Patty Melts Your Way
While the classic patty melt recipe is undeniably delicious, there’s always room for personal touches and creative modifications. Customizing your patty melt allows you to cater to specific tastes or dietary preferences, transforming a familiar favorite into something uniquely yours. From altering the foundational flavors to introducing entirely new elements, making it “your way” ensures every bite is exactly what you crave. These variations prove that the patty melt is a versatile comfort food, ready for your culinary imagination.
Adding Caramelized Onions
Caramelized onions are a cornerstone of the traditional patty melt, providing a deep, sweet, and savory counterpoint to the beef and cheese. However, you can enhance or modify them. For a deeper flavor, try slow-cooking your onions with a splash of balsamic vinegar or a pinch of brown sugar during the last few minutes of caramelization. This adds an extra layer of complexity and a beautiful glaze. Alternatively, for a quicker but still flavorful option, you can use crispy fried onions (like those found in a can) for added crunch, or even finely diced raw red onion for a sharper, fresher bite, though this deviates significantly from the classic. The goal is to always achieve tender, sweet, and savory onions that perfectly complement your juicy beef patties, contributing to melt perfection.
Switching Up Cheese Choices
While Swiss cheese is the traditional choice for a classic diner sandwich, experimenting with different cheeses can open up a world of new flavor possibilities. Provolone or Muenster cheese offers a milder, creamier melt. For a sharper, more assertive taste, consider using aged cheddar or a good quality Monterey Jack. If you prefer a bit of spice, pepper jack cheese is an excellent option that melts beautifully. Don’t be afraid to mix and match; combining Swiss with a slice of white cheddar can create a wonderful depth of flavor. The key is to choose cheeses that melt well and complement the rich beef patties and savory secret sauce. Each cheese variation can subtly transform your homemade patty melt recipe, offering a new spin on a beloved dish, ensuring variety for your savory dinners.
Spice Up Your Patty Melts
For those who love a little heat, infusing your patty melts with a spicy kick can transform this classic comfort food into an exciting new experience. Adding spice doesn’t just mean making it hotter; it also means adding another layer of flavor complexity that can cut through the richness of the beef and cheese. These simple additions can dramatically alter the flavor profile, offering a bold twist on the traditional patty melt recipe and creating a truly memorable spicy option.
Adding Heat to Secret Sauce
The secret sauce is a perfect vehicle for introducing heat into your patty melt. A simple way to do this is by adding a dash or two of your favorite hot sauce directly into the sauce mixture when you’re mixing it smooth. Sriracha, Tabasco, or a smoky chipotle hot sauce all work wonderfully, offering different flavor nuances alongside the heat. Alternatively, you can mix in a pinch of cayenne pepper or red pepper flakes for a more direct, fiery kick. Start with a small amount, taste, and then add more if desired, as different hot sauces and spices vary greatly in intensity. This customization allows you to control the level of spice, ensuring your patty melt is perfectly tailored to your palate, whether you prefer a subtle warmth or an intense burn. This makes your homemade patty melt even more dynamic.
Using Pickled Jalapeños
Another excellent way to introduce heat and a tangy counterpoint to your patty melt is by incorporating pickled jalapeños. Their bright, vinegary crunch and moderate heat are a fantastic addition. You can simply layer a few slices of pickled jalapeños directly onto the beef patty with the caramelized onions before adding the top slice of cheese. The heat from the sandwich will slightly warm the jalapeños, softening them just enough while retaining their piquant bite. If you prefer a more integrated spice, you can finely chop the pickled jalapeños and mix them into the secret sauce for an even distribution of flavor. This adds a wonderful zing and a pleasant textural contrast, making your patty melt a spicy option that’s truly irresistible. This small change adds a lot of character to the savory dinner dish.
Other Fun Patty Melt Twists
The versatility of the patty melt extends beyond just changing cheeses or adding spice. With a few creative adjustments, you can cater to different dietary needs or simply indulge in a more decadent version of this beloved sandwich. These fun twists ensure that everyone can enjoy a delicious patty melt, whether they’re looking for a healthier alternative or a hearty, satisfying feast. Experimenting with these options keeps the classic diner sandwich exciting and fresh, proving its adaptability as a favorite comfort food.
Try a Gluten-Free Option
For those avoiding gluten, enjoying a patty melt is still absolutely possible. The easiest modification is to simply swap out the traditional rye bread for a high-quality gluten-free bread. Look for sturdy, sliceable gluten-free bread that can hold up to grilling and the weight of the patty and cheese. Ensure that all other ingredients, such as the Worcestershire sauce in the secret sauce, are also certified gluten-free, as some brands may contain wheat. You might also consider using a lettuce wrap for a low-carb, gluten-free patty melt, serving the juicy beef patties with melted cheese and caramelized onions wrapped in crisp lettuce leaves. This gluten-free patty melt variation allows everyone to savor the delicious flavors of this classic, making it an inclusive and satisfying meal option for any diet.
Make a Double Patty Melt
For the truly hungry or those craving an extra-indulgent meal, a double patty melt is the ultimate upgrade. Instead of just one beef patty per sandwich, prepare two! You’ll need to increase your ground beef accordingly. Build your double patty melt by layering cheese, then one patty, more cheese, the second patty, and then the final cheese layer, all between your buttered rye bread. This creates an incredibly hearty and satisfying sandwich, packed with even more savory beef flavor. Ensure your griddle cooking technique is solid, as a thicker sandwich might require slightly more time on each side to ensure everything is heated through and the cheese is thoroughly melted. This substantial twist turns a great quick lunch into a truly epic savory dinner, perfect for big appetites seeking melt perfection.