
Delicious glazed ham and cheese sliders are the perfect solution for any occasion, from weeknight dinners to game day gatherings. These quick ham and cheese sliders feature savory ham, melted cheese, and a buttery, sweet Dijon glaze, making them an irresistible crowd-pleaser and a simple appetizer.
Key Takeaways
- These savory-sweet ham sliders are quick to prepare, perfect for any occasion or party.
- A simple, buttery sweet Dijon glaze elevates the classic ham and cheese combination.
- Easily customizable with various ingredients for diverse flavor profiles.
- Ideal for make-ahead preparation, saving time for busy hosts.
- A beloved crowd-pleaser that satisfies both kids and adults.
These sliders are incredibly popular. Their taste is simply irresistible. The sweet glaze adds much flavor. They are so easy to assemble. Everyone will surely enjoy them.
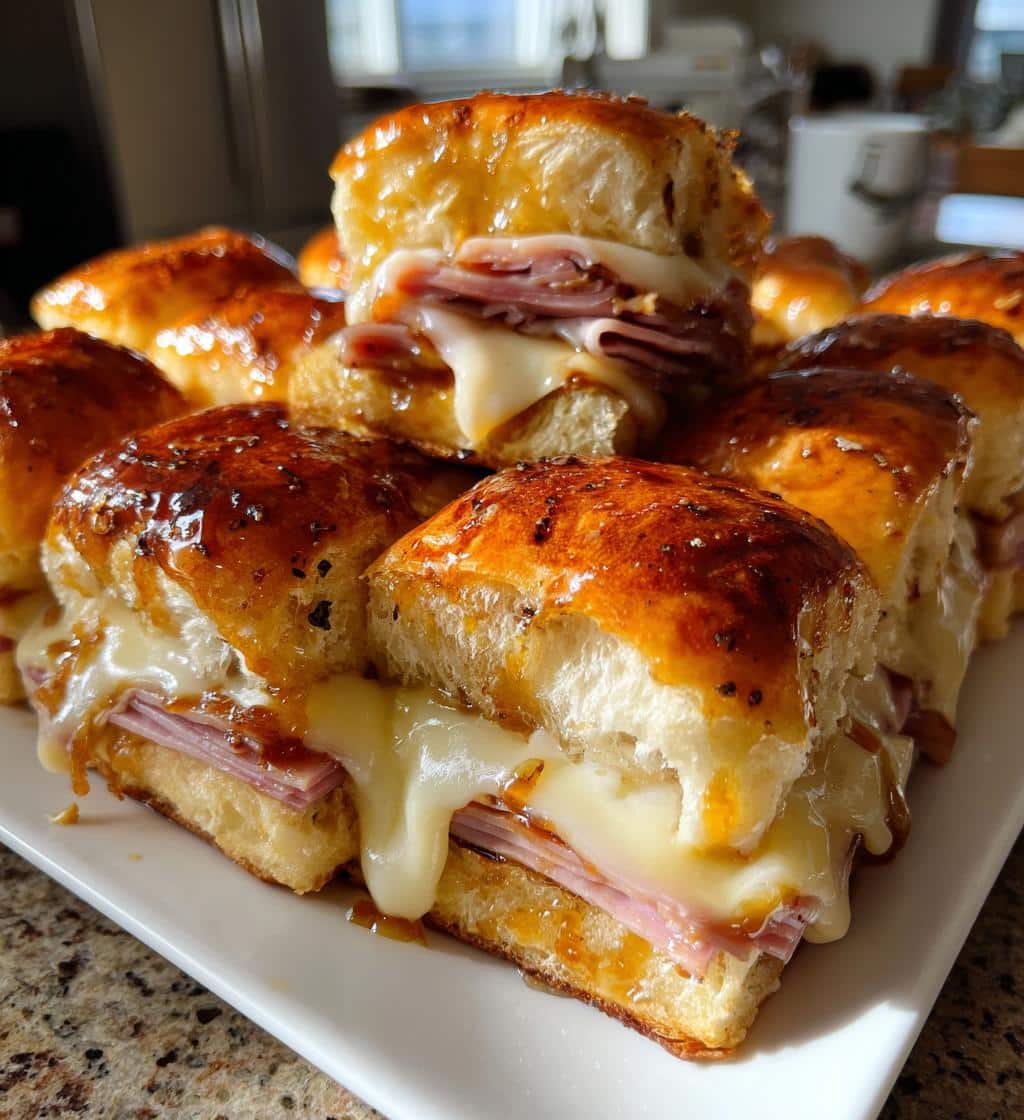
Delicious Glazed Ham and Cheese Sliders
There’s nothing quite like a plate of delicious glazed ham and cheese sliders to bring smiles to faces, whether you’re hosting a gathering or simply seeking a hassle-free weeknight dinner. These popular sliders combine tender ham, gooey melted cheese, and a mouth-watering sweet Dijon glaze, all nestled in soft Hawaiian rolls. They are renowned for being an incredibly quick meal for any occasion, offering both convenience and flavor in every bite. Their simple preparation makes them a go-to choice when time is short but you don’t want to compromise on taste. Think less time in the kitchen and more time enjoying company or relaxing after a busy day.
Quick meal for any occasion
When you need a reliable and satisfying meal that comes together in a flash, look no further than these quick ham and cheese sliders. They are ideal for busy weeknights, offering a comforting and flavorful option that appeals to everyone. Pair them with a simple salad or some roasted vegetables for a complete and balanced dinner. The beauty of these homemade sliders lies in their ability to adapt to various settings, fitting seamlessly into your meal rotation when you need a dependable dinner solution. They prove that quick doesn’t have to mean boring, delivering a delightful experience with minimal effort.
Perfect party food idea
Beyond being a fantastic main course, these sliders excel as a perfect party food idea. Imagine serving a tray of warm, savory-sweet ham sliders at your next gathering. They are consistently a hit, making them an excellent choice for game day food, birthdays, or casual get-togethers. Guests love the individual portions and the irresistible combination of flavors. Their ease of serving and eating means more time for you to socialize and less time worrying about complicated dishes. They are truly one of the best slider ideas for entertaining, ensuring your guests leave happy and satisfied.
Gathering Glazed Sliders Ingredients
The beauty of making delicious glazed ham sliders lies in the simplicity of their ingredients. You won’t need an extensive shopping list or exotic items to create this crowd-pleasing dish. Most components are readily available at your local grocery store, making the preparation even smoother. Having your ingredients prepped and organized before you start assembling is key to a quick and enjoyable cooking process. This section breaks down the essential items you’ll need, offering suggestions for the best combinations to achieve that perfect balance of sweet and savory.
Buns, ham, and cheese choices
The foundation of any great slider starts with the right bun. Hawaiian rolls are often the preferred choice for these sweet dijon glaze recipe sliders due to their inherent sweetness and soft, fluffy texture, which beautifully complements the savory ham and tangy glaze. However, you can also use brioche slider buns or even dinner rolls if Hawaiian rolls aren’t available. For the ham, thinly sliced deli ham works best. Consider opting for a good quality black forest ham or honey ham for enhanced flavor. As for the cheese, Swiss cheese is a traditional pairing with ham, offering a nutty, slightly sweet profile that melts wonderfully. Other popular choices include provolone, cheddar, or a Monterey Jack blend, depending on your preference for creaminess or sharpness. Don’t hesitate to learn more about ham varieties to find your favorite!
Simple glaze components needed
The magic of these sliders truly comes alive with the signature sweet Dijon glaze. This simple yet flavorful topping requires just a few pantry staples. You’ll need melted butter, which serves as the rich base, combined with brown sugar for that irresistible sweetness. Dijon mustard adds a subtle tang and depth that cuts through the richness, balancing the flavors perfectly. A touch of garlic powder and onion powder enhances the savory notes, making the glaze incredibly aromatic and delicious. These components are whisked together to create a luscious coating that transforms ordinary ham and cheese into something extraordinary. This versatile glaze can also be adapted for other easy weeknight dinners, like a glaze for chicken.
Crafting the Sweet Dijon Glaze
The sweet Dijon glaze is undoubtedly the star of these baked ham sliders, elevating them from good to truly exceptional. This flavorful concoction is surprisingly easy to make and requires minimal effort, yet it delivers a profound impact on the overall taste. The combination of sweet, tangy, and savory notes creates a delectable contrast that makes these sliders so addictive. Taking a few moments to properly prepare this glaze will pay off immensely in the final product, ensuring every bite is bursting with flavor.
Mix butter and brown sugar
Begin by melting your butter. You can do this in a small saucepan over low heat or in a microwave-safe bowl. Once the butter is completely melted and clear, transfer it to a mixing bowl. This warm, golden liquid forms the foundation of your glaze. Next, incorporate the brown sugar. The brown sugar not only provides a lovely sweetness but also contributes to the beautiful caramelization that occurs during baking. Whisk the melted butter and brown sugar together until the sugar begins to dissolve and the mixture is smooth. This initial step ensures a well-integrated base before adding the remaining ingredients.
Add Dijon, garlic, onion
With the butter and brown sugar base ready, it’s time to introduce the key flavor enhancers: Dijon mustard, garlic powder, and onion powder. The Dijon mustard is crucial, as its distinctive tangy and slightly pungent flavor provides the perfect counterpoint to the sweetness of the brown sugar, creating that classic savory-sweet balance. Add the garlic powder and onion powder to impart an aromatic depth that rounds out the glaze’s profile. Whisk all these ingredients thoroughly until the glaze is uniform and smooth. Give it a quick taste and adjust any components if necessary; some prefer a bit more Dijon for an extra kick, while others might lean towards a sweeter profile. This simple glaze components needed step is quick, yet it creates the signature flavor that makes these sliders so memorable.
Assembling Your Sliders Easily
The assembly of these easy party food sliders is a breeze, making them an ideal recipe for both novice cooks and seasoned chefs alike. The process is straightforward, efficient, and can even be a fun activity to involve family members in, especially kids. Preparing them quickly means you spend less time in the kitchen and more time enjoying your event or simply relaxing. Proper layering is key to ensuring that each slider is perfectly balanced with ham, cheese, and that delicious glaze.
Place buns in baking dish
Start by preparing your baking dish. A 9×13 inch baking dish is typically perfect for a standard pack of 12 Hawaiian rolls. Do not separate the rolls; keep them connected. Carefully slice the entire block of rolls horizontally, creating a top and bottom half. Place the bottom half of the rolls directly into the baking dish. This forms the sturdy base for your sliders. If you wish, you can lightly butter the bottom of the dish to prevent sticking, though with the glaze, it’s often not strictly necessary. Ensuring the buns fit snugly in the dish helps them hold their shape and stay together during the baking process, resulting in neat, individual portions.
Layer ham and cheese slices
Now comes the fun part: layering! On top of the bottom bun halves, arrange a generous layer of your chosen ham. Ensure the ham slices cover the entire surface evenly. Overlap them slightly if needed to prevent gaps. Following the ham, add your cheese. If you’re using individual cheese slices, lay them side-by-side to create a full layer over the ham. If you’re using shredded cheese, sprinkle it evenly. Feel free to double up on the ham or cheese if you desire a heartier slider. The key is to create substantial layers so that every bite is packed with flavor and texture. This systematic layering is crucial for the classic slider build, ensuring the optimal ratio of ingredients.
Pouring the Glaze Over Sliders
Once your ham and cheese layers are perfectly assembled, the next crucial step is applying the savory-sweet ham sliders glaze. This step is where the magic truly happens, as the glaze permeates the buns and infuses the entire dish with its signature flavor. A properly applied glaze ensures that every part of the slider, from the crispy top to the tender interior, is seasoned and delicious. This is what truly makes these make ahead appetizers stand out, creating an irresistible aroma as they bake.
Ensure even coating
Take your prepared sweet Dijon glaze and spoon or pour it evenly over the layered ham and cheese. The goal is to distribute the glaze as uniformly as possible, ensuring that every corner of the sliders receives a generous coating. Don’t be shy; the glaze will seep down into the layers, moistening the buns and infusing the ham and cheese with its incredible flavor. Use a pastry brush if you have one to gently spread the glaze, especially around the edges and in between the individual slider sections. This helps create that appealing glossy finish and ensures an even distribution of flavor throughout the entire batch of homemade sliders.
Top with bun halves
Immediately after coating with the glaze, carefully place the top halves of the Hawaiian rolls back over the ham and cheese layers, aligning them with the bottom halves. It’s important to do this relatively quickly after pouring the glaze, as some of the glaze will naturally absorb into the top buns, contributing to their flavor and texture. Once the top buns are in place, you can lightly brush any remaining glaze over the very tops of the buns for an extra layer of flavor and a beautiful golden-brown finish during baking. This final assembly step sets the stage for baking these delicious treats. For another delightful, cheesy meal, consider trying this cheesy chicken and rice casserole.
Baking Glazed Sliders to Perfection
Baking is the final stage where all the flavors meld together, the cheese turns wonderfully gooey, and the buns become lightly toasted and infused with the sweet Dijon glaze. Achieving the perfect bake ensures that your homemade sliders are warm, inviting, and utterly delicious. Proper oven temperature and timing are critical to prevent over-browning while allowing the cheese to melt into a creamy, irresistible layer. This step transforms your assembled dish into golden-brown perfection, ready to be devoured.
Oven temperature and time
Preheat your oven to 350°F (175°C). This moderate temperature is ideal for allowing the sliders to heat through evenly without burning the tops. Once the oven is preheated, cover the baking dish loosely with aluminum foil. This foil covering helps to trap steam, ensuring the buns remain soft and moist while the cheese begins to melt. Bake the covered sliders for approximately 15-20 minutes. After this initial baking period, remove the foil and continue to bake for another 5-10 minutes, or until the tops are golden brown and slightly crisp. Keep a close eye on them during the uncovered baking phase, as ovens can vary. The total time for baking should be around 20-30 minutes, contributing to the quick prep and cook times that make these such appealing appetizers.
Cheese melting beautifully
The moment you remove the foil, you’ll witness the magic of the cheese melting beautifully. The heat from the oven transforms the slices into a rich, gooey layer that binds the ham to the bottom buns. The cheese should be completely melted and bubbly, possibly with a few slightly browned edges, indicating perfect readiness. This melted cheese is what creates that satisfying pull-apart texture when you serve the sliders. Ensure the cheese is fully melted before removing them from the oven; undercooked cheese simply won’t have the same appeal. This gooey, melted cheese is a hallmark of truly delicious sliders and is key to their crowd-pleasing appeal. For another main course that uses cheese to perfection, consider our Crispy Parmesan Chicken with a Rich Garlic Sauce.
Serving Your Warm Sliders
Once your glazed ham sliders emerge from the oven, golden-brown and bubbling, they are ready to be served and enjoyed immediately. The aroma filling your kitchen will be irresistible, signaling that a delicious treat awaits. Allowing them to cool for just a few minutes before slicing and serving can make them easier to handle, but the best way to savor these savory-sweet delights is when they are still warm, with the cheese perfectly gooey and the glaze still glistening.
Enjoy straight from oven
Carefully remove the baking dish from the oven and let it rest on a wire rack for about 5 minutes. This brief resting period allows the cheese to set slightly, making it easier to separate the individual sliders without losing too much of that melty goodness. Using a sharp knife, cut along the lines between the rolls to separate them into individual portions. You can serve them directly from the baking dish for a casual presentation, or arrange them artfully on a platter for a more polished look. Garnish with a sprinkle of fresh parsley or chives, if desired, for a touch of color. These quick ham and cheese sliders are designed to be enjoyed straight from the oven, offering maximum flavor and comfort. They are truly one of the best slider ideas for any meal.
Must-Try Glazed Sliders: 5 Variations
While the classic glazed ham and cheese sliders are undeniably delicious, their versatility means you can easily experiment with different flavors and ingredients to create exciting new variations. These adaptations allow you to tailor the sliders to specific tastes or occasions, making them even more appealing for any menu. Don’t be afraid to get creative and make these homemade sliders truly your own; these variations are just a starting point for your culinary adventures. These simple adjustments can turn a great recipe into an extraordinary one.
Add bacon for crunch
For an extra layer of flavor and satisfying texture, consider adding crispy cooked bacon slices to your sliders. The smoky, salty crunch of bacon complements the sweet ham and tangy glaze beautifully. Simply layer the bacon over the ham before adding the cheese. This variation is a guaranteed crowd-pleaser and adds a gourmet touch to your easy party food.
Try different cheese blends
Instead of just Swiss, experiment with various cheese blends. A sharp cheddar, smoked gouda, or a Monterey Jack pepper cheese can add unique dimensions. A blend of mozzarella and provolone could offer a milder, super-melty experience. Different cheese blends allow you to customize the savory-sweet ham sliders to your preference.
Spicy jalapeño kick
If you love a little heat, thinly sliced fresh or pickled jalapeños can provide a welcome spicy kick. Layer them sparingly over the ham before adding the cheese. The heat from the jalapeños pairs wonderfully with the sweetness of the glaze, creating a dynamic flavor profile that is truly addictive.
Sweet pineapple twist
For a tropical and extra sweet twist, add a thin layer of crushed pineapple (well-drained) or small pineapple tidbits over the ham. The pineapple’s sweetness and slight tartness provide a refreshing contrast, reminiscent of a Hawaiian pizza, making these best slider ideas even more diverse.
Caramelized onion jam
Elevate your sliders with a layer of homemade or store-bought caramelized onion jam. The rich, sweet, and savory depth of caramelized onions pairs exceptionally well with ham and cheese, adding an element of sophistication. Spread a thin layer on the bottom bun before adding the ham for a truly indulgent experience.
Quick Prep and Cook Times
One of the most attractive features of these quick ham and cheese sliders is their incredibly efficient preparation and cooking times. In today’s fast-paced world, finding a delicious meal that doesn’t demand hours in the kitchen is a true treasure. These sliders deliver on both flavor and speed, making them an ideal choice for busy individuals and families. Their streamlined process ensures that you can whip up a satisfying meal or a party-ready appetizer without feeling overwhelmed, a testament to why they are considered simple appetizer perfection.
Total time: thirty minutes
From start to finish, you can have a batch of these mouth-watering glazed ham sliders ready to serve in approximately thirty minutes. The preparation involves minimal chopping and simple layering, which typically takes about 10-15 minutes. The bulk of the time is spent in the oven, where the sliders bake to golden, gooey perfection for about 20-30 minutes. This includes the initial covered baking to ensure softness and the final uncovered baking for a beautiful golden crust. This total time: thirty minutes makes them a standout option for a quick weeknight dinner when you’re short on time but still want a homemade meal. The ability to create such a flavorful dish in such a short period solidifies their status as a go-to recipe for quick and easy entertaining or a spontaneous family meal.
Glazed Slider Nutrition Facts
Understanding the nutritional value of your food can be helpful, especially when incorporating new recipes into your diet. While glazed ham and cheese sliders are a delightful treat, knowing their general composition can assist in making informed dietary choices. Please note that these facts are estimates and can vary based on specific brands of ingredients used and portion sizes. The quality and type of ham, cheese, and even the glaze components will influence the final nutritional breakdown. This section provides a general overview to give you an idea of what each serving typically contains.
Calories, fat, and protein
On average, one glazed slider can range from 200-300 calories, depending heavily on the amount of ham, cheese, and glaze applied. The fat content typically falls between 10-18 grams, primarily from the cheese, butter in the glaze, and the ham itself. Protein is a significant component, with each slider often providing 10-15 grams, thanks to the ham and cheese, making them quite satisfying. These figures are approximations, and precise values would require calculating based on exact ingredient measurements.
Sodium and sugar per serving
Due to the ham and cheese, the sodium content in these sliders can be noticeable, typically ranging from 400-600 mg per serving. Opting for low-sodium ham varieties can help reduce this. The sugar per serving primarily comes from the brown sugar in the glaze and the Hawaiian rolls, usually falling between 5-10 grams. While delicious, enjoying these savory-sweet ham sliders in moderation is advisable if you are monitoring your sodium or sugar intake. Adjusting the glaze sweetness is one way to manage sugar content. You can always check the nutritional labels of your specific ingredients for the most accurate information to tailor these homemade sliders to your dietary needs.
Helpful Tips for Delicious Sliders
Creating the perfect batch of glazed ham and cheese sliders is not just about following a recipe; it’s also about understanding how to adapt and enhance the dish to suit your personal tastes and those of your guests. These helpful tips will guide you in making minor adjustments that can lead to significant improvements, ensuring your sliders are always a resounding success. From ingredient selection to flavor balancing, these insights aim to make your cooking experience more enjoyable and the end result even more delicious.
Customize cheese preference
While Swiss cheese is a classic choice, don’t limit yourself! Customizing your cheese preference is a fantastic way to personalize these homemade sliders. For a sharper flavor, try aged cheddar. If you prefer a milder, meltier cheese, provolone or mozzarella work wonderfully. Pepper jack adds a subtle spice, while smoked gouda offers a sophisticated, smoky depth. You can even use a combination of two or three cheeses to create a unique flavor profile. Experimenting with different cheeses can transform your standard easy party food into something truly distinctive and tailored to specific palates.
Adjust glaze sweetness
The sweet Dijon glaze is a highlight of this recipe, but its sweetness can be adjusted to your liking. If you prefer a less sweet and more savory flavor, reduce the amount of brown sugar slightly, or increase the Dijon mustard for a tangier kick. Conversely, if you have a sweet tooth, a touch more brown sugar or a drizzle of honey can enhance the sweetness. Remember to taste the glaze before pouring it over the sliders and make any necessary modifications. This small adjustment ensures the glaze perfectly complements the ham and cheese, making your quick ham and cheese sliders exactly how you like them. For more recipe ideas, check out Carina Recipes on Pinterest or Instagram for visual inspiration.
Make Ahead and Reheat Glazed Sliders
One of the most appealing aspects of these delicious glazed ham sliders is their flexibility for make-ahead preparation. This feature makes them an absolute lifesaver for busy hosts or anyone looking to streamline their meal prep. The ability to assemble these savory-sweet ham sliders in advance significantly reduces stress on the day of an event or during a hectic week, ensuring you always have a delicious option ready to go. Knowing how to store and reheat them properly means you can enjoy their freshness even days after preparation.
Prepare for busy days
To make these sliders ahead of time, simply assemble them completely in the baking dish, up to the point of pouring the glaze. Instead of baking, cover the dish tightly with plastic wrap or aluminum foil and refrigerate for up to 24 hours. Just before baking, remove the dish from the refrigerator and let it sit at room temperature for about 15-20 minutes while your oven preheats. Then, pour the glaze over the top and proceed with the baking instructions as usual. This make ahead appetizers strategy is perfect for parties or when you want to have a quick family meal ready to pop into the oven after a long day.
Reheat instructions for freshness
If you have leftover glazed ham and cheese sliders, they can be reheated beautifully, maintaining much of their original deliciousness. For best results, preheat your oven to 300°F (150°C). Place the leftover sliders (preferably separated into individual portions or in a single layer) on a baking sheet and cover them loosely with foil. Reheat for about 10-15 minutes, or until warmed through and the cheese is re-melted. Alternatively, you can reheat them in an air fryer at 300°F (150°C) for 5-7 minutes. Avoid reheating in the microwave, as this can make the buns soggy. Proper reheating ensures your quick ham and cheese sliders remain a satisfying treat, even as leftovers.