
Homemade Beef Chimichangas are a fantastic way to enjoy a delicious, crispy, and flavorful meal right in your own kitchen. This easy recipe simplifies the process, making it accessible for any cook. You’ll create a savory beef filling, wrapped in a tortilla, and fried to golden perfection, perfect for a memorable weeknight dinner.
Key Takeaways
- Follow simple steps to create delicious homemade beef chimichangas.
- Learn to prepare a savory beef and cheese filling for maximum flavor.
- Master crispy frying techniques for that perfect golden shell.
- Explore healthier baked options and creative filling customizations.
- Gain valuable tips for preparation, serving, and making ahead.
Craving a flavorful dish? These chimichangas deliver big taste. They are simple to prepare. Crispy on the outside. Warm and savory within. A real crowd-pleaser.
Homemade Beef Chimichangas: Quick Overview
Dive into the world of homemade beef chimichangas, a beloved Mexican-inspired dish that brings vibrant flavors and a satisfying crunch to your dining table. This recipe is designed to be straightforward, making it an excellent choice for a weeknight meal or a casual gathering. We’ll walk you through each step, ensuring you achieve a restaurant-quality result right in your own kitchen. The crispy shell encasing a savory beef filling makes this dish an instant family favorite.
Total Time and Servings
This easy recipe for homemade beef chimichangas typically takes about 45-55 minutes from start to finish. This includes prep time, cooking the beef filling, assembly, and frying. The recipe is designed to yield approximately 8 chimichangas, making it ideal for serving 4 people with two chimichangas each, or a larger family with hearty appetites. It’s a quick meal solution for busy evenings when you crave something delicious without spending hours in the kitchen.
Why Make This Easy Recipe?
Opting for this easy recipe means enjoying a fantastic meal with minimal fuss. Not only do you get to control the quality of your ingredients, but you also save money compared to dining out. The process is broken down into simple steps, perfect for cooks of all skill levels. Plus, the satisfaction of serving a warm, crispy, homemade beef chimichanga, bursting with a savory beef filling, is truly unparalleled. It’s a delicious dinner that offers both comfort and excitement.
Gathering Your Chimichanga Recipe Ingredients
The success of your homemade beef chimichangas starts with selecting the right ingredients. A well-stocked pantry and fresh produce are key to building a flavorful foundation for your savory beef filling. This section outlines the essential components you’ll need, ensuring you have everything on hand before you begin the cooking process. Pay attention to the quality of your beef and the freshness of your spices for the best possible outcome.
Essential Beef and Tortilla Items
- Ground Beef: We recommend using lean ground beef (85-90%) for a less greasy, yet still flavorful, filling. Around 1 pound is sufficient for 8 chimichangas.
- Flour Tortillas: Large (burrito-sized, 10-12 inches) flour tortillas are crucial for easy folding and containing the generous filling.
- Refried Beans: One can of traditional refried beans adds creaminess and a classic Mexican-inspired taste.
- Shredded Cheddar Cheese: About 1.5-2 cups of sharp or mild cheddar cheese, or a Mexican blend, will make your filling wonderfully cheesy.
- Vegetable Oil: For frying, a neutral oil with a high smoke point like canola, vegetable, or peanut oil is ideal.
Spices and Flavor Enhancers
These aromatics and seasonings will infuse deep, authentic flavor into your ground beef mixture. Don’t skimp on quality, as they are the heart of the chimichanga’s taste profile.
- Onion: One medium yellow onion, finely diced, provides a sweet and pungent base.
- Garlic: 2-3 cloves of fresh garlic, minced, are essential for robust flavor.
- Chili Powder: Adds a foundational mild heat and color.
- Cumin: A must-have spice for its earthy, warm notes, defining the Mexican-inspired profile.
- Smoked Paprika: For a touch of smoky depth and vibrant color.
- Dried Oregano: Mexican oregano is preferred, but standard dried oregano works well.
- Salt and Black Pepper: To taste, for balancing and enhancing all the other flavors.
- Optional: A pinch of cayenne pepper for extra heat, or a bay leaf for simmering.
Preparing the Beef for Chimichangas
The beef filling is the star of your homemade beef chimichangas, and its preparation is key to a truly savory and delicious result. Proper browning and sautéing aromatics are fundamental steps that build depth and complexity in the overall flavor profile. Taking your time here will significantly impact the final taste of your crispy shell delight. This easy recipe emphasizes simple steps to ensure a fantastic outcome.
Browning Ground Beef Perfectly
Begin by heating a large skillet or Dutch oven over medium-high heat. Add your lean ground beef and break it apart with a spoon. Cook the beef, stirring occasionally, until it is completely browned and no pink remains. This step is crucial for developing a rich, meaty flavor. Once browned, carefully drain any excess grease from the skillet. This prevents your filling from becoming overly oily and ensures that the other ingredients can properly meld with the beef, contributing to a truly savory beef filling.
Softening Onions and Garlic
After draining the beef, reduce the heat to medium. Add the finely diced onion to the skillet with the browned ground beef. Sauté the onion for 5-7 minutes, or until it becomes translucent and tender. This softens the onion’s sharp edges and releases its natural sweetness, forming a delicious base for the chimichanga filling. Next, add the minced garlic to the pan. Cook for another 1-2 minutes, stirring constantly, until the garlic becomes fragrant. Be careful not to burn the garlic, as this can lead to a bitter taste. The softened onions and aromatic garlic will lay a fantastic foundation for infusing deeper flavor into your beef mixture.
Infusing Flavor into Beef Mixture
Once your ground beef is perfectly browned and your aromatics are softened, it’s time to transform them into a truly savory beef filling by infusing them with a vibrant blend of spices and seasonings. This stage is where the magic happens, developing the rich, Mexican-inspired taste that makes homemade beef chimichangas so irresistible. The aromatic depth created here will ensure every bite of your delicious dinner is packed with flavor.
Adding Key Spices and Seasonings
With the beef, onions, and garlic in the skillet, it’s time to introduce the heart of the flavor. Sprinkle in the chili powder, cumin, smoked paprika, dried oregano, salt, and black pepper. Stir these spices thoroughly into the beef mixture, ensuring every morsel is coated. This step is vital because it allows the spices to “bloom” in the residual heat and fat, releasing their full aromatic potential. If you enjoy robust flavors in your main course dishes, consider trying this recipe for Crispy Parmesan Chicken with a Rich Garlic Sauce, which also relies on well-balanced seasoning.
Cooking for Aromatic Depth
After adding the spices, continue to cook the mixture for another 2-3 minutes, stirring constantly. This brief period allows the spices to toast slightly, intensifying their flavor and aroma. Next, pour in about half a cup of water or beef broth. Bring the mixture to a gentle simmer, then reduce the heat to low, cover the skillet, and let it cook for about 10-15 minutes. This simmering time allows all the flavors to meld together beautifully, creating a rich and aromatic depth that permeates the entire beef filling. The liquid helps to soften any bits stuck to the bottom of the pan, further enriching the sauce. This patient approach ensures your homemade beef chimichangas will have an incredibly flavorful foundation.
Creating the Cheesy Chimichanga Filling
After perfecting the seasoned beef mixture, the next step is to combine it with other key ingredients to create the ultimate cheesy, savory beef filling for your homemade beef chimichangas. This combination adds layers of texture and taste, making each bite incredibly satisfying. The addition of refried beans brings a creamy element, while shredded cheddar cheese melts into gooey perfection, enhancing the overall deliciousness of this easy recipe.
Mixing in Refried Beans
Once your seasoned ground beef mixture has simmered and achieved its aromatic depth, remove the skillet from the heat. Carefully stir in one can of refried beans. The beans will immediately begin to incorporate into the beef, adding a wonderful creaminess and helping to bind the filling together. Ensure the beans are thoroughly mixed, creating a cohesive, easy-to-manage texture. This combination of ground beef and refried beans forms the hearty base of your chimichanga filling, providing substance and authentic Mexican-inspired flavor. The warmth from the beef helps to soften the beans, making them even smoother.
Incorporating Shredded Cheddar Cheese
Finally, stir in the shredded cheddar cheese (or your preferred Mexican blend cheese) into the warm beef and bean mixture. The residual heat from the filling will gently melt the cheese, creating a gooey, irresistible component. Stir until the cheese is mostly melted and evenly distributed throughout the mixture. This step transforms your filling into a rich, cheesy, savory beef filling that is ready to be wrapped in tortillas. The melted cheese not only adds a fantastic taste but also acts as another binder, helping the filling stay intact when you assemble and fry your homemade beef chimichangas. This creates a truly delicious dinner experience.
Assembling Your Beef Chimichangas Easily
Assembling your homemade beef chimichangas is a crucial step that ensures they hold together perfectly during frying, leading to that coveted crispy shell. This easy recipe emphasizes simple steps for dividing the filling and folding the tortillas tightly, making the process straightforward even for beginners. Proper assembly prevents the filling from spilling out and helps achieve a uniform, golden-brown exterior, contributing to a fantastic weeknight meal or family favorite dinner.
Dividing Filling on Tortillas
Lay a large flour tortilla flat on a clean work surface. Spoon about ½ to ¾ cup of the cheesy beef and bean filling onto the center of the tortilla. It’s important not to overfill, as this will make folding difficult and can lead to breakage during frying. Leave a good border around the edges of the tortilla to ensure you have enough room to fold it securely. Consistency in filling amounts for each tortilla will help them cook evenly. For a delicious dinner, take care with this step.
Folding Tortillas Tightly
To fold your chimichanga, first, bring the bottom edge of the tortilla up and over the filling, tucking it snugly underneath. Then, fold in the two sides of the tortilla towards the center, overlapping them slightly. Finally, roll the entire package tightly from the bottom upwards, creating a compact, cylinder-like shape. Think of it like rolling a burrito, but ensure it’s extra secure. This tight folding is essential to prevent the filling from escaping when deep-frying. Repeat this process with the remaining tortillas and filling. You can secure the seam with a toothpick if desired, but a tight fold is often enough for a perfect crispy shell.
Frying for Golden Chimichanga Perfection
The frying stage is where your homemade beef chimichangas truly come to life, developing their signature crispy shell and golden-brown exterior. Achieving this perfection requires attention to oil temperature and proper frying techniques. This step transforms the assembled chimichangas into a delicious dinner that’s both crunchy and incredibly flavorful. For other delicious fried dishes, you might like our frying category which offers a variety of recipes and techniques.
Heating Oil to Right Temperature
In a large, heavy-bottomed pot or deep skillet, pour enough vegetable oil to reach a depth of about 2-3 inches. Heat the oil over medium-high heat until it reaches 350-375°F (175-190°C). Using a kitchen thermometer is highly recommended for accuracy, as the correct temperature is critical for a crispy, non-greasy result. If the oil isn’t hot enough, the chimichangas will absorb too much oil and become soggy; if it’s too hot, they’ll burn on the outside before the filling is thoroughly heated. For more about this cooking method, you can learn about deep frying on Wikipedia.
Crispy Frying Techniques
Once the oil is at the correct temperature, carefully place 1-2 chimichangas into the hot oil, seam-side down first, ensuring not to overcrowd the pot. Overcrowding will lower the oil temperature and lead to uneven cooking. Fry for about 2-4 minutes on each side, or until they are golden brown and beautifully crispy. Use tongs to gently turn them to ensure even browning. Once golden, carefully remove the homemade beef chimichangas from the oil and place them on a wire rack set over a baking sheet lined with paper towels. This allows excess oil to drain off, keeping your chimichangas wonderfully crispy and avoiding greasy results. Repeat with the remaining chimichangas, monitoring the oil temperature between batches.
Serving Your Delicious Chimichanga Recipe
After all the effort in preparing, assembling, and frying, presenting your homemade beef chimichangas is the final step to a truly delicious dinner. Serving them hot and with complementary toppings elevates the entire experience, making this easy recipe a memorable family favorite. The crispy shell and savory beef filling are best enjoyed immediately after frying, ensuring maximum crunch and warmth.
Draining and Presenting Hot
Once your beef chimichangas are fried to golden perfection, it’s crucial to let them drain properly. Transfer them from the oil directly onto a wire rack placed over a baking sheet lined with paper towels. This allows any excess oil to drip away, ensuring your chimichangas remain crispy and not greasy. Serve them immediately while they are still hot, as the crispy shell is at its best right out of the fryer. Arrange them attractively on plates, perhaps alongside a simple side salad or some Mexican rice, for a complete and appealing quick meal.
Suggested Toppings for Enjoyment
Toppings can truly enhance the flavor and presentation of your chimichangas. Offer a variety to let everyone customize their own perfect bite:
- Salsa: Fresh pico de gallo or a zesty homemade salsa adds brightness.
- Sour Cream or Greek Yogurt: A dollop provides a cool, creamy contrast to the rich filling.
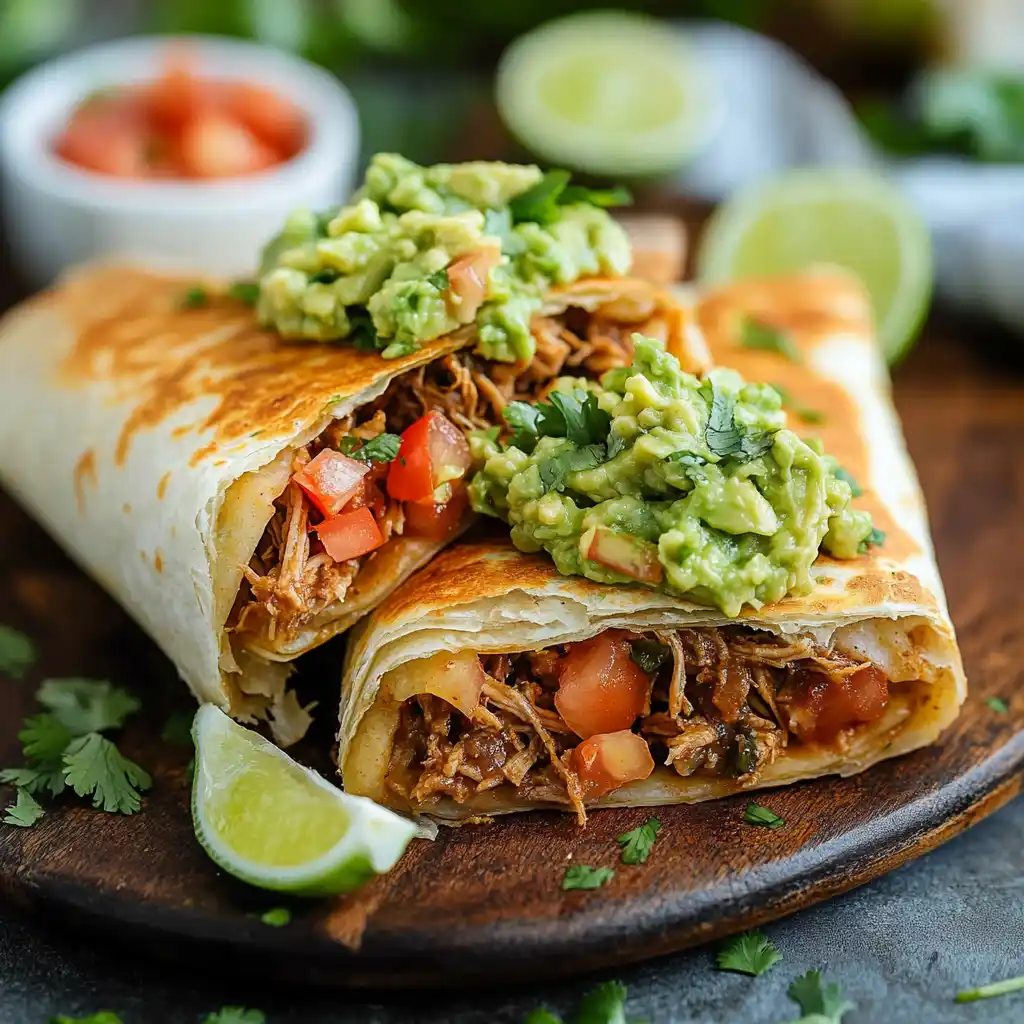
- Guacamole or Sliced Avocado: Adds healthy fats and a smooth texture.
- Shredded Lettuce: For a refreshing crunch.
- Diced Tomatoes: Adds freshness and color.
- Pickled Jalapeños: For a spicy kick.
- Cilantro: Freshly chopped cilantro offers an aromatic garnish.
Another quick and delicious dinner idea that pairs well with fresh toppings is our Easy Honey Garlic Chicken, offering similar versatility in serving.
Healthier Baked Chimichanga Option
For those looking for a lighter alternative to deep-frying, baking your homemade beef chimichangas is an excellent choice. You can still achieve a wonderful crispy shell without the added oil, making this easy recipe adaptable to different dietary preferences. This method allows you to enjoy the savory beef filling and cheesy goodness with a slightly different texture, providing a healthier baked chimichangas option that is still incredibly delicious.
Baking Instructions for Crunch
To bake your chimichangas, preheat your oven to 400°F (200°C). Place the assembled chimichangas seam-side down on a baking sheet. Bake for 20-25 minutes, or until they are golden brown and crispy. Halfway through the baking time (around 10-12 minutes), carefully flip the chimichangas to ensure even browning on both sides. This will help them achieve a more uniform crispy shell. Keep an eye on them, as oven temperatures can vary. The goal is a firm, golden exterior that mimics the fried version, while keeping the savory beef filling hot and delicious.
Brushing Tortillas with Oil
Before baking, an important step for achieving that desired crunch is to lightly brush each assembled chimichanga with vegetable oil, olive oil, or cooking spray. This thin layer of oil helps the tortillas crisp up beautifully in the oven, giving them a texture that’s closer to the deep-fried version. While it won’t be exactly the same, it creates a satisfyingly firm and golden exterior. Ensure you brush all surfaces evenly, especially the seams, for the best results. This small step makes a big difference in the quality of your healthier baked chimichangas, delivering a crispy shell that is still incredibly enjoyable.
Customizing Your Chimichanga Filling
While the classic savory beef filling is incredibly delicious, one of the joys of making homemade beef chimichangas is the flexibility to customize the filling to suit your tastes and what you have on hand. This easy recipe offers a fantastic base, but don’t hesitate to get creative with additional ingredients. Customizing your chimichanga filling can transform this delicious dinner into an even more personalized and exciting quick meal.
Adding Rice or Vegetables
You can easily bulk up your chimichangas by adding cooked rice or finely diced vegetables to the beef mixture. Cooked white or brown rice can add texture and make the filling even more substantial. For vegetables, consider adding:
- Diced Bell Peppers: Sauté them with the onions and garlic for added sweetness and color.
- Corn: Fresh, frozen, or canned corn kernels provide a sweet pop.
- Black Beans: Rinsed and drained black beans can replace some of the refried beans for a different texture and flavor profile.
- Spinach: Wilted spinach can be stirred in for extra greens.
If you enjoy customizing your meals, check out our recipe for Cheesy Chicken and Rice Casserole for more versatile dinner ideas that encourage ingredient flexibility.
Other Creative Mix-ins
Beyond rice and vegetables, there are many ways to make your chimichanga filling unique:
- Different Cheeses: Experiment with Monterey Jack, Pepper Jack (for a spicy kick), or even a blend of cheeses.
- Different Meats: While this is a beef recipe, shredded chicken, ground turkey, or even seasoned pork can be substituted for the ground beef.
- Green Chiles: A can of diced green chiles (mild or hot) can add another layer of authentic Mexican-inspired flavor.
- Hot Sauce: A dash of your favorite hot sauce can be mixed into the filling for an extra zing.
- Crema: A spoonful of Mexican crema or cream cheese can make the filling even creamier.
Feel free to play around with these ideas to create your perfect savory beef filling variation for your homemade beef chimichangas.
Tips for Best Easy Chimichangas
Making homemade beef chimichangas can be an easy recipe, but a few key tips will help you achieve the best results every time. These insights focus on ensuring a perfectly crispy shell and avoiding common pitfalls like greasy chimichangas. Following these simple steps will elevate your quick meal from good to truly exceptional, ensuring a family favorite that everyone will rave about.
Ensuring Hot Oil for Frying
The single most important factor for achieving a crispy shell and preventing greasy chimichangas is maintaining the correct oil temperature. Use a deep-fry thermometer to keep the oil consistently between 350-375°F (175-190°C). If the oil is too cool, the tortillas will soak up too much oil, resulting in a soggy and heavy texture. If it’s too hot, the exterior will brown too quickly, leaving the inside potentially not fully heated or the tortilla burnt. Fry in batches to avoid overcrowding the pot, which can drop the oil temperature significantly. Always let the oil come back up to temperature between batches for consistent results.
Avoiding Greasy Results
Beyond hot oil, several techniques can help you avoid greasy chimichangas. First, ensure your ground beef is well-drained after browning. Excess fat in the filling can make the chimichangas heavy. Second, use a neutral oil with a high smoke point, like canola or vegetable oil. Third, after frying, immediately transfer the cooked chimichangas to a wire rack placed over paper towels. This setup allows air to circulate around them and excess oil to drip off, rather than pooling and reabsorbing. Resist the urge to stack them directly on paper towels, as this can steam them and make them less crispy. A proper draining process is key to maintaining that delightful crispy shell for your delicious dinner.
FAQs About This Beef Chimichanga
Here are some frequently asked questions to help you prepare and enjoy your homemade beef chimichangas with confidence. These answers provide practical advice for making this easy recipe fit into your schedule, whether you’re planning a quick meal or preparing a family favorite in advance.
Can I Prepare Ahead of Time?
Yes, you can absolutely prepare homemade beef chimichangas ahead of time! The beef filling can be cooked and refrigerated for up to 3-4 days. When you’re ready to make the chimichangas, simply reheat the filling gently before assembling. You can also assemble the chimichangas completely (filling and folding into tortillas) and refrigerate them for up to 24 hours before frying or baking. Just make sure to cover them tightly to prevent the tortillas from drying out. This makes it a great option for a quick meal on a busy weeknight.
Freezing and Reheating Advice
Chimichangas freeze wonderfully! To freeze, assemble the chimichangas, but do not fry or bake them. Place the unfried chimichangas in a single layer on a baking sheet and freeze until solid. Once solid, transfer them to a freezer-safe bag or container, separating layers with parchment paper, and freeze for up to 2-3 months. To cook from frozen, you can fry or bake them directly from the freezer, adding an extra 5-10 minutes to the cooking time to ensure they heat through properly. You can also partially thaw them in the refrigerator overnight. Reheating cooked chimichangas is best done in an oven at 375°F (190°C) for 10-15 minutes, or until heated through and crispy again. Avoid the microwave for reheating cooked chimichangas if you want to maintain that crispy shell. For more kitchen inspiration and delicious recipes, follow us on Pinterest and Instagram!