
Pistachio Dream Cookie Bars are a truly irresistible dessert that combines the rich, nutty taste of pistachios with a delightful cookie bar texture. These layered treats are simple to make and perfect for sharing. Prepare to impress everyone with these vibrant and flavorful bars, becoming a new favorite for any occasion.
Key Takeaways
- Pistachio Dream Cookie Bars offer a unique five-layer dessert experience.
- The recipe is straightforward, suitable for home bakers.
- Features vibrant green pistachios and sweet chocolate chips.
- Includes tips for baking, cooling, and storing for best results.
- Great for sharing or enjoying as a special treat.
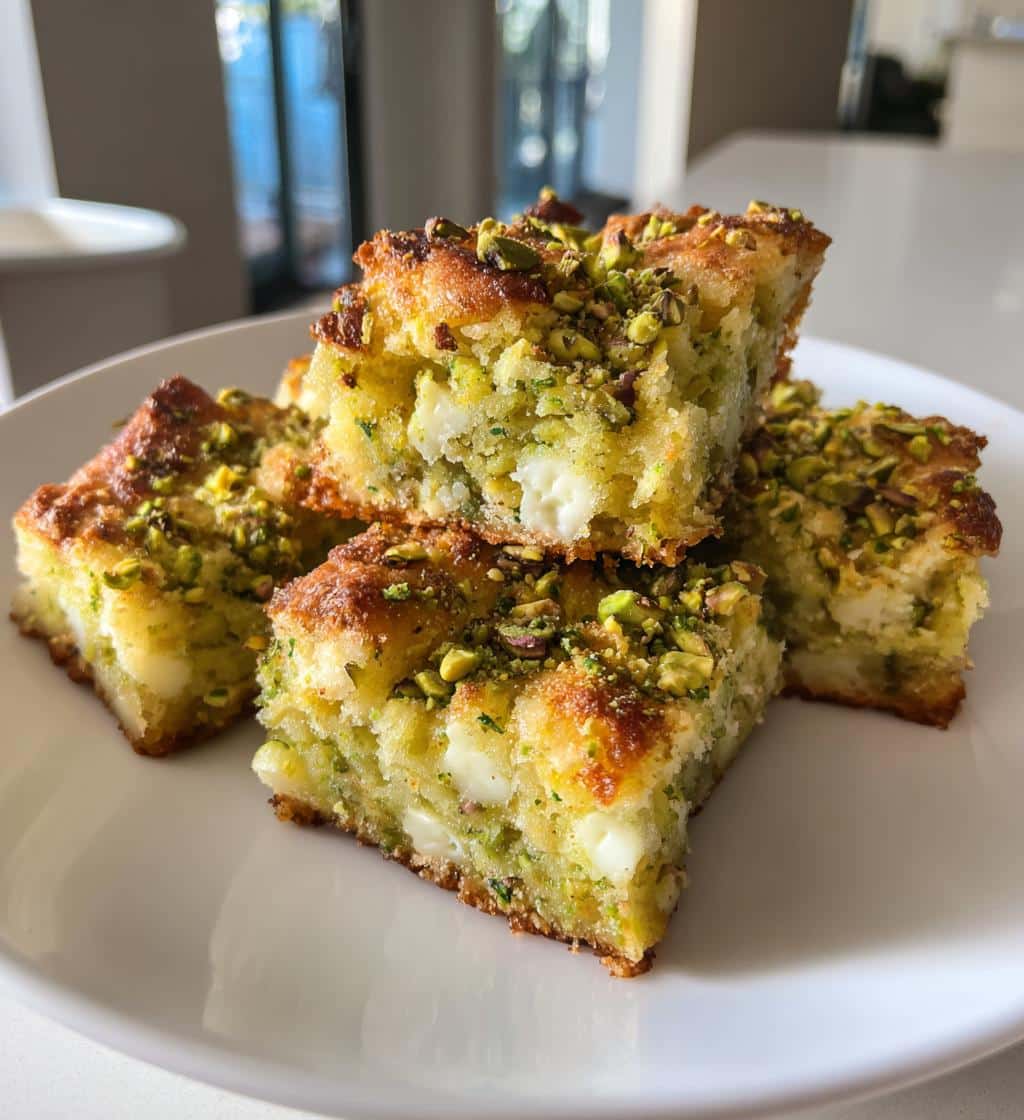
Baking these bars is pure joy. Layers of flavor truly shine through. Each bite offers a delightful texture. They are perfect for any gathering. Your kitchen will smell amazing.
Meet Pistachio Dream Cookie Bars
What Makes These Bars Special?
Pistachio Dream Cookie Bars stand out from ordinary desserts. Their specialty lies in the delightful combination of textures and flavors, culminating in a truly memorable treat. Imagine a crumbly, buttery cookie base, often infused with extra nutty goodness, topped with a rich, creamy pistachio filling. This filling is what gives the bars their signature vibrant green hue and distinct, earthy sweetness. But it doesn’t stop there; many versions of these dream bars also incorporate elements like white chocolate chips for an added layer of sweetness or a smooth, decadent glaze to seal in all the flavors. The result is a multi-layered masterpiece that appeals to both the eyes and the palate, making them a centerpiece for any dessert table. Each layer contributes to a harmonious whole, making every bite an exciting experience. Unlike a simple cookie, these bars offer a complexity that keeps you coming back for more.
Why You Will Love Them
There are countless reasons why these Pistachio Dream Cookie Bars will quickly become a cherished recipe in your baking repertoire. First, their incredible flavor profile is simply captivating. The mild, sweet notes of pistachio blend beautifully with a rich, buttery base, creating a taste sensation that’s both comforting and sophisticated. Second, they are surprisingly easy to make, even for novice bakers. The layered structure looks impressive, but the steps are straightforward and manageable. Third, these bars are incredibly versatile. They are perfect for holiday gatherings, potlucks, birthday parties, or simply as an indulgent weekend treat. They travel well and are easy to serve, making them a fantastic option for any event where you need a crowd-pleasing dessert. Furthermore, the visual appeal of these bars, with their distinctive green color, is undeniable, adding a festive touch to any occasion. You’ll love the compliments you receive when serving these delightful pistachio treats.
Gather Pistachio Dream Bar Ingredients
Essential Baking Supplies List
Before you dive into the delightful process of making Pistachio Dream Cookie Bars, it’s crucial to have all your baking delight supplies ready. A well-prepared kitchen makes the entire experience smoother and more enjoyable. Here’s a checklist of the fundamental items you’ll need:
- 9×13 inch baking pan: This size is ideal for achieving the perfect thickness for your cookie bar layers. Line it with parchment paper for easy removal.
- Large mixing bowls: You’ll need at least two – one for dry ingredients and one for wet.
- Electric mixer (stand or hand-held): Essential for creaming butter and sugars, ensuring a light and fluffy dough.
- Rubber spatula: Perfect for scraping down the sides of bowls and folding in delicate ingredients.
- Measuring cups and spoons: Accuracy in baking is key to consistent results.
- Wire cooling rack: Allows your baked bars to cool evenly and prevents sogginess.
- Sharp knife: For clean, precise cuts once the bars are fully cooled.
Having these tools organized and within reach will streamline your baking process, allowing you to focus on the joy of creating these delicious treats.
Star Ingredients for Flavor
The magic of these pistachio dream bars truly comes alive with a selection of key ingredients that deliver on taste and texture. Each component plays a vital role in creating that unforgettable nutty flavor and irresistible sweetness. Start with all-purpose flour, providing the structure for your rich base. Granulated sugar and brown sugar work together to offer a balanced sweetness and a hint of molasses depth, contributing to the sweet buttery crust. High-quality unsalted butter is non-negotiable for its richness and tenderness in the cookie dough. Of course, the star of the show is pistachios, preferably shelled and unsalted. You’ll want some finely ground for the dough and a portion chopped for texture and garnish. Don’t forget the white chocolate chips; their creamy sweetness complements the pistachios wonderfully. A touch of vanilla extract enhances all the flavors, while a pinch of salt balances the sweetness. Some recipes also call for a small amount of almond extract to boost the nutty notes, even though the primary flavor is pistachio. This thoughtful combination ensures every bite is packed with deliciousness, much like the rich flavors found in Quick Italian Cream Cake.
Simple Tools for Cookie Bars
Prepare Your Baking Pan
A well-prepared baking pan is the first step to ensuring your easy homemade bars come out perfectly and can be easily removed without sticking. For Pistachio Dream Cookie Bars, a 9×13 inch baking pan is typically recommended. Start by lightly greasing the pan with butter or a non-stick cooking spray. This initial layer of grease acts as a barrier, preventing the dough from sticking. The next crucial step is to line the pan with parchment paper. Cut two strips of parchment paper: one to fit the length of the pan, extending over the sides, and another to fit the width, also extending over the sides. This cross-hatch method creates “slings” that allow you to lift the entire batch of baked bars out of the pan effortlessly once they have cooled. The overhang on the sides provides handles for this process. Press the parchment paper firmly into the corners and along the edges to ensure a smooth, even surface for your cookie bar layers. This simple preparation makes a huge difference in the final presentation and ease of slicing.
Preheat Oven to Perfection
Preheating your oven might seem like a minor detail, but it’s absolutely vital for successful baking, especially for cookie bars that require even cooking. Setting your oven to the correct temperature, typically around 350°F (175°C), and allowing it ample time to reach and stabilize at that temperature ensures your cookie bar recipe bakes evenly from edge to center. If you place your dough into an oven that hasn’t fully preheated, it can lead to underbaked centers, overbaked edges, or inconsistent textures. The initial burst of heat helps to set the crust and promote a uniform rise. Many ovens take 15-20 minutes, or even longer, to truly reach and maintain the set temperature, even if the indicator light comes on sooner. Consider using an oven thermometer to verify accuracy if you suspect your oven runs hot or cold. Proper preheating ensures that when your delicious Pistachio Dream Cookie Bars go into the oven, they begin baking under optimal conditions, leading to that coveted golden-brown finish and perfectly cooked interior.
Mixing Your Cookie Bar Dough
Creaming Butter and Sugars
The foundation of perfectly chewy and tender Pistachio Dream Cookie Bars begins with the crucial step of creaming butter and sugars. This process is more than just mixing; it’s about incorporating air into the mixture, which contributes to the light texture of the cookie base. Start with room temperature unsalted butter. It should be soft enough to make an indentation when pressed, but not melted. In a large mixing bowl, combine the softened butter with both granulated sugar and brown sugar. Using an electric mixer, beat these ingredients together on medium speed for about 3-5 minutes. The mixture should become noticeably lighter in color, pale yellow, and significantly fluffier in texture. It will also appear airy and well-combined. This aeration creates tiny pockets that will expand during baking, resulting in a tender, less dense crumb. Don’t rush this step; patiently creaming the butter and sugars is key to achieving that delightful sweet buttery crust that holds these layered dessert bars together.
Adding Eggs and Vanilla Extract
Once your butter and sugars are perfectly creamed, it’s time to introduce the wet ingredients that add richness, binding, and flavor to your cookie bar dough. Begin by adding the eggs, typically one at a time, to the butter and sugar mixture. Beat each egg thoroughly until it is fully incorporated before adding the next. This ensures that the emulsion remains stable and the ingredients are well-blended, leading to a consistent dough. Eggs play a critical role; they act as a binder, giving structure to the bars, and also contribute to their moisture and tenderness. After the eggs are incorporated, stir in a generous amount of pure vanilla extract. Vanilla is a flavor enhancer that works synergistically with the pistachios and chocolate, rounding out the sweetness and adding a warm, aromatic note. For an extra boost of that delightful nutty flavor, some bakers also add a hint of almond extract here, though it’s optional depending on your preference. Mix until just combined, being careful not to overmix at this stage, as excessive mixing after flour is added can lead to tough bars.
Finish Dough for Dream Bars
Fold in Pistachios and Chips
With the wet ingredients beautifully combined, the next exciting step is to incorporate the stars of our pistachio dessert recipe: the actual pistachios and white chocolate chips. Gently fold in your chopped pistachios. You’ll want a good mix of finely ground pistachios, which integrate into the dough and give it color and subtle flavor, and coarsely chopped pieces, which provide bursts of texture and green pistachio visual appeal. Then, add the white chocolate chips. These chips will melt slightly during baking, creating pockets of creamy sweetness that beautifully complement the nutty pistachios. When folding, use a rubber spatula and a gentle hand. The goal is to distribute these mix-ins evenly throughout the dough without overworking it. Overmixing can develop the gluten in the flour too much, leading to tough, rather than tender, cookie bars. A perfectly folded dough will show a lovely scattering of green pistachios and white chocolate chips, promising a flavorful bite in every single bar. This step really brings the “dream” into your Pistachio Dream Cookie Bars.
Spread Evenly in Pan
Once your dough is perfectly mixed with all the delectable add-ins, it’s time to transfer it to your prepared baking pan. Remember that parchment paper sling? It’s about to prove its worth! Carefully spoon the dough into the lined 9×13 inch pan. The dough might be thick and slightly sticky, so don’t be afraid to use your hands (lightly floured, if needed) or the back of a spatula to spread it. The key here is to create an even layer across the entire bottom of the pan. Pay special attention to the corners and edges, ensuring the dough is pressed uniformly. An uneven layer will result in uneven baking, where some parts might be undercooked while others are overly crisp. A consistent thickness guarantees that your cookie bar layers will bake uniformly, achieving that perfect chewy-tender texture throughout. Take your time with this step, smoothing the surface as much as possible. A well-spread dough is a promise of perfectly baked, beautiful Pistachio Dream Cookie Bars. For other delightful layered dessert options, consider something like a classic Snickerdoodle Cobbler.
Bake Pistachio Dream Cookie Bars
Oven Temperature and Time
Proper oven temperature and baking time are critical for achieving the ideal texture in your delicious sweet treat. As mentioned earlier, preheating your oven to 350°F (175°C) is non-negotiable. Once the oven is fully preheated, carefully place your pan of cookie bar dough into the center rack. Baking time for these Pistachio Dream Cookie Bars typically ranges from 25 to 35 minutes, but this can vary significantly depending on your oven’s calibration and the exact thickness of your dough layer. Start checking around the 25-minute mark. The goal is to bake the bars until the edges are lightly golden brown and the center appears set. If the center still looks very wet or jiggly, continue baking for a few more minutes, checking frequently. Overbaking can lead to dry, crumbly bars, so it’s better to err on the side of slightly underbaked than overbaked, as they will continue to set as they cool. Keep an eye on the clock, but more importantly, trust your senses and visual cues to determine when they are ready.
Checking for Golden Brown
Knowing when your Pistachio Dream Cookie Bars are perfectly baked is a skill that develops with practice, but there are clear visual indicators to look for. The most telling sign is the color of the edges: they should be a beautiful, light golden brown. This indicates that the sugars have caramelized and the dough has cooked through. The center of the bars should also appear set. If you gently jiggle the pan, the middle shouldn’t wobble excessively. Another common test is to insert a toothpick into the center of the bars. For a fudgier bar, you want a few moist crumbs to cling to the toothpick, not wet batter. For a firmer bar, it should come out mostly clean. If your oven has a tendency to bake unevenly, you might rotate the pan halfway through the baking process to ensure all sides achieve that desirable golden brown finish. Remember, the bars will continue to cook slightly from residual heat once removed from the oven, so pulling them out just as they hit that perfect golden hue is key to delightful results.
Cooling Your Baked Cookie Bars
Patience for Perfect Slices
After your Pistachio Dream Cookie Bars emerge from the oven, fragrant and golden, the hardest part begins: waiting for them to cool. This step is absolutely crucial for achieving clean, perfect slices and ensuring the structural integrity of your layered dessert. Immediately upon removing them from the oven, place the pan on a wire cooling rack. This allows air to circulate around the bottom of the pan, preventing the bars from becoming soggy. Allow the bars to cool in the pan for at least 30-60 minutes. During this time, the internal temperature of the bars will gradually decrease, allowing them to firm up and fully set. Attempting to cut them while they are still warm will almost certainly result in a crumbly mess, with the layers potentially separating and the chips smearing. The longer you let them cool, the easier they will be to handle. For the cleanest cuts, some bakers even recommend chilling the bars in the refrigerator for an hour or two after they’ve cooled to room temperature. This patience will be richly rewarded with beautifully defined, intact slices of your delicious sweet treat.
Cutting Into Servings
Once your Pistachio Dream Cookie Bars are completely cooled and firm, you are ready for the satisfying task of cutting them into individual servings. First, use the parchment paper overhangs as “slings” to carefully lift the entire slab of bars out of the baking pan and transfer it to a cutting board. This prevents any scratching of your pan and provides a stable surface for cutting. For the cleanest cuts, use a large, sharp knife. For best results, run your knife under hot water, wipe it clean, and then make your cut. Repeat this process for each cut to prevent stickiness and ensure smooth edges. This is a pro-tip, especially when dealing with sticky fillings or chocolate layers. You can cut them into traditional squares, rectangles, or even smaller bite-sized pieces for a party platter. Standard serving sizes are often 2×2 inch squares, yielding about 24 bars from a 9×13 inch pan. Don’t worry if the first cut isn’t absolutely perfect; practice makes perfect, and they will still taste amazing regardless of their shape. Enjoy the beautiful presentation of your easy homemade bars!
Enjoy Pistachio Dream Cookie Bars
Serving Suggestions
The moment has finally arrived! Your perfectly baked and cooled Pistachio Dream Cookie Bars are ready to be savored. While they are utterly delightful on their own, a few creative serving suggestions can elevate the experience even further. For a simple yet elegant presentation, arrange the cut bars on a beautiful platter, perhaps dusted lightly with powdered sugar or a sprinkle of extra chopped green pistachio for a pop of color and added crunch. If you’re serving them as a dessert at a dinner party, consider pairing a square with a scoop of vanilla bean ice cream or a dollop of freshly whipped cream. The cool, creamy accompaniment contrasts wonderfully with the rich cookie bar. For a truly indulgent treat, a drizzle of white chocolate ganache or a light caramel sauce over the top can add another layer of decadence. These delicious sweet treat bars are also perfect for lunchboxes, picnics, or as a grab-and-go snack for busy days. Their sturdy nature makes them travel-friendly, ideal for sharing with friends and family.
Pairing with Beverages
Just as wine pairs with dinner, certain beverages can complement the flavors of your Pistachio Dream Cookie Bars beautifully, enhancing the overall enjoyment. For a warm and comforting pairing, a classic cup of coffee or a rich espresso is an excellent choice. The slight bitterness of coffee helps to cut through the sweetness of the bars, creating a balanced palate. Tea lovers might find that a delicate black tea or an Earl Grey with its bergamot notes provides a lovely counterpoint. For those who prefer cooler options, a tall glass of cold milk, whether dairy or a plant-based alternative like almond or oat milk, is a timeless and comforting pairing, especially loved by children. If you’re looking for something a bit more sophisticated, consider a dessert wine that isn’t overly sweet, or even a glass of sparkling cider. The key is to choose a beverage that refreshes the palate and highlights the nutty flavor of the pistachios without overpowering them. Don’t forget to share your creations on Pinterest and Instagram!
Storing Leftover Pistachio Bars
Airtight Container Tips
To keep your leftover Pistachio Dream Cookie Bars as fresh and delicious as the day they were baked, proper storage is paramount. The enemy of freshly baked goods is air, which can lead to staleness and a loss of moisture. Always store your cookie bar recipe in an airtight container. Choose a container that fits the bars snugly to minimize air exposure. If you have multiple layers of bars, place a piece of parchment paper or wax paper between each layer to prevent them from sticking together. This also makes it easier to grab a single bar without disturbing the others. Store the container at room temperature if you plan to consume them within a day or two. If your kitchen is particularly warm or humid, or if your bars contain a creamy topping that might spoil, refrigerating them is a safer bet. Just ensure the container is truly airtight to prevent them from absorbing refrigerator odors. Proper sealing helps maintain the texture and creamy filling if your recipe has one, and overall freshness, so every bite is as enjoyable as the first.
How Long Do They Last?
The shelf life of your pistachio dream bars depends on how they are stored and the specific ingredients used. Generally, when stored properly in an airtight container at room temperature, Pistachio Dream Cookie Bars will remain fresh and delicious for 3 to 4 days. If your recipe includes perishable ingredients like a cream cheese frosting or a very delicate custard-like layer, refrigeration is advisable, and they might last slightly longer, up to 5-7 days in the fridge. For longer storage, these bars freeze beautifully. Wrap individual bars or small batches tightly in plastic wrap, then place them in a freezer-safe airtight container or a heavy-duty freezer bag. Frozen cookie bars can last for up to 2-3 months. To enjoy, simply thaw them at room temperature for a few hours. Freezing is an excellent way to prepare these layered dessert treats in advance for future events or to ensure you always have a delightful delicious sweet treat on hand for an unexpected craving. Enjoy the convenience and continued enjoyment of your homemade bars.
Pistachio Dream Bar Substitutions
Try Almonds for Pistachios
While the green pistachio is undoubtedly the star of Pistachio Dream Cookie Bars, culinary creativity often calls for adaptability. If pistachios are hard to find, too expensive, or if you simply prefer a different nutty flavor, almonds make an excellent substitute. Almonds offer a similar delicate flavor profile and a pleasing crunch. You can use blanched slivered almonds, or finely ground almond flour in the base dough for a subtle flavor integration. For texture, simply chop whole almonds and fold them into the dough, just as you would with pistachios. The resulting bars will have a slightly different hue, leaning towards a golden-brown rather than vibrant green, but the flavor will be equally delightful. This substitution allows for a variation that is still distinctly nutty and delicious, providing a wonderful alternative for those who enjoy almond-based desserts. It’s a fantastic way to customize your easy homemade bars while still retaining the layered goodness.
Boost Flavor with Extract
Even when using real pistachios, you can intensify and enhance their nutty flavor through the clever use of extracts. Pistachio extract, if available, can significantly boost the inherent pistachio taste in your bars, making the flavor more pronounced and vibrant. Add a small amount, typically 1/2 to 1 teaspoon, along with your vanilla extract. Be mindful not to overdo it, as extracts can be potent. Another excellent option for deepening the nutty notes, even if you are using only pistachios, is almond extract. A tiny splash of almond extract (about 1/4 to 1/2 teaspoon) works synergistically with pistachios, bringing out their natural sweetness and providing a more complex, well-rounded flavor profile without making the bars taste distinctly like almonds. Vanilla extract is also a non-negotiable flavor enhancer, bringing warmth and depth to any baked good, including your pistachio dream bars. Experiment with these extracts to find your perfect balance and ensure every bite is packed with incredible taste. For another great dessert option, try Peanut Butter Brownie Swirl Cookies.
Nutrition Facts for Cookie Bars
Per Serving Breakdown
Understanding the nutritional content of your delicious sweet treat can be helpful, especially if you’re mindful of your dietary intake. While Pistachio Dream Cookie Bars are an indulgent dessert, knowing the per-serving breakdown allows for informed choices. A typical serving, often considered a 2×2 inch square, will contain calories primarily from carbohydrates (sugars and flour), fats (butter, pistachios, white chocolate), and some protein (from eggs and nuts). For instance, a single bar might range from 200-300 calories, depending heavily on the specific recipe, the amount of sugar and butter used, and the addition of toppings like glaze. It’s also important to consider the fiber content from the pistachios and the presence of micronutrients. While a precise breakdown requires calculating based on your exact ingredient quantities, general estimations can give you a good idea. Always remember that these are treats, meant to be enjoyed in moderation as part of a balanced diet. Baking at home also offers the advantage of controlling ingredients, such as reducing sugar slightly if desired, a useful tip for those watching their intake. For a heartier main course, consider a Chicken Bacon Ranch Tater Tot Casserole.
Understanding the Macros
When looking at the macronutrient profile of Pistachio Dream Cookie Bars, we’re primarily focused on carbohydrates, fats, and proteins. Carbohydrates will form the largest component, coming from the flour and the significant amount of sugars (granulated, brown, and in chocolate chips). These provide energy, but also contribute to the sweet buttery crust and overall richness. Fats are abundant from the butter, the natural oils in the pistachios, and the white chocolate chips. These fats contribute to the tender texture, moisture, and satiety. While calorie-dense, healthy fats from nuts offer benefits. Protein content will be relatively lower compared to the other macros, mainly derived from the eggs and, to a lesser extent, the pistachios. Understanding these macros can help you fit these pistachio dream bars into your personal dietary goals. For instance, if you’re tracking sugar intake, you might adjust the recipe by slightly reducing the sugar content or opting for a less sweet topping. Knowing your macros helps you appreciate these easy homemade bars as an occasional delightful indulgence.
Tips for Perfect Cookie Bars
Avoiding Dry or Crumbly Bars
Achieving a perfectly moist and tender Pistachio Dream Cookie Bar is the goal, and avoiding a dry or crumbly texture is key to baking delight. Here are some baking tips to ensure your bars are always soft and chewy: Measure accurately: Too much flour is the most common culprit for dry baked goods. Use a kitchen scale for precision, or the “spoon and level” method if using measuring cups, where you spoon flour into the cup and level it off without packing it down. Don’t overbake: As highlighted earlier, overbaking can quickly turn tender bars into brittle ones. Watch for visual cues like golden edges and a set center, and remove them promptly from the oven. Use room temperature ingredients: Softened butter and eggs incorporate better, leading to a smoother, more emulsified dough that retains moisture. Don’t overmix: Once you add the flour, mix only until just combined. Overmixing develops gluten, resulting in tougher, drier bars. Following these guidelines will help you achieve wonderfully moist and satisfying cookie bar layers every time.
Ensuring Even Baking
Even baking is crucial for uniform texture and flavor throughout your pistachio dessert recipe. No one wants burnt edges and a raw center! Here’s how to ensure your Pistachio Dream Cookie Bars bake evenly: Preheat thoroughly: Allow your oven ample time to reach and stabilize at the correct temperature. An oven thermometer can confirm accuracy. Prepare the pan properly: Spreading the dough evenly in your lined baking pan ensures uniform thickness, which is vital for even heat distribution. Pay attention to the corners. Rotate the pan: Ovens often have hot spots. Rotating the baking pan halfway through the baking time (e.g., at the 15-minute mark for a 30-minute bake) can help ensure all sides cook consistently. Don’t open the oven door too often: Each time you open the oven, the temperature drops, disrupting the baking process. Trust your preheating and visual checks. Use the correct pan size: A 9×13 inch pan is specified for a reason; using a different size will alter the thickness of the bars and thus the baking time and outcome. By implementing these simple yet effective baking tips, you’ll consistently achieve perfectly baked Pistachio Dream Cookie Bars with every batch.
