
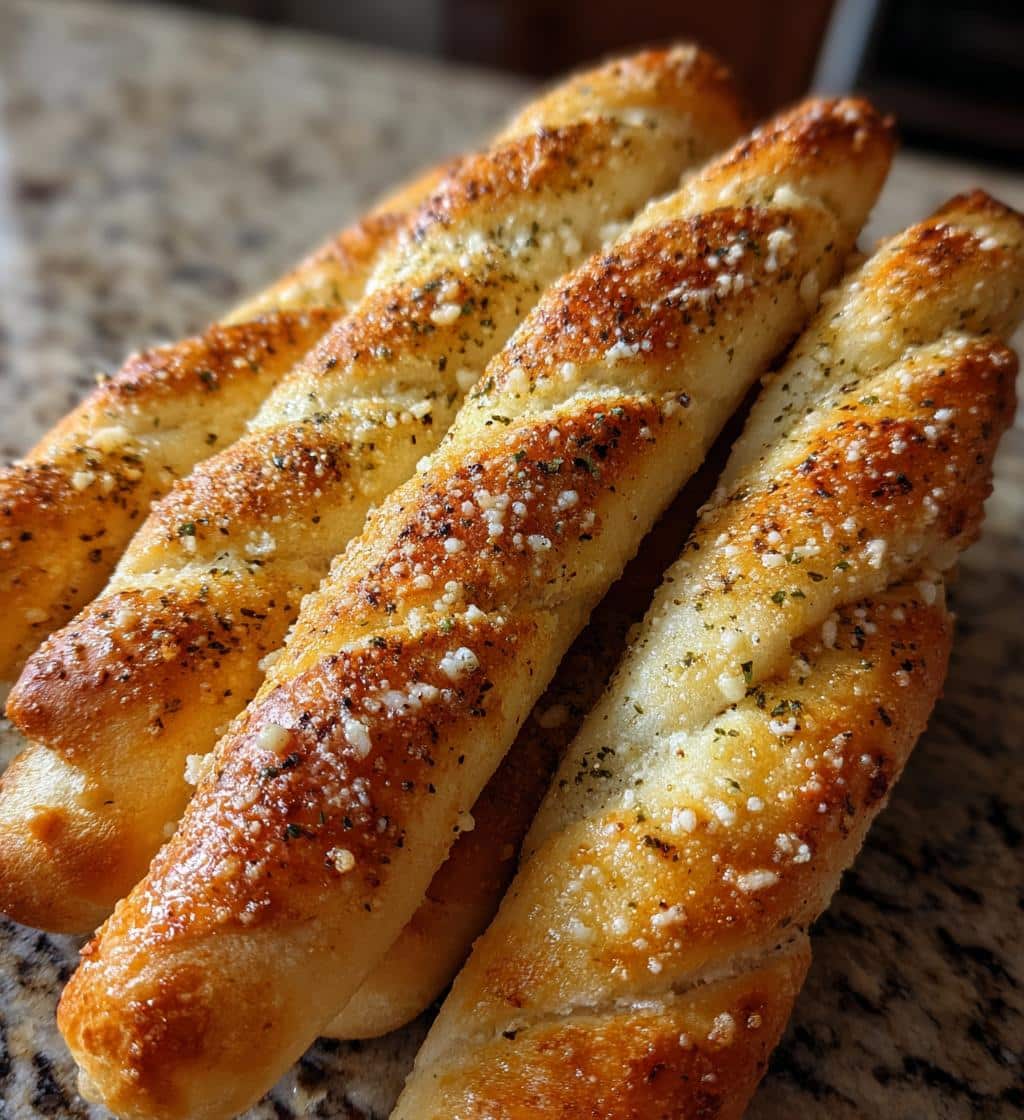
Olive Garden breadsticks are a beloved restaurant staple, and now you can recreate that warm, soft, and garlicky goodness in your own kitchen. This simple copycat recipe helps you craft delicious homemade breadsticks perfect for any meal. Enjoy the inviting aroma and delightful taste with family and friends, making every bite a memorable one.
Key Takeaways
- Follow a step-by-step process for making copycat Olive Garden breadsticks.
- Proper yeast activation and dough rising are crucial for fluffy results.
- The signature garlic butter topping completes the authentic flavor profile.
- Serve breadsticks warm and fresh for the best possible dining experience.
Freshly baked breadsticks bring joy. They pair well with many dishes. The aroma fills your home. This recipe is rewarding. Share this simple comfort.
Olive Garden Breadsticks Copycat: An Overview
Recreating the iconic Olive Garden breadsticks at home is a rewarding culinary adventure that brings restaurant-quality comfort food right to your kitchen. This copycat recipe is designed to demystify the baking process, ensuring that even those new to yeast dough can achieve perfectly soft, airy, and flavorful results. Imagine the delight of serving these warm, savory snacks, brushed with their signature garlic butter, to your family and friends. This experience is more than just baking; it’s about crafting memories and enjoying the simple pleasures of homemade goodness. From the moment the ingredients are combined to the final golden-brown loaves emerging from the oven, every step contributes to a truly satisfying culinary project. These fluffy breadsticks are not only delicious on their own but also serve as an excellent accompaniment to a variety of meals, complementing everything from a robust pasta dish to a light salad. Consider pairing them with a hearty creamy chicken alfredo lasagna rolls for a truly Italian-inspired meal.
Your 7 Steps to Comfort Cooking
Making these homemade breadsticks involves a straightforward, seven-step process that guarantees success and plenty of comfort. It begins with activating your yeast, preparing it to bring life to your dough. Next, you’ll mix and knead the dough, transforming simple ingredients into a smooth, elastic mass. The dough then undergoes its first rise, a crucial period where patience pays off as it doubles in size. After this, you’ll shape the dough into individual sticks, preparing them for their second, shorter rise. Finally, the breadsticks are baked to golden perfection, then immediately coated with the aromatic garlic butter topping. Each step builds on the last, guiding you toward irresistibly delicious results.
What You’ll Need for Breadsticks
To embark on this easy baking journey, gather a few basic yet essential ingredients. You’ll need all-purpose flour, active dry yeast, warm water, sugar, salt, and olive oil for the dough. For that unmistakable Olive Garden touch, you’ll prepare a delectable topping made with melted butter, garlic powder, and a sprinkle of dried parsley. These foundational elements come together to create a yeast dough that is both forgiving and incredibly flavorful. Having these items on hand ensures a smooth and enjoyable baking process, leading to the ultimate family favorite: freshly baked, warm, and utterly delicious breadsticks.
Gather Ingredients for Breadsticks
A successful batch of homemade breadsticks begins with precise ingredient gathering. For your dough, you’ll need standard all-purpose flour, ensuring a consistent texture. Active dry yeast is crucial for leavening, giving your breadsticks their signature fluffiness. Warm water is essential for activating the yeast, and a touch of granulated sugar not only feeds the yeast but also contributes to the bread’s subtle sweetness and golden crust. Fine sea salt or kosher salt balances the flavors, while a little olive oil adds moisture and richness to the dough, making it more pliable and tender. Having these items measured and ready before you begin will streamline the entire process, making the creation of these savory snacks much more enjoyable. Think of it as setting the stage for a delightful baking performance.
Essential Baking Items
Beyond the primary ingredients, having the right tools makes all the difference in your easy baking endeavors. You’ll need a large mixing bowl, preferably one that’s wide enough for kneading. A liquid measuring cup for warm water and dry measuring cups for flour, sugar, and salt are indispensable. A reliable kitchen thermometer can be very helpful for ensuring your water is at the optimal temperature for yeast activation, which is usually between 105-115°F (40-46°C). A sturdy wooden spoon or a stand mixer with a dough hook attachment will make mixing and kneading much easier. Lastly, a clean kitchen towel for covering the dough during its rise times, and baking sheets lined with parchment paper, are essential for perfectly oven-baked breadsticks. These simple items help you manage the yeast dough with confidence, setting you up for success.
Activating Your Yeast Mixture
The first and arguably most critical step in creating light, fluffy breadsticks is properly activating your yeast. Active dry yeast is a living organism, and it needs the right environment to wake up and get to work. Start by measuring out warm water, ideally between 105-115°F (40-46°C). Water that’s too hot can kill the yeast, rendering it ineffective, while water that’s too cold won’t activate it sufficiently. Pour the warm water into a small bowl, then sprinkle in the granulated sugar and your active dry yeast. The sugar provides food for the yeast, helping it to become active more quickly. Gently stir the mixture, then let it sit undisturbed for about 5-10 minutes. During this time, you should observe the mixture becoming foamy and bubbly. This foam on the surface is a clear indication that your yeast is alive and active, ready to leaven your dough.
Getting Dough Ready to Grow
Once your yeast mixture is bubbly and fragrant, it signifies that you’ve successfully created the foundation for a thriving yeast dough. This active mixture is now primed to contribute to the rise and texture of your breadsticks. The bubbles are carbon dioxide being released by the yeast as it consumes the sugar, which is exactly what you want to see. Without proper activation, your breadsticks may turn out dense and heavy, lacking the airy quality that makes them so enjoyable. This initial step sets the stage for the subsequent rising periods, ensuring that your homemade breadsticks will be beautifully light and soft. If your mixture doesn’t foam, it’s best to start over with fresh yeast and ensure your water temperature is correct, as this step is non-negotiable for delicious results. For more details on this fascinating ingredient, you can read about yeast on Wikipedia.
Mixing and Kneading Dough
With your yeast activated and ready, it’s time to bring all the ingredients together to form your breadstick dough. In a large mixing bowl, combine the all-purpose flour and salt. Create a well in the center of the dry ingredients. Pour the activated yeast mixture and the olive oil into this well. Using a sturdy wooden spoon or the dough hook attachment of a stand mixer, begin to mix the ingredients. Start from the center, gradually incorporating the flour from the sides until a shaggy dough forms. Continue to mix until all the flour is hydrated and the dough starts to come together into a coherent mass. This initial mixing is crucial for uniform distribution of ingredients, which directly impacts the final texture of your fluffy breadsticks.
Developing Smooth Breadstick Dough
Once the dough has come together, the next vital step is kneading. Kneading develops the gluten strands in the flour, which are responsible for the dough’s elasticity and the breadstick’s characteristic chewiness. If kneading by hand, turn the shaggy dough out onto a lightly floured surface. Begin to push the dough away from you with the heels of your hands, then fold it back towards you, rotate, and repeat. Continue this process for 8-10 minutes, or until the dough becomes smooth, elastic, and no longer sticky. If using a stand mixer, knead on medium-low speed for 6-8 minutes with the dough hook. You’ll know your dough is properly kneaded when it passes the “windowpane test” – you can stretch a small piece thin enough to see light through it without tearing. This indicates well-developed gluten, ensuring your Olive Garden breadsticks will have a wonderfully soft interior. For a deeper understanding of this technique, refer to the kneading process on Wikipedia.
First Dough Rise: Patience Pays Off
After mixing and kneading, your yeast dough is ready for its first rise, also known as bulk fermentation. This stage is critical for developing flavor and texture in your homemade breadsticks. Lightly oil a clean large bowl, place the dough inside, and turn it once to coat all sides with oil. This prevents the dough from drying out and sticking to the bowl. Cover the bowl tightly with plastic wrap or a clean kitchen towel. Now, find a warm, draft-free spot in your kitchen. Ideal temperatures for rising dough are usually between 70-80°F (21-27°C). A slightly warmed oven (turned off, with just the light on) or a sunny spot can work wonders. Avoid cold drafts, which can inhibit yeast activity and slow down the rise considerably.
Watching Your Dough Double
The duration of the first rise can vary depending on the ambient temperature and the vitality of your yeast, but it typically takes 60-90 minutes. During this time, the yeast consumes sugars in the dough, producing carbon dioxide gas that gets trapped by the gluten network, causing the dough to expand. You’ll know the dough is ready when it has visibly doubled in size. To confirm, gently press two fingers into the dough; if the indentations remain, it’s ready. If they spring back immediately, it needs more time. This period of quiet waiting truly pays off, as it contributes significantly to the fluffy texture and rich flavor of your future Olive Garden breadsticks. Resist the urge to rush this step, as it’s a cornerstone of successful bread baking.
Preheat Oven for Golden Breadsticks
As your shaped breadsticks begin their second rise, it’s the perfect time to preheat your oven. Proper preheating is absolutely crucial for achieving that desirable golden-brown crust and a perfectly cooked interior, reminiscent of true Olive Garden breadsticks. Set your oven to the specified temperature in the recipe, typically around 400°F (200°C), and allow it ample time to reach and stabilize at that heat. Ovens can be deceptive; the indicator light might suggest it’s ready, but the internal temperature can still be fluctuating. Aim for at least 15-20 minutes of preheating once the light comes on to ensure the oven’walls and air are uniformly hot. This consistent heat will provide an initial burst of energy to the dough, known as oven spring, resulting in a lighter, airier texture.
While the oven preheats, prepare your baking sheets. Line them with parchment paper to prevent sticking and make cleanup a breeze. This also ensures even baking across the bottom of your homemade breadsticks. Arranging the breadsticks with enough space between them on the baking sheet is also important. Crowding them can lead to uneven baking and prevent them from developing that beautiful golden exterior. By taking the time to properly preheat your oven and prepare your baking surfaces, you’re setting the stage for truly impressive, oven-baked results that will make these copycat breadsticks a proud addition to your table.
Shaping Your Olive Garden Breadsticks
Once your dough has completed its first rise and doubled in size, it’s time for the fun part: shaping those distinctive Olive Garden breadsticks. Gently punch down the dough to release the accumulated gases, then turn it out onto a lightly floured surface. Knead it briefly for about 30 seconds to deflate it evenly. The goal here is to create uniform pieces that will bake consistently. Using a sharp knife or a dough cutter, divide the dough into equally sized portions. For classic breadstick size, aiming for about 1.5 to 2 ounces per piece usually works well. This precise measurement helps ensure that all your savory snacks bake at the same rate and have a similar appearance.
Creating Perfect Sticks
Take one portion of dough and roll it between your palms or on a lightly floured surface to form a rope about 6-8 inches long and 1 inch thick. The key is to apply gentle, even pressure to create a smooth, cylindrical shape without stretching the dough too thin, which can make them tough. Repeat this process with the remaining dough portions, arranging the shaped breadsticks on your prepared baking sheets, leaving about 1 inch of space between each. This spacing is vital to allow for their second rise and to prevent them from sticking together during baking. This step ensures that each breadstick gets ample space to achieve its signature golden hue and fluffy texture. These wonderful crispy parmesan chicken with a rich garlic sauce or a hearty soup.
Second Rise for Fluffy Breadsticks
With all your breadsticks shaped and on the baking sheets, it’s time for their second rise, also known as proofing. Loosely cover the baking sheets with plastic wrap or a clean kitchen towel to prevent the dough from drying out. Place them back in a warm, draft-free spot for another 20-30 minutes. This second rise is shorter than the first but equally important for achieving truly fluffy breadsticks. During this period, the yeast gets a final burst of activity, filling the dough with air pockets that contribute to the light and airy interior structure. You’ll notice the breadsticks will appear visibly plumper and slightly larger. Do not over-proof, as this can lead to a deflated texture during baking. A gentle touch and keen observation will lead to perfectly risen dough, ready for the oven.
Baking Golden Olive Garden Breadsticks
Once your breadsticks have completed their second rise and your oven is fully preheated, it’s time for the moment of truth: baking them to golden perfection. Carefully transfer the baking sheets to the preheated oven. Ensure there’s good air circulation around them, avoiding overcrowding. The high initial heat of the oven causes a phenomenon called “oven spring,” where the yeast gets a final surge of activity, making the breadsticks puff up beautifully in the first few minutes of baking. This contributes significantly to their light and airy texture, making them a true comfort food. Resist the urge to open the oven door frequently, as this can cause temperature fluctuations that negatively impact the rise and crust development. Trust in the process, and let the heat do its work.
Oven Time for Perfection
Bake your Olive Garden breadsticks for approximately 12-18 minutes, or until they turn a beautiful golden brown color. The exact baking time can vary depending on your oven and the thickness of your breadsticks, so keep a close eye on them, especially towards the end of the baking cycle. They should be firm to the touch and sound hollow when tapped on the bottom. Once baked, immediately remove the breadsticks from the oven. This swift action is crucial for the next step – applying the signature garlic butter topping – which is best done while they are piping hot. A perfectly oven-baked breadstick has a crispy exterior and a soft, tender interior, delivering that authentic experience. This final baking phase brings together all your efforts, transforming simple yeast dough into a delightful treat.
Crafting the Garlic Butter Topping
The signature garlic butter topping is what truly elevates these homemade breadsticks from simple baked goods to the beloved Olive Garden classic. This simple yet incredibly flavorful mixture is what gives the breadsticks their irresistible aroma and taste. To prepare it, you’ll need unsalted butter, garlic powder, and a touch of dried parsley flakes. Melt the butter gently in a small saucepan or microwave-safe bowl. Once melted, stir in the garlic powder. The garlic powder infuses the butter with that pungent, savory flavor without the raw bite of fresh garlic, making it kid-friendly and universally appealing. The dried parsley flakes add a pop of color and a subtle herbaceous note, enhancing the overall presentation and taste. This combination creates a rich, aromatic glaze that seeps into the warm bread, making every bite a pure delight.
The Signature Olive Garden Touch
Timing is key when applying the garlic butter topping. As soon as your golden Olive Garden breadsticks emerge from the oven, they should be immediately brushed generously with the warm garlic butter mixture. The heat of the fresh breadsticks helps the butter to melt and soak right into the crust, infusing them with savory goodness. Don’t be shy with the butter; it’s what makes these copycat breadsticks so incredibly moist and flavorful. You can use a pastry brush for even application, ensuring every surface is glistening and aromatic. This step is where the magic truly happens, transforming your oven-baked creations into the authentic experience you crave. The fragrant steam rising from the buttered breadsticks is a testament to their deliciousness, making them the ultimate family favorite. This garlic butter is also fantastic on other dishes, like a cheesy chicken and rice casserole.
Serving Your Warm Breadsticks
The best way to enjoy your freshly baked Olive Garden breadsticks is immediately after they’ve been brushed with that irresistible garlic butter topping. There’s nothing quite like the experience of biting into a warm, soft, and garlicky breadstick straight from the oven. The warmth enhances the flavors of the butter and garlic, and the texture is at its peak—light, fluffy, and slightly chewy. Gather your family and friends, because these savory snacks are designed for sharing. They effortlessly complement a wide array of meals, from rich pasta dishes to crisp salads and comforting soups. The enticing aroma alone will draw everyone to the table, making these homemade breadsticks a true centerpiece of any meal. This simple act of serving fresh, warm bread creates an atmosphere of hospitality and warmth that is deeply satisfying.
Best Enjoyed Fresh
While these copycat breadsticks are certainly delicious at any temperature, their true glory shines when they are still warm. The soft interior, slightly crispy crust, and melted garlic butter create a sensory experience that is hard to beat. Consider serving them in a bread basket lined with a cloth napkin to help retain their heat. They are fantastic as an appetizer before a main course, or as a side dish to soak up delicious sauces. This easy baking recipe ensures you can have this delightful comfort food ready whenever the craving strikes. For more bread ideas, check out our bread category. Don’t forget to capture your delicious creations and share them with us on Instagram or find inspiration on Pinterest!
Storing Leftover Breadsticks
While Olive Garden breadsticks are undoubtedly best enjoyed fresh and warm, it’s sometimes inevitable to have a few delightful leftovers. Proper storage is key to maintaining their deliciousness and preserving their texture for a little longer. Allow the breadsticks to cool completely to room temperature before storing them. Storing them while still warm can trap moisture, leading to sogginess and a shorter shelf life. Once cool, place them in an airtight container or a resealable plastic bag. This barrier helps prevent them from drying out and becoming stale too quickly. You can store them at room temperature on your counter for up to 2-3 days. For longer storage, you can refrigerate them for up to a week.
Keeping Them Delicious
To revive refrigerated or day-old homemade breadsticks and bring back their freshly baked appeal, reheating is simple. Preheat your oven or toaster oven to 300°F (150°C). Place the breadsticks directly on a baking sheet or toaster oven rack. Warm them for about 5-7 minutes, or until they are heated through and have softened. If you’re short on time, a quick zap in the microwave for 15-30 seconds per breadstick can warm them up, but be cautious as this can sometimes make them a little chewier. You can even brush them with a tiny bit more melted butter and garlic powder after reheating for an extra boost of flavor. With these simple storage and reheating tips, you can extend the enjoyment of your delicious copycat Olive Garden breadsticks, ensuring every last one is savored.
Why Make These Copycat Breadsticks?
There are countless reasons to make these Olive Garden breadsticks copycat recipe at home, far beyond just satisfying a craving. The primary benefit is undoubtedly the freshness. Nothing compares to the aroma and taste of oven-baked bread that has just come out of your own kitchen. You control the ingredients, ensuring quality and avoiding any unwanted additives often found in commercially prepared versions. This easy baking project offers immense satisfaction; the process of transforming simple flour and yeast into something so delicious is incredibly rewarding. It’s a fantastic way to engage with the art of baking, even for beginners, as the recipe is forgiving and the results consistently impressive. Plus, making a batch of these fluffy breadsticks is often more cost-effective than buying them, allowing you to enjoy this family favorite more frequently.
Simple Comfort Cooking at Home
Ultimately, making these homemade breadsticks is about embracing simple comfort cooking. It’s about creating warmth and deliciousness in your home, providing a comforting touch to any meal. Whether you’re hosting a dinner party, preparing a weeknight meal, or simply want a savory snack, these breadsticks fit the bill perfectly. They bring a restaurant-quality experience to your table without the need to leave your house. The joy of sharing a warm basket of these garlic butter-infused treats with loved ones creates lasting memories. It’s a culinary hug in bread form, proving that some of the best flavors come from the heart of your own kitchen. This recipe isn’t just about food; it’s about the feeling of home, connection, and the sheer delight of a freshly baked, utterly delicious treat.