
Classic Piña Colada is a beloved tropical drink, perfect for sunny days or any time you crave a refreshing escape. This simple recipe shows you how to create the iconic frozen cocktail at home. Enjoy the sweet blend of pineapple, coconut, and rum. It’s truly a taste of paradise in a glass.
Key Takeaways
- Quickly prepare a classic Piña Colada in just five minutes.
- Uses simple ingredients like white rum, coconut cream, and pineapple juice.
- Achieve perfect, smooth texture with proper blending techniques.
- Customize with non-alcoholic options or fruity variations.
- Learn tips for garnishing, serving, and storing your drink.
This drink brings island vibes. It is sweet and creamy. Perfect for any warm occasion. Make it easily at home. Enjoy your delightful, refreshing sip.
Make The Best Classic Piña Colada
Creating the best classic piña colada at home is simpler than you might imagine, bringing the vibrant flavors of the Caribbean directly to your kitchen. This tropical drink is renowned for its creamy texture and sweet, refreshing taste, making it a perfect choice for entertaining guests or simply treating yourself. Our straightforward guide ensures that even novice mixologists can achieve a truly authentic and delicious result. We focus on balancing the key elements of a perfect piña colada, from selecting the right ingredients to mastering the blending process. Getting the proportions right is crucial for that signature balance of sweetness and tang, complemented by the smooth kick of rum. Think about those moments when you’ve craved a getaway; this recipe aims to deliver that feeling in a glass.
Total Time: Just Five Minutes
One of the most appealing aspects of this classic piña colada recipe is its incredible speed. From gathering your ingredients to the first delightful sip, you’re looking at a total time of just five minutes. This makes it an ideal choice for impromptu gatherings, a quick after-work treat, or when you simply can’t wait to cool down on a warm day. The efficiency comes from using a high-powered blender, which does most of the heavy lifting, ensuring a smooth, uniform consistency without any fuss. No complex steps or lengthy chilling times are needed, just pure, instant gratification.
Serves Two Thirsty People
This recipe is perfectly scaled to serve two thirsty people, making it great for sharing with a friend, partner, or enjoying a generous serving yourself. The quantities are designed to fit most standard blenders, providing enough volume for two full, satisfying glasses. If you’re hosting a larger crowd, simply double or triple the recipe to accommodate more guests. Preparing larger batches is just as quick and easy, ensuring everyone gets a taste of this delightful tropical escape. For other delicious recipes to enjoy with company, consider preparing a delightful Crispy Parmesan Chicken with a Rich Garlic Sauce to pair with your drinks.
Easy Classic Piña Colada Recipe
Our easy classic piña colada recipe demystifies what many consider a complex cocktail, transforming it into an accessible and enjoyable home project. The goal is to provide a clear, step-by-step approach that eliminates any guesswork, allowing you to focus on the pleasure of making and savoring your drink. This recipe prioritizes simplicity without compromising on the authentic, rich flavor profile that defines a true piña colada. We highlight the essential components and techniques, ensuring that every batch you make will be consistently delicious. It’s a fantastic way to bring a touch of the tropics into your everyday life, proving that you don’t need to be a professional bartender to create outstanding cocktails.
Simple Ingredients For Success
The beauty of this classic piña colada lies in its incredibly simple ingredients. You only need a handful of readily available items to achieve a spectacular result. The core components include white rum, creamy coconut cream, and tangy pineapple juice, all harmonized with ice. Using high-quality ingredients, particularly fresh pineapple juice, can make a noticeable difference in the final taste, elevating the drink from good to extraordinary. We’ll delve into how each ingredient contributes to the overall flavor and texture, ensuring you understand the foundation of this beloved cocktail. This straightforward approach encourages anyone to try their hand at making this popular tropical drink.
Quick Preparation, No Cooking
Forget about lengthy prep times or complicated cooking processes. This classic piña colada recipe boasts quick preparation with absolutely no cooking involved. The entire process is about blending everything together until smooth and creamy. This makes it an ideal choice for spontaneous celebrations or when you need a refreshing drink in a hurry. The minimal effort required means you can spend more time relaxing and less time in the kitchen. Just gather, measure, blend, and serve. This ease of preparation is a key reason why the piña colada remains a perennial favorite among quick blender recipes.
Gather Your Piña Colada Ingredients
The secret to a truly outstanding classic piña colada begins with gathering the right ingredients. Quality matters here, as each component plays a vital role in creating the signature taste and texture. Before you even think about blending, take a moment to ensure you have everything on hand and that your chosen items are fresh and of good quality. This simple step can significantly impact the final flavor of your tropical drink. We recommend checking expiration dates, especially for coconut cream, to guarantee freshness. Consider refrigerating your liquids beforehand if you have extra time; this helps create an even colder frozen drink.
Essential Items For Your Drink
To make a classic piña colada, you will need:
- White Rum: A light, crisp rum is traditional and allows the fruit flavors to shine.
- Coconut Cream: This provides the rich, creamy texture and distinct coconut flavor. Do not confuse it with coconut milk, which is thinner.
- Pineapple Juice: Freshly squeezed pineapple juice is always best for a vibrant flavor, but high-quality canned juice works too.
- Frozen Pineapple Chunks: These are crucial for the frosty, thick consistency without watering down the flavor.
- Ice: Adds to the coldness and helps achieve the desired frozen drink consistency.
- Sweetener (Optional): A touch of simple syrup or agave nectar can be added if you prefer a sweeter drink.
Having these essential items ready ensures a seamless and successful piña colada creation. For more beverage ideas, check out our drinks category.
Key Flavors: Rum And Coconut
The iconic taste of a piña colada is defined by the harmonious marriage of rum and coconut. The white rum provides an alcoholic base that is subtle enough not to overpower the delicate fruit and coconut notes, yet strong enough to give the drink its characteristic kick. It contributes a slight sweetness and a warming finish. The coconut cream is arguably the star, delivering an unparalleled richness and creamy mouthfeel that is instantly recognizable. This ingredient is responsible for the drink’s luxurious body and its deep, tropical aroma. Together with the bright, tangy pineapple, these key flavors create a symphony that transports you straight to a sun-drenched beach, making it a truly exceptional cocktail experience.
Simple Steps To Make Your Colada
Making a classic piña colada is surprisingly straightforward, relying heavily on the power of your blender. There are no complicated techniques or special bar tools required, just a few simple steps to transform your ingredients into a luscious, frozen drink. The key is to ensure all components are properly combined to achieve that signature smooth and creamy consistency. This process is designed for efficiency, so you can enjoy your delicious cocktail almost immediately after deciding to make it. It’s a quick preparation method that consistently yields excellent results, perfect for any occasion when a tropical escape is desired. To learn more about the history of this popular Piña Colada, consult its Wikipedia page.
Add All To High-Powered Blender
The first step is arguably the simplest: gather all your measured ingredients and add them directly into a high-powered blender. This includes your white rum, coconut cream, pineapple juice, frozen pineapple chunks, and ice. For best results, it’s often helpful to add the liquids first, then the frozen ingredients. This allows the blades to move more freely, preventing air pockets and ensuring a smoother blend. If your blender has a tamper, keep it handy, as you might need it to push down the thicker ingredients towards the blades, especially when starting with a lot of frozen fruit.
Blend Until Completely Smooth And Creamy
Once all ingredients are in the blender, secure the lid and begin blending. Start on a low speed to break up the ice and frozen pineapple, then gradually increase to a high speed. The goal is to blend until the mixture is completely smooth and creamy, with no discernible ice shards or lumps of fruit. This usually takes about 30 to 60 seconds, depending on your blender’s power. Listen for the sound of the blender; it should go from a choppy noise to a continuous hum as the mixture becomes fully emulsified. The texture should resemble a thick milkshake or a soft-serve ice cream.
Pour Into Chilled Glasses
As soon as your piña colada reaches the desired smooth and creamy consistency, it’s time to serve. Pour the luscious mixture into chilled glasses immediately. Chilling your glasses beforehand helps to keep the piña colada colder for longer, enhancing the refreshing experience and preventing it from melting too quickly. Tall, elegant hurricane glasses or classic highball glasses are excellent choices, but any glass will do. The visual appeal of a perfectly poured, frosty piña colada is part of its charm, so make sure to fill your glasses generously and get ready to enjoy this delightful tropical drink.
Blend The Classic Piña Colada Smoothly
Achieving the perfect texture is paramount when making a classic piña colada. It’s not just about mixing ingredients; it’s about transforming them into a velvety, uniform frozen drink that glides over the palate. A well-blended piña colada should be thick enough to hold a garnish, yet smooth enough to sip easily through a straw. The art of blending involves patience and sometimes a bit of finessing to ensure every crystal of ice and every piece of frozen fruit is thoroughly pulverized and integrated with the liquids. This section will guide you through the techniques to ensure your piña colada is always perfectly smooth and creamy, avoiding common pitfalls like an icy, chunky, or overly thin consistency. For more visual inspiration on perfect drinks, check out our Pinterest page.
Achieving Perfect Drink Texture
The perfect piña colada texture is often described as thick, smooth, and slushy, without being too watery or too stiff. To achieve this, a strong blender is your best friend. Start by adding a decent amount of ice along with your frozen pineapple. The ice helps to create that desired icy, yet smooth, consistency. If your mixture seems too thick and the blender blades are struggling, resist the urge to add too much extra liquid. Instead, try adding a small amount of extra ice or a splash more pineapple juice, a tablespoon at a time, until the blades can move freely and the mixture starts to swirl smoothly. Over-blending can also warm the drink, so keep an eye on it.
Stir And Re-Blend If Needed
Sometimes, even with a high-powered blender, you might find that some ingredients cling to the sides or bottom, or that the consistency isn’t quite uniform. If you notice this, stop the blender, remove the lid, and use a spatula or spoon to stir the mixture, pushing any unblended pieces down towards the blades. Be extremely careful when doing this and ensure the blender is completely off before stirring. After stirring, secure the lid and re-blend for another 10-15 seconds. This short re-blend can often resolve any texture issues, ensuring your classic piña colada is consistently smooth and creamy from the first sip to the last.
Garnish And Serve Your Piña Colada
The presentation of your classic piña colada is almost as important as its taste. A beautifully garnished drink instantly elevates the experience, making it feel more festive and inviting. Garnishes add a pop of color and an extra layer of tropical charm, enhancing the overall aesthetic appeal of your frozen drink. This section will explore traditional garnishes and offer some fun, creative presentation ideas to make your piña colada truly stand out. Remember, the goal is to create a visual treat that complements the delicious flavors within the glass, encouraging anticipation and delight with every serving. Share your creations with us on Instagram!
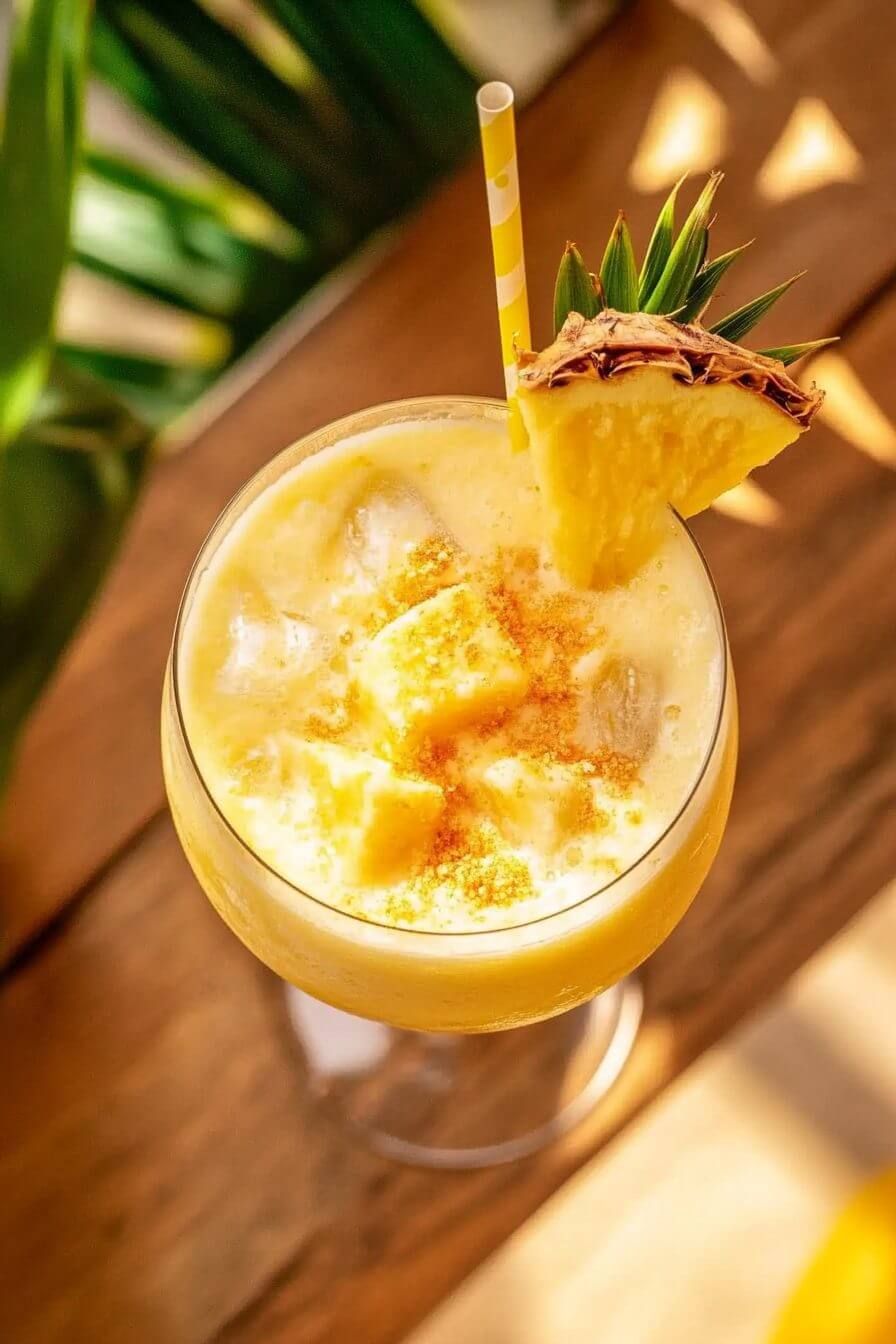
Classic Garnishes: Pineapple And Cherry
The most iconic garnishes for a classic piña colada are a fresh pineapple wedge or slice and a vibrant maraschino cherry. A small wedge of pineapple can be cut to sit on the rim of the glass, or a larger slice can be notched to hang over the edge. The maraschino cherry, with its bright red hue, offers a beautiful contrast against the creamy white of the drink, adding a playful touch. Sometimes, a fresh pineapple leaf is also included to provide a touch of greenery and an extra tropical flourish. These garnishes are simple, effective, and instantly signal the drink’s tropical origins.
Fun Presentation Ideas To Try
Beyond the classic pineapple and cherry, there are many fun ways to present your piña colada. Consider adding a small paper umbrella for a truly retro, vacation-vibe feel. For an extra touch of flavor and visual appeal, you could toast some coconut flakes and sprinkle them over the top of the drink or rim the glass with them. A drizzle of raspberry or strawberry syrup can add a lovely color swirl and a hint of fruity sweetness. For a more sophisticated look, use a long cocktail skewer to thread fresh berries or a mini fruit kebab. Whatever your choice, a little creativity in presentation can transform your delicious piña colada into a memorable centerpiece.
How To Make Piña Colada Without Alcohol
The classic piña colada’s delicious blend of pineapple and coconut flavors is so appealing that it’s frequently enjoyed by everyone, regardless of whether they consume alcohol. Creating a non-alcoholic version, often called a “virgin piña colada” or “piña colada mocktail,” is incredibly simple and yields a drink that is just as refreshing and satisfying as its alcoholic counterpart. This option ensures that children, designated drivers, or anyone opting out of alcohol can still fully participate in the tropical fun. The beauty is that the core flavors are so strong and delightful on their own that removing the rum doesn’t diminish the drink’s appeal; it merely changes its character slightly, making it a fantastic family-friendly beverage. This is a perfect example of a delicious frozen drink that can be customized.
Skip The Rum, Add Extra Juice
To make a delicious non-alcoholic piña colada, the process is straightforward: simply skip the white rum entirely. To compensate for the slight liquid reduction and to maintain a balanced flavor profile, you can add an extra splash of pineapple juice or even a bit of coconut water. This ensures the drink retains its refreshing quality and appropriate consistency. You can also experiment with a dash of non-alcoholic rum flavoring if you wish to mimic the taste more closely, though it’s entirely optional. The primary flavors of coconut cream and pineapple are strong enough to carry the drink beautifully on their own, making it a perfectly enjoyable virgin cocktail for any occasion. For another delightful, rum-free treat, consider trying a blueberry muffin cookies recipe.
Delicious Piña Colada Variations To Try
While the classic piña colada is undeniably perfect, its versatile flavor profile lends itself beautifully to creative variations. Experimenting with different fruits, sweeteners, or even adding a touch of spice can transform this beloved tropical drink into something new and exciting. These variations allow you to customize the piña colada to suit different tastes, seasons, or dietary preferences, expanding its appeal beyond the traditional rendition. Whether you’re looking for a fruitier twist, a lighter version, or even a dessert-inspired treat, the piña colada provides a fantastic base for culinary innovation. Don’t hesitate to play with the ingredients and find your new favorite combination.
Fruity Twists: Strawberry Or Mango
Adding other fruits is one of the most popular ways to create delicious piña colada variations. For a vibrant pink drink, try a Strawberry Piña Colada by blending in a cup of fresh or frozen strawberries along with the classic ingredients. The sweet-tart strawberries complement the pineapple and coconut wonderfully. Alternatively, a Mango Piña Colada offers a rich, tropical sweetness. Just add half a cup of frozen mango chunks to your blender. Other fruits like banana, peach, or even a mixed berry blend can also create unique and delightful fruity twists, adding complexity and a burst of new flavors to your frozen drink experience.
Lighter Or Dessert Options
Beyond fruity twists, you can adapt your piña colada to be either lighter or more decadent, depending on your preference. For a lighter option, consider using light coconut milk instead of coconut cream, or replace some of the pineapple juice with sparkling water for a fizzier, less dense drink. You can also reduce or omit added sweeteners. On the other end of the spectrum, for a dessert option, think about adding a scoop of vanilla ice cream to the blend for an extra creamy, rich treat that can double as a decadent dessert. A swirl of chocolate syrup or a sprinkle of toasted coconut flakes on top can further enhance its dessert-like appeal, making it a perfect end to any meal. For another sweet treat, check out this Quick Italian Cream Cake recipe.
Store Your Piña Colada The Best Way
While a classic piña colada is always best enjoyed fresh and immediately after blending, sometimes you might have leftovers or wish to prepare a batch in advance. Knowing how to properly store your piña colada ensures that you can savor its delicious flavors later without significant loss of quality. The main challenges with storing frozen drinks are maintaining consistency and preventing separation. With a few simple tips, you can keep your piña colada fresh in the fridge for a short period or even freeze it for longer-term enjoyment, minimizing waste and maximizing your tropical drink pleasure. Proper storage allows for greater flexibility in your entertaining or personal indulgence.
Keep It Fresh In The Fridge
If you have leftover piña colada and plan to consume it within a day or two, storing it in the fridge is your best bet. Pour the remaining drink into an airtight container and place it in the refrigerator. Be aware that the mixture might separate a bit, with the coconut cream rising to the top. This is normal. When you’re ready to enjoy it again, simply pour it back into your blender and give it a quick re-blend for about 10-15 seconds. This will emulsify the ingredients once more and restore its smooth, creamy consistency, bringing it back to nearly its original state for a refreshing chilled drink.
Freeze Leftovers For Later Enjoyment
For longer-term storage, freezing your leftover piña colada is an excellent option. Pour the mixture into ice cube trays, a freezer-safe container, or even popsicle molds. Freezing it in smaller portions makes it easy to thaw or re-blend only what you need. When you crave another taste of your tropical drink, simply take out the frozen piña colada, let it thaw slightly, and then put it back into your blender with a little extra ice or pineapple juice to achieve that perfectly smooth and creamy consistency again. This method allows you to enjoy the classic piña colada whenever the mood strikes, ensuring no delicious drop goes to waste.
Piña Colada Nutrition Information
Understanding the nutrition information for a classic piña colada can be helpful for those monitoring their dietary intake. As a sweet, creamy, and often alcoholic tropical drink, it typically contains a notable calorie count, primarily from the rum, coconut cream, and pineapple juice, which contribute sugars and fats. While delicious and refreshing, a piña colada is best enjoyed in moderation as part of a balanced diet. It’s a treat rather than an everyday staple, offering a delightful indulgence for special occasions or a relaxing moment. Keep in mind that homemade versions allow for some control over ingredients, potentially enabling minor adjustments for calorie or sugar content.
Calories Per Serving: 350kcal
A typical classic piña colada serving, prepared with standard ingredients including white rum, coconut cream, pineapple juice, and ice, generally contains around 350 kilocalories (kcal). This calorie count can vary slightly depending on the exact brands of ingredients used, whether additional sugar or syrup is added, and the specific portion size. The coconut cream contributes significantly to the fat content and, consequently, the calories, while the pineapple juice and any added sweeteners contribute to the sugar content. If you’re looking to reduce the calorie count, consider using light coconut milk, reducing the amount of added sweetener, or opting for the non-alcoholic version, which naturally cuts down on the rum calories. Additionally, being mindful of garnish choices can also play a small role in the overall nutritional profile of your frozen drink.
Quick Piña Colada Recipe In Minutes
Life can be hectic, but that doesn’t mean you have to sacrifice delicious, homemade tropical drinks. Our quick piña colada recipe is specifically designed for speed and convenience, allowing you to whip up this creamy, frosty delight in mere minutes. This approach focuses on minimal fuss and maximum flavor, ensuring that a refreshing escape is always within reach. Whether you’re suddenly hit by a craving for a sweet, coconut-pineapple concoction or need a last-minute drink for an unexpected guest, this recipe delivers without delay. It’s the perfect solution for anyone who loves the taste of a classic piña colada but doesn’t have a lot of time to spare for preparation. The blend of simple ingredients and quick steps makes it an ideal blender recipe for busy schedules.
Enjoy Your Tropical Escape Fast
The promise of this recipe is simple: enjoy your tropical escape fast. In just five minutes, you can transform a few basic ingredients into a luxurious, vacation-worthy beverage. This rapid preparation time is achieved by leveraging the efficiency of a good blender, which quickly processes all components into a smooth and creamy consistency. There’s no cooking, no complicated layering, and no extensive chilling required. Just a few swift steps from bottle to glass, allowing you to sit back, relax, and savor the sweet, refreshing taste of a perfectly made classic piña colada without any undue waiting. It’s the ultimate shortcut to instant relaxation and a delicious frozen drink.
Expert Tips For Perfect Piña Colada
While the basic steps for making a classic piña colada are simple, incorporating a few expert tips can elevate your drink from good to truly exceptional. These insights come from experience, helping to refine the texture, enhance the flavor, and improve the overall presentation of your tropical drink. Paying attention to these small details can make a significant difference in the final outcome, ensuring every piña colada you make is as perfect as one from a high-end resort. From temperature control to subtle flavor additions, these tips will guide you in crafting a piña colada that consistently impresses and delights. Master these nuances, and you’ll be known for making the best frozen drink around.
Chilled Glasses Make A Difference
One of the simplest yet most effective expert tips for a perfect piña colada is to use chilled glasses. This small preparatory step can significantly impact the enjoyment of your tropical drink. When a cold beverage is poured into a warm glass, the temperature of the drink rises, causing it to melt faster and potentially become watery. Chilling your glasses in the freezer for at least 15-20 minutes before serving helps to maintain the piña colada’s frosty temperature and thick, creamy consistency for longer. It enhances the refreshing sensation and extends the pleasurable drinking experience, ensuring every sip is as cold and delightful as the first.
Try A Toasted Coconut Rim
For an extra touch of gourmet flair and a wonderful aromatic boost, consider adding a toasted coconut rim to your piña colada glasses. This simple addition elevates both the visual appeal and the flavor profile of the drink. To prepare, lightly toast some shredded coconut in a dry pan over medium heat until golden brown and fragrant. Let it cool, then moisten the rim of your chilled glass with a pineapple wedge or a damp cloth, and gently dip the rim into the toasted coconut. The subtle crunch and rich, nutty flavor of the toasted coconut beautifully complement the sweet and creamy notes of the piña colada, adding an extra layer of tropical indulgence that will impress your guests.