
Apple slab pie offers a fantastic way to serve a crowd-pleasing dessert. This easy apple recipe transforms classic flavors into a convenient sheet pan format, perfect for any gathering. With a flaky homemade crust, sweet glaze, and tender fruit filling, it becomes a delicious dessert. Get ready to bake a family favorite that everyone will adore.
Key Takeaways
- Enjoy a simple, large-format apple pie recipe suitable for gatherings.
- Learn to craft a flaky homemade crust and a flavorful fruit filling.
- Master the techniques for baking, glazing, and serving your slab pie.
- Explore variations, serving ideas, and nutritional information for this treat.
Baking apple pie is truly rewarding. This slab version simplifies things. You can feed many guests. Everyone loves a warm slice. Enjoy this delightful dessert creation.
Make Simple Yummy Apple Slab Pie Easily
Making a simple yummy apple slab pie is an enjoyable experience that yields a generous, delicious dessert perfect for feeding a crowd. Unlike traditional round pies, a slab pie is baked in a sheet pan, offering more servings and a streamlined cutting process. This easy apple recipe is designed to be approachable for home bakers of all skill levels, ensuring a fantastic outcome every time. Whether you’re hosting a holiday meal, a casual get-together, or simply want a substantial homemade treat, this slab pie recipe fits the bill beautifully. Its convenient format makes it a great party treat, easy to transport and serve. The aroma of baking apples and cinnamon will fill your home, promising a truly satisfying experience from start to finish. We focus on clear steps to make your baking journey smooth and successful.
Delicious Recipe for All Occasions
This delicious recipe is incredibly versatile, making it ideal for various occasions. From festive holiday celebrations like Thanksgiving and Christmas to casual summer barbecues or cozy family dinners, apple slab pie always receives rave reviews. Its large size means you won’t have to bake multiple pies, saving you time and effort. It’s a comforting classic that brings warmth and joy to any table. The combination of a buttery crust, sweet-tart apple filling, and a delicate glaze creates a perfect harmony of textures and flavors that will become a cherished family favorite. For more delightful sweet creations, explore our desserts category, where you’ll find other inspiring ideas to complement any meal.
Gather Ingredients for Yummy Apple Pie
The foundation of any great pie lies in its ingredients. For your yummy apple slab pie, selecting fresh, high-quality items is key to achieving that perfect balance of flavor and texture. This section details what you’ll need for the crust, the flavorful filling, and the sweet finishing glaze. Having everything ready before you start baking will ensure a smooth process and a stress-free baking experience. Think of this as your mise en place for a wonderful sheet pan pie.
Essential Crust and Filling Items
For the crust, you’ll need all-purpose flour, cold unsalted butter (cut into cubes for flakiness), a pinch of salt, and ice water. These ingredients come together to create a tender, buttery foundation that holds up beautifully to the generous apple filling. The filling calls for a medley of fresh apples, granulated sugar, light brown sugar for depth, cornstarch or all-purpose flour as a thickener, ground cinnamon, nutmeg, and a splash of lemon juice to brighten the flavors and prevent browning. A small amount of butter dotted over the apples before baking adds richness. Choosing good quality butter for the crust is especially important as it contributes significantly to the overall taste and texture.
Best Apples for Tasty Slab Pie
The choice of apples significantly impacts the taste and texture of your slab pie. For a truly tasty slab pie, opt for a mix of sweet and tart apples that hold their shape well during baking. Excellent choices include Granny Smith (for tartness), Honeycrisp, Fuji, Braeburn, and Golden Delicious (for sweetness and firmness). Using a combination ensures a complex flavor profile that prevents the pie from being too sweet or too bland. Avoid apples that become mushy when cooked, as they can result in a watery filling. A mix of two or three varieties typically yields the best results, creating a vibrant fruit filling. Learn more about the history and varieties of apples on Wikipedia’s apple pie page.
Glaze Essentials for Sweet Finish
A simple yet delicious glaze adds the perfect sweet finish to your baked apple slab pie. For this, you’ll need powdered sugar (also known as confectioners’ sugar), a touch of milk (dairy or non-dairy works), and a hint of vanilla extract. For a festive touch, you might also consider adding a pinch of ground cinnamon or a tiny dash of nutmeg to the glaze. The glaze should be whisked until smooth and pourable, but not too thin. It adds an extra layer of sweetness and a beautiful visual appeal, making your yummy pie even more inviting. This sweet glaze will set nicely, adding just the right amount of sugary shine.
Preparing Crust for Your Slab Pie
The crust is the backbone of your apple slab pie, providing a delicious counterpoint to the sweet, tender apple filling. A well-made homemade crust offers unparalleled flakiness and buttery flavor that truly makes this dessert shine. While store-bought crusts can be a time-saver, taking the extra step to prepare your own dough is highly rewarding and contributes significantly to the “yummy” factor of your pie. Ensure your butter is very cold when preparing the dough, as this is crucial for achieving a flaky texture. Working quickly helps prevent the butter from melting, maintaining those distinct layers. This simple pie recipe makes crust preparation straightforward.
Rolling Out Dough to Size
Once your pie dough is chilled, it’s time to roll it out. Divide your dough into two portions, one slightly larger for the bottom crust and the other for the top. Lightly flour your work surface and rolling pin. Roll the larger portion into a rectangle that is roughly 2-3 inches larger than your 9×13 inch sheet pan on all sides. This extra dough is needed to create an overhang for crimping. Aim for an even thickness, about 1/8 to 1/4 inch, to ensure uniform baking. If the dough gets too warm and sticky, don’t hesitate to pop it back into the refrigerator for 10-15 minutes to firm up. Precision in rolling out the dough ensures your sheet pan pie will be well-formed and visually appealing.
Fitting Crust into Sheet Pan
Carefully transfer the rolled-out bottom crust to your 9×13 inch sheet pan. The easiest way to do this is to gently roll the dough around your rolling pin and then unroll it over the pan. Press the dough gently into the corners and up the sides of the pan, making sure there are no air bubbles trapped underneath. Allow the excess dough to hang over the edges. This overhang will be used later to seal the pie. For a truly professional finish, you can trim the edges slightly, leaving about an inch of overhang. Chill the lined sheet pan while you prepare the filling; this helps prevent the crust from shrinking during baking, contributing to a perfect homemade crust. Remember, this step is vital for a structurally sound and delicious dessert.
Making the Apple Pie Filling Easily
The heart of your yummy apple slab pie is its flavorful fruit filling. Crafting this filling is surprisingly easy, ensuring that your pie bursts with sweet and slightly tart apple goodness. The key is to properly combine the ingredients so that every slice offers a balanced taste and texture. This section will walk you through preparing the apples and integrating them with the spices and sugars that define classic apple pie flavor. Getting the filling right is crucial for a delicious dessert that people will remember. This simple pie filling comes together quickly, ready for assembly.
Mixing Dry Ingredients Together
Start by preparing your dry ingredients. In a large bowl, whisk together the granulated sugar, light brown sugar, cornstarch (or flour), ground cinnamon, and nutmeg. The cornstarch acts as a thickening agent, ensuring your apple pie filling isn’t watery, but beautifully luscious and holds its shape when sliced. The combination of sugars provides a complex sweetness, while cinnamon and nutmeg infuse the apples with warm, inviting aromas that are synonymous with classic apple pie. Make sure these dry ingredients are thoroughly combined so that they are evenly distributed among the apples. This preliminary step is key to a perfectly seasoned filling.
Tossing Apples with Lemon Juice
Next, add your sliced apples to a separate large bowl. Drizzle them with fresh lemon juice. This step is twofold: first, the lemon juice helps prevent the apples from browning, keeping them looking fresh and appealing. Second, it adds a subtle tartness that balances the sweetness of the sugars and spices, brightening the overall flavor profile of your fruit filling. Toss the apples gently to ensure each slice is coated with the lemon juice. This simple addition makes a noticeable difference in the final taste of your tasty slab pie.
Coating Apples Evenly and Fully
Now, add the whisked dry ingredients to the bowl of lemon-tossed apples. Using your hands or a large spoon, gently toss the apples until they are evenly and fully coated with the sugar and spice mixture. Take care not to break the apple slices. You want every piece of apple to be touched by the flavorful coating, ensuring a consistent taste in every bite of your delicious dessert. Once coated, the apples are ready to be spread onto your prepared pie crust, leading you closer to baking your delightful sheet pan pie.
Assemble Your Yummy Apple Slab Pie
With your crust prepared and your apple filling seasoned, the assembly of your yummy apple slab pie is the next exciting step. This stage brings all the components together, transforming individual ingredients into what will become a spectacular and delicious dessert. Assembling a slab pie is straightforward, allowing you to focus on an even distribution of filling and creating an appealing top crust. This simple pie assembly process ensures a great result.
Spreading Apple Mix on Crust
Retrieve your chilled sheet pan with the bottom crust. Pour the prepared apple filling over the crust, spreading it out evenly to form a consistent layer from edge to edge. Make sure the apples are distributed relatively flat, avoiding large mounds in the center, which can lead to uneven baking. Dot the top of the apple filling with small pieces of butter. This step adds moisture and richness, creating a more luxurious fruit filling as it melts into the apples during baking. For the top crust, you can either roll out a second rectangle of dough to cover the entire pie or cut the dough into strips to create a lattice design. If making a lattice, arrange the strips over the apples and then trim and crimp the edges of both crusts together to seal the pie. If using a full top crust, lay it over the apples, trim the edges, crimp to seal, and cut several slits in the top to allow steam to escape during baking. This attention to detail will help you achieve a beautifully baked, tasty slab pie.
Baking Your Simple Yummy Apple Slab Pie
Baking is where the magic truly happens, transforming raw ingredients into a golden-brown, bubbly, and fragrant masterpiece. Properly baking your simple yummy apple slab pie is crucial for achieving that perfectly cooked fruit filling and a wonderfully crisp, golden crust. Following the correct temperature and timing ensures that the apples are tender without being mushy, and the crust is flaky and browned. This section provides the essential baking tips for a delicious dessert, ensuring a successful outcome for your sheet pan pie.
Preheat Oven to 450°F
Before your pie goes into the oven, preheating is a non-negotiable step. Set your oven to 450°F (232°C) and allow it to preheat fully. A hot oven is essential for the initial stages of baking. The high temperature helps to set the crust quickly, preventing it from becoming soggy, and encourages the butter in the crust to create those desirable flaky layers. Ensure your oven has reached the target temperature for at least 15-20 minutes before placing the pie inside, allowing the heat to stabilize. This initial blast of heat is a critical baking tip for a successful homemade crust and a tasty slab pie.
Bake Until Golden and Bubbly
Place your assembled apple slab pie into the preheated oven. You’ll start baking at 450°F (232°C) for the first 15-20 minutes. This high heat encourages the crust to crisp up quickly. After this initial period, reduce the oven temperature to 375°F (190°C) and continue to bake for another 35-50 minutes, or until the crust is deeply golden brown and the filling is visibly bubbly around the edges. If the crust starts to brown too quickly, you can loosely tent the pie with aluminum foil. To check if the apples are tender, insert a thin knife through a vent in the top crust; it should meet little resistance. This long, slow bake ensures that the apples cook through perfectly, making a truly delicious dessert. For further understanding of baking techniques, you might want to visit the Baking Wikipedia page.
Crafting Easy Glaze for Apple Pie
A simple yet elegant glaze provides the perfect finishing touch to your yummy apple slab pie. This sweet layer not only enhances the flavor profile but also adds a beautiful sheen, making your delicious dessert even more appealing. Crafting the glaze is perhaps the easiest part of the entire recipe, requiring minimal effort for maximum impact. This easy apple recipe component ensures a sweet finish that elevates the overall experience of your sheet pan pie.
Whisk Powdered Sugar with Milk
To create the glaze, begin by placing powdered sugar (also known as confectioners’ sugar) into a medium-sized bowl. Gradually add milk, starting with just a tablespoon or two, and whisk vigorously until a smooth, thick but pourable consistency is achieved. The amount of milk can vary slightly depending on the humidity and your desired thickness, so add it slowly until you reach the perfect drizzle consistency. A thicker glaze will create a more opaque coating, while a thinner one will be more translucent. This sweet glaze is an integral part of the pie’s overall appeal.
Add Spices for Festive Touch
For an extra layer of flavor and a truly festive touch, consider adding a pinch of ground cinnamon, nutmeg, or even a tiny dash of allspice to your glaze. These warm spices complement the apple filling beautifully and add another dimension to the taste. A splash of vanilla extract can also enhance the sweetness and aroma. Mix these additions thoroughly into the glaze until fully incorporated. This spiced glaze takes your simple pie to a new level, making it a truly delicious recipe for any special occasion. It’s a small detail that makes a big difference in creating a memorable party treat.
Cooling and Glazing Your Slab Pie
Patience is a virtue when it comes to pie, especially during the cooling phase. Proper cooling is crucial for allowing the fruit filling to set and the crust to firm up, ensuring clean slices. Rushing this step can lead to a messy, soupy pie, diminishing the effort you put into making your yummy apple slab pie. Once cooled, the delightful task of glazing begins, adding that final, irresistible layer of sweetness and visual appeal. These important steps are part of achieving a perfect delicious dessert.
Cool Pie on Wire Rack
Once your apple slab pie is golden and bubbly from the oven, resist the urge to slice into it immediately. Carefully transfer the hot sheet pan to a wire rack. Allow the pie to cool completely, or at least until it’s just warm to the touch, which can take anywhere from 2 to 4 hours. Cooling on a wire rack allows air to circulate around the entire pie, preventing the bottom crust from becoming soggy. This cooling period is vital for the fruit filling to thicken and set, ensuring each slice holds its shape. A fully cooled pie provides the best canvas for your sweet glaze.
Drizzle Glaze Over Cooled Pie
After your apple slab pie has sufficiently cooled, it’s time for the final flourish: the glaze. Using a spoon or a whisk, drizzle the prepared sweet glaze evenly over the top of the pie. You can create an intricate pattern or simply cover the entire surface—the choice is yours. The goal is to create a thin, even layer that will set beautifully. If the pie is too warm, the glaze will melt and run off, so ensure adequate cooling time. This step truly elevates the presentation of your sheet pan pie, making it look as good as it tastes.
Allow Glaze to Set Firmly
Once you’ve drizzled the glaze, allow it some time to set firmly. This typically takes about 15-30 minutes at room temperature. Setting ensures that the glaze won’t be sticky when you cut or serve the pie, and it will hold its beautiful form. You can gently test the glaze with a fingertip to confirm it’s no longer wet. Once the glaze has set, your yummy apple slab pie is officially ready to be portioned and enjoyed. This final step guarantees a neat and delicious dessert experience, ready to be admired and savored.
Serve Yummy Apple Slab Pie Deliciously
After all your efforts in baking this magnificent yummy apple slab pie, the moment of truth arrives: serving it! This delicious dessert is designed for sharing, offering generous portions that are easy to manage. Presenting it well and offering delightful accompaniments can elevate the experience even further. Whether you prefer it warm or at room temperature, with extra toppings or simply as is, this sheet pan pie is a crowd-pleaser that will leave everyone satisfied. Share your baking triumphs with others; for more inspiration, follow us on Pinterest and Instagram!
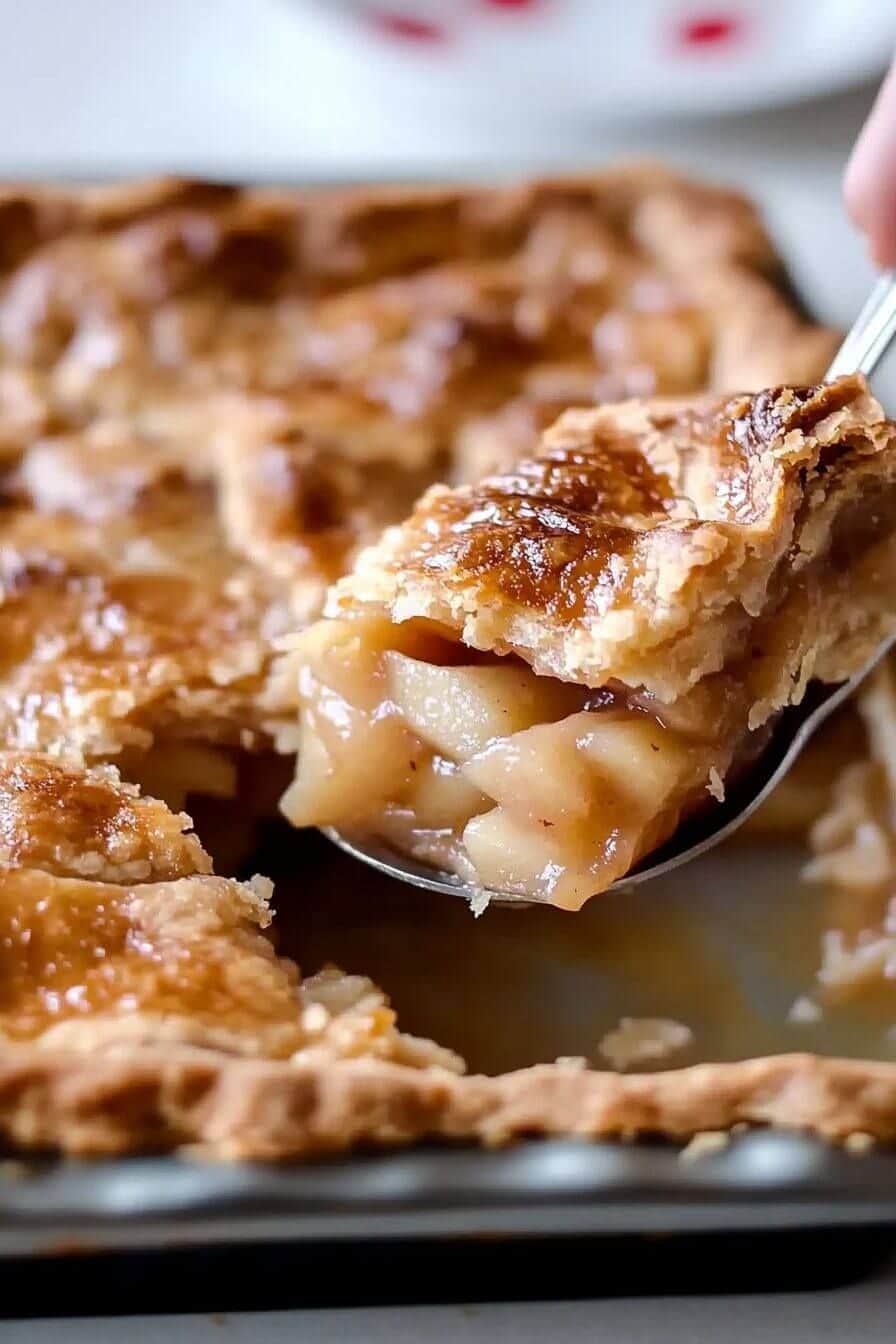
Slicing Pie into Squares
One of the great advantages of a slab pie is how effortlessly it can be sliced and served. Unlike traditional round pies, which can be tricky to portion evenly, a slab pie is typically cut into neat squares or rectangles. Using a sharp knife, first cut the pie lengthwise down the middle, then make several crosswise cuts to create your desired serving size. For a 9×13 inch pan, you might get 12-16 generous squares, making it a perfect party treat. Clean cuts ensure a beautiful presentation for each serving of your tasty slab pie.
Serving Warm or Room Temp
Your apple slab pie is delicious served either warm or at room temperature. A warm slice, especially straight out of the oven after a brief cooling period, provides that comforting, melt-in-your-mouth experience where the apples are still tender and the crust is slightly crisp. If serving warm, heat individual slices briefly in the microwave or oven. Alternatively, allowing the pie to cool completely to room temperature allows the flavors to meld beautifully and the filling to fully set, making for cleaner cuts. Both methods offer a delightful experience, so choose based on your preference or the occasion. Consider serving alongside other delightful desserts, like Peanut Butter Brownie Swirl Cookies.
Add Whipped Cream or Ice Cream
To truly enhance the serving experience, consider offering classic accompaniments. A dollop of freshly whipped cream or a scoop of vanilla bean ice cream pairs wonderfully with the warm, spiced apple filling. The cool, creamy textures provide a delightful contrast to the pie’s warmth and fruitiness. Other options include a sprinkle of toasted nuts or a drizzle of caramel sauce for an extra touch of decadence. These simple additions can transform your already delicious recipe into an unforgettable dessert experience. For another fantastic dessert option, check out our Quick Italian Cream Cake recipe.
Apple Slab Pie Time and Servings
Understanding the time commitment and potential yield of any recipe is important for planning, especially when preparing for gatherings. This yummy apple slab pie, while designed for ease, still requires specific preparation and cooking times. Knowing these details will help you integrate this delicious dessert seamlessly into your meal planning, whether for a holiday feast or a simple weeknight treat. This comprehensive breakdown ensures you can manage your time effectively, making it a truly simple pie to execute.
Quick Preparation Time
One of the appealing aspects of this easy apple recipe is its relatively quick preparation time. You can expect the hands-on work—mixing the crust dough, peeling and slicing apples, and assembling the pie—to take approximately 30-45 minutes. This timeframe does not include the chilling time for the pie dough, which is crucial for a flaky homemade crust but can often be done in advance. By preparing your ingredients ahead of time, such as slicing apples or making the dough the day before, you can further reduce the active prep time on the day of baking, making it a very quick dessert option for busy schedules.
Total Cooking and Setting Time
The total cooking and setting time for your apple slab pie involves both baking in the oven and cooling afterward. Baking typically takes about 50-70 minutes, depending on your oven and the desired doneness of the apples and crust. After baking, it’s critical to allow the pie to cool and set. This cooling period can range from 2 to 4 hours to ensure the fruit filling thickens sufficiently and the crust maintains its structure for clean slicing. Therefore, plan for a total time commitment of roughly 3 to 5 hours from start to finish, including active preparation, baking, and cooling. The reward, however, is a generous sheet pan pie that serves 12-16 people, making it an excellent party treat.
Nutrition Facts for Apple Slab Pie
While enjoying a delicious dessert like apple slab pie, it’s often helpful to have a general understanding of its nutritional content. Given that this is a homemade item, exact figures can vary based on specific ingredient brands, apple varieties, and serving sizes. However, we can provide a typical breakdown to give you an idea of what each slice of this yummy pie offers. This section aims to provide transparency regarding the energy and macronutrients in this family favorite, helping you make informed choices.
Calories Per Serving Breakdown
A typical slice of apple slab pie, when cut into 12-16 servings from a 9×13 inch pan, will contain approximately 300-450 calories per serving. This range accounts for variations in crust thickness, the amount of sugar used in the fruit filling, and whether additional toppings like whipped cream or ice cream are added. Each serving also generally provides a balance of carbohydrates (primarily from the apples, sugar, and flour), some fat (from the butter in the crust), and a small amount of protein. These nutrition facts offer a general guide for enjoying this sweet treat in moderation. Remember that homemade crust and fresh fruit filling contribute to a richer, more satisfying experience compared to many store-bought alternatives.
Variations for Your Apple Slab Pie
While the classic apple slab pie is undeniably delicious, there’s always room for creativity and customization. Exploring variations allows you to tailor this sheet pan pie to different tastes or seasonal ingredients, ensuring it remains a versatile and exciting dessert. These simple modifications can add a unique twist to your yummy pie, transforming a familiar favorite into something new and exciting. Feel free to experiment with these ideas to make your delicious dessert truly your own, perfect for any occasion or party treat.
Adding Berries for Twist
For a delightful twist on the traditional apple pie, consider adding other fruits to your filling. Berries like blueberries, raspberries, or blackberries pair wonderfully with apples, introducing new layers of flavor and color. A common and popular variation is to make an apple-berry slab pie. Simply add 1-2 cups of fresh or frozen (not thawed) berries to your apple mixture during the filling preparation. The berries will release their juices, creating a slightly tangier and more vibrant fruit filling. This addition not only enhances the flavor but also makes for a visually stunning dessert. This easy apple recipe becomes even more adaptable with a berry inclusion.
Drizzling Warm Caramel Sauce
Another fantastic variation that elevates your apple slab pie to a new level of decadence is a warm caramel sauce drizzle. After the pie has cooled and potentially been glazed, gently warm some store-bought or homemade caramel sauce. Just before serving, generously drizzle the warm caramel over the individual slices or the entire pie. The rich, buttery notes of the caramel perfectly complement the sweet-tart apples and the spiced glaze, creating an incredibly indulgent experience. This variation is especially popular during fall and winter months. For ideas on what main course to serve before such a rich dessert, check out our recipe for Crispy Parmesan Chicken.
