
Melt in Your Mouth Chicken is a culinary delight that promises an unforgettable dining experience. Achieving this perfect texture involves key steps, from proper marination to expert frying. This guide will help you create a truly exceptional meal for your family and friends, ensuring every bite is wonderfully tender chicken with a crispy finish.
Key Takeaways
- Utilize a buttermilk marinade for maximum tenderness and flavor in your chicken.
- Master the art of creating a perfectly seasoned, flavorful flour coating.
- Maintain the correct oil temperature for crispy, golden chicken without burning.
- Allowing fried chicken to rest is crucial for retaining juices and improving overall texture.
- Pair your delicious chicken with suitable side dishes for a complete and satisfying meal.
Achieving perfect chicken is simple. Just follow these proven steps. Tender meat awaits your plate. Crispy skin adds great crunch. Enjoy a wonderful meal soon.
Understanding Melt in Your Mouth Chicken
The quest for truly exceptional fried chicken often begins with a vision of meat so tender it practically dissolves, encased in a shatteringly crisp, flavorful coating. This isn’t just a dream; it’s an achievable reality with the right techniques. Understanding what defines “melt in your mouth” chicken is the first step towards creating it in your own kitchen. It’s about more than just cooking; it’s about crafting an experience.
What makes this chicken special?
Melt in your mouth chicken stands out due to its incredible combination of textures and flavors. On the outside, you want a golden, crunchy crust that provides a satisfying initial bite. Inside, the chicken should be moist, juicy, and fall-off-the-bone tender. This special quality isn’t accidental; it’s the result of strategic preparation, primarily focusing on marination, proper seasoning, and controlled cooking. It’s the kind of dish that makes guests ask for your secret, guaranteeing a memorable dinner idea.
Why tenderness matters for chicken.
Tenderness is paramount in chicken dishes. Overcooked or improperly prepared chicken can be dry, chewy, and unappetizing. A tender chicken piece, however, signifies that the meat has retained its natural juices and that its muscle fibers have been relaxed, often through an acidic marinade or gentle cooking. This not only enhances the eating experience but also allows the intricate flavors of your seasoning to shine through fully. Achieving that perfect, tender chicken texture elevates a simple meal to something truly extraordinary.
Gather Ingredients for Perfect Flavor Chicken
Before you begin the exciting process of making your own melt in your mouth chicken, gathering all necessary ingredients is crucial. A well-organized kitchen and a complete pantry ensure a smooth and enjoyable cooking experience. This preparation phase is often overlooked but plays a significant role in the overall success and flavor of your fried chicken recipe. Starting with fresh, high-quality ingredients is a fundamental aspect of home cooking that makes a real difference.
Essential items for your kitchen.
To prepare this delicious chicken, you’ll need a few core components. First, select fresh chicken pieces, ideally bone-in and skin-on for maximum flavor and moisture retention. Buttermilk is absolutely non-negotiable for our first secret; it’s the star player in achieving that unparalleled tenderness. For your coating, all-purpose flour is standard, but the magic truly happens with a thoughtful blend of spices. Don’t forget cooking oil—enough for deep frying, such as vegetable, canola, or peanut oil. Having a reliable frying thermometer is also key for safety and consistent results. Ensure you have large mixing bowls for marinating and coating, along with tongs for handling. For other delicious chicken recipes, consider checking out this easy honey garlic chicken recipe.
Checking your pantry supplies.
Beyond the fresh chicken and buttermilk, a quick check of your pantry will ensure you have all your seasoning needs covered. Common spices like salt, black pepper, paprika, garlic powder, onion powder, and cayenne pepper are typically found in most kitchens. Consider adding a touch of dried thyme or oregano for an extra layer of aromatic flavor. Make sure you have enough flour for dredging and a sturdy pan suitable for frying. Having everything measured and ready to go before you start cooking streamlines the process and helps prevent any last-minute rushes. This careful preparation is part of what makes this a reliable method for perfect crispy chicken.
Secret 1: Buttermilk Marinade for Tenderness
The first and arguably most critical secret to achieving genuinely melt in your mouth chicken lies in the buttermilk marinade. This simple yet powerful ingredient transforms ordinary chicken into something extraordinary. Buttermilk’s mild acidity and enzymes work wonders on chicken fibers, tenderizing the meat without making it tough, while also imparting a subtle tang that complements the savory spices beautifully. It’s a foundational step that sets this recipe apart, ensuring a juicy, tender chicken every single time. For more information on buttermilk, you can visit its Wikipedia page.
How to marinate chicken properly.
Proper marination is more than just soaking chicken in liquid; it’s about ensuring every piece is thoroughly coated and given ample time to absorb the goodness. In a large bowl or a resealable plastic bag, combine your buttermilk with a generous amount of salt and pepper, along with a few pinches of your preferred spices (e.g., garlic powder, paprika). Add your chicken pieces, ensuring they are fully submerged. If using a bowl, cover it tightly with plastic wrap. The goal is complete contact between the chicken and the buttermilk mixture. This initial step is vital for developing both the tenderness and the deep flavor profile that defines our golden chicken. Don’t rush this process; patience here truly pays off with delicious results, making this a fantastic fried chicken recipe.
Minimum time for best results.
While some recipes suggest short marinating times, for truly melt in your mouth chicken, you need to commit to a longer soak. A minimum of 4 hours is recommended, but for optimal tenderness and flavor absorption, aim for 8 to 12 hours, or even overnight, in the refrigerator. Any less, and the buttermilk won’t have sufficient time to break down the chicken fibers effectively. Marinating for too long (over 24 hours), however, can sometimes lead to a slightly mushy texture, so find that sweet spot within the recommended window. This commitment to time is what ensures the chicken achieves its ultimate potential for tenderness, making it incredibly moist and flavorful when cooked.
Preparing Your Flavorful Flour Coating
After the chicken has soaked up all the tenderizing goodness of the buttermilk marinade, the next crucial step is creating a flavorful and crispy coating. This outer layer is not just about texture; it’s where a significant portion of your fried chicken’s taste will come from. A well-prepared flour coating ensures that every bite delivers a punch of seasoning, complementing the juicy, tender chicken beneath. This flavorful coating is key to the overall sensory experience and contributes greatly to that satisfying crunch.
Mixing spices for optimal taste.
The secret to a truly memorable coating lies in the judicious blending of spices. Beyond just salt and pepper, consider a robust mix that builds layers of flavor. Common choices include paprika for color and a subtle sweetness, garlic powder and onion powder for aromatic depth, and cayenne pepper for a touch of heat, if desired. Don’t be afraid to experiment with your favorites! Some chefs also add a pinch of baking powder to the flour, which can contribute to a lighter, crispier texture. Combine all dry ingredients thoroughly in a shallow dish or large resealable bag, ensuring an even distribution of spices. This creates the foundational flavor profile for your crispy chicken, ensuring a delicious outcome every time.
Adding herbs for extra flavor.
While spices provide the backbone, dried herbs can introduce an aromatic complexity that elevates your fried chicken to the next level. Dried thyme, oregano, or even a touch of rosemary, finely crushed, can add a wonderfully fragrant dimension to your coating. These herbs release their flavors as the chicken fries, infusing the crust with an earthy, savory aroma. Be mindful of quantities; a little goes a long way to enhance, not overpower, the natural chicken flavor. Mix them in well with your other spices and flour. This thoughtful inclusion of herbs is part of the “flavorful coating” strategy that ensures your easy chicken recipe yields truly exceptional results, moving beyond just basic seasoning to a gourmet experience.
Setting Up Your Frying Station Safely
Frying chicken, especially deep frying, requires careful attention to safety and proper setup. A well-organized and safe frying station is not only efficient but also prevents accidents and ensures consistent cooking results. Before you even think about heating oil, take a moment to prepare your space. This proactive approach is crucial for achieving perfectly golden chicken and enjoying the home cooking experience without undue stress. Safety in the kitchen should always be your top priority.
Choosing the right frying pan.
Selecting the correct frying vessel is paramount. A heavy-bottomed pot or Dutch oven is ideal because it distributes heat evenly and retains temperature well, which is essential for consistent frying. Cast iron skillets are also excellent choices for their heat retention properties. Ensure the pan is deep enough to submerge the chicken pieces partially without overflowing once the chicken is added. Avoid thin-bottomed pans, as they can lead to uneven cooking and hot spots, potentially burning your flavorful coating. Always choose a pan with high sides to minimize oil splatter, keeping your cooking area cleaner and safer. A sturdy pan makes all the difference in achieving the crispy chicken you desire.
Heating oil correctly and safely.
Correct oil temperature is the cornerstone of great fried chicken. Fill your chosen pan with at least 2-3 inches of high smoke point oil, such as vegetable, canola, or peanut oil. Heat the oil over medium-high heat. The ideal temperature for frying chicken is typically between 325°F and 350°F (160°C to 175°C). Use a deep-fry thermometer to monitor the temperature; it’s a non-negotiable tool for safety and precision. Never overcrowd the pan, as this will drop the oil temperature significantly, leading to greasy, soggy chicken instead of crispy, golden perfection. Have a metal spider or tongs ready, along with a plate lined with paper towels for draining the cooked chicken. Keep a fire extinguisher nearby and never leave hot oil unattended. For more frying guidance, you might find this frying category helpful.
Coating Chicken for Crispy Texture
The coating process is a critical step that dictates the final texture of your fried chicken. It’s not merely about dusting the chicken with flour; it’s about creating a robust, craggy surface that will crisp up beautifully in the hot oil. This is where you lock in moisture and build the foundation for that irresistible crunchy exterior. A perfectly coated piece of chicken ensures a crispy chicken result, making every bite of your golden chicken a delight.
Ensuring even flour distribution.
After marinating, remove the chicken pieces from the buttermilk, allowing any excess to drip off gently. Do not rinse the chicken. The buttermilk residue is essential for the flour to adhere properly. Transfer the chicken directly into your seasoned flour mixture. The key here is to ensure every nook and cranny of each chicken piece is thoroughly covered. Roll, press, and gently toss the chicken in the flour, making sure there are no wet spots visible. This even distribution is vital for uniform cooking and a consistent crispy texture. For a different dinner idea, try this cheesy chicken and rice casserole.
Pressing flour onto chicken pieces.
To achieve that coveted craggy, extra-crispy exterior, don’t just lightly dust the chicken. Instead, gently but firmly press the seasoned flour onto each piece. This helps create layers of flour and buttermilk that will fry up into delightful, crunchy flakes. Once coated, gently shake off any loose excess flour. You want a substantial coating, but not so much that it becomes pasty. Place the coated chicken on a wire rack set over a baking sheet. Allowing the chicken to rest for about 10-15 minutes after coating helps the flour adhere even better, reducing the chance of it falling off during frying. This technique contributes significantly to the delicious crispy chicken outcome of your fried chicken recipe.
Secret 2: Frying Perfectly Golden Chicken
The second major secret to creating truly melt in your mouth chicken lies in the frying process itself. This stage requires precision, patience, and a keen eye for temperature control. Achieving a perfectly golden brown exterior with a thoroughly cooked interior is an art, but one that is easily mastered with a few key techniques. This is where your crispy chicken dreams come to life, transforming simple ingredients into a glorious fried chicken recipe masterpiece.
Checking oil temperature for frying.
As mentioned, maintaining the correct oil temperature is non-negotiable for golden chicken. Before adding any chicken, ensure your oil reaches the sweet spot of 325-350°F (160-175°C). If the oil is too cool, the chicken will absorb too much oil, resulting in a greasy, soggy crust. If it’s too hot, the exterior will burn before the interior has a chance to cook through, leaving you with raw chicken and a ruined flavorful coating. Use a reliable thermometer and adjust your heat as needed. When you add chicken, the temperature will drop, so be prepared to slightly increase the heat to bring it back up. Fry in batches to avoid overcrowding the pan and drastically lowering the oil temperature. For some insights into the science of deep frying, check out this Wikipedia article on deep frying.
Cooking until deeply golden brown.
Once the oil is at the right temperature, carefully lower your coated chicken pieces into the hot oil using tongs, placing them away from you to avoid splashes. Do not overcrowd the pan; typically, 3-4 pieces at a time is ideal depending on your pan size. Allow the chicken to fry undisturbed for about 6-8 minutes on one side until it develops a deep golden-brown color and a visibly crispy texture. This initial frying sets the crust and begins the cooking process. The goal is a rich, appetizing hue that promises incredible flavor and crunch. This stage is crucial for building the visual and textural appeal of your fried chicken recipe, ensuring a beautiful golden chicken finish.
Flipping and Cooking to Doneness
After achieving that initial golden crust, the cooking process continues with careful flipping and monitoring to ensure the chicken cooks through completely while maintaining its crispy exterior. This stage is where you balance the desire for a beautiful golden-brown color with the necessity of safe internal doneness. Mastering this part is key to delivering a perfect melt in your mouth chicken experience, ensuring every bite is both delicious and safe.
How long to cook each side.
Once the first side of your chicken pieces is deeply golden brown, carefully flip them using tongs. Continue frying for another 6-8 minutes, or until the second side is equally golden and crispy. During this time, continue monitoring the oil temperature to keep it within the 325-350°F range. You might need to adjust the heat up or down slightly to maintain consistency. The total cooking time will vary depending on the size and thickness of your chicken pieces, but typically ranges from 12-18 minutes for smaller pieces (like wings and drumsticks) to 18-25 minutes for larger pieces (like thighs and breasts). The goal is an even cook and color all around for your delicious golden chicken.
Ensuring chicken is thoroughly cooked.
To confirm that your chicken is thoroughly cooked and safe to eat, the internal temperature must reach 165°F (74°C). Use an instant-read meat thermometer inserted into the thickest part of the chicken, avoiding the bone. The juices should run clear when pierced. If the chicken is golden brown but not yet at the correct internal temperature, you can transfer it to a baking sheet and finish it in a preheated oven at 350°F (175°C) for a few minutes until it reaches doneness. This ensures safety without compromising the crispy coating. This diligence guarantees your fried chicken recipe is not only flavorful but also perfectly cooked through, providing peace of mind with every tender chicken bite. Explore more dinner ideas for your family on Carina Recipes Dinners.
Draining and Resting Your Fried Chicken
Once your perfectly golden chicken is cooked through and boasts a magnificent crispy coating, the journey isn’t quite over. Two final, yet crucial, steps remain: draining and resting. These processes are often overlooked, but they play a significant role in the overall texture, flavor, and enjoyment of your melt in your mouth chicken. Proper handling after frying ensures your hard work culminates in the best possible result, enhancing that amazing flavorful coating and tender chicken.
Using paper towels to drain.
As each batch of chicken finishes frying, carefully remove the pieces from the hot oil using tongs and immediately transfer them to a wire rack set over a baking sheet lined with several layers of paper towels. The wire rack allows air to circulate around all sides of the chicken, preventing the bottom from becoming soggy, while the paper towels absorb any excess oil dripping off. Resist the temptation to stack the chicken directly on paper towels without a rack, as this can trap steam and soften the crispy exterior you worked so hard to achieve. This quick draining helps eliminate any excess grease, contributing to a cleaner, more enjoyable eating experience for your fried chicken recipe.
Why resting improves overall flavor.
Resting is perhaps the most underrated step in preparing any cooked meat, and fried chicken is no exception. After draining, allow the chicken to rest on the wire rack for at least 5-10 minutes before serving. During this resting period, the internal juices, which have been pushed to the center by the heat of frying, redistribute throughout the meat. This results in chicken that is significantly juicier, more tender, and more flavorful. Cutting into the chicken too soon will cause those precious juices to escape, leading to a drier product. A brief rest ensures your tender chicken remains incredibly moist and lives up to its “melt in your mouth” promise. It’s a simple step that yields profound improvements in taste and texture.
Serving Melt in Your Mouth Chicken
After all your careful preparation and expert frying, the moment has finally arrived to present your masterpiece: melt in your mouth chicken. The way you serve it can enhance the dining experience, turning a simple meal into a delightful occasion. Consider both presentation and complementary side dishes to create a well-rounded and satisfying home cooking experience. This is where your delicious golden chicken shines and becomes the star of the table.
Best side dishes to pair.
Melt in your mouth chicken pairs wonderfully with a variety of classic comfort food sides. Creamy mashed potatoes and gravy are always a winner, providing a smooth contrast to the crispy chicken. A fresh coleslaw or a crisp green salad adds a refreshing crunch and acidity that cuts through the richness of the fried chicken. Other excellent choices include baked beans, corn on the cob, or even a simple side of mac and cheese, such as this creamy baked mac and cheese. Choose sides that you and your family love to create a truly personalized and enjoyable meal. The right accompaniments elevate this easy chicken dish from good to unforgettable, completing your fried chicken recipe.
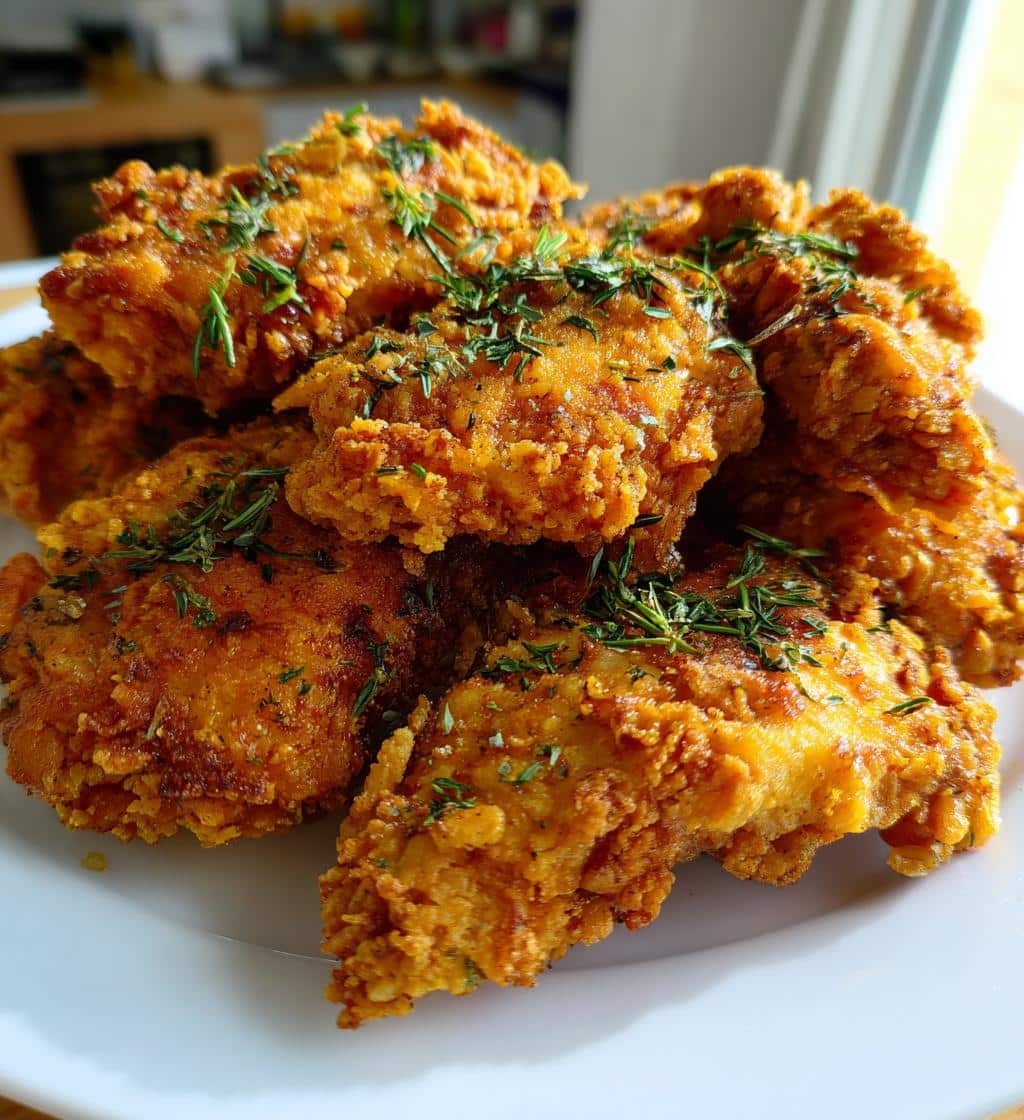
Presenting your delicious meal simply.
The beauty of perfectly fried chicken often lies in its rustic charm, so there’s no need for overly elaborate presentation. Arrange the golden chicken pieces artfully on a large platter, perhaps garnished with a sprinkle of fresh parsley or chives for a pop of color. Serve the side dishes in separate bowls or on the same plate, ensuring they are easily accessible. A simple presentation allows the star of the meal – your crispy, tender chicken – to take center stage. Enjoy the fruits of your labor and watch as your family and friends savor every bite of this incredible home cooking creation. Share your creations with us on Instagram or find more inspiration on Pinterest.
Nutrition Facts for Your Meal
Understanding the nutritional content of your meal is helpful for maintaining a balanced diet, especially when enjoying a fried chicken recipe. While melt in your mouth chicken is a delicious indulgence, being aware of its components can help you make informed choices about portion sizes and accompanying side dishes. This section provides a general overview of what you might expect from a typical serving of this flavorful coating fried chicken.
Understanding calories and protein.
Fried chicken, particularly bone-in, skin-on pieces, tends to be higher in calories due to the frying process and the presence of skin. A single serving (e.g., a fried chicken thigh) can range from 300 to 500 calories, depending on size, breading, and oil absorption. However, chicken is an excellent source of protein, which is essential for muscle repair, growth, and overall body function. A serving can provide 25-40 grams of high-quality protein, making it a satisfying and muscle-building component of your dinner ideas. The buttermilk marinade also contributes some protein and calcium.
Fats and carbohydrates per serving.
The frying method means this dish will contain a significant amount of fat, primarily from the cooking oil and the chicken skin. This includes both saturated and unsaturated fats. While fats are necessary for energy and nutrient absorption, moderation is key. A single serving can contain 20-35 grams of fat. Carbohydrates primarily come from the flour coating. While not a low-carb dish, a typical serving will have around 10-20 grams of carbohydrates. Remember that these are estimates, and actual values can vary based on specific ingredients, preparation methods, and portion sizes. Enjoy your tender chicken in moderation as part of a varied diet.
Quick Tips for Perfect Flavor Chicken
Even after mastering the main steps, a few additional quick tips can help refine your fried chicken recipe, ensuring every batch of melt in your mouth chicken is consistently delicious. These minor adjustments and considerations can make a big difference in achieving truly perfect flavor chicken and a wonderfully crispy chicken every time. Pay attention to these details for an elevated home cooking experience.
Adjusting spices to your liking.
The beauty of home cooking is the ability to customize. Don’t be afraid to experiment with your spice blend for the buttermilk marinade and the flour coating. If you prefer more heat, increase the cayenne pepper or add a pinch of chili powder. For a smokier flavor, use smoked paprika. If you enjoy a herbaceous note, consider adding more dried thyme or a touch of sage. Taste and adjust is always the best advice. Keep notes of your favorite combinations to replicate them later. Personalizing your seasoning ensures that your tender chicken is exactly how you like it, making it uniquely yours.
Keeping oil at right temperature.
This tip bears repeating because it’s that important. Consistency in oil temperature is the single biggest factor in preventing soggy, greasy chicken or burnt exteriors with raw interiors. Use your thermometer religiously. If the oil drops too low after adding chicken, gently increase the heat. If it gets too hot, reduce the heat or remove the pan from the burner briefly. Frying in smaller batches helps maintain a more stable temperature. Remember to also let the oil reheat between batches if necessary. A well-maintained oil temperature guarantees a beautiful golden chicken with an irresistibly crispy, flavorful coating, truly making it a stellar fried chicken recipe for your dinner ideas.