
Oven steak is a fantastic way to cook a flavorful, juicy cut of meat with minimal fuss. This recipe provides clear, simple steps to achieve perfect doneness, combining a golden pan sear with oven baking. You will master this delicious cooking technique and impress everyone with your culinary skills.
Key Takeaways
- Combine pan searing with oven baking for superior steak texture.
- Use a meat thermometer for precise doneness, ensuring a perfect result.
- Resting the steak after cooking is crucial for maximum juiciness.
- Simple ingredients and proper technique yield restaurant-quality flavor.
- Adjust cooking times for different steak thicknesses and desired doneness.
Achieving a restaurant-quality steak at home is easier than you think. A good pan sear adds amazing flavor. The oven finishes it gently. Resting ensures juicy results. Enjoy a perfectly cooked meal.
Master the Art of Oven Steak
Cooking a steak to perfection can feel daunting, but mastering the oven-finishing technique simplifies the process significantly. This method ensures a beautiful, savory crust on the outside and a tender, juicy interior, making it a favorite among home cooks and professional chefs alike. Forget guesswork; with our straightforward approach, you’ll consistently create impressive results that rival any steakhouse.
Why Bake Steak?
Baking steak, especially after an initial pan sear, offers several advantages. The oven provides a consistent, even heat that cooks the steak gently through to the center, preventing dry edges or an uneven cook. This method also reduces the amount of smoke in your kitchen compared to continuous stovetop searing. By combining the high-heat sear for flavor and texture with the controlled oven environment, you achieve optimal doneness and a remarkably moist piece of meat. It’s an efficient and reliable way to handle various cuts, ensuring every bite is as delicious as the last. For another fantastic main course, consider trying this crispy parmesan chicken with a rich garlic sauce, perfect for pairing.
Our Simple 7 Steps
Our method for a flawless oven-baked steak breaks down into seven easy-to-follow steps. First, prepare your steak by preheating and seasoning. Second, achieve a golden pan sear on the stovetop. Third, infuse it with aromatic flavors. Fourth, transfer the skillet to the hot oven for precise internal cooking. Fifth, monitor the baking for ideal doneness with a thermometer. Sixth, allow the steak to rest generously. Finally, slice and serve your delicious creation. These steps ensure a delightful cooking experience and an even more delightful meal.
What You Need for Steak
Success in cooking steak begins with selecting the right ingredients. Quality meat and a few key flavor enhancers are all it takes to create a memorable meal. Prioritizing fresh, good-quality components will significantly impact the final taste and texture of your oven-baked steak, transforming a simple dinner into a culinary highlight. Pay attention to the details of your meat selection for the best results.
Essential Ribeye Steak
For an exceptional oven steak, a good quality ribeye is highly recommended. Look for a cut that is at least 1 to 1.5 inches thick. This thickness allows for a beautiful sear without overcooking the interior in the oven. The ribeye’s generous marbling – those fine veins of fat running through the muscle – will melt during cooking, basting the meat from within and contributing to its incredibly rich flavor and tenderness. While ribeye is ideal, you can also apply this technique to other thick-cut steaks like New York strip or sirloin, adjusting cooking times as needed. When choosing, seek out vibrant red meat with well-distributed fat. If you enjoy simple yet flavorful meals, our easy honey garlic chicken is another fantastic recipe to try.
Key Flavor Ingredients
Beyond the steak itself, a few simple ingredients are crucial for enhancing its natural flavors. Coarse sea salt and freshly cracked black pepper are non-negotiable for seasoning; they create a savory crust. For searing, use a high smoke point oil like avocado oil, grapeseed oil, or canola oil, which can withstand high temperatures without burning. To infuse incredible aromatic depth, you’ll want fresh garlic cloves and sprigs of rosemary or thyme. A knob of unsalted butter added towards the end of the searing process will create a rich basting liquid, adding a nutty, complex flavor. These components work in harmony to build a complex flavor profile that elevates the simple steak to something extraordinary.
Simple Steps to Prepare Steak
Proper preparation is the foundation of any great steak. Taking the time to correctly preheat your oven and season your meat will ensure even cooking and a fantastic crust. These initial steps are often overlooked but are critical for achieving the desired texture and flavor in your oven steak. A little attention here goes a long way towards a delicious outcome.
Preheat Oven to 450°F
Before you even think about putting steak in the pan, it’s vital to preheat your oven to a blazing 450°F (232°C). This high temperature is crucial for the oven-finishing step, ensuring the steak continues to cook quickly and evenly without drying out. Make sure your oven is fully preheated, including any cast iron skillet you might be planning to transfer directly into it, to maintain a consistent cooking environment. A sufficiently hot oven contributes significantly to the steak’s tenderness and the overall success of the dish.
Season Steak Evenly
Generous and even seasoning is paramount for a flavorful steak. Start by patting your steak thoroughly dry with paper towels. Removing surface moisture is key to achieving that coveted crispy, brown crust—a phenomenon known as the Maillard reaction. Once dry, season both sides of the steak liberally with coarse sea salt and freshly cracked black pepper. Don’t be shy with the salt; much of it will form the crust. For a 1.5-inch thick steak, aim for about 1 teaspoon of salt per side. Press the seasonings gently into the meat to help them adhere. Allow the seasoned steak to sit at room temperature for 30-60 minutes before searing. This allows the salt to penetrate deeper, tenderizing the meat and drawing out more flavor.
Achieve a Perfect Pan Sear
The pan sear is where your steak truly begins to build character. This initial high-heat contact creates a beautiful, caramelized crust that locks in juices and develops deep, complex flavors. Mastering this step is fundamental to achieving a restaurant-quality finish for your oven steak, providing a textural contrast that elevates the entire dining experience. Don’t rush this stage; it’s vital for a fantastic result.
Heat Skillet with Oil
To achieve an impeccable crust, a heavy-bottomed, oven-safe skillet is your best friend. Cast iron is ideal due to its excellent heat retention. Place the skillet on high heat and let it get screaming hot for 3-5 minutes. You’ll know it’s ready when you see wisps of smoke. At this point, add 1-2 tablespoons of a high smoke point oil (like avocado or grapeseed oil) to the hot pan. Swirl the oil to coat the bottom evenly. The oil should shimmer, indicating it’s ready for the steak. A perfectly hot pan is non-negotiable for a superior sear, ensuring the steak doesn’t stick and develops that rich, dark brown color we’re looking for. Follow our cooking adventures and get more recipe inspiration on our Pinterest page.
Sear Each Side Golden
Carefully place the seasoned, room-temperature steak into the hot skillet. You should hear an immediate, satisfying sizzle. Resist the urge to move the steak for the first 2-3 minutes; this allows a deep golden-brown crust to form. Once a beautiful crust has developed, flip the steak and sear the other side for another 2-3 minutes. For thicker cuts, you may also want to sear the edges, holding the steak with tongs for about 1 minute per edge. The goal here is to create a rich, flavorful crust on all exterior surfaces, which contributes significantly to the overall taste and texture of your finished oven steak. This browning not only adds flavor but also helps to lock in moisture.
Infusing Steak with Flavor
While the searing process builds fundamental flavor, adding aromatics further enhances your oven steak, creating a more sophisticated and inviting aroma and taste. This step introduces fragrant herbs and garlic, which, when combined with butter, create a basting liquid that permeates the steak, contributing to its depth and richness. It’s a small detail that makes a big impact on the overall experience.
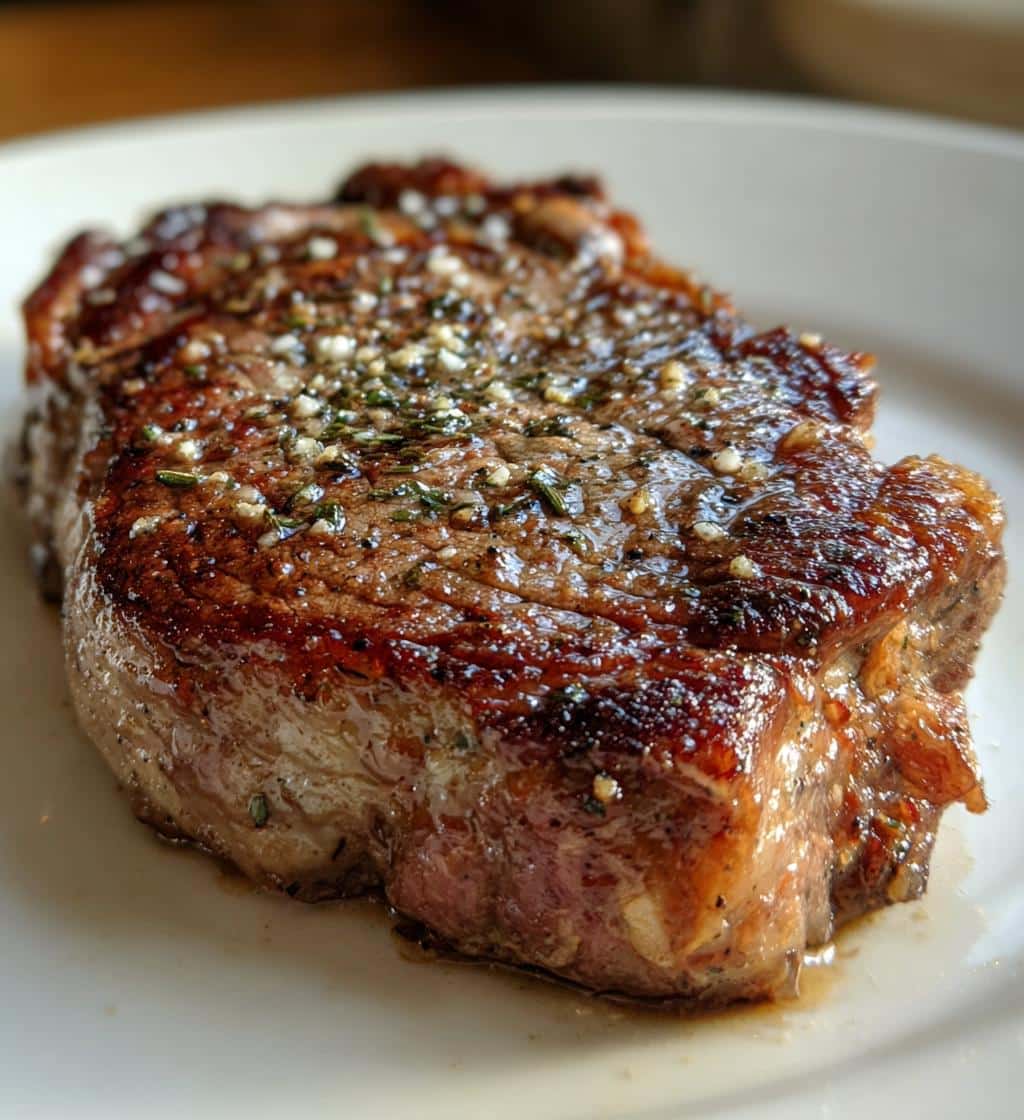
Add Garlic and Rosemary
Once both main sides of the steak are seared, reduce the heat slightly to medium. Add a tablespoon or two of unsalted butter to the pan, along with several smashed garlic cloves and a few sprigs of fresh rosemary or thyme. As the butter melts and the aromatics release their fragrance, tilt the pan slightly and, using a spoon, baste the steak with the melted butter and herb mixture for about 30-60 seconds. This process continuously moistens the steak and infuses it with the savory, herbaceous flavors, creating an incredible aroma and adding another layer of complexity to the crust. Be mindful not to burn the garlic or herbs; if they start to brown too quickly, remove them.
Finish Your Steak in Oven
The seamless transition from stovetop to oven is key to our method, ensuring that the steak cooks through evenly without losing its precious juices. This two-stage cooking technique provides the best of both worlds: a perfect sear and a controlled bake, allowing you to achieve consistent results every time. It’s an efficient way to manage your cooking time and guarantees a beautifully finished product.
Transfer Skillet to Oven
Immediately after basting, carefully transfer the entire oven-safe skillet, steak and all, into your preheated 450°F (232°C) oven. There’s no need to change pans or lose any of those flavorful pan juices and aromatics. Placing the hot skillet directly into the hot oven ensures that the cooking process continues smoothly and evenly. Use oven mitts or a thick kitchen towel to handle the hot skillet, as the handle will be extremely hot. This continuous heat is essential for maintaining the cooking momentum and reaching your desired internal temperature efficiently. For other versatile cooking options, try our ground turkey and peppers recipe.
Baking for Ideal Doneness
Achieving the perfect doneness is crucial for an enjoyable steak. Overcooking can lead to a dry, tough result, while undercooking might be unappetizing. The oven baking stage allows for precise control, especially when paired with a reliable meat thermometer. This section will guide you through the timing and the most accurate way to ensure your steak is cooked exactly to your preference, every single time.
How Long to Bake
The baking time in the oven will depend on your steak’s thickness and your desired level of doneness. For a 1 to 1.5-inch thick ribeye, here’s a general guideline after searing:
- Rare: 3-5 minutes (120-125°F / 49-52°C)
- Medium-Rare: 5-7 minutes (130-135°F / 54-57°C)
- Medium: 7-9 minutes (140-145°F / 60-63°C)
- Medium-Well: 9-11 minutes (150-155°F / 66-68°C)
Remember that carryover cooking will increase the internal temperature by a few degrees after it leaves the oven, so aim for temperatures slightly below your final target.
Use a Meat Thermometer
The most accurate way to ensure your steak reaches the ideal doneness is by using an instant-read meat thermometer. Insert the thermometer horizontally into the thickest part of the steak, avoiding any bone or large pockets of fat. This provides the most precise reading of the internal temperature. Relying on visual cues or touch can be unreliable, especially for beginners. The internal temperature is the only true indicator of doneness. Invest in a good quality thermometer; it’s an invaluable tool for consistent cooking results, not just for steak but for all your meats.
The Secret to Juicy Perfection
After all the careful preparation and precise cooking, there’s one final, absolutely critical step that separates a good steak from an outstanding one: resting. This often-overlooked practice is the true secret to a juicy, tender, and incredibly flavorful oven steak. Skipping this step can undo all your hard work, leading to a dry and less enjoyable result. Understand why and how to rest your steak perfectly.
Resting Your Steak
Once your steak reaches its target internal temperature, remove the skillet from the oven and transfer the steak to a cutting board. Crucially, tent it loosely with aluminum foil and let it rest for at least 5-10 minutes (or even longer for very thick cuts). During cooking, the muscle fibers contract, pushing the juices towards the center of the meat. If you slice into the steak immediately, these juices will rush out onto your cutting board, leaving you with a dry steak. Resting allows these juices to redistribute evenly throughout the meat, resulting in a significantly more tender, moist, and flavorful steak. This patience is rewarded with every bite. Don’t miss out on our latest delicious creations; follow us on Instagram for more cooking inspiration.
Serving Your Delicious Steak
After all your efforts, the moment of truth has arrived: serving your perfectly cooked oven steak. Presentation is key, and how you slice your steak can greatly impact its tenderness and eating experience. This final step is where you transform your culinary creation into a beautiful and appetizing dish, ready to be savored.
Slice and Enjoy
Once rested, remove the foil and slice your steak against the grain into desired thickness. Slicing against the grain shortens the muscle fibers, making each bite more tender and easier to chew. You can serve the slices as is, or with a sprinkle of flaky sea salt for an extra pop of flavor. Oven-baked steak pairs wonderfully with a variety of sides, from roasted vegetables and mashed potatoes to a fresh green salad. Garnish with a fresh sprig of rosemary or a drizzle of olive oil for an elegant touch. Enjoy your delicious, perfectly cooked oven steak!
Important Notes for Steak Success
While the basic steps are straightforward, a few key considerations can further refine your oven steak cooking technique. Understanding how to adapt to different scenarios, such as varying steak thicknesses, ensures consistent success and allows you to confidently tackle any cut of meat. These pro tips will help you fine-tune your approach for truly outstanding results every time.
Adjust for Thicker Cuts
The cooking times provided are general guidelines for steaks approximately 1 to 1.5 inches thick. If you’re working with a significantly thicker cut (e.g., 2 inches or more), you’ll need to adjust the oven baking time accordingly. Thicker cuts will require more time in the oven to reach the desired internal temperature. Conversely, thinner steaks will cook faster and might require less oven time, or even just a longer pan sear to finish. Always rely on your meat thermometer as the ultimate guide, rather than fixed timings, to achieve perfect doneness regardless of steak size. For more great main course recipes, explore our collection.
Quick Steak Prep and Cook
One of the great advantages of this oven steak method is its relative speed and efficiency, making it an ideal choice for a weeknight dinner or when you’re looking for a quick yet impressive meal. From preparation to plate, the entire process is surprisingly fast, delivering gourmet results in a minimal amount of time. Get ready to enjoy a delicious steak without spending hours in the kitchen.
Total Time: 25 Minutes
This oven steak recipe is designed for efficiency. Here’s a quick breakdown:
- Prep Time: 5 minutes (for seasoning and bringing to room temperature, though allowing 30-60 mins for room temp is ideal if time permits)
- Sear Time: 4-6 minutes (2-3 minutes per side)
- Bake Time: 5-9 minutes (depending on doneness and thickness)
- Rest Time: 5-10 minutes
With an active cooking time of under 15 minutes, you can have a restaurant-quality steak on your table in roughly 25-30 minutes, not including the optional room temperature rest. This makes it a perfect choice for a flavorful and satisfying meal even on busy evenings.
Steak Nutrition at a Glance
Understanding the nutritional value of your oven steak can help you incorporate it into a balanced diet. Steak, particularly cuts like ribeye, offers significant protein and essential nutrients. This section provides a general overview, allowing you to make informed dietary choices while still enjoying a delicious meal. Always consider portion sizes and preparation methods when assessing nutritional content.
Calories per Serving
The caloric content of a steak serving can vary significantly based on the cut, size, and marbling. For a 3-ounce (approximately 85-gram) cooked serving of ribeye steak, you can expect around 250-300 calories. This figure will increase with larger portions or if extra butter and oil are used generously during cooking. It’s always a good idea to refer to specific packaging or a reliable nutritional database for the most accurate information on the particular cut you are using, as fat content plays a large role in calorie count.
Protein and Fat Details
Steak is an excellent source of high-quality protein, which is vital for muscle repair and growth, satiety, and overall body function. A 3-ounce serving of ribeye typically provides about 20-25 grams of protein. As for fat, ribeye is known for its marbling, meaning it has a higher fat content compared to leaner cuts like sirloin or tenderloin. This contributes to its rich flavor and tenderness. A 3-ounce serving may contain 15-20 grams of fat, including both saturated and unsaturated fats. For those monitoring fat intake, trimming visible fat before cooking or choosing leaner cuts can be an option. Steak also provides essential micronutrients like iron, zinc, and B vitamins.