
This sweet potato cake offers a truly irresistible taste, perfect for those seeking a unique and comforting treat. Its moist texture and warm spice notes make it a standout dessert. Follow our simple steps for a truly memorable baking experience, transforming simple ingredients into a special occasion cake.
Key Takeaways
- This recipe guides you through making a flavorful sweet potato cake.
- Proper ingredient preparation, like roasting sweet potatoes, enhances taste.
- Learn techniques for a perfectly moist batter and ideal baking.
- Discover creative serving and storage ideas for your delicious treat.
Sweet potato cake is truly a delightful pleasure. Its warmth offers comfort in every bite. This special dessert impresses all palates. It’s surprisingly simple to prepare. Enjoy baking something wonderful today.
Irresistible Sweet Potato Cake Overview
What Makes This Cake Special
The irresistible sweet potato cake stands apart from traditional desserts due to its incredible depth of flavor and uniquely moist crumb. Unlike typical spice cakes, it harnesses the natural sweetness and earthy notes of cooked sweet potatoes, creating a distinct profile that’s both comforting and sophisticated. The puréed sweet potato not only contributes to the cake’s characteristic hue but also ensures a wonderfully tender texture, making every slice a delightful experience. This cake often features a harmonious blend of warm spices such as cinnamon, nutmeg, and ginger, which beautifully complement the sweet potato, evoking feelings of home and hearth. It’s a perfect dessert for those looking to expand beyond common cake varieties, offering a pleasant surprise with each bite. The subtle complexity yet approachable taste makes it a beloved choice.
A Perfect Dessert Idea
Searching for a perfect dessert idea that truly impresses? This sweet potato cake is an exceptional choice for any occasion, from casual family gatherings to more formal holiday celebrations. Its robust flavor stands up well to various accompaniments, making it incredibly versatile. Imagine serving this beautiful, fragrant cake during the fall or winter months, perhaps alongside a scoop of vanilla bean ice cream or a dollop of fresh whipped cream. It’s not just a cake; it’s a centerpiece, a conversation starter, and a true crowd-pleaser. Moreover, its homemade charm ensures that it feels special and thoughtful. For more delightful dessert inspiration, check out our recipe for a quick Italian cream cake or our desserts category which features many other sweet treats.
Gathering Your Cake Ingredients
Pantry Staples You Need
Creating an irresistible sweet potato cake begins with assembling the right ingredients, many of which are likely already in your pantry. You’ll need all-purpose flour, granulated sugar, light brown sugar (for added molasses notes), baking powder, baking soda, salt, and a medley of warm spices like cinnamon, nutmeg, and ginger. Don’t forget unsalted butter, large eggs, vanilla extract, and buttermilk, which contributes to the cake’s tender crumb and tangy depth. Having these pantry staples on hand ensures a smooth and enjoyable baking process. Always measure your ingredients accurately for the best results, especially when it comes to leavening agents.
Choosing Best Sweet Potatoes
The star of this delicious treat is, of course, the sweet potato. For the best sweet potato cake, selecting high-quality sweet potatoes is paramount. Look for firm, unblemished sweet potatoes that are free from soft spots or green tints. Varieties like Beauregard, Jewel, or Garnet are excellent choices due to their vibrant orange flesh and naturally sweet, moist characteristics when cooked. Avoid dry or stringy varieties if possible. Whether you choose to roast them for an enhanced, caramelized flavor (highly recommended) or simply boil and mash them, ensuring your sweet potatoes are fresh and flavorful will make a significant difference in the final taste of your cake. This attention to detail is a key baking tip for achieving a truly exceptional flavorful dessert. Learn more about the versatility and nutritional benefits of this root vegetable on its Wikipedia page.
Essential Preparation Steps
Preheating Oven Temperature
Before you even think about mixing your sweet potato cake batter, the very first and most crucial step is to preheat your oven. Proper oven temperature is vital for even baking and achieving the desired texture in your cake. Set your oven to the specified temperature (typically 350°F or 175°C) and allow it ample time to fully reach and stabilize at that heat. This usually takes at least 15-20 minutes after the preheat indicator light goes off. A consistent oven temperature prevents the cake from baking unevenly, resulting in a cake that is perfectly cooked through, rather than having raw spots or over-browned edges.
Preparing Your Cake Pan
The success of your easy baking journey heavily relies on how well you prepare your cake pan. For this irresistible sweet potato cake, a standard 9×13 inch baking pan or two 8 or 9-inch round cake pans are typically used. To ensure your cake releases cleanly, generously grease the pan(s) with butter or baking spray. For an extra layer of protection, especially with sticky cakes, dust the greased pan with a light coating of flour, tapping out any excess. For round pans, you might also consider lining the bottom with a circle of parchment paper after greasing, which guarantees a flawless release. This simple preparation step saves you frustration later and contributes to a beautiful presentation.
Crafting the Sweet Potato Batter
Creaming Butter and Sugar
The foundation of a light and airy sweet potato cake batter begins with the creaming process. In a large mixing bowl, combine the softened unsalted butter with both granulated and brown sugars. Using an electric mixer, beat them together on medium-high speed for about 3-5 minutes, or until the mixture becomes pale, light, and fluffy. This crucial step incorporates air into the butter and sugar mixture, which creates tiny pockets that will expand during baking, resulting in a tender crumb. Don’t rush this stage; proper creaming is a key factor in achieving a wonderfully moist cake. For more on this technique, see “The Art of Creaming Butter” further down.
Mixing Wet Ingredients Thoroughly
Once your butter and sugars are perfectly creamed, it’s time to incorporate the remaining wet ingredients. Beat in the eggs one at a time, ensuring each egg is fully incorporated before adding the next. This prevents the mixture from curdling and helps maintain a smooth consistency. Next, add the vanilla extract and the mashed sweet potato puree. Mix until just combined. Overmixing at this stage can develop the gluten in the flour too much, leading to a tough cake. The goal is a uniform, smooth mixture where all the rich, earthy flavors of the sweet potato are evenly distributed, ready to mingle with the dry elements.
Combining Dry Cake Elements
Whisking Flour and Spices
In a separate medium-sized bowl, it’s time to prepare the dry ingredients for your sweet potato cake. This step is often overlooked but is fundamental for a consistent and well-balanced cake. Whisk together the all-purpose flour, ground cinnamon, nutmeg, ginger, and a pinch of salt. Whisking ensures that the spices are evenly distributed throughout the flour, preventing pockets of concentrated flavor and ensuring every bite of your flavorful dessert is harmonious. This also helps to aerate the flour slightly, which contributes to a lighter texture in the final cake. Take your time with this, making sure no lumps remain.
Integrating Baking Agents
Alongside your flour and spices, you’ll integrate the crucial leavening agents: baking powder and baking soda. These ingredients are responsible for the cake’s rise and tender texture. Make sure to whisk them thoroughly with the flour mixture. It’s important that these are evenly distributed to ensure a uniform rise. Baking powder reacts when wet and with heat, while baking soda requires an acidic ingredient (like buttermilk, which we’ll add later) to activate. The combination creates a double-acting leavening effect, giving your cake a beautiful lift. For a deeper understanding of these agents, you can consult the Wikipedia page on baking powder. Properly integrated, these agents are key to a light, airy, and irresistible sweet potato cake.
Finishing the Cake Batter
Alternating Dry and Buttermilk
The final stage of crafting your sweet potato cake batter involves carefully combining the wet and dry mixtures, along with the buttermilk. This process, known as alternating additions, is crucial for developing the correct cake texture. Begin by adding about one-third of your whisked dry ingredients to the wet sweet potato mixture. Mix on low speed until just combined. Next, pour in half of the buttermilk and mix until incorporated. Repeat this process: add another third of the dry ingredients, mix, then the remaining buttermilk, mix, and finally the last third of the dry ingredients. Always begin and end with the dry ingredients. The key here is to mix only until no streaks of flour remain, being careful not to overmix. Overmixing develops gluten, which can lead to a dense, tough cake. This gentle, alternating addition technique ensures a smooth, homogeneous batter and a beautifully moist cake.
Baking Your Irresistible Sweet Potato Cake
Filling the Prepared Pan
With your perfectly finished batter ready and your cake pan(s) meticulously prepared, it’s time to fill the pan. Carefully spoon or pour the sweet potato cake batter into your greased and floured pan(s). If using multiple round pans, divide the batter evenly among them to ensure uniform baking. Gently smooth the top of the batter with a spatula to create an even surface. A slight tap of the pan on the counter can help release any trapped air bubbles, leading to a denser, more uniform crumb. Avoid overfilling the pan, as the cake will rise during baking; generally, fill pans about two-thirds full.
How to Check Doneness
Baking times for your irresistible sweet potato cake can vary slightly depending on your oven and pan size, so knowing how to check for doneness is more reliable than strictly adhering to a timer. For a 9×13 inch pan, bake for approximately 35-45 minutes. For two 8 or 9-inch round pans, baking time is usually closer to 30-40 minutes. The most common method to check for doneness is the toothpick test: insert a wooden toothpick or thin skewer into the center of the cake. If it comes out clean or with a few moist crumbs attached (but no wet batter), your cake is done. The edges of the cake should also be golden brown and pulling slightly away from the sides of the pan. An underbaked cake will be gummy, while an overbaked cake will be dry, so proper timing is a crucial baking tip for this homemade treat.
Cooling and Serving Your Cake
Initial Pan Cooling Time
Once your irresistible sweet potato cake emerges from the oven, fragrant and golden, resist the urge to immediately remove it from the pan. Cakes are delicate when hot and can crumble or break if handled too soon. Allow the cake to cool in its pan on a wire rack for at least 10-15 minutes. This initial cooling period allows the cake structure to set and firm up, making it much easier to handle without damage. The residual heat in the pan also continues to cook the cake slightly, further developing its flavor and texture. This step is vital for the integrity of your homemade cake.
Complete Cooling on Rack
After the initial pan cooling, carefully invert the cake onto a wire rack to finish cooling completely. If you baked in multiple round pans, gently flip each layer. Ensure the cake is completely cool before attempting to frost or glaze it. Attempting to frost a warm cake will result in melted frosting and a messy presentation. A wire rack allows air to circulate all around the cake, preventing condensation and ensuring the bottom doesn’t become soggy. Patience during this stage is key for a truly perfect dessert. This full cooling process can take anywhere from 1 to 2 hours, or even longer for larger cakes. Once cool, your sweet potato cake is ready for its final touches and eager guests. For other delightful treats that require careful cooling, consider our snickerdoodle cobbler or these rich vanilla bean creme brulee cheesecake cupcakes.
Irresistible Sweet Potato Cake Ideas
Optional Frosting Suggestions
While the natural sweetness and spice of this moist cake make it delightful on its own, adding a frosting can truly elevate your irresistible sweet potato cake to a new level of indulgence. A classic pairing is a rich and tangy cream cheese frosting. Its creamy texture and slight tartness perfectly complement the sweet and earthy notes of the cake. You could also opt for a brown butter frosting for a nutty, caramelized flavor, or a simple vanilla buttercream for a traditional touch. For those who prefer a less sweet option, a spiced whipped cream can be a light and airy accompaniment. Don’t be afraid to experiment with your favorites; the robust flavor of the sweet potato cake can handle a variety of toppings.
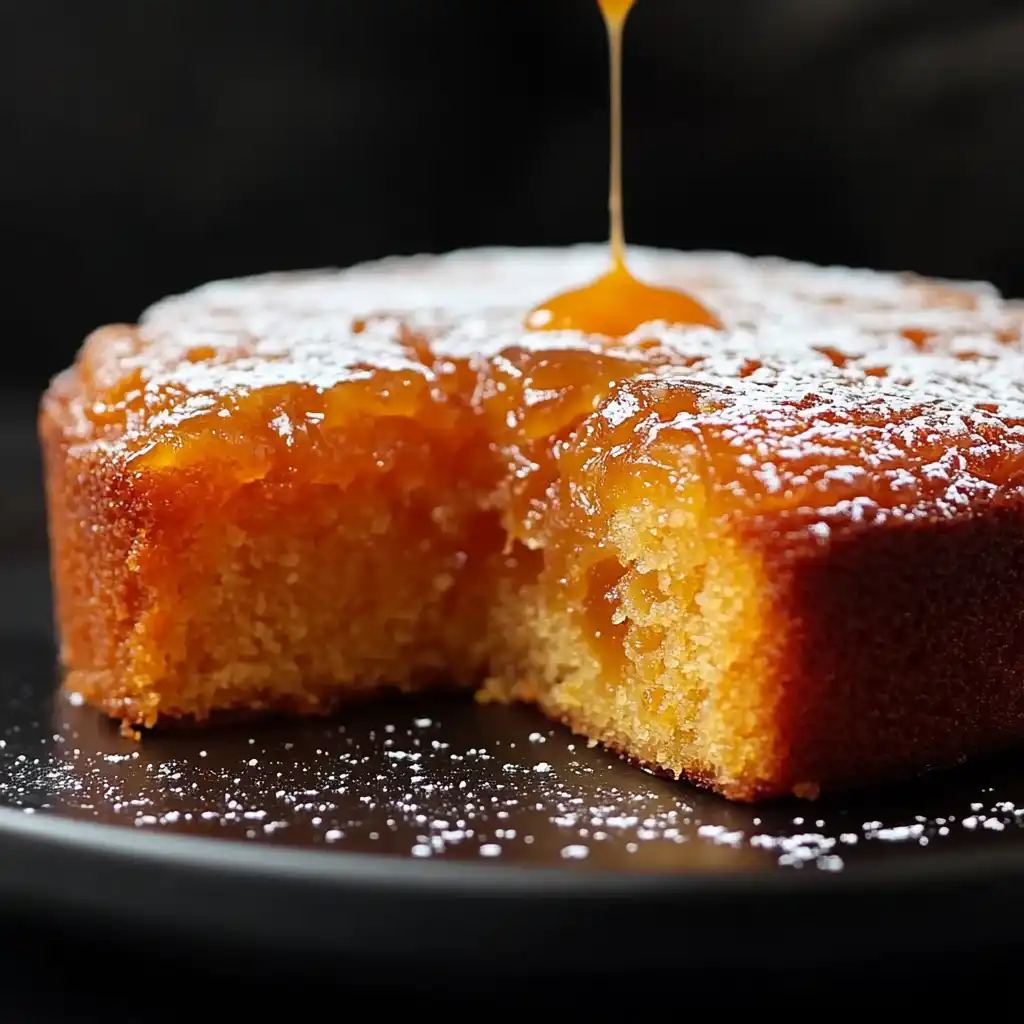
Serving with Simple Glaze
If you prefer a lighter touch than a full frosting, a simple glaze is an elegant and delicious alternative for your sweet potato cake. A classic powdered sugar glaze, perhaps enhanced with a touch of milk or orange juice and a hint of vanilla or bourbon, can add a beautiful sheen and an extra layer of sweetness without overpowering the cake. Drizzle it artfully over the cooled cake, allowing it to gently cascade down the sides. For a spiced glaze, consider adding a tiny pinch of cinnamon or nutmeg directly into the glaze mixture. This approach highlights the cake’s natural deliciousness, offering a sophisticated finish that’s both easy to prepare and visually appealing. A simple glaze is often the best choice when you want the pure, comforting flavor of the sweet potato cake to shine, making it an ideal choice for a perfect dessert.
Making Irresistible Sweet Potato Cake
Roasting Sweet Potatoes for Flavor
To truly unlock the deepest, most complex flavors for your sweet potato cake, roasting your sweet potatoes is a game-changer compared to boiling or steaming. Roasting caramelizes their natural sugars, intensifying their sweetness and adding a wonderful depth that boiling simply cannot achieve. To roast, preheat your oven to 400°F (200°C). Pierce the sweet potatoes several times with a fork, then place them directly on a baking sheet. Roast for 45-60 minutes, or until they are fork-tender and slightly shriveled. Once cooled, scoop out the soft flesh and mash it thoroughly. This small extra step yields a dramatically more flavorful dessert, making your sweet potato cake truly irresistible. This is a top baking tip for elevating any dish that calls for sweet potato puree.
The Art of Creaming Butter
The “creaming” method is more than just mixing butter and sugar; it’s an art that significantly impacts the texture of your sweet potato cake. This technique involves beating softened butter and sugar together until they are light, pale, and fluffy. During this process, tiny air pockets are incorporated into the mixture. These air pockets expand when exposed to the oven’s heat, creating a tender, open crumb in the final cake. Proper creaming takes time, usually 3-5 minutes with an electric mixer, scraping down the bowl sides frequently. Avoid using cold butter, which won’t cream properly, or melted butter, which will yield a dense cake. Perfecting this art ensures a truly light and airy moist cake every time. You can find more cooking methods and tips on our Pinterest page.
Adapting Your Cake Recipe
Making Mini Cupcakes
This versatile sweet potato cake recipe can easily be adapted from a full-sized cake into delightful mini cupcakes, perfect for parties or individual servings. To make cupcakes, line a muffin tin with paper liners and fill each about two-thirds full with batter. Baking time will be significantly shorter, typically 18-25 minutes for standard cupcakes and even less for mini ones (around 12-18 minutes). Keep a close eye on them and use the toothpick test for doneness. Mini cupcakes offer all the wonderful flavor of the larger cake in a convenient, portable format, making them a fantastic option for a grab-and-go delicious treat. Plus, they cool faster, so you can enjoy them sooner!
Using Canned Sweet Potatoes
While fresh sweet potatoes are recommended for their superior flavor, life sometimes calls for convenience. This sweet potato cake recipe can certainly accommodate canned sweet potatoes if fresh ones are unavailable or time is limited. Opt for canned sweet potatoes packed in water or light syrup, not heavy syrup or spiced varieties, as these can alter the cake’s sweetness and spice balance. Drain them thoroughly and rinse if they were in syrup, then mash them well. Ensure the texture is smooth, just like you would with freshly cooked sweet potatoes. While the flavor might be slightly less intense than roasted fresh ones, it still yields a wonderfully moist and flavorful dessert, proving this recipe is quite adaptable for a quick and easy baking solution.
Storing This Sweet Potato Cake
Making Ahead for Flavor
One of the many advantages of this particular sweet potato cake is that its flavors deepen and meld beautifully over time, making it an excellent candidate for baking ahead. In fact, many find the cake tastes even better on the second or third day. If unfrosted, wrap the cooled cake tightly in plastic wrap and store at room temperature for up to 2 days, or in the refrigerator for up to 4-5 days. If frosted with a cream cheese frosting, it must be refrigerated due to the dairy content. Allow refrigerated cake to come to room temperature for about 30 minutes before serving for the best texture and flavor. This makes it a stress-free option for a holiday cake or for special occasions.
Freezing Cake for Later
For longer storage, this irresistible sweet potato cake freezes exceptionally well, allowing you to enjoy a slice whenever a craving strikes. To freeze, ensure the cake is completely cooled. If unfrosted, wrap individual slices or the entire cake tightly in plastic wrap, then an additional layer of aluminum foil. This double wrapping helps prevent freezer burn. For frosted cakes, you can flash freeze them first until the frosting is firm, then wrap. Store in the freezer for up to 2-3 months. To thaw, simply unwrap and let it come to room temperature on the counter for several hours or overnight in the refrigerator. This convenient storage method ensures you always have a delicious treat on hand. You can also visit our Instagram for more baking ideas.