
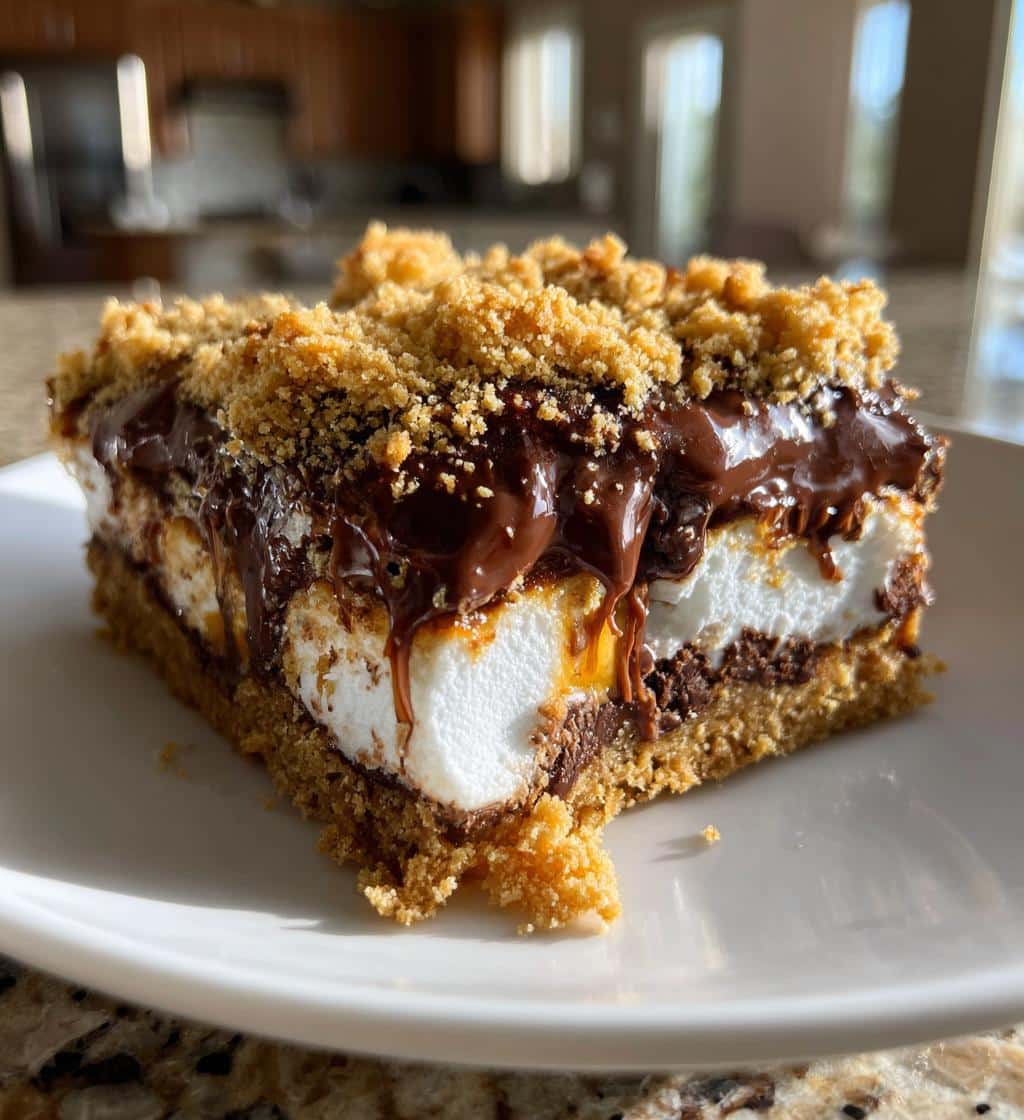
S’mores Cookie Bars are the ultimate combination of a campfire classic and a convenient homemade treat. This easy dessert recipe brings together golden graham cracker crumbs, melty chocolate chips, and gooey marshmallows in a delicious bar form. Get ready to enjoy a sweet snack that’s perfect for sharing with family and friends, all year round.
Key Takeaways
- This recipe for s’mores cookie bars yields 24 delicious servings.
- Total preparation and bake time is approximately 45 minutes, making it a quick dessert option.
- Achieve gooey s’mores bliss by following 7 simple, easy-to-understand steps.
- Uses common pantry staples alongside classic s’mores components for a perfect homemade treat.
- Tips are provided for optimal flavor, texture, and storage of your finished bars.
These bars capture summer’s delight. Enjoy the classic s’mores flavor. They are perfect for any occasion. Baking them is so simple. A sweet joy awaits everyone.
S’mores Cookie Bars: The Recipe Overview
Creating homemade s’mores cookie bars is a delightful experience that brings the taste of a campfire favorite into your kitchen. This easy dessert recipe is designed for maximum flavor with minimal fuss, making it a perfect sweet snack for any occasion. Whether you’re planning a party, need a quick treat for the family, or simply crave the irresistible combination of graham cracker, chocolate, and marshmallow, these bars are sure to hit the spot. Our recipe provides clear, simple steps to achieve a truly memorable dessert.
Total Time: 45 Minutes
One of the best aspects of these s’mores cookie bars is their efficiency. From start to finish, you’ll have these gooey s’mores treats ready in just 45 minutes. This includes active prep time, which is remarkably quick, and the baking duration. This rapid turnaround makes them an ideal choice when you need a fantastic homemade treat without spending hours in the kitchen. The active preparation is straightforward, focusing on combining ingredients efficiently to get your bars into the oven fast. This rapid process doesn’t compromise on flavor, delivering rich, satisfying results every time.
Yields 24 Delicious Bars
This recipe is generously portioned, designed to yield 24 delicious s’mores cookie bars. This makes it perfect for feeding a crowd, bringing to a potluck, or simply having plenty of decadent sweet snacks on hand for your family throughout the week. Each bar is packed with flavor, ensuring everyone gets a satisfying taste of the gooey marshmallow, melted chocolate, and buttery graham cracker crust. The substantial yield means you’ll have enough to share, or to enjoy over several days, making it a versatile and economical option for your dessert repertoire. This generous batch size is just one more reason why these s’mores cookie bars become a quick family favorite.
7 Key Steps to Gooey S’mores Bliss
Achieving the perfect gooey s’mores cookie bars is simpler than you might imagine, thanks to our straightforward, step-by-step approach. This section outlines the essential phases of the baking process, ensuring that even novice bakers can confidently create these irresistible homemade treats. We break down the journey from raw ingredients to a golden, melt-in-your-mouth dessert into easily manageable segments, focusing on clear instructions and optimal results. Our goal is to make your baking experience as enjoyable and stress-free as possible, leading to truly perfect s’mores.
Quick Guide to Making Bars
Making these s’mores dessert bars involves a harmonious blend of simple baking techniques. You’ll start by preparing your cookie dough base, which is rich and buttery. Following this, the signature s’mores elements—graham cracker crumbs, chocolate chips, and mini marshmallows—are carefully incorporated. The layering process is key to achieving that desirable gooey center, creating distinct textures in every bite. This quick guide ensures that you build your bars correctly, maximizing both flavor and visual appeal. For more indulgent dessert ideas, consider exploring recipes like Quick Italian Cream Cake on our site.
Follow Our Simple Instructions
Our instructions are designed to be intuitive and easy to follow, making the baking process seamless from start to finish. Each step is clearly articulated, from combining wet and dry ingredients to layering the s’mores components and baking the bars to golden perfection. We emphasize precision without complexity, guiding you through crucial moments like oven temperature and cooling times. By adhering to these simple instructions, you’re guaranteed to produce s’mores cookie bars that are consistently delicious, with a wonderfully soft, chewy cookie base and a perfectly melted, gooey s’mores topping. This recipe is an ideal entry point for anyone looking to bake a truly rewarding homemade treat.
Gather Ingredients for S’mores Bars
Before you begin the exciting process of crafting these delicious s’mores cookie bars, it’s crucial to gather all your ingredients. This ensures a smooth and uninterrupted baking experience, preventing any last-minute searches. Our recipe utilizes a blend of common pantry staples that you likely already have on hand, combined with the distinctive components that give these bars their classic s’mores flavor. Preparing your ingredients in advance is a simple step that greatly contributes to the overall success and enjoyment of making this easy dessert recipe.
Pantry Staples You Will Need
For the foundational cookie dough, you’ll need several basic pantry items. This includes all-purpose flour, granulated sugar, light brown sugar, unsalted butter (softened), eggs, and vanilla extract. Baking soda and a pinch of salt are also essential to help the cookie bars rise properly and balance the sweetness. These staples form the rich, chewy base that cradles the gooey s’mores elements. Ensuring your butter is at room temperature is important for proper creaming, which contributes to the light and airy texture of the dough. Having these readily available makes the initial mixing process quick and efficient, laying the groundwork for your perfect s’mores experience.
Key S’mores Flavor Components
The magic of these bars truly comes alive with the inclusion of their namesake s’mores ingredients. You’ll need graham cracker crumbs (either pre-crushed or crushed from whole crackers), mini marshmallows, and your favorite chocolate chips or chocolate squares. For an authentic s’mores dessert, it’s best to use mini marshmallows as they melt more evenly and integrate beautifully into the bars. A classic milk chocolate chip works well, but feel free to experiment with semi-sweet or even dark chocolate for a richer flavor profile, as suggested in our tips section. The combination of these specific ingredients provides the distinctive taste and texture that makes these s’mores cookie bars a beloved sweet snack. These are the elements that transform a simple cookie bar into a true campfire classic.
Prep Your Pan and Oven
Proper preparation of your baking environment is a fundamental step to ensure your s’mores cookie bars bake evenly and come out of the pan without sticking. This seemingly small detail can significantly impact the overall quality and presentation of your homemade treat. Taking a few moments to correctly prepare your oven and baking pan will save you frustration later and contribute to a successful baking endeavor for your easy dessert recipe.
Preheat Oven to 350°F (175°C)
Preheating your oven to the specified temperature of 350°F (175°C) is absolutely crucial for baking consistency. A properly preheated oven ensures that the cookie bars begin baking at the correct temperature from the moment they enter, leading to even cooking and proper rising. If your oven isn’t hot enough, the bars may spread too much or bake unevenly, resulting in a less than ideal texture. Always allow your oven to fully reach the target temperature before placing your baking pan inside, typically waiting an extra 10-15 minutes after the preheat light indicates it’s ready, just to be sure. This step is key to developing that perfect golden-brown crust and soft, gooey interior.
Grease Your Baking Pan
For these s’mores cookie bars, thoroughly greasing your baking pan is essential to prevent sticking and ensure easy removal once cooled. For a 9×13 inch baking pan, you can use butter, shortening, or a non-stick cooking spray. For an extra layer of non-stick protection and easier cleanup, consider lining the pan with parchment paper, leaving an overhang on the sides. This overhang acts as “handles” allowing you to lift the entire slab of cooled bars out of the pan effortlessly before slicing. Properly greasing or lining your pan makes cutting and serving your delicious bars much simpler and helps maintain their perfect shape and gooey texture. For other baked goods, like Snickerdoodle Cobbler, proper pan prep is equally important.
Mixing Cookie Dough for S’mores
The foundation of truly exceptional s’mores cookie bars lies in perfectly prepared cookie dough. This section guides you through the process of combining the base ingredients, transforming simple pantry staples into a rich, flavorful dough that will serve as the delicious framework for your gooey s’mores additions. Each step in the mixing process contributes to the final texture and taste of these irresistible homemade treats, ensuring a delightful easy dessert recipe.
Cream Butter and Both Sugars
Begin by creaming together the softened unsalted butter with both granulated sugar and light brown sugar. This step is more than just mixing; it’s about incorporating air into the mixture, which is vital for a light and tender cookie bar. Use an electric mixer on medium speed and beat until the mixture is light, fluffy, and pale in color, typically taking 2-3 minutes. The brown sugar adds a lovely molasses flavor and moisture, contributing to the chewy texture, while the granulated sugar provides crispness. Properly creaming ensures that the sugars are fully dissolved and evenly distributed, creating a smooth and consistent base for your s’mores dessert. This initial step sets the stage for the rich flavor profile of your s’mores cookie bars.
Add Eggs and Vanilla Extract
Once your butter and sugars are perfectly creamed, it’s time to incorporate the eggs and vanilla extract. Add the eggs one at a time, beating well after each addition until fully combined. This staggered approach helps to emulsify the mixture, preventing it from separating and ensuring a smooth, homogenous dough. The eggs provide structure and moisture, contributing to the chewy texture of the bars. Follow with the vanilla extract, which enhances the overall flavor profile of the cookie dough, adding a warm, aromatic note that complements the s’mores components beautifully. Continue to mix until everything is just combined, being careful not to overmix at this stage.
Combine Dry and Wet Ingredients
The final stage of dough mixing involves carefully combining your dry ingredients with the wet mixture. In a separate bowl, whisk together the all-purpose flour, baking soda, and salt. Gradually add the dry ingredient mixture to the wet ingredients, mixing on low speed until just combined. Overmixing the flour can develop the gluten too much, leading to tough cookie bars, so stop as soon as no streaks of flour remain. The goal is a soft, pliable dough that will bake up into a tender, buttery base for your gooey s’mores. This careful combination ensures the perfect texture, making these s’mores cookie bars a true sweet snack delight.
Stir in Final Dough Mix-ins
With your rich, buttery cookie dough base prepared, the next exciting step is to incorporate the elements that truly define these as s’mores cookie bars. This stage is where the traditional campfire classic flavors begin to meld with the cookie dough, creating a harmonious blend of textures and tastes. Gently folding in these final mix-ins ensures they are evenly distributed throughout the dough, setting the stage for every bite to be a delightful experience of graham cracker crunch and chocolatey goodness, contributing to the perfect s’mores experience.
Chocolate Chips and Graham Crumbs
Now, gently fold in the chocolate chips and a portion of the graham cracker crumbs into your prepared cookie dough. Use a spatula to incorporate these mix-ins, being careful not to overmix. The chocolate chips will provide those delightful pockets of melted chocolate once baked, while the graham cracker crumbs integrated into the dough will infuse a subtle, buttery, and slightly spiced flavor that is characteristic of a graham cracker base. This addition boosts the “s’mores dessert” appeal right from the dough stage, ensuring a comprehensive flavor experience. Save some graham cracker crumbs for later, as they will be used for a topping. For more sweet creations, don’t forget to check out our desserts category which features other homemade treats like Peanut Butter Brownie Swirl Cookies.
Layering Gooey S’mores Cookie Bars
The art of creating truly gooey s’mores cookie bars lies in the layering process. This crucial step is what transforms a simple cookie bar into a decadent, multi-textured dessert that perfectly encapsulates the campfire classic. Each layer plays a vital role in achieving the signature gooey s’mores bliss, ensuring that every bite delivers a harmonious blend of chewy cookie, melted chocolate, and toasted marshmallow. Pay close attention to these instructions to achieve the most appealing and delicious homemade treat.
Spread Half of Dough Evenly
Once your dough is ready with the initial mix-ins, take half of it and press it evenly into the bottom of your prepared 9×13 inch baking pan. It’s important to spread this layer as uniformly as possible, covering the entire bottom surface. You can use your hands (lightly floured if the dough is sticky) or the back of a spoon or spatula to achieve an even layer. This bottom layer will form a sturdy, chewy base for your s’mores cookie bars, providing stability and a rich, buttery foundation for the gooey fillings that follow. An even base ensures consistent baking and a pleasant texture throughout the bar.
Add Mini Marshmallows and Squares
Now comes the star of the s’mores show: the marshmallows and chocolate. Over the evenly spread bottom dough layer, scatter a generous amount of mini marshmallows. Using mini marshmallows is recommended because they melt more quickly and distribute more evenly than larger ones, creating that irresistible gooey s’mores texture. Then, if you’re using chocolate squares (like Hershey’s milk chocolate bars), break them into smaller pieces and scatter them amongst the marshmallows. If you’re using chocolate chips, scatter them liberally over the marshmallows. This middle layer is where the magic happens, promising molten chocolate and perfectly toasted marshmallows in every single one of your s’mores cookie bars. This will become the ultimate gooey center of your easy dessert recipe.
Cover with Remaining Dough
Finally, carefully dollop the remaining cookie dough over the marshmallow and chocolate layer. This part can be a bit tricky, as you want to cover the filling without completely squishing it. Drop spoonfuls of dough gently over the top, then use your fingers or a small offset spatula to lightly spread and connect the dough, trying to cover as much of the filling as possible. It doesn’t need to be perfect; some peeking marshmallows and chocolate add to the rustic charm of these homemade treats. This top layer will bake into a golden, slightly crisp crust, sealing in all that gooey s’mores goodness underneath. For visual inspiration and other delightful baking ideas, be sure to visit our Pinterest page.
Baking Your S’mores Cookie Bars Perfectly
Baking is the stage where all your careful preparation comes to fruition, transforming the layered dough into golden, gooey s’mores cookie bars. Achieving the perfect bake ensures that the cookie base is tender, the chocolate is melted, and the marshmallows are beautifully toasted and caramelized. This section provides the key baking instructions to deliver a truly magnificent homemade treat, making sure your easy dessert recipe yields delicious results every time.
Bake for 25-30 Minutes
Place your baking pan into the preheated 350°F (175°C) oven and bake for 25 to 30 minutes. The exact baking time can vary slightly depending on your oven, so it’s important to keep an eye on your bars. Look for a golden-brown edge and a lightly set center. The marshmallows on top will be puffed and slightly golden or caramelized, adding to the classic s’mores dessert appeal. Avoid overbaking, as this can lead to dry bars and a less gooey interior. A little bit of jiggle in the center is perfectly fine, as the bars will continue to set as they cool. The goal is to create a soft, chewy cookie bar with a wonderfully melted and gooey s’mores filling. For more information on the history of s’mores, you can consult Wikipedia’s S’more page.
Cooling and Cutting S’mores Bars
The cooling process is just as critical as the baking itself for s’mores cookie bars. While it might be tempting to dive into these warm, gooey s’mores treats right out of the oven, proper cooling is essential for achieving clean slices and preventing your delicious bars from falling apart. Patience here will be rewarded with perfectly structured and incredibly flavorful homemade treats, ensuring your easy dessert recipe is a complete success.
Let Cool Completely Before Slicing
This instruction cannot be stressed enough: allow your s’mores cookie bars to cool completely in the pan on a wire rack before attempting to slice them. This typically takes at least 2-3 hours, or even longer if your kitchen is warm. As the bars cool, the melted chocolate and marshmallow layers will firm up, and the cookie base will set. Trying to cut them while warm will result in a sticky, messy, and crumbly situation where the layers meld into an unmanageable goo. A completely cooled bar will yield neat, distinct slices, showcasing the beautiful layers and making them easy to serve. Once fully cooled, you can easily lift the entire slab using the parchment paper overhang (if used) and transfer it to a cutting board for precise slicing into your 24 delicious bars. This step is vital for the presentation and enjoyment of your perfect s’mores.
Tips for Best S’mores Cookie Bars
To ensure your s’mores cookie bars reach their full potential and become an unforgettable homemade treat, consider these expert tips. These small adjustments can significantly enhance the flavor and texture, allowing you to customize your easy dessert recipe to your exact preferences. From marshmallow quantity to chocolate choice, these insights will help you create the perfect s’mores experience every time.
Adjust Marshmallow Quantity to Taste
The amount of marshmallows you use in your s’mores cookie bars can be adjusted to your personal preference for gooeyness. The recipe calls for a generous layer, but if you love an extra-gooey s’mores dessert, feel free to add a bit more mini marshmallows. Conversely, if you prefer a less intensely sweet or sticky bar, you can slightly reduce the quantity. Just ensure there’s still enough to create that iconic melted layer. Experimenting with marshmallow levels allows you to fine-tune the texture and sweetness, making these sweet snacks truly your own. Don’t be afraid to customize for your family favorite! You might also enjoy another layered treat like Blueberry Muffin Cookies with Streusel.
Dark Chocolate for Richer Flavor
While milk chocolate chips are a traditional choice for s’mores and provide a classic sweetness, consider using dark chocolate chips or chopped dark chocolate squares for a richer, more sophisticated flavor. The slight bitterness of dark chocolate provides a wonderful contrast to the sweetness of the marshmallows and graham cracker, adding depth and complexity to your s’mores cookie bars. This small substitution can elevate the entire dessert, transforming it into a more grown-up version of the campfire classic. Feel free to use a blend of milk and dark chocolate chips for a balanced approach, making your homemade treat even more unique. For more details on chocolate, you can check its history on Wikipedia.
Store Your Delicious S’mores Cookie Bars
Once your s’mores cookie bars have cooled completely and been sliced, proper storage is key to maintaining their freshness, chewiness, and delightful gooey texture. These homemade treats are best enjoyed within a few days of baking, and keeping them correctly will ensure every bite is as good as the first. This simple step preserves your easy dessert recipe’s quality for longer, allowing you to savor your perfect s’mores.
Keep in Airtight Container
To keep your s’mores cookie bars fresh and prevent them from drying out, store them in an airtight container at room temperature. Layering them between sheets of parchment paper can help prevent sticking, especially if the weather is warm. They will remain fresh and delicious for 3-5 days. While they can be refrigerated, this sometimes makes the cookie base a bit firmer, though still delicious. For longer storage, you can also freeze the cooled bars in an airtight container for up to 2-3 months. Just thaw them at room temperature before serving for a perfectly gooey s’mores experience every time. Don’t forget to follow us on Instagram for more delicious recipe ideas and storage tips!
S’mores Cookie Bars: Nutrition Overview
Understanding the nutritional content of your s’mores cookie bars can be helpful for those monitoring their dietary intake. While specific values can vary based on exact ingredient brands and portion sizes, this section provides a general overview of what you might expect from this delicious sweet snack. For precise nutritional information, it is always recommended to use a reliable nutrition calculator with your specific ingredients.
Per Serving: Calories, Sugar, Fat
Each serving of these homemade s’mores cookie bars typically contains a balance of calories, sugars, and fats, reflecting the rich ingredients like butter, chocolate, and marshmallows. As a delightful easy dessert recipe, they are an indulgence, and their nutritional profile aligns with a classic treat. Individuals focused on tracking specific macronutrients should calculate the exact values based on their chosen ingredients and serving sizes. Enjoy these perfect s’mores as part of a balanced diet, savoring their unique blend of flavors and textures.