
Making a copycat ice cream cake at home brings joy to any celebration. This recipe allows you to replicate that beloved classic dessert experience with simple ingredients and straightforward steps. Prepare to delight your family and friends with a delicious homemade treat that’s perfect for birthdays, holidays, or just because you crave something sweet.
Key Takeaways
- Recreate the iconic Dairy Queen ice cream cake with a homemade recipe.
- The process involves baking a simple cake base, layering ice cream and fudge, and freezing.
- Customize your cake with different flavors and toppings to suit any preference.
- Proper chilling and storage ensure the best texture and longevity of your dessert.
Crafting this dessert is very fun. Layers of joy wait to be created. Simple steps lead to big flavor. It’s a perfect treat for anyone. Enjoy your delicious homemade cake soon.
Why Make This Copycat Ice Cream Cake?
There’s a special kind of nostalgia associated with a classic Dairy Queen ice cream cake, a treat that has graced countless birthday parties and celebrations. Now, you can recreate that beloved experience right in your own kitchen with this fantastic copycat ice cream cake recipe. Imagine the delight on faces when you present a dessert that captures the iconic taste and texture of your favorite frozen cake, all made with your personal touch. This isn’t just about saving a trip to the store; it’s about the satisfaction of crafting a truly special dessert yourself.
Enjoy classic DQ taste at home
Making a homemade ice cream cake offers numerous advantages. Firstly, you get to control the quality of ingredients, ensuring a fresh and delicious outcome every time. You can choose premium ice creams, high-quality chocolate fudge, and a cake mix that suits your preference. This control also extends to dietary needs, allowing you to adapt ingredients if necessary. The process itself is surprisingly simple, making it accessible even for novice bakers. The result is a dessert that rivals its store-bought counterpart, often tasting even better because it’s made with love and care. Plus, the aroma of baking cake and the anticipation of assembling the layers adds to the entire experience, creating lasting memories.
Perfect dessert for any party
Beyond the nostalgic taste, this copycat ice cream cake serves as an absolutely ideal party dessert for any gathering. Its impressive layered appearance makes it a showstopper, guaranteeing compliments from your guests. It’s inherently a crowd-pleaser, appealing to both kids and adults with its combination of rich cake, creamy ice cream, and gooey fudge. Preparing it in advance is another huge benefit; you can assemble the cake days before your event, freeing up precious time on the day of the party. Simply pull it from the freezer when it’s time to serve, slice, and enjoy. Whether it’s a birthday, anniversary, holiday gathering, or a casual weekend get-together, this cake promises to be the sweet highlight of your event. For other party delights, consider making a funnel cake bites recipe to complement your cake spread.
Gather Cake Recipe Ingredients Easily
One of the most appealing aspects of this easy ice cream cake recipe is the accessibility of its ingredients. You don’t need obscure or hard-to-find items; most of what you’ll use are likely staples in your kitchen or readily available at any local grocery store. This simplicity makes the entire baking process less daunting and more enjoyable, allowing you to focus on the creative assembly of your dessert rather than a complex shopping list. Knowing you can whip up such an impressive treat with common items is incredibly rewarding and encourages more frequent baking adventures. For more delicious dessert recipes and ideas, visit our desserts category.
Simple items for delicious dessert
The core components typically include a boxed chocolate cake mix, eggs, oil, water (as per cake mix instructions), your favorite vanilla ice cream, chocolate ice cream, and a good quality hot fudge topping. You’ll also need some whipped topping for the final flourish. These simple ingredients come together to create a complex flavor profile that belies their straightforward nature. The beauty is in their combination, forming distinct layers that offer varied textures and temperatures in every bite. Consider adding sprinkles, chopped nuts, or even crushed candies if you plan to customize further down the line.
Check your pantry first
Before heading to the store, take a moment to peek into your pantry and freezer. You might be surprised at how many items you already have on hand. A common chocolate cake mix, some cooking oil, and perhaps even a tub of vanilla ice cream could be waiting for their moment to shine. This quick check can save you time and money, making the process even more efficient. Ensure your hot fudge topping is shelf-stable or readily available. Having everything prepared before you start ensures a smooth and stress-free baking and assembly experience, letting you focus on the fun parts. To learn more about the history and variations of this delightful treat, you can read about ice cream cake on Wikipedia.
Bake Your Chocolate Cake Base
The foundation of any great copycat ice cream cake is a perfectly baked cake base. For simplicity and consistent results, we recommend starting with a high-quality boxed chocolate cake mix. This saves time and ensures a moist, delicious cake that will hold up well under the layers of ice cream and fudge. While some might prefer to bake from scratch, the boxed mix streamlines the process significantly without compromising on taste, making this recipe approachable for all skill levels. The rich, deep flavor of chocolate complements the cold, creamy ice cream beautifully, creating that signature contrast that makes this dessert so irresistible.
Follow mix box directions
For the best results, it’s crucial to meticulously follow the instructions provided on your chosen chocolate cake mix box. Pay close attention to the specified quantities of eggs, oil, and water, as these can vary slightly between brands. Accurate measurements ensure the cake bakes correctly, achieving the ideal texture and moisture content. Overmixing can lead to a dense cake, so mix until just combined, as recommended. Use the correct pan size—typically two 8-inch or 9-inch round cake pans—and prepare them properly by greasing and flouring, or lining with parchment paper, to prevent sticking. A well-baked cake base is essential for the structural integrity of your finished ice cream cake, providing a sturdy foundation for the layers to come. If you’re looking for other delightful baked goods, try our recipe for quick Italian cream cake.
Cool cake completely before use
Patience is a virtue, especially when it comes to cooling your cake layers. After removing them from the oven, let them cool in the pans for about 10-15 minutes before inverting them onto a wire rack. It is absolutely imperative that the cake layers cool completely before you attempt to assemble your ice cream cake. Any residual warmth will cause the ice cream to melt prematurely, leading to a messy and unstable dessert. This cooling process can take several hours, or you can speed it up slightly by placing the cooled-down layers (still on the wire rack) in the refrigerator for a while. Ensure they are cool to the touch all the way through before moving on to the next step. A properly cooled cake guarantees clean layers and a beautifully structured final product.
Assemble Irresistible Ice Cream Cake Layers
The magic of a copycat ice cream cake truly comes to life during the assembly phase, where each component is carefully layered to create that distinct, mouth-watering structure. This step requires a bit of precision and quick action, as you’re working with frozen and semi-frozen ingredients. Having all your components ready—cooled cake, softened ice creams, and warmed fudge—before you begin will make the process much smoother. The goal is to create distinct, appealing layers that not only look fantastic but also deliver a balanced bite of cake, fudge, and ice cream. This is where your homemade creation starts to really take shape and resemble the classic treat everyone loves, making it an exciting part of the dessert-making journey.
Cut cake layers evenly
Evenness is key for a stable and aesthetically pleasing ice cream cake. If your baked cake layers have a domed top, gently level them using a serrated knife. This ensures that when you stack them, your cake sits flat and doesn’t lean. For an ideal ice cream cake structure, you will typically need two layers of chocolate cake. If you baked two separate thinner cakes, great! If you baked one thicker cake, you’ll need to slice it horizontally into two even layers. A long, serrated knife and a steady hand are your best tools here. Take your time to achieve clean, uniform layers, as this will significantly impact the final look and stability of your dessert. Perfectly cut layers make the subsequent steps of spreading ice cream and fudge much easier and result in a professional-looking finish.
Prepare your serving plate
Before you begin layering, select your final serving plate or platter. It’s much easier to build the cake directly on the plate you intend to serve it on rather than trying to transfer a heavy, frozen cake later. If you’re concerned about mess during assembly, you can place strips of parchment paper under the edges of your first cake layer on the plate. These can be gently pulled out once the cake is fully assembled and frozen, leaving a clean serving surface. This foresight prevents potential mishaps and ensures your beautiful creation remains pristine. A sturdy, flat surface is essential, so choose a plate or cake stand that can comfortably support the weight and size of your finished homemade ice cream cake.
Hot Fudge and Vanilla Ice Cream
The initial layers are crucial for setting the tone and flavor profile of your copycat ice cream cake. The combination of rich chocolate cake, luscious hot fudge, and creamy vanilla ice cream creates that quintessential taste and texture that makes this dessert so popular. Ensure your hot fudge is at a spreadable temperature—not too hot, which would melt the cake, but warm enough to easily spread. For the ice cream, letting it soften slightly at room temperature for 10-15 minutes before you begin makes it much easier to work with, allowing for smooth, even layers without too much struggle. This step is where the classic flavors truly begin to intermingle, building anticipation for the final product.
Spread fudge on first layer
Take one of your cooled, leveled chocolate cake layers and place it centrally on your prepared serving plate. This will be the base of your cake. Next, generously spread a layer of hot fudge topping over the entire surface of the cake. Aim for an even coating, extending almost to the edges but leaving a small border, as it will spread slightly when the ice cream is added. The fudge layer not only adds an incredible depth of chocolate flavor but also acts as a delicious glue between the cake and ice cream, preventing the ice cream from soaking into the cake too much. For a truly rich experience, don’t be shy with the fudge!
Add soft vanilla ice cream
Immediately after the fudge, add your slightly softened vanilla ice cream. Spoon dollops of ice cream over the fudge layer, then gently spread it out using an offset spatula or the back of a spoon. The goal is to create a thick, even layer of vanilla ice cream that covers the fudge completely. Work relatively quickly here to minimize melting. Once the layer is smooth, you’ll want to place the entire base (cake, fudge, vanilla ice cream) into the freezer for about 20-30 minutes. This quick chill helps the vanilla ice cream firm up slightly, making it easier to add the next cake layer without squishing the ice cream. This intermediate freezing step is vital for maintaining the distinct layers and structural integrity of your delicious homemade dessert.
Chocolate Ice Cream and Whipped Topping
With the vanilla ice cream firm, it’s time to add the second cake layer and rich chocolate ice cream. This stage completes the core structure of your copycat ice cream cake, adding height, flavor, and texture. Ensure ice cream is softened but not melted. Careful layering, followed by light whipped topping, creates an impressive homemade dessert. The classic chocolate and vanilla combination will shine.
Top with second cake layer
Remove your partially frozen cake base from the freezer. Carefully place the second chocolate cake layer directly on top of the firmed vanilla ice cream. Gently press down to ensure it adheres well. Avoid pressing too hard, which could squeeze out ice cream. Level cake layers ensure a flat surface for the next ice cream layer. This top cake layer creates a delicious core, ready for its chocolatey crown. For visual inspiration on assembling incredible desserts, check out our Carina Recipes Pinterest page.
Spread chocolate ice cream
Now, it’s time for the chocolate ice cream. Spoon dollops of the slightly softened chocolate ice cream over the entire second cake layer. Use an offset spatula to spread it evenly from edge to edge, aiming for a generous, uniform layer. The contrasting flavors of vanilla and chocolate ice creams are what make a Dairy Queen ice cream cake so iconic. Work efficiently to keep ice cream mostly frozen. Return the cake to the freezer for 20-30 minutes to firm up this layer before the final topping.
Finish with whipped topping
Once the chocolate ice cream layer is firm, take your cake out for the final decorative touch. Spread a generous amount of whipped topping over the top and sides of the cake. You can use store-bought or homemade. Smooth it out for a neat finish, or create decorative swirls using an offset spatula or piping bag. The whipped topping provides a light, airy contrast to the rich cake and ice cream. This final layer gives it that classic finished look of a perfect homemade ice cream cake.
Chill Your Dairy Queen Ice Cream Cake
After all the careful layering, the most crucial step to ensure the success and stability of your copycat ice cream cake is adequate chilling. This isn’t a step to rush; patience truly pays off here. A properly frozen cake will hold its shape beautifully when sliced, and the distinct layers will remain separate and intact. Rushing the freezing process can lead to a messy, unstable cake that crumbles and melts too quickly, losing the delightful structural integrity that makes an ice cream cake so appealing. Think of the freezer as the final setting stage, where all your hard work is solidified into a delicious masterpiece, ready for enjoyment.
Freeze cake two hours
Once your cake is fully assembled with all its layers and whipped topping, cover it loosely with plastic wrap or aluminum foil, taking care not to disturb the whipped topping. Then, transfer the entire cake to the freezer. It needs a minimum of two hours to freeze solid. For best results, especially if you’re making it ahead of time, a four-hour freeze or even overnight is ideal. This extended freezing time ensures that every layer, from the cake base to the ice creams and fudge, becomes firm and well-integrated. This makes for clean cuts and prevents the cake from collapsing or melting too quickly when it’s served. This waiting period transforms your layered creation into a true freezer dessert.
Helps layers set firmly
The freezing process is essential for the structural integrity of your homemade ice cream cake. When frozen thoroughly, the ice cream layers harden, creating a solid block that supports the cake and fudge. This firmness is what allows you to slice through the cake cleanly, revealing those beautiful, distinct layers. Without sufficient freezing, the ice cream would be too soft, leading to squashed layers and a messy presentation. It also prevents the cake from becoming soggy, as the cold locks in the moisture of the cake and prevents the ice cream from seeping into it. A well-chilled cake is not just firmer; it tastes better, offering a delightful contrast of textures and temperatures in every bite, truly mimicking the famous Dairy Queen ice cream cake.
Serving Your Perfect Ice Cream Cake
After patiently waiting for your copycat ice cream cake to chill, the moment of truth arrives: serving. A perfectly chilled cake is a joy to behold and even more delightful to eat, but proper serving techniques ensure that every slice looks as good as it tastes. The key is to manage the cake’s temperature correctly, allowing it to soften just enough for smooth cutting without melting into a puddle. This section provides valuable serving tips to help you present your impressive dessert with confidence, making sure each guest receives a beautiful and intact portion of your homemade creation.
Slice cleanly when frozen
To achieve clean, crisp slices, remove the cake from the freezer approximately 10-15 minutes before you plan to serve it. This allows the ice cream to soften slightly, making it easier to cut through, but not so much that it becomes runny. For the cleanest cuts, use a long, sharp, serrated knife. Dip the knife in hot water and wipe it clean between each slice. This simple trick warms the blade, allowing it to glide through the frozen layers with ease, minimizing sticking and crumbling. Each slice will then reveal the beautiful, distinct layers of cake, fudge, and ice cream that you so carefully created, ensuring a picture-perfect presentation for your special freezer dessert.
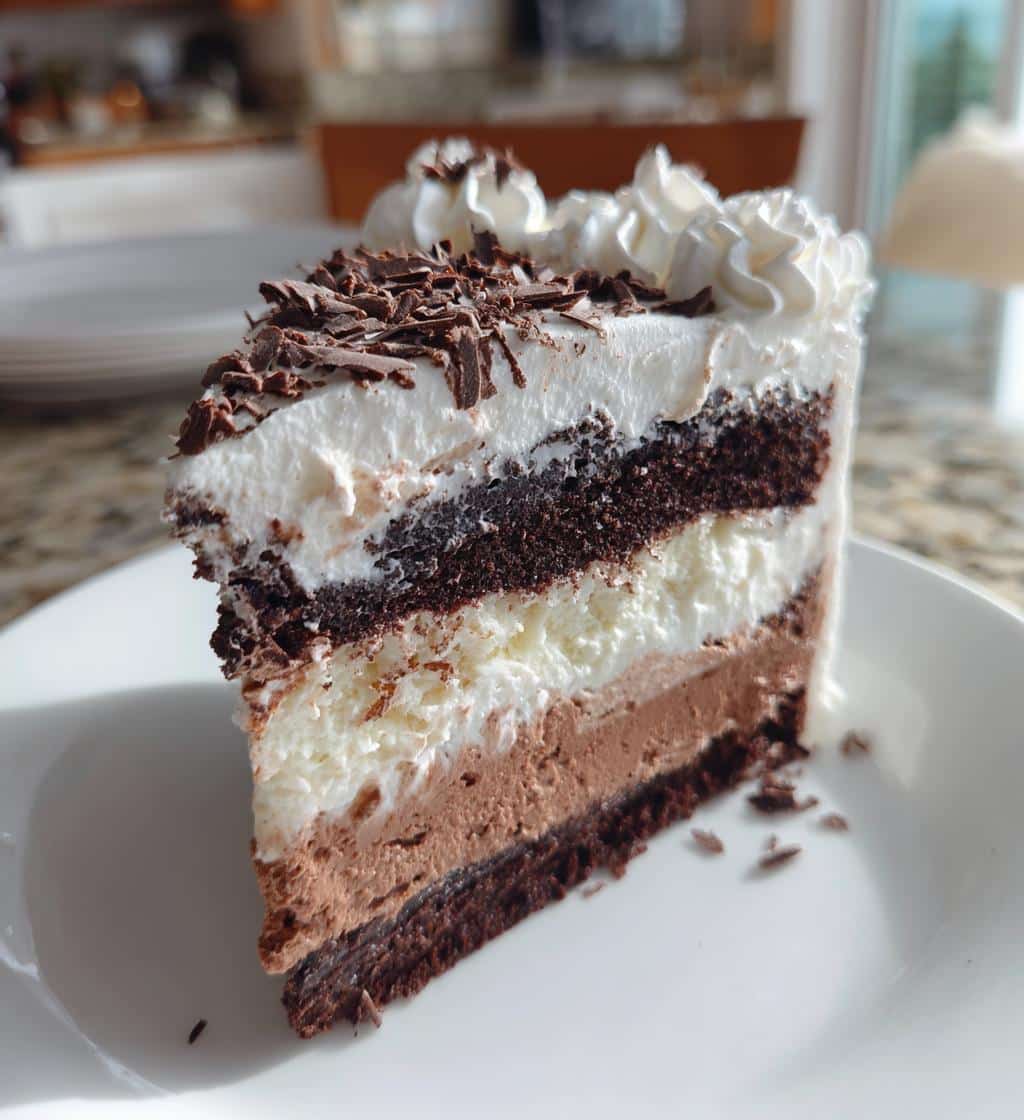
Decorate with chocolate shavings
While the whipped topping provides a lovely finish, adding a few simple decorations can elevate your homemade ice cream cake to bakery-worthy status. Chocolate shavings are a classic and elegant choice that beautifully complement the chocolate cake and ice cream flavors. You can easily make your own by using a vegetable peeler on a block of chocolate, or purchase pre-made shavings. Other ideas include a drizzle of extra hot fudge, sprinkles, chopped nuts, or even fresh berries. These small additions add visual appeal and a touch of extra texture or flavor. A beautifully decorated cake makes the serving experience even more special and highlights your effort. For another sweet treat that’s perfect for celebrations, try our vanilla bean creme brulee cheesecake cupcakes. To learn more about the delightful ingredient, read about chocolate on Wikipedia.
Store Leftover Ice Cream Cake Safely
It’s rare to have leftovers of such a delicious copycat ice cream cake, but if you do, proper storage is essential to maintain its quality and freshness. An ice cream cake, by its very nature, is a delicate dessert that can easily succumb to freezer burn or absorb unwanted odors if not stored correctly. Taking a few simple precautions will ensure that every subsequent slice tastes just as wonderful as the first, allowing you to enjoy your homemade creation for days to come. These storage tips are critical for preserving the texture, flavor, and overall appeal of your impressive frozen dessert.
Wrap cake tightly for freezer
To protect your leftover cake from freezer burn and the absorption of other food odors, it is crucial to wrap it tightly. If you have an airtight cake carrier, that’s the best option. Otherwise, carefully wrap the remaining cake—whether it’s a whole section or individual slices—first in plastic wrap, ensuring it’s completely sealed. Then, add a second layer of aluminum foil for extra protection. This double-layer approach creates an effective barrier against air and moisture, which are the main culprits behind freezer damage. The goal is to keep as much air away from the cake surfaces as possible to maintain its creamy texture and fresh taste.
Keeps fresh for few days
When properly wrapped and stored in a consistently cold freezer, your homemade ice cream cake can remain fresh and delicious for up to 3-5 days. While it might last longer technically, the quality and texture are best within this timeframe. Beyond that, the ice cream can start to develop ice crystals, and the cake might dry out slightly, even with careful wrapping. When you’re ready for another slice, simply remove the desired portion from the freezer, unwrap it, and let it sit at room temperature for 5-10 minutes to soften slightly before enjoying. This ensures you can savor your amazing Dairy Queen ice cream cake long after the party is over.
Customize Your Copycat Ice Cream Cake
While the classic chocolate and vanilla combination of a Dairy Queen ice cream cake is undeniably delicious, making a homemade ice cream cake opens up a world of customization possibilities. This is where you can truly make the recipe your own, adapting it to personal preferences, seasonal themes, or specific party requirements. Don’t feel limited by the original; consider this recipe a fantastic canvas for your culinary creativity. Customizing your cake allows you to surprise and delight guests with unique flavor combinations and textures, making each creation a truly special dessert experience. It also means you can enjoy this treat again and again without it ever feeling repetitive.
Try different cake flavors
Instead of a standard chocolate cake mix, why not experiment with other flavors? A rich dark chocolate cake would provide an even more intense base, while a yellow or vanilla cake could offer a lighter contrast. For a fruity twist, a strawberry or lemon cake mix could be interesting, especially when paired with complementary ice cream flavors. Even a red velvet cake could create a stunning visual and flavor profile. Always ensure the cake is fully cooled before proceeding with the ice cream layers. This simple change in the cake base can dramatically alter the entire character of your copycat ice cream cake, offering a fresh take on a beloved classic. Consider pairing it with a rich peanut butter brownie swirl cookies recipe.
Mix up ice cream choices
The ice cream layers are another prime area for creativity. Beyond vanilla and chocolate, the options are limitless! Think mint chocolate chip, coffee, strawberry, cookie dough, or even a delightful swirl of two different flavors. Seasonal ice creams like pumpkin spice or peppermint can make your cake perfect for holidays. Just ensure your chosen ice creams have a similar consistency for easy spreading. Pairing a fruit-flavored ice cream with a complementary cake, or a nut-flavored ice cream with chocolate fudge, can lead to incredible results. This is your chance to really showcase your favorite ice cream varieties and create a truly personalized ice cream cake.
Add fruit or candy layers
Beyond changing the cake and ice cream, adding additional layers between or on top of the ice cream can provide extra texture and flavor. Consider crushed cookies (like Oreos or graham crackers), chopped candy bars (Snickers, Heath Bar), or even a layer of fresh fruit like sliced strawberries or raspberries (just add these closer to serving time to prevent them from freezing too hard). A layer of caramel sauce, peanut butter sauce, or even a different type of fudge could also be incorporated. These additions can transform your simple homemade ice cream cake into an indulgent, multi-textured masterpiece. Get creative and have fun with it!
Nutrition Facts for Each Slice
When indulging in a delightful dessert like a copycat ice cream cake, it’s natural to be curious about its nutritional impact. While this treat is certainly a special occasion indulgence rather than an everyday staple, understanding the general nutrition facts for each slice can help you enjoy it mindfully. Keep in mind that homemade versions can vary significantly from commercial products, especially depending on the brands of cake mix, ice cream, and fudge topping you choose. This section provides a realistic perspective on what to expect, allowing you to make informed choices without detracting from the enjoyment of your delicious creation.
Know your serving calories
The caloric content of your homemade ice cream cake will largely depend on the specific ingredients used and the size of your slices. A typical serving, which can be quite generous, might range anywhere from 300 to 500 calories or more per slice. Factors like using full-fat ice cream versus reduced-fat options, the amount of fudge topping, and the density of your cake base all contribute to the final calorie count. If you’re mindful of calorie intake, consider using lighter ice cream alternatives or being slightly more conservative with the fudge and whipped topping. Remember, this is a treat, so savoring a smaller portion can be just as satisfying as a larger one. Portion control is key to enjoying such a rich dessert responsibly.
Check sugar and fat content
Given its primary ingredients of cake, ice cream, and fudge, a slice of homemade ice cream cake will naturally be high in both sugar and fat. The sugar content comes from the cake mix, ice cream, and fudge, providing that satisfying sweetness. Similarly, dairy fats in the ice cream and whipped topping, along with oils in the cake, contribute to the fat profile. Exact numbers are difficult to provide without knowing your specific ingredients, but it’s safe to assume a slice will contain a significant amount of saturated fat and sugars. If these are areas of concern, look for low-sugar cake mixes, reduced-fat ice creams, and sugar-free fudge toppings. However, for most, this cake is an occasional pleasure designed to bring joy, so enjoy it in moderation as part of a balanced diet.
Tips for Best Dairy Queen Cake
Creating the best ice cream cake at home, one that truly rivals the iconic Dairy Queen ice cream cake, involves paying attention to a few critical details. These expert tips are designed to help you avoid common pitfalls and ensure your homemade version is nothing short of spectacular. From the moment you begin preparing your ingredients to the final chilling process, each step contributes to the overall success, texture, and presentation of your dessert. Following these pieces of advice will not only simplify your baking experience but also guarantee a superior result that will impress everyone who tastes it.
Soften ice cream slightly
One of the most important secrets to smooth, even ice cream layers is to allow your ice cream to soften slightly before spreading. Don’t let it melt into a liquid, but rather bring it to a consistency similar to soft-serve. This usually takes about 10-15 minutes at room temperature, depending on how hard your ice cream is to begin with. Softened ice cream is much easier to spread uniformly across the cake layers, preventing tearing or crumbling of the cake beneath. If your ice cream is too hard, you’ll struggle to spread it and might end up with an uneven, bumpy layer. If it’s too soft, it will melt too quickly and make the cake soggy. This slight softening is a small step that makes a huge difference in the final product’s appearance and texture.
Ensure even layers for stability
Evenness in your cake and ice cream layers is paramount for both the visual appeal and structural stability of your homemade ice cream cake. Level your cake layers if they have domes, and use an offset spatula to spread each layer of ice cream and fudge as uniformly as possible. Uneven layers can cause the cake to lean, sag, or even collapse when sliced, especially if it’s not completely frozen. Taking the time to smooth out each layer carefully will pay off immensely when you cut into your finished dessert, revealing beautifully defined lines. A stable cake is easier to handle, transport, and serve, making your dessert experience stress-free and enjoyable.
Don’t skip freezing time
This cannot be stressed enough: adequate freezing time is absolutely non-negotiable for a successful copycat ice cream cake. Each intermediate freezing step, and especially the final extended chill (at least 2-4 hours, or preferably overnight), is vital. It allows the ice cream layers to firm up completely, the cake to become perfectly integrated, and the entire structure to solidify. Skipping or shortening these freezing times will result in a soft, messy cake that melts too quickly and is impossible to slice cleanly. Patience in freezing ensures a firm, beautiful, and delicious dessert. For more behind-the-scenes glimpses into our baking process and delicious recipes, be sure to follow us on Instagram!