
Irresistible Apple Crisp Mini Cheesecakes are the perfect bite-sized sweet treat for any occasion. This recipe combines the comforting flavors of apple crisp with the creamy indulgence of cheesecake. Ideal for parties or a cozy evening, these delightful mini desserts will surely impress everyone who tries them. Get ready to bake something truly special.
Key Takeaways
- Create delicious, bite-sized apple crisp cheesecakes.
- Enjoy quick preparation and baking times.
- Perfectly balanced creamy and crisp textures.
- Ideal dessert for gatherings or personal enjoyment.
- Simple steps for cooling, serving, and storage.
Craving a unique dessert? These cheesecakes offer autumn flavors. They are simple to prepare. Everyone will love these treats. A perfect balance of taste.
Irresistible Apple Crisp Mini Cheesecakes Recipe
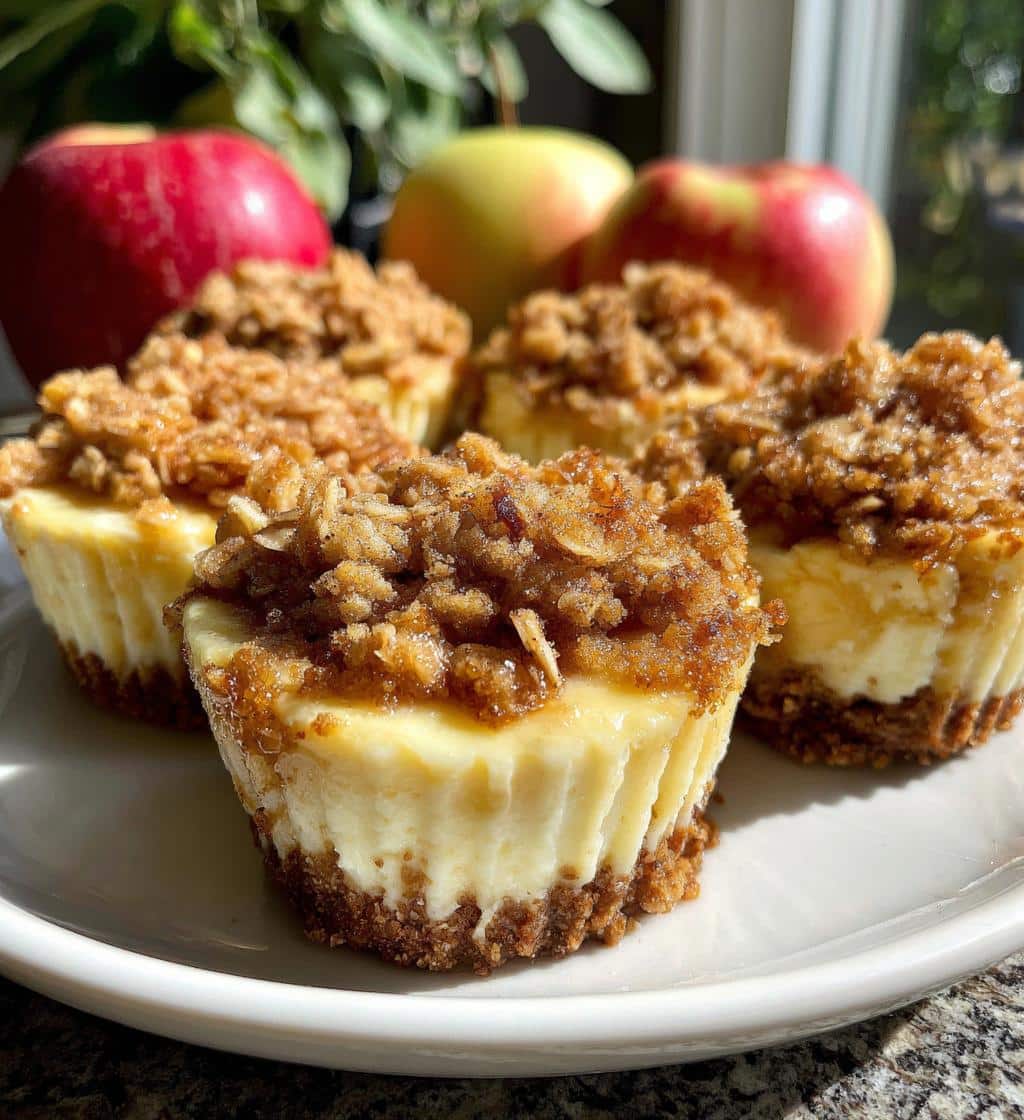
This irresistible apple crisp mini cheesecakes recipe brings together two beloved desserts into one delightful bite-sized treat. Combining the creamy richness of cheesecake with the warm, spiced comfort of apple crisp, these mini cheesecakes are perfect for any gathering, holiday, or simply as a special dessert at home. They offer a fantastic alternative to traditional apple pie or larger cheesecakes, providing individual portions that are both elegant and easy to serve. The layered textures—from the crunchy graham cracker crust to the smooth cream cheese filling and the spiced apple topping with a buttery oat crumble—create a truly memorable dessert experience.
Quick Prep and Bake Times
One of the best aspects of this mini cheesecakes recipe is its efficiency. With careful planning, you can significantly reduce the total time spent in the kitchen. The components, such as the graham cracker crust and the apple topping, can be prepared in advance, making the assembly process much quicker. The individual size of these cheesecakes also means they bake faster than a full-sized cheesecake, allowing you to enjoy your delicious creations sooner. Total active preparation time is approximately 30-45 minutes, with baking adding another 20-25 minutes, making this an achievable dessert even on busy days.
Serves 12 Delicious Treats
This recipe is designed to yield 12 individual mini cheesecakes, making it an excellent option for sharing. Whether you’re hosting a dinner party, planning a potluck, or just want enough treats for your family with a few leftovers, this quantity is just right. Each cheesecake is perfectly portioned, ensuring everyone gets a satisfying taste without overindulging. The elegant presentation of these mini desserts also makes them a fantastic addition to any dessert table.
Essential Tools for Baking
To ensure a smooth baking process for your apple crisp mini cheesecakes, having the right tools on hand is crucial. You’ll need a 12-cup muffin tin, ideally lined with paper or foil liners for easy removal. A food processor is highly recommended for quickly making the graham cracker crumbs and the oat crumble, though you can also use a zip-top bag and a rolling pin for the crumbs. Mixing bowls of various sizes, a hand mixer or stand mixer for the cream cheese filling, measuring cups and spoons, and a sturdy spatula will also be essential. Don’t forget a sharp peeler and knife for preparing the apples. For more dessert inspirations, check out our recipe for Vanilla Bean Creme Brulee Cheesecake Cupcakes.
Gather All Ingredients Needed
Before you begin the delightful process of creating these mini apple crisp cheesecakes, ensure all your ingredients are measured and ready. Having everything prepped, a method often called “mise en place,” streamlines your baking experience and helps prevent last-minute rushes. This recipe calls for a mix of pantry staples and fresh produce, all contributing to the rich, layered flavors that make these treats so irresistible.
Creamy Filling Components
The heart of any cheesecake lies in its creamy filling. For this recipe, you will need full-fat cream cheese, softened to room temperature, which is crucial for achieving a smooth, lump-free batter. Granulated sugar provides the sweetness, while an egg helps bind the mixture and adds richness. A touch of sour cream or Greek yogurt adds a subtle tang and contributes to the velvety texture of the cheesecake. A splash of vanilla extract will enhance all the sweet flavors.
Crust and Crumble Items
The foundation and topping of these mini cheesecakes require specific ingredients to achieve their signature crunch. For the crust, gather graham cracker crumbs, which you can make yourself from whole graham crackers or buy pre-crushed. Melted unsalted butter will bind the crumbs together. For the crispy oat crumble, you’ll need rolled oats (not instant), brown sugar for its molasses notes, and more melted butter. A pinch of cinnamon can also be added to the crumble for extra warmth, complementing the apple topping beautifully.
Fresh Apple and Spice
The apple topping is what truly elevates this dessert, bringing in the “apple crisp” element. Select firm, tart-sweet apples like Honeycrisp, Granny Smith, or Fuji. You’ll need about one to two medium apples, peeled, cored, and finely diced. A blend of cinnamon and a touch of nutmeg will bring out the natural sweetness of the apples and infuse them with that classic fall flavor. A small amount of granulated sugar can also be mixed with the apples to create a slightly jammy texture when baked, further enhancing the taste of your homemade dessert.
Making the Graham Cracker Crust
The foundation of your mini cheesecakes is a buttery, slightly sweet graham cracker crust. This step is straightforward but essential for a good base that holds up to the creamy filling. A well-made crust provides a delightful contrast in texture to the smooth cheesecake and adds another layer of flavor. It’s the first element guests will taste, so making it perfectly crunchy and flavorful is key to an overall satisfying dessert.
Combine Crumbs with Butter
Start by gathering your graham cracker crumbs. If using whole crackers, process them in a food processor until fine or crush them inside a zip-top bag using a rolling pin. You’ll typically need about 1.5 cups of crumbs for 12 mini cheesecakes. In a medium bowl, combine the graham cracker crumbs with melted unsalted butter and a tablespoon of sugar, if desired, for extra sweetness. Mix thoroughly until the crumbs are evenly moistened, resembling wet sand. This ensures that the crust will bind together properly when pressed into the muffin tin. The butter acts as a binder, and the sugar enhances the overall flavor profile, creating a perfect base for your apple crisp cheesecakes.
Press Firmly into Pans
Once your crumb mixture is ready, divide it evenly among the 12 cups of your prepared muffin tin. Using the bottom of a small glass, a tart tamper, or even your fingertips, press the mixture firmly and evenly into the bottom of each liner. Compacting the crust is crucial to prevent it from crumbling when the cheesecakes are removed from the tin. A firm crust will also provide a stable base for the filling. After pressing, you might want to chill the crusts for 10-15 minutes while you prepare the filling. This extra step helps them set even more, contributing to a perfect bite. This firm base is the first step towards a truly professional-looking and tasting mini cheesecake.
Crafting the Cream Cheese Filling
The creamy, tangy filling is what makes these apple crisp mini cheesecakes truly irresistible. Achieving a smooth, luscious texture is paramount, and it largely depends on the temperature of your ingredients and the mixing technique. A perfectly crafted filling provides a rich counterpoint to the spiced apples and crunchy oat crumble, creating a harmonious blend of flavors and textures in every bite. This section will guide you through preparing the velvety cream cheese mixture.
Blend Cream Cheese Smooth
For the smoothest filling, ensure your full-fat cream cheese is completely softened to room temperature. This is a critical step; cold cream cheese will result in a lumpy batter. In a large mixing bowl, using an electric mixer on medium speed, beat the softened cream cheese until it is light, fluffy, and completely smooth, with no lumps remaining. Scrape down the sides of the bowl frequently to ensure even mixing. Once smooth, gradually beat in the granulated sugar until it is fully incorporated and the mixture is light and airy. Overmixing at this stage should be avoided, but ensuring the cream cheese is perfectly smooth is vital before adding other wet ingredients. This initial blending sets the stage for a flawless cheesecake texture. For other delightful dessert options, explore our range of desserts.
Add in Sour Cream
After the cream cheese and sugar are well combined, it’s time to add the remaining wet ingredients. Beat in the egg just until it’s incorporated, being careful not to overmix, as too much air can cause cracks in the cheesecake during baking. Next, fold in the sour cream (or Greek yogurt) and vanilla extract. The sour cream not only adds a wonderful tang that balances the sweetness but also contributes significantly to the filling’s creamy, silken texture. Mix on low speed until just combined. The goal is to achieve a uniform mixture without incorporating too much air. This careful blending ensures your mini cheesecakes will bake up beautifully, with a tender crumb and a rich flavor that complements the spiced apple topping perfectly. The balance of sweet and tangy flavors in this filling is key to making these apple crisp cheesecakes a standout.
Preparing the Spiced Apple Topping
The spiced apple topping is the “apple crisp” component that gives these mini cheesecakes their unique character and irresistible fall flavor. This layer adds a burst of freshness, warmth, and a delightful texture contrast to the creamy cheesecake. Proper preparation of the apples ensures they cook down perfectly, becoming tender and aromatic without turning mushy. The blend of spices creates that comforting aroma and taste reminiscent of classic apple desserts. This step is crucial for achieving a balanced flavor profile in your finished apple crisp cheesecakes.
Peel and Dice Apples
Start by selecting your apples. Good choices include Honeycrisp, Granny Smith, or Fuji, as they hold their shape well during baking and offer a pleasant balance of sweetness and tartness. Peel the apples using a vegetable peeler, then core them thoroughly. Once peeled and cored, dice the apples into small, uniform pieces, about 1/4 to 1/2 inch cubes. Uniformity is important for even cooking. Smaller pieces will soften more quickly and integrate better into the mini cheesecakes. This precise dicing ensures that each bite of your mini cheesecake gets a perfect distribution of sweet, tender apple pieces, contributing significantly to the texture and flavor experience.
Mix Apples with Cinnamon
Once your apples are diced, transfer them to a medium bowl. Add a tablespoon or two of granulated sugar, depending on the sweetness of your apples and your personal preference. Now, for the star of the show: spices! Generously sprinkle ground cinnamon over the apples, along with a pinch of nutmeg if desired. Toss everything together until the apple pieces are thoroughly coated. The cinnamon will infuse the apples with a warm, aromatic flavor, enhancing their natural sweetness and creating that classic apple crisp profile. Allowing the apples to sit for a few minutes after mixing can help them release some of their juices, which will create a delicious, slightly syrupy topping once baked. This spiced mixture will be a delightful addition, making your fall dessert truly special. For more baking inspiration, follow us on Instagram!
Mixing the Crispy Oat Crumble
The oat crumble is the final flourish, providing a much-needed textural contrast and a delightful buttery, sweet crunch to these mini cheesecakes. This crisp topping is characteristic of apple crisp and brings that element directly into our cheesecake creation. It’s easy to prepare and adds a rustic, homemade charm. The combination of oats, brown sugar, and butter creates a rich flavor profile that perfectly complements the creamy filling and spiced apples, making each bite an irresistible experience. This simple step elevates the dessert, making it more dynamic and flavorful.
Combine Oats and Brown Sugar
In a medium bowl, combine the rolled oats (avoid instant oats, as they won’t provide the same texture) with light or dark brown sugar. Brown sugar adds a lovely molasses flavor and helps create a chewier, richer crumble compared to granulated sugar. A pinch of ground cinnamon can also be added here to tie the crumble flavor to the spiced apples below. Mix these dry ingredients thoroughly with a fork until they are well combined. The oats and sugar will form the bulk of your crumble, providing both texture and sweetness. This initial mixing ensures that all components are evenly distributed for a consistent crumble throughout your mini cheesecakes.
Add Remaining Melted Butter
Once the oats and brown sugar are mixed, pour in the melted unsalted butter. Use a fork or your fingertips to work the butter into the dry ingredients until large, moist crumbs form. You want a crumbly, sandy texture, not a paste. If the mixture seems too dry, you can add a tiny bit more melted butter, a teaspoon at a time, until the desired consistency is reached. Conversely, if it’s too wet, add a few more oats. This step creates the characteristic crispy topping that defines an apple crisp. Once mixed, set the crumble aside. It will be sprinkled over the cheesecakes just before baking, ensuring it gets beautifully golden and crunchy in the oven. The crispy oat crumble is a key element that completes these apple crisp cheesecakes, offering a wonderful textural balance.
Assembling Your Mini Cheesecakes
With all your components prepared—the graham cracker crust, the creamy cheese filling, the spiced apple topping, and the crispy oat crumble—it’s time for the exciting step of assembling your mini cheesecakes. This is where all the elements come together to create a cohesive and visually appealing dessert. Layering correctly ensures that each bite delivers a balanced taste of creamy, crunchy, and fruity flavors. Careful assembly also contributes to the neat presentation of these individual treats, making them perfect for serving at any gathering.
Layer Crust in Pans
If you haven’t already, ensure your muffin tin is lined with paper or foil liners. Place a small amount of the prepared graham cracker crust mixture into the bottom of each liner. Using the back of a small spoon or your fingers, press the crust firmly and evenly into the base. A well-compacted crust is essential to prevent crumbling when you remove the cheesecakes later. You want a solid, flat layer that will support the layers above. This forms the delicious foundation for your mini cheesecakes, providing a sweet and crunchy base. This initial layer is vital for the structural integrity and taste of your apple crisp cheesecakes.
Pour Cream Cheese Mixture
Next, carefully spoon or pour the cream cheese filling over the compacted crusts. Divide the mixture evenly among the 12 muffin cups. Fill each cup approximately two-thirds full, leaving enough room for the apple topping and the oat crumble. You can gently tap the muffin tin on the counter a few times to help settle the filling and release any air bubbles, which contributes to a smoother cheesecake texture. Ensure the tops are relatively flat before moving to the next step. The creamy white layer contrasts beautifully with the crust below and the toppings to come. Remember to check out Wikipedia’s entry on cheesecake for more historical context and variations!
Top with Diced Apples
Finally, spoon a generous amount of the spiced diced apples over the cream cheese filling in each cup. You want a visible layer of apples on top, showcasing the “apple crisp” element of these mini cheesecakes. Gently spread the apples to cover the cream cheese mixture, but avoid pressing them too firmly into the filling. The goal is a distinct layer that will cook and soften beautifully, releasing its aromatic spices. This layering creates a beautiful visual appeal and ensures that every bite includes that delicious fruity, spiced component, truly embodying the essence of apple crisp cheesecakes. Once topped, they are nearly ready for their final touch and baking.
Baking Your Irresistible Apple Crisp Mini Cheesecakes
The baking process is where the magic truly happens, transforming your assembled components into perfectly set, golden-brown mini cheesecakes. Achieving the right temperature and bake time is crucial for a creamy center and a crispy topping. These guidelines will help you bake your irresistible apple crisp mini cheesecakes to perfection, ensuring they are cooked through without cracking or over-browning. Patience and precision in this step will yield the best results for your sweet treat.
Preheat Oven to 325°F
Before placing your assembled mini cheesecakes into the oven, ensure it is properly preheated. Set your oven to 325°F (160°C). Allowing the oven to reach and stabilize at this temperature is critical for even baking. A consistent, moderate heat prevents the cheesecakes from baking too quickly, which can lead to cracks, and ensures the filling sets smoothly. Place your oven rack in the middle position to ensure optimal heat distribution. This temperature is ideal for cheesecake, allowing it to cook gently. For another comforting dish, consider making Creamy Baked Mac and Cheese for a different course.
Sprinkle Crumble Evenly
Just before baking, it’s time to add the crispy oat crumble. Evenly sprinkle the prepared oat crumble mixture over the top of the diced apples in each cheesecake cup. You can be generous here, as this layer will become beautifully golden and crunchy, adding that signature apple crisp texture. Try to distribute the crumble so it covers most of the apple layer. This final topping not only adds texture but also forms a delightful aroma as it bakes. Ensure the crumble is spread somewhat loosely to allow it to crisp up during baking, providing a fantastic contrast to the soft cheesecake and apples.
Bake Until Set
Carefully transfer the muffin tin to the preheated oven. Bake for approximately 20-25 minutes. The cheesecakes are done when the edges appear set, and the center still has a slight jiggle when gently shaken. The oat crumble topping should be golden brown and fragrant. Overbaking can lead to dry cheesecakes and potential cracking, so keep a close eye on them towards the end of the baking time. Once baked, remove the muffin tin from the oven. The gentle baking process will ensure a tender, creamy interior, and a perfectly crisp topping, making your apple crisp mini cheesecakes an absolute delight. For more information on the history of this delicious topping, check out Wikipedia’s article on apple crisp.
Cooling and Serving Your Recipe
Once your irresistible apple crisp mini cheesecakes are baked to perfection, the journey isn’t quite over. Proper cooling and chilling are crucial steps to ensure the best texture and flavor. Skipping these stages can result in a less stable cheesecake and a less satisfying experience. Patience at this point will be rewarded with perfectly set, delicious mini cheesecakes that are ready to impress.
Allow Cheesecakes to Cool
After removing the muffin tin from the oven, resist the urge to immediately transfer the cheesecakes. Allow them to cool in the muffin tin on a wire rack for about 15-20 minutes. This gradual cooling helps the cheesecakes set and prevents them from cracking due to a sudden temperature change. Once they have cooled slightly in the tin, gently remove the mini cheesecakes by lifting them out with their liners and place them directly onto the wire rack to cool completely to room temperature. This process might take another hour or so. Ensuring they are fully cool before chilling is key for optimal texture.
Chill for Optimal Taste
Once your apple crisp mini cheesecakes have reached room temperature, it’s time for the most important part of the cooling process: chilling. Cover them loosely with plastic wrap and refrigerate for at least 2-4 hours, or preferably overnight. Chilling allows the cheesecake filling to fully set and firm up, enhancing its creamy texture and concentrating the flavors. The cold temperature also helps to solidify the crust and crumble, ensuring they remain distinct and crispy. When fully chilled, these mini cheesecakes will be firm, refreshing, and incredibly flavorful, making them the perfect easy baking treat. For more dessert ideas, visit CarinaRecipes on Pinterest!
Storing Your Irresistible Apple Crisp Mini Cheesecakes
Proper storage is essential to maintain the freshness, flavor, and texture of your irresistible apple crisp mini cheesecakes. While they are delicious served fresh, knowing how to store them correctly means you can enjoy these delightful treats for several days. This ensures that every bite is as enjoyable as the first, preserving their creamy texture and crisp topping.
Refrigerate Up to 3 Days
To keep your mini cheesecakes at their best, store them in an airtight container in the refrigerator. This method will help preserve their creamy consistency and prevent them from absorbing odors from other foods in your fridge. When properly stored, these apple crisp cheesecakes will remain fresh and delicious for up to 3 days. If you’ve made them with paper liners, leaving the liners on can also help maintain moisture. While they might last a little longer, the texture and flavor are optimal within the first three days. For extended storage, freezing is an option, but for short-term enjoyment, refrigeration is perfect for these delightful fall dessert treats. These are also a great addition to any dessert table, alongside other delightful desserts like Peanut Butter Brownie Swirl Cookies or Blueberry Muffin Cookies with Streusel.
Nutrition Facts for This Recipe
Understanding the nutritional content of your irresistible apple crisp mini cheesecakes can be helpful, especially when managing dietary intake. While these are a delightful sweet treat, knowing what’s in each serving allows for informed consumption. Please note that these are estimated values and can vary based on specific brands and ingredient measurements used.
Calories and Fat Content
Each mini cheesecake typically contains around 250-300 calories, primarily from the cream cheese, butter, and sugar. The fat content per serving usually ranges from 15-20 grams, with a significant portion being saturated fat due to the cream cheese and butter in the crust and crumble. These values highlight the rich and indulgent nature of this dessert. Adjusting ingredient quantities slightly can alter these estimations.
Carb and Protein Details
The carbohydrate content per mini cheesecake is generally between 25-35 grams, largely coming from the sugar, graham crackers, oats, and apples. Sugars themselves will account for a good portion of these carbs. Protein content is relatively modest, typically falling between 3-5 grams per serving, contributed by the cream cheese, egg, and oats. These figures demonstrate the energy provided by this delicious sweet treat.
Sodium and Cholesterol
Sodium content in each mini cheesecake is usually around 100-150 milligrams, mainly from the cream cheese and a small amount in the graham crackers. Cholesterol levels can be estimated at 50-70 milligrams per serving, primarily from the dairy products (cream cheese) and egg. These nutritional facts provide a comprehensive look at what makes up these delightful apple crisp cheesecakes, helping you enjoy them responsibly as part of a balanced diet.
Best Tips for Irresistible Apple Crisp Mini Cheesecakes
To truly elevate your apple crisp mini cheesecakes from good to utterly irresistible, a few expert tips can make all the difference. These insights go beyond the basic recipe steps, focusing on subtle techniques and ingredient choices that enhance flavor, texture, and overall appeal. Implementing these suggestions will ensure your mini cheesecakes are not just delicious, but truly memorable, making them a standout fall dessert.
Choose Different Apple Varieties
While Granny Smith offers a classic tartness, experimenting with different apple varieties can dramatically change the flavor profile of your mini cheesecakes. For a sweeter topping, try Honeycrisp, Fuji, or Gala apples. If you prefer a more complex flavor, a mix of two or three varieties can provide layers of sweetness and tartness, along with varying textures. For instance, combining a tart Granny Smith with a sweet Honeycrisp creates a balanced and dynamic apple topping. Ensure apples are firm and fresh for the best results, as mushy apples will not hold up well during baking. This simple change can make your easy baking experience even more delightful, tailoring the flavor to your personal preference for this delicious homemade dessert.