
Better Than Anything Bars are a truly irresistible dessert, promising layers of moist cake, sweet condensed milk, and luscious caramel. This easy-to-follow recipe brings a truly sweet indulgence to your table, perfect for any gathering or simply satisfying a craving for something extraordinary. Get ready for a new family favorite!
Key Takeaways
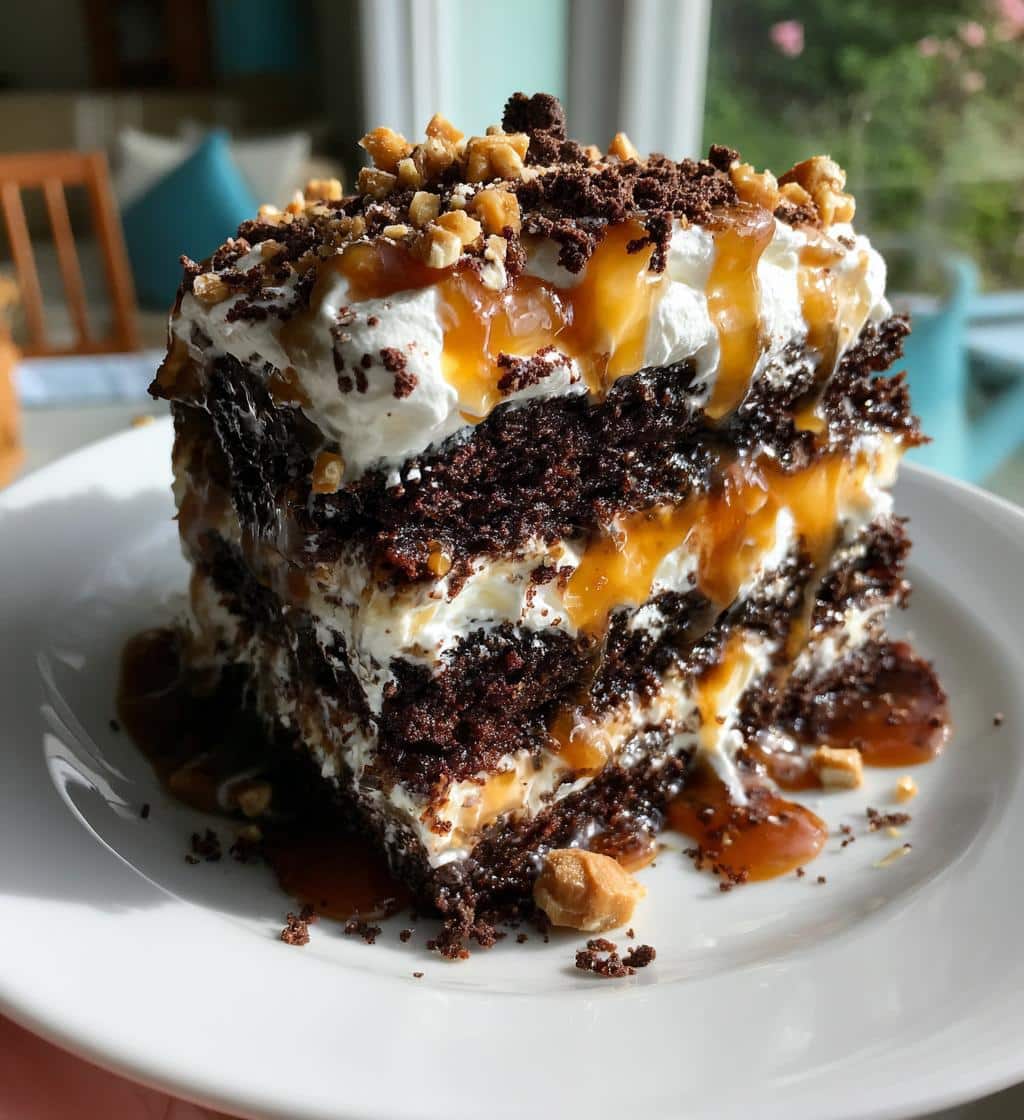
- These dessert bars are a layered treat featuring a cake base, condensed milk, caramel, and creamy toppings.
- The recipe is simplified by using a convenient cake mix, making it an easy treat to prepare.
- A crucial step involves poking holes in the baked cake to ensure maximum absorption of the sweet liquids.
- Better Than Anything Bars are excellent for make-ahead preparation, perfect for parties or potlucks.
- Chilling is essential for the layers to set properly, enhancing the overall texture and flavor.
Quickly bake these amazing bars. They are truly simple. A perfect sweet escape awaits. Everyone will love this recipe. Pure dessert joy is guaranteed.
Indulge in Better Than Anything Bars
Why You’ll Love This Dessert
Prepare yourself for a dessert that truly lives up to its name: Better Than Anything Bars. These incredible dessert bars are a symphony of flavors and textures, featuring a moist cake base, soaked in sweet condensed milk, topped with rich caramel drizzle, and finished with a fluffy whipped topping and crunchy candy bits. This isn’t just an easy treat; it’s a sweet indulgence designed to captivate your taste buds and become an instant family favorite. Whether you’re a seasoned baker or just starting, this cake mix recipe ensures a foolproof process that yields spectacular results every single time. It’s the ideal party dessert or a comforting delight for a quiet evening at home.
The beauty of these bars lies in their layered complexity, yet surprising simplicity. Each bite offers a different sensation, from the tender cake to the creamy sweetness of the milk and caramel, all balanced by the light whipped topping. They are perfect for various occasions, making them a versatile choice for any host or hostess. Plus, the convenience of using readily available ingredients means you can whip up a batch whenever a craving strikes. Forget complicated baking; this recipe focuses on maximum flavor with minimal fuss, making it a standout in any collection of our desserts section.
Gather Ingredients for Perfect Bars
Essential Cake Mix and Wet Ingredients
To create these phenomenal Better Than Anything Bars, you’ll start with a foundation of simplicity and flavor. The backbone of this recipe is a standard yellow or white cake mix. While you might be tempted to use a fancy scratch cake, the beauty of this dessert lies in the reliable and moist texture provided by a box mix, making it an incredibly easy treat. You’ll need the usual wet ingredients to prepare the cake mix according to its package instructions: typically eggs, vegetable oil, and water. These components come together to form a smooth, luscious batter that will bake into a tender, `golden brown cake` base, perfect for soaking up all the delightful layers to come. Don’t underestimate the power of a good cake mix recipe; it’s the secret to consistent success for these bars.
Sweet Toppings for Rich Flavor
The magic of these dessert bars truly unfolds with their indulgent toppings. For the iconic “poke cake” effect, you’ll need one can of sweetened condensed milk. This thick, sweet liquid will seep into the cake, providing unparalleled moisture and flavor. Next up is the caramel drizzle – a jar of pre-made caramel sauce works perfectly, ensuring that rich, buttery sweetness coats every square inch. Then, to lighten and brighten the flavors, a container of cool whip topping (or your favorite whipped cream) will provide a cloud-like layer. Finally, for that irresistible crunch and extra burst of flavor, you’ll add chocolate toffee bits. You can find these pre-packaged in the baking aisle, or feel free to crush your own candy bars if you’re feeling adventurous. Some bakers also like to include `butterscotch chips` for an extra layer of sweetness. These elements combine to create a truly decadent and memorable `condensed milk dessert` that everyone will adore.
Preparing Your Cake Batter
Oven Preheat and Dish Prep
Before you even think about mixing, setting your oven to the correct temperature is crucial for any successful `homemade dessert`. Preheat your oven to 350°F (175°C). This allows the oven to reach and maintain an even temperature, ensuring your cake bakes uniformly and achieves that desired `golden brown cake` finish. While the oven preheats, take a moment to prepare your baking dish. A 9×13 inch baking dish is ideal for these Better Than Anything Bars. Lightly grease the dish with non-stick cooking spray or butter, then dust it with a thin layer of flour. This simple step prevents the cake from sticking, making for easier serving later on. Proper preparation here contributes significantly to the overall enjoyment of this `recipe for bars`.
Simple Mixing for Smooth Batter
With your oven preheated and dish ready, it’s time to create your cake batter. Follow the instructions on your chosen cake mix box carefully. Typically, this involves combining the dry cake mix with the wet ingredients: eggs, vegetable oil, and water. Using an electric mixer on medium speed, beat the ingredients together until they are well combined and the batter appears smooth. Make sure there are no dry pockets of flour remaining at the bottom of the bowl. While you want a smooth batter, avoid overmixing, as this can lead to a tougher cake texture. Gentle mixing is the key to a tender, `moist cake` that will perfectly absorb all the delicious toppings. This straightforward `cake mix recipe` ensures a consistent and delightful base for your `easy treat`.
Baking Your Cake to Perfection
Pouring Batter into Dish
Once your cake batter is perfectly mixed, carefully pour it into the prepared 9×13 inch baking dish. Use a spatula to scrape every last bit of batter from the mixing bowl, ensuring nothing goes to waste. Gently spread the batter evenly across the bottom of the dish, creating a consistent layer. An even spread is important for uniform baking, which will lead to a beautifully `golden brown cake` base. This step might seem simple, but it sets the stage for a well-structured and delicious `homemade dessert` that’s just waiting to be transformed into indulgent Better Than Anything Bars. Ensure the corners are filled, but don’t overwork the batter once it’s in the dish.
Baking Time and Doneness Test
Place your baking dish into the preheated 350°F (175°C) oven. The baking time will typically range from 25 to 30 minutes, but this can vary slightly depending on your oven. Keep an eye on the cake as it bakes; you’re looking for a beautiful `golden brown cake` that springs back when lightly touched in the center. To ensure it’s fully cooked, perform the classic “toothpick test.” Insert a clean toothpick into the center of the cake. If it comes out clean, the cake is done. If it has wet batter clinging to it, allow it to bake for a few more minutes, checking periodically. Achieving the right doneness is crucial for a `moist cake` that can stand up to the layers of sweet goodness it’s about to receive. For more insights on baking perfect bases, explore classic cake recipes.
Cooling and Creating Holes
Resting the Baked Cake
Once your `golden brown cake` emerges from the oven, resist the urge to immediately proceed to the next steps. The first crucial stage is to allow the cake to cool. Transfer the baking dish from the hot oven to a wire rack. Let the cake rest for about 10-15 minutes. This initial cooling period allows the cake to set slightly and prevents it from being too delicate when you begin the next step. It’s an important moment for the structure of your `moist cake`, ensuring it will hold up beautifully under the layers of liquid indulgence. This resting phase is vital for the overall success of your Better Than Anything Bars, transforming it from a simple cake into a magnificent `condensed milk dessert`.
Fork Poking for Absorption
Now comes the signature technique that gives these bars their name and incredible flavor profile: the “poke cake” method. While the cake is still warm (but not piping hot), use the handle of a wooden spoon or the tines of a fork to generously poke holes all over the top surface of the cake. Make sure the holes go deep enough to penetrate the cake without tearing it apart completely. Aim for approximately 1-inch intervals across the entire surface. These holes are absolutely essential, as they create channels for the sweet condensed milk and caramel to seep into, ensuring every bite of your `recipe for bars` is incredibly moist and flavorful. This step is what makes these bars truly `better than anything` and allows for maximum absorption, delivering an unforgettable `sweet indulgence`.
Pouring Sweet Condensed Milk
Soaking the Cake with Milk
After you’ve meticulously poked holes in your warm cake, it’s time for the first layer of pure liquid gold: the sweetened condensed milk. Open a can of this wonderfully thick and sweet milk, and slowly pour it evenly over the entire surface of the poked cake. Take your time, allowing the milk to gradually seep into all the tiny holes you created. The warmth of the cake will help the milk absorb deeply, transforming a simple `moist cake` into a rich, decadent foundation. This step is what truly defines a `condensed milk dessert` and is critical for the extreme moisture and sweetness that these Better Than Anything Bars are famous for. Ensure every corner and edge gets its fair share, as this layer is key to the melt-in-your-mouth texture. For more information on this versatile ingredient, check out its history on Wikipedia’s page on condensed milk.
The goal here is not just to coat the top, but to infuse the cake from within. The milk will slowly work its way down, making the cake unbelievably tender and flavorful. This creates an `easy treat` with an intensity of sweetness that is hard to match, laying the perfect groundwork for the subsequent layers. Let the cake sit for a few minutes after pouring to allow for maximum absorption before moving on to the next delightful addition.
Drizzling Rich Caramel Sauce
Spreading Evenly Over Milk
With the sweetened condensed milk fully absorbed, it’s time to add another layer of irresistible sweetness: the rich caramel sauce. Take your chosen jar of caramel topping – whether it’s a smooth, buttery variety or a thicker, more robust one – and generously drizzle it all over the condensed milk-soaked cake. The contrast between the milky sweetness and the deeper, often slightly salty notes of the `caramel drizzle` creates a complex flavor profile that elevates these `dessert bars` to another level. Use a spoon or a small offset spatula to gently spread the caramel evenly across the entire surface. You want every square inch of your `poke cake` to be covered in this luscious layer.
Don’t be shy with the caramel; it’s one of the star components that makes these bars so incredibly indulgent. Ensuring an even spread guarantees that each serving gets a balanced amount of this sticky, sweet goodness. This layer not only adds significant flavor but also contributes to the beautiful, glistening appearance of the bars. The `caramel drizzle` creates a sticky, delicious top layer that provides a fantastic textural contrast to the soft cake below. This addition solidifies its status as a `sweet indulgence` and prepares it for the final, creamy topping.
Whipped Topping and Candy Sprinkles
Layering Whipped Topping
After the caramel has been spread, the next layer brings a light, airy contrast to the rich sweetness beneath. Gently spread a generous amount of `cool whip topping` over the caramel layer. The cool whip should be at room temperature for easier spreading, but if it’s too warm, it might melt into the caramel. Use an offset spatula or the back of a spoon to create an even, fluffy cloud across the entire surface of your `recipe for bars`. This creamy layer provides a refreshing counterpoint to the intense sweetness of the condensed milk and `caramel drizzle`, making each bite perfectly balanced. It’s an `easy treat` that looks as impressive as it tastes, adding a beautiful white canvas for the final decorative touches. You can always check our Pinterest page for more visual inspiration on layering.
Adding Chocolate and Toffee
To complete your Better Than Anything Bars, it’s time for the crowning glory: `chocolate and toffee bits`. Sprinkle these generously and evenly over the whipped topping. The crunchy texture of the toffee, combined with the slightly bitter notes of chocolate, provides a fantastic contrast to the soft, sweet layers below. You can use pre-made chocolate toffee bits, crushed Heath bars, or a mix of mini chocolate chips and toffee pieces. Some even like to add `butterscotch chips` for an extra pop of flavor. This final addition not only enhances the flavor profile but also adds visual appeal, making these `dessert bars` truly irresistible. This `sweet indulgence` is now almost ready for chilling, a critical step for setting all these magnificent layers. For more behind-the-scenes content and dessert ideas, follow us on Instagram.
Chill Your Better Than Anything Bars
Refrigeration for Setting
This step is non-negotiable for achieving the perfect texture and flavor for your Better Than Anything Bars. Once all the layers—the `moist cake`, the `condensed milk dessert` infusion, the `caramel drizzle`, the cool whip topping, and the `chocolate and toffee bits`—are in place, it’s time to send your beautiful creation to the refrigerator. Cover the baking dish tightly with plastic wrap to prevent any odors from the fridge affecting your dessert and to keep the whipped topping fresh. Place the dish in the refrigerator for a minimum of 4 hours, though overnight chilling is highly recommended if you have the time. This extended chilling period allows all the flavors to meld together wonderfully and, more importantly, gives the layers ample time to set. The cool whip will firm up, the caramel will become delightfully gooey but stable, and the cake will fully absorb all the liquid goodness, resulting in bars that are easy to slice and incredibly satisfying to eat. This crucial step contributes to making them an excellent `make ahead` option for any event.
Serving Your New Favorite Dessert
Ideal Serving Size and Enjoyment
After a patient wait during the chilling period, your Better Than Anything Bars are finally ready to be enjoyed! Remove the dish from the refrigerator and uncover it. Using a sharp knife, cut the bars into desired serving sizes. A common approach is to cut them into 12-16 squares, depending on how generous you want each `sweet indulgence` to be. Because these `dessert bars` are quite rich, smaller portions are often perfectly satisfying. Serve them chilled, and watch as they quickly become the star of any gathering. These are perfect as a `party dessert` or an impressive `potluck dessert` because of their satisfying layers and universal appeal. The combination of textures – soft cake, gooey caramel, creamy topping, and crunchy bits – makes every bite an experience. For another fantastic dessert, you might enjoy our snickerdoodle cobbler, offering a different kind of comforting sweetness.
You’ll find that these bars are incredibly popular, often disappearing quickly. Their unique blend of flavors, from the `moist cake` to the `caramel drizzle` and `chocolate toffee bits`, creates an unforgettable treat. Don’t be surprised if guests ask for the `recipe for bars`! It’s a `family favorite` for a reason, promising delight in every square. For other delightful treats, explore our recipe for peanut butter brownie swirl cookies.
Nutrition Facts for Each Bar
Understanding Calorie and Sugar Content
While Better Than Anything Bars are an undeniable `sweet indulgence`, it’s helpful to have a general idea of their nutritional impact. As with most decadent `dessert bars`, these will be relatively high in calories and sugar. The primary contributors are the cake mix, sweetened condensed milk, and `caramel drizzle`. A typical serving, if cut into 12-16 bars, could range anywhere from 300 to 450 calories per bar. The sugar content will also be significant due to the condensed milk and caramel. Understanding these components can help you enjoy this `easy treat` in moderation. It’s important to remember that such treats are meant for enjoyment and occasional indulgence, not as a primary source of daily nutrition. Knowing the `calorie and sugar content` allows for mindful enjoyment.
Fat and Protein Details
In terms of fat, these bars will contain a moderate to high amount, primarily from the oil used in the cake mix, the fats present in the sweetened condensed milk, and any dairy in the caramel and `cool whip topping`. Depending on specific brands and ingredients, a single bar might contain 15-25 grams of fat. Protein content will be relatively low, coming mainly from the eggs in the cake mix and minimal amounts in the dairy components. These `fat and protein details` further confirm that Better Than Anything Bars are a rich, energy-dense `homemade dessert` best enjoyed as a special treat rather than a daily staple. If you’re looking for another rich, sweet cake, you might like our quick Italian cream cake.
Why You Need These Better Than Anything Bars
Can Be Prepared in Advance
One of the most appealing aspects of these Better Than Anything Bars, aside from their incredible taste, is their fantastic `make ahead` capability. This `easy treat` can be fully assembled and refrigerated a day or even two in advance of when you plan to serve them. In fact, chilling overnight actually enhances their flavor and texture, allowing the liquids to fully permeate the cake and the layers to set perfectly. This makes them an absolute lifesaver for busy hosts planning a `party dessert` or anyone needing a reliable `potluck dessert`. Imagine the peace of mind knowing your show-stopping dessert is ready and waiting in the fridge, leaving you free to focus on other preparations. It’s truly a `quick dessert` solution for entertaining.
Storing Leftovers Easily
Beyond their make-ahead convenience, these `dessert bars` are also incredibly practical when it comes to `storing leftovers easily`. Should you be lucky enough to have any left, simply cover the baking dish tightly with plastic wrap or transfer individual bars to an airtight container. Stored in the refrigerator, these bars will maintain their deliciousness and moist texture for up to 3-4 days. This means you can continue to enjoy a slice of `sweet indulgence` long after the initial event. Their robust structure and rich flavors hold up exceptionally well, ensuring that every leftover piece is as delightful as the first. This durability adds to their appeal as a `family favorite` and a sensible choice for any `homemade dessert` enthusiast.
