
Hot Cross Buns are a delightful traditional treat, especially popular around Easter. This recipe provides a simple, step-by-step method to bake your own perfectly spiced, fruit-filled buns at home. Enjoy the comforting aroma and delicious taste of freshly baked goods with family.
Key Takeaways
- Master baking traditional hot cross buns from scratch.
- Learn to achieve a soft, fluffy texture with perfect sweetness.
- Discover tips for kneading dough, adding fruit, and proper rising.
- Glaze your buns for an irresistible shine and extra flavor.
- Understand the nutritional aspects and serving suggestions for these fruit buns.
Baking these buns is a joy. The aroma fills your kitchen. Share them warm with loved ones. It creates lasting memories. A true homemade delight.
5 Reasons to Love These Buns
There are countless reasons why hot cross buns have remained a beloved confection for centuries, particularly as an Easter treat. These sweet, spiced, and fruit-studded buns offer a unique blend of flavors and textures that make them incredibly appealing. Beyond their traditional significance, their delightful characteristics ensure they’re a perennial favorite, perfect for any occasion that calls for a comforting baked good. From their aromatic sweet spice to their wonderfully soft crumb, each bite is a testament to simple, delicious baking.
Sweet and Spicy Flavor
The signature flavor profile of hot cross buns is a harmonious blend of sweetness and aromatic spices. Typically, a mix of cinnamon, nutmeg, cloves, and allspice provides a warm, inviting aroma and a gentle kick that perfectly complements the sweetness of sugar and dried fruits. This unique combination creates a depth of flavor that is both comforting and exhilarating, making these buns stand out from other sweet breads. The subtle hint of citrus zest often included also brightens the overall taste, adding another layer to this complex yet familiar treat.
Soft, Fluffy Texture
Achieving a truly soft, fluffy texture is key to perfect hot cross buns. Our recipe focuses on techniques that ensure the dough rises beautifully, resulting in buns that are incredibly tender and airy. When you tear into one, you’ll notice the delicate, pillowy interior that melts in your mouth. This delightful texture is enhanced by the inclusion of butter and egg, which contribute to a rich, moist crumb that stays fresh longer. It’s this irresistible softness that makes them so enjoyable, whether eaten plain or with a spread.
Perfect for Sharing
Hot cross buns are inherently designed for sharing. Their individual size makes them ideal for serving at gatherings, family breakfasts, or afternoon teas. Arranged beautifully on a platter, they invite everyone to partake in a communal baking experience. The act of sharing these sweet buns often symbolizes fellowship and celebration, especially during the spring season. Plus, making a batch often yields a generous quantity, ensuring there’s enough for everyone to enjoy and even some to give away as thoughtful gifts. For more delightful dessert ideas, consider these peanut butter brownie swirl cookies, which are also fantastic for sharing.
Gather Ingredients for Hot Cross Buns
Before you begin the delightful process of baking these traditional hot cross buns, it’s crucial to have all your ingredients prepped and ready. This ensures a smooth and enjoyable baking experience, preventing any last-minute rushes or forgotten items. Organizing your components into dry, wet, and cross/glaze categories will make the mixing stages much more efficient, helping you achieve perfect homemade buns. Quality ingredients are the foundation of any great baking recipe, so choose fresh, high-quality items for the best results in your sweet spiced buns.
Dry Ingredients List
The dry ingredients form the foundational structure and flavor of your hot cross buns. You’ll need all-purpose flour (ensure it’s fresh for optimal gluten development), granulated sugar for sweetness, active dry yeast (check its expiry date!), and a blend of aromatic spices like ground cinnamon, nutmeg, and allspice. Don’t forget a pinch of salt, which balances the sweetness and enhances all the other flavors. If you prefer a richer flavor, you might also include a touch of powdered ginger or mixed spice for an extra layer of complexity. These ingredients are essential for creating the characteristic sweet spice of these famous Easter buns.
Wet Ingredients Needed
The wet ingredients bring moisture and richness to the dough, contributing to its fluffy texture. Your list should include warm milk (ideally whole milk for richness), melted unsalted butter, and a large egg. The milk activates the yeast and provides the necessary liquid for the dough, while the butter adds tenderness and flavor. The egg acts as a binder, enriches the dough, and contributes to its golden color. For an extra hint of freshness, consider adding a tablespoon of orange zest to the wet ingredients; it pairs wonderfully with the candied fruit you’ll add later. You can find more bread recipes and baking tips in our bread category.
Cross and Glaze Items
The distinctive cross and glossy glaze are what truly define a hot cross bun. For the cross, you’ll need a simple paste made from all-purpose flour and water. This creates the iconic white lines that bake onto the surface. For the glaze, apricot jam is traditionally used, warmed until it’s thin and brushable. This not only gives the buns a beautiful shine but also adds a subtle fruity sweetness. Alternatively, a simple sugar syrup can be used for the glaze. Have these ready as the buns come out of the oven for immediate application, ensuring maximum shine and flavor. For more information on the history of this treat, see its Wikipedia page.
Mixing Dough for Our Hot Cross Buns
The mixing process is a critical step in developing the perfect texture for your hot cross buns. Proper mixing ensures all ingredients are well combined and the gluten in the flour begins to develop, which is essential for that signature fluffy dough. Taking your time and following the steps carefully will lay the groundwork for a batch of truly exceptional sweet spiced buns. This stage is where your raw ingredients start their journey to becoming a delicious, aromatic Easter treat. Be mindful of temperatures and consistency to achieve the best results.
Combining Dry Mix
Start by thoroughly combining all your dry ingredients in a large mixing bowl. Whisk together the all-purpose flour, granulated sugar, active dry yeast, salt, and your chosen spices (cinnamon, nutmeg, allspice). Ensuring an even distribution of these dry components is vital; you don’t want pockets of unmixed salt or spices. This initial step helps activate the yeast evenly when it comes into contact with the wet ingredients and guarantees that every bite of your baked hot cross buns will be infused with consistent flavor. A well-combined dry mix is the first secret to a successful batch of fluffy buns.
Adding Liquids and Egg
Once your dry mix is ready, create a well in the center and pour in your warm milk, melted butter, and the beaten egg. Use a wooden spoon or a stand mixer with a dough hook attachment to gradually incorporate the wet ingredients into the dry. Mix until a shaggy dough forms, and all the flour is hydrated. Be careful not to add all the liquid at once, as flour absorption can vary. The goal here is to bring everything together into a cohesive, sticky mass, signaling that it’s ready for the next crucial stage: kneading. This combination sets the stage for the rich texture of your homemade buns.
Kneading Until Smooth
Kneading is where the magic truly happens, developing the gluten structure that gives hot cross buns their characteristic elasticity and soft texture. Transfer the shaggy dough to a lightly floured surface and knead for about 8-10 minutes by hand, or 5-7 minutes with a stand mixer. The dough should become smooth, elastic, and no longer sticky. You’ll know it’s properly kneaded when it passes the “windowpane test” – you can stretch a small piece thin enough to see light through it without tearing. This meticulous kneading process is essential for achieving the perfect fluffy dough that defines these beloved sweet buns. For another soft bread recipe, try our Hawaiian roll french toast.
Adding Candied Fruit to Hot Buns
The addition of candied fruit is a defining characteristic of classic hot cross buns, contributing bursts of sweet and tangy flavor throughout the fluffy dough. This step is not just about adding ingredients; it’s about integrating them thoughtfully to ensure every bite offers a delightful surprise. While traditional recipes often call for mixed peel and currants, feel free to customize your fruit selection to your preference. Properly incorporating the fruit prevents it from sinking to the bottom during the rise and bake, ensuring an even distribution of flavor and texture in your sweet spiced buns.
Folding in Candied Fruit
Once your dough has been thoroughly kneaded and is smooth and elastic, it’s time to incorporate the candied fruit. Gently flatten the dough into a large disk on a lightly floured surface. Scatter your desired candied fruit (such as currants, raisins, mixed peel, or chopped dried apricots) evenly over the surface. Then, carefully fold the dough over itself multiple times, pressing lightly with each fold, until the fruit is mostly enclosed. Avoid overworking the dough at this stage, as you want to maintain the gluten structure you’ve just developed. The goal is to distribute the fruit without tearing the dough extensively.
Ensuring Even Distribution
For the best hot cross buns, it’s important that the candied fruit is evenly distributed throughout the dough. After the initial folding, gently knead the dough for just one or two more minutes. This light kneading helps to further spread the fruit and ensures that each bun will have a good amount of fruit in it. If you find the fruit is clumping together, gently separate it as you knead. An even distribution guarantees that every single one of your homemade buns delivers that delightful mix of sweet, spicy dough and chewy fruit, making each bite a pleasure. This attention to detail elevates the overall enjoyment of these Easter buns.
Letting Hot Cross Buns Rise
The rising process, also known as proofing, is absolutely crucial for creating light, airy, and fluffy hot cross buns. This is where the yeast gets to work, fermenting the sugars in the dough and producing carbon dioxide, which causes the dough to expand. Patience during this stage is key; rushing it can result in dense, heavy buns. Understanding the optimal conditions for dough rising will dramatically improve the texture and volume of your sweet spiced buns, making them truly irresistible. Give your homemade buns the time they need to reach their full potential.
First Dough Rise Time
After incorporating the candied fruit, form the dough into a neat ball and place it in a lightly oiled large bowl. Turn the dough once to coat it with oil, then cover the bowl tightly with plastic wrap or a clean kitchen towel. Allow the dough to rise in a warm, draft-free place for about 1 to 1.5 hours, or until it has doubled in size. The exact time will depend on the ambient temperature and the activity of your yeast. This first rise, often called the bulk fermentation, develops flavor and structure, ensuring a wonderful texture for your Easter buns. You can learn more about how yeast works at Wikipedia’s yeast page.
Finding a Warm Spot
Choosing the right spot for your dough to rise is essential for consistent and successful results. A warm, draft-free environment encourages the yeast to work efficiently. Ideal spots include a warm kitchen counter away from open windows, inside a turned-off oven with just the light on (this provides gentle warmth), or even near a radiator or heat vent (but not directly on it, which could kill the yeast). Aim for a temperature around 75-85°F (24-30°C). If your kitchen is cool, a longer rising time might be necessary. Consistency in temperature ensures your fluffy dough rises evenly, leading to perfectly light hot cross buns.
Shaping Your Delicious Hot Cross Buns
Shaping is a pivotal step in creating uniformly sized and appealing hot cross buns. After the first rise, the dough is pliable and ready to be transformed into individual portions. Precise division and careful shaping ensure that all your homemade buns bake evenly and look professional, with that classic round form. This stage also prepares the buns for their second rise, which is critical for their final light and airy texture. Taking the time to shape them correctly will make all the difference in the final presentation and enjoyment of your sweet spiced buns.
Dividing the Dough
Once your dough has doubled in size, gently punch it down to release the air. Transfer the dough to a lightly floured surface. Using a kitchen scale, divide the dough into equal portions. For standard hot cross buns, aim for about 60-70 grams (approximately 2 to 2.5 ounces) per bun, which usually yields 12-16 buns depending on the recipe size. Even division is important for consistent baking times and uniform appearance. If you don’t have a scale, try to eyeball it as best as possible, then make slight adjustments to balance the sizes. This ensures all your Easter buns are cooked through at the same time.
Forming Round Buns
Once divided, each piece of dough needs to be shaped into a smooth, round bun. Take one portion of dough and gently flatten it slightly. Then, pull the edges of the dough towards the center, pinching them together at the bottom to create tension on the surface. Flip the dough over so the pinched seam is underneath, then gently cup the dough with your hand and roll it against the counter in a circular motion. This creates a tight, smooth ball. Place the shaped buns about 1-2 inches apart on a baking sheet lined with parchment paper, giving them room to expand during their second rise and baking. Proper shaping contributes significantly to the final fluffy dough texture.
Second Rise on Tray
After shaping, cover the baking sheet loosely with plastic wrap or a clean kitchen towel and allow the buns to undergo a second rise. Place them again in a warm, draft-free spot for another 30-45 minutes, or until they look noticeably puffy and have nearly doubled in size. This second rise, often called proofing, is vital for achieving an incredibly light and airy texture in your hot cross buns. Do not skip or shorten this step, as it directly impacts the final softness and volume. While they are proofing, you can start preparing the paste for the iconic crosses. For more bread-making inspiration, follow us on Pinterest!
Piping Crosses on Hot Cross Buns
The distinctive cross on top of each bun is perhaps the most iconic feature of hot cross buns, giving them their name and traditional appearance. This isn’t just for aesthetics; the paste bakes into a slightly firmer texture, offering a subtle contrast to the soft dough beneath. Applying the crosses requires a steady hand but is a straightforward process that completes the classic look of these sweet spiced buns. Perfecting this step adds an authentic touch to your homemade buns, making them instantly recognizable as the beloved Easter treat.
Making the Paste
The paste for the crosses is incredibly simple to prepare, requiring just two ingredients: all-purpose flour and water. In a small bowl, combine about 1/2 cup of flour with 3-4 tablespoons of water, stirring until you achieve a thick, smooth, and pipeable paste. The consistency should be like thick pancake batter – firm enough to hold its shape but fluid enough to pipe easily. If it’s too thick, add a tiny bit more water; if too thin, add a touch more flour. This basic mixture is robust enough to withstand baking and create the characteristic white lines on your fluffy dough.
Drawing Crosses Clearly
Once your buns have completed their second rise and are visibly puffy, it’s time to add the crosses. Carefully transfer the flour paste into a piping bag fitted with a small round nozzle, or simply snip a tiny corner off a Ziploc bag. Pipe a straight line across the center of each bun, then another line perpendicular to the first, creating a distinct ‘X’ or cross shape. Work gently to avoid deflating the risen dough. The lines should be clear and even. If some paste drips, gently smooth it with a toothpick. These crosses, an enduring symbol, are what truly make them hot cross buns, ready for baking to golden perfection.
Baking Your Perfect Hot Cross Buns
Baking is the moment of truth for your hot cross buns, where the raw dough transforms into golden, aromatic, sweet spiced buns. Proper oven temperature and precise timing are essential to ensure the buns are cooked through, beautifully browned, and retain their soft, fluffy texture. This stage will fill your kitchen with an irresistible aroma, signaling that a delicious Easter treat is on its way. Follow these guidelines closely to achieve perfectly baked homemade buns that are a delight to eat.
Oven Temperature Setup
Before placing your prepared buns in the oven, it’s vital to preheat your oven thoroughly. Set your oven to 375°F (190°C). Allow it to preheat for at least 15-20 minutes after it signals it’s reached temperature, ensuring the entire oven cavity is uniformly hot. A consistently hot oven allows the buns to rise quickly and evenly, creating that desired light and airy crumb. Placing the buns into a cold or insufficiently heated oven can lead to dense, unevenly baked results. Proper preheating is a cornerstone of successful baking, especially for delicate yeast-leavened goods like hot cross buns.
Baking Time Estimate
Once your oven is perfectly preheated, carefully place the baking sheet with the hot cross buns into the center rack. Bake for approximately 15-20 minutes. The exact baking time may vary slightly depending on your oven and the size of your buns. Look for a beautiful golden-brown color on the tops and sides of the buns. If they start browning too quickly, you can loosely tent them with aluminum foil. To check for doneness, an instant-read thermometer inserted into the center of a bun should register around 200°F (93°C). This ensures they are cooked through and have that wonderful fluffy dough interior. For another satisfying main course, check out this crispy parmesan chicken recipe.
Glazing Hot Cross Buns for Shine
The final touch for perfect hot cross buns is a glistening glaze, which not only enhances their appearance but also adds another layer of subtle sweetness. This step elevates your homemade buns from simple baked goods to bakery-quality Easter treats. A warm glaze brushed over the hot buns absorbs beautifully, locking in moisture and providing an irresistible sheen that beckons you to take a bite. It’s a small effort that yields a significant aesthetic and flavor improvement for your sweet spiced buns.
Warming Apricot Jam
Apricot jam is the traditional choice for glazing hot cross buns, offering a delicate fruitiness and a lovely amber shine. To prepare the glaze, simply place a few tablespoons of apricot jam in a small saucepan over low heat, or microwave it in a bowl for 30-60 seconds. Stir frequently until the jam melts and becomes smooth and fluid. If it’s too thick, you can add a tiny splash of water or orange juice to thin it out to a brushable consistency. The key is to have it warm and smooth, ready to be applied as soon as the buns come out of the oven. This warm, glossy layer contributes to the overall appeal of these fruit buns.
Brushing Warm Buns
Immediately after removing the golden-brown hot cross buns from the oven, while they are still piping hot, generously brush the warm apricot glaze over the tops of each bun. The warmth of the buns will help the glaze melt slightly and adhere beautifully, creating a shiny, enticing finish. Don’t be shy with the glaze; a good coating provides the best shine and a delicate extra layer of flavor. Let the glazed buns cool slightly on a wire rack before serving. This step truly gives your fluffy dough buns that professional, irresistible look. You can share your glazed bun creations with us on Instagram!
Serving Your Fresh Hot Cross Buns
The moment of serving your freshly baked hot cross buns is the culmination of all your efforts. These sweet spiced buns are more than just a treat; they’re an experience, a symbol of spring and tradition, particularly around Easter. How they are presented and enjoyed can truly enhance their deliciousness. While they are wonderful on their own, a little thought into their serving temperature can make all the difference, ensuring every bite of your homemade buns is a delight.
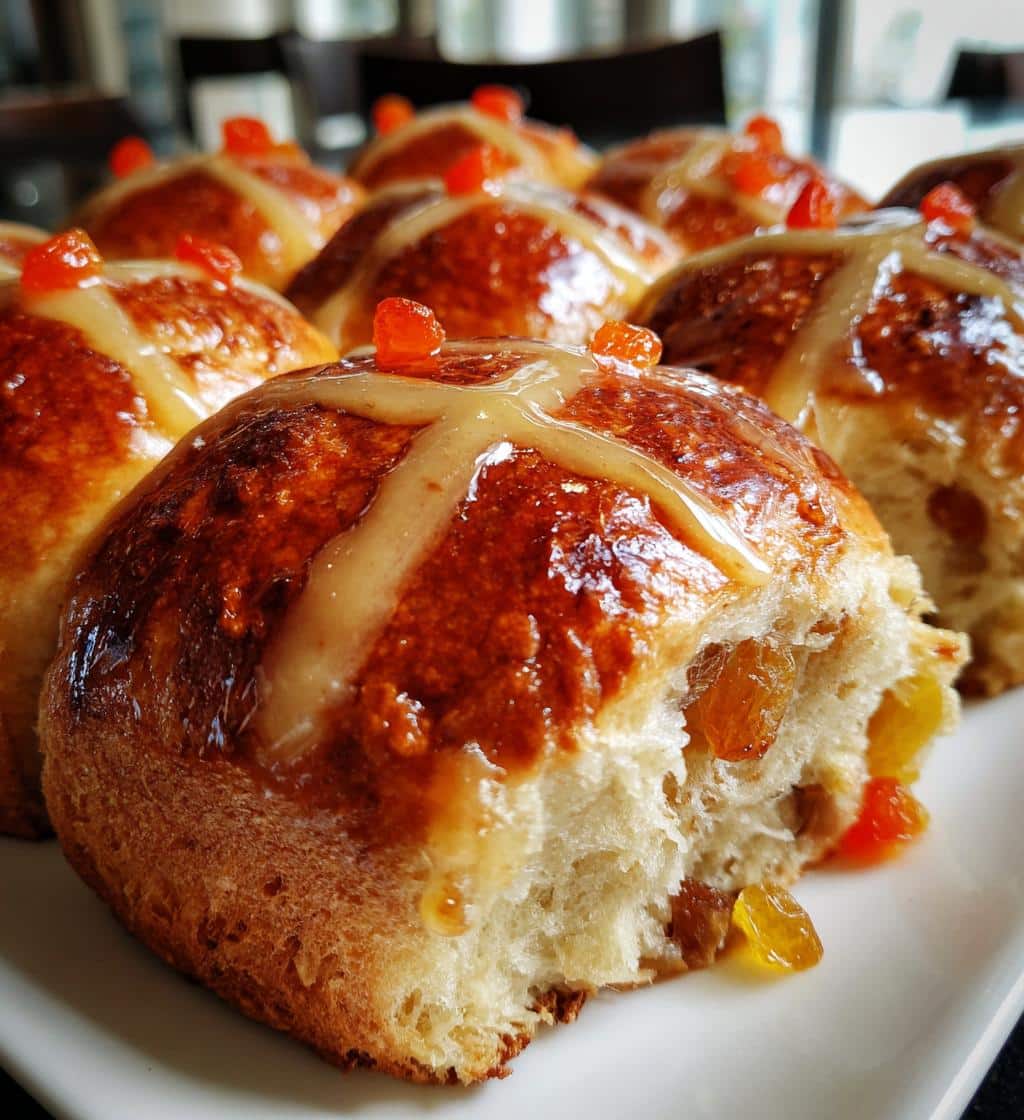
Best Enjoyed Warm
Hot cross buns are undoubtedly at their absolute best when served warm. The warmth enhances their fluffy dough texture, softens the candied fruit, and releases their aromatic sweet spice notes more intensely. You can enjoy them fresh out of the oven after a brief cooling period, or gently reheat them in a microwave for 15-20 seconds, or in a preheated oven at 300°F (150°C) for 5-7 minutes. Often, people enjoy them sliced in half and lightly buttered, or with a dollop of clotted cream or extra jam. The warmth makes them incredibly comforting and flavorful, truly capturing the essence of these traditional fruit buns.
Nutrition in Hot Cross Buns
Understanding the nutritional content of hot cross buns can be helpful, especially if you’re mindful of your dietary intake. While these sweet spiced buns are undeniably a delicious Easter treat, like most baked goods, they are typically enjoyed in moderation. A breakdown of their calories and key nutrients offers insight into how they fit into a balanced diet. This section provides a general overview, as precise values can vary based on specific ingredients and serving sizes in your homemade buns.
Calories per Serving
The calorie count for hot cross buns can fluctuate depending on the recipe, particularly the amount of sugar, butter, and candied fruit used. On average, a single standard-sized hot cross bun (approximately 60-70g) contains roughly 180-250 calories. This makes them a moderately energy-dense snack or breakfast item. If you are watching your caloric intake, being mindful of portion sizes is important. Consider sharing your homemade buns or opting for slightly smaller portions to manage the calorie count, while still enjoying the fluffy dough and sweet spice.
Key Nutrient Breakdown
Beyond calories, hot cross buns provide several key nutrients. They are a source of carbohydrates, primarily from the flour and sugar, offering quick energy. The milk and egg contribute protein and some essential vitamins like B vitamins and calcium. The dried fruits add dietary fiber, as well as vitamins and minerals such as potassium and iron, though in smaller amounts per bun. Fats come from butter and egg. While not a primary source of micronutrients, they contribute to a varied diet when consumed as part of a balanced eating plan. For another dessert that offers comfort, try our snickerdoodle cobbler.
Extra Tips for Hot Cross Buns
Baking hot cross buns is a rewarding experience, and a few extra tips can help you achieve even better results or adapt the recipe to your preferences. From customizing the fruit to managing dough preparation, these insights aim to make your baking journey smoother and more enjoyable. These suggestions will ensure your homemade buns are consistently delicious, whether you’re a seasoned baker or trying this Easter treat for the first time. Experiment with these ideas to personalize your sweet spiced buns and truly make them your own.
Fruit Combination Ideas
While traditional recipes often call for currants and mixed candied peel, don’t hesitate to experiment with different fruit combinations in your fluffy dough. Consider adding finely chopped dried apricots, cranberries, or even chopped glace cherries for varying colors and flavors. A mix of citrus zest (orange or lemon) can brighten the taste. For a richer flavor, you could soak your dried fruits in a little orange juice, tea, or even a splash of brandy overnight before adding them to the dough. This adds moisture and infuses them with extra flavor, making your sweet buns even more special.
Overnight Dough Rise
If you prefer to break up the baking process or want fresh hot cross buns for breakfast, you can opt for an overnight dough rise. After the first kneading and fruit incorporation, place the dough in a lightly oiled bowl, cover it tightly, and refrigerate it overnight (8-12 hours). The cold temperature will slow down the yeast activity. The next morning, remove the dough from the fridge and let it come to room temperature for about 30-60 minutes before proceeding with shaping and the second rise. This slow fermentation can even enhance the flavor complexity of your homemade buns, giving them a deeper, more nuanced taste.
Freshness Matters Most
The delightful soft, fluffy texture and vibrant sweet spice flavor of hot cross buns are best enjoyed when they are fresh. While they can be stored in an airtight container at room temperature for 2-3 days, their texture will begin to change. For optimal enjoyment, aim to consume them within 24 hours of baking. If you have leftovers, they can be gently reheated, or even toasted, to refresh their texture. For longer storage, freeze cooled buns in an airtight bag for up to 2-3 months. Reheat from frozen in a moderate oven. Prioritizing freshness ensures you experience these Easter buns at their peak deliciousness.