
Vanilla Custard Cream Squares are a beloved homemade dessert, known for their creamy texture and crisp buttery crust. This recipe simplifies the process, ensuring even beginner bakers can achieve perfect results. Prepare to impress your family and friends with this delightful sweet treat, ideal for any occasion.
Key Takeaways
- Follow a straightforward recipe for delicious vanilla custard cream squares.
- Learn how to prepare a perfectly flaky, buttery crust and a smooth, rich vanilla custard filling.
- Understand the importance of proper chilling for optimal texture and flavor.
- Gain insights into successful storage methods, delightful variations, and common troubleshooting tips.
- Master serving suggestions to present these delightful squares beautifully.
Sweet cream squares offer pure bliss. Their smooth custard delights every palate. A crisp crust adds perfect texture. Chill them well for best flavor. Enjoy this simple, elegant dessert.
Your Easy Vanilla Custard Cream Squares Recipe
Making homemade vanilla custard cream squares doesn’t have to be daunting. This recipe breaks down the process into manageable steps, ensuring a satisfying baking experience from start to finish. We focus on creating a dessert that is both impressive in appearance and delightful in taste, perfect for family gatherings, special occasions, or just a sweet craving. The combination of a golden, flaky crust and a silky, vanilla-infused custard filling makes these squares an irresistible treat. Get ready to bake a dessert that will earn you rave reviews and become a new family favorite. For more delightful sweet creations, consider trying our peanut butter brownie swirl cookies, another excellent option from our desserts category that your taste buds will appreciate.
Quick Glance at Prep Time
The preparation for these luscious squares is surprisingly swift. You can expect to spend approximately 25-30 minutes on active prep work, which includes mixing the crust ingredients, preparing the custard, and assembling the layers. The baking and chilling times are longer, but much of this is hands-off, allowing you to focus on other tasks while your dessert comes to life. This recipe is designed to fit into a busy schedule, making it a convenient option for a homemade treat.
What You Need for 9 Servings
This recipe is perfectly portioned to yield nine generous squares, making it ideal for a small family or a cozy get-together. The ingredients are readily available, typically found in any well-stocked pantry or local grocery store. You’ll need standard baking equipment, such as a square baking dish, mixing bowls, and a whisk. Scaling the recipe up or down is also straightforward if you need more or fewer servings. Just remember to adjust your baking dish size accordingly to maintain the desired thickness of the crust and custard layers.
Gathering Ingredients for Custard Squares
The success of your easy vanilla custard squares hinges on having the right ingredients, fresh and ready. While the recipe is forgiving, using quality components will genuinely elevate the final flavor and texture. Think of this as your baking mise en place, ensuring everything is measured and at hand before you begin. This preparatory step prevents last-minute scrambles and helps the entire process flow smoothly, leading to a more enjoyable baking experience and a perfect end result. Understanding the role of each ingredient helps you appreciate the science behind this delicious dessert.
Crust Essentials List
For the buttery crust, you’ll need all-purpose flour, granulated sugar, a pinch of salt, and crucially, cold unsalted butter. The cold butter is key to achieving that desirable flaky, tender texture that provides a wonderful contrast to the smooth custard. Some recipes also call for a touch of ice water to bind the dough without overworking the gluten. Make sure your butter is cut into small cubes and kept chilled until you’re ready to incorporate it into the dry ingredients. This simple yet effective technique ensures a delightful base for your cream squares.
Custard Filling Must-Haves
The star of these squares, the vanilla custard, requires whole milk, heavy cream, egg yolks (for richness and thickness), granulated sugar, cornstarch (as a thickener), a pinch of salt, and pure vanilla extract. Using whole milk and heavy cream contributes to the custard’s luxurious, smooth consistency. The cornstarch helps stabilize the custard, preventing it from being too runny. Most importantly, don’t skimp on a good quality vanilla extract or even a vanilla bean for an authentic, aromatic vanilla flavor. A deeper dive into the origins and varieties of this flavorful spice can be found on Wikipedia’s vanilla page.
Preparing the Buttery Crust Base
The crust is the foundation of your vanilla custard cream squares, providing a sturdy, flavorful base that complements the creamy filling. Achieving a perfectly golden and tender crust is simpler than you might think, especially when you follow a few key steps. The goal is to create a dough that’s easy to work with but doesn’t become tough, ensuring every bite of your square is a delightful textural experience. Pay attention to the temperature of your ingredients, as this plays a significant role in the crust’s final texture and flakiness. This careful preparation sets the stage for a truly outstanding homemade dessert.
Combining Dry and Wet Ingredients
Start by whisking together the dry ingredients: flour, sugar, and salt. This ensures an even distribution of flavor and leavening (if any). Next, add the cold, cubed butter. Using a pastry blender, two knives, or even your fingertips, cut the butter into the dry mixture until it resembles coarse crumbs with some pea-sized pieces remaining. This technique creates pockets of butter that melt during baking, resulting in a flaky texture. Finally, gradually add ice water, one tablespoon at a time, mixing until the dough just comes together. Be careful not to overmix, as this can develop the gluten too much, leading to a tough crust. Once combined, gently press the dough into your prepared baking dish, ensuring an even layer up the sides.
Baking Until Golden Brown
Before baking, it’s often beneficial to chill the pressed crust in the refrigerator for about 15-20 minutes. This helps the butter solidify, preventing the crust from shrinking too much in the oven. Preheat your oven to the specified temperature. Bake the crust for approximately 15-20 minutes, or until it achieves a beautiful golden-brown color around the edges and appears set. This pre-baking, often called blind baking, prevents the crust from becoming soggy once the custard filling is added. Keep an eye on it to prevent over-browning. Once baked, remove it from the oven and let it cool completely on a wire rack before adding the custard. This ensures the crust maintains its crispness and provides a stable base for the smooth vanilla custard.
Making Smooth Vanilla Custard Filling
The heart of your vanilla custard cream squares lies in its smooth, rich, and perfectly set custard filling. This section details the critical steps to achieve that luscious texture and deep vanilla flavor everyone craves. Custard making, while seemingly intricate, is quite straightforward with attention to detail and a bit of patience. The key is to manage heat properly and whisk consistently to prevent lumps and ensure even thickening. This process is similar to creating the fillings for other delicious treats like a quick Italian cream cake, where a creamy component is essential for flavor and mouthfeel.
Heating Milk and Cream Gently
In a medium saucepan, combine the whole milk and heavy cream. Add half of the granulated sugar along with a pinch of salt. Heat this mixture over medium-low heat, stirring occasionally, until it just begins to simmer around the edges. Do not let it boil vigorously. The goal is to warm the liquids and dissolve the sugar, preparing them to be incorporated with the egg mixture. This gentle heating also helps to infuse any additional flavors, such as a vanilla bean pod, which can be steeped in the warm milk and cream for an even richer vanilla aroma. Remove the vanilla bean pod before proceeding if you used one.
Whisking Eggs and Sugars Smoothly
While the milk and cream are warming, whisk the egg yolks with the remaining granulated sugar in a separate bowl until the mixture is pale yellow and slightly thickened. This process is known as “tempering” and it makes the egg yolks more stable and less likely to scramble when hot liquid is added. Gradually whisk in the cornstarch until smooth; this slurry will prevent lumps in your custard and aid in thickening. Slowly pour about half of the hot milk mixture into the egg yolk mixture, whisking constantly to temper the eggs. This step gradually raises the temperature of the eggs without cooking them, ensuring a silky-smooth custard. For more information on the culinary art of custard, visit the Wikipedia page on custard.
Thickening Custard to Perfection
Pour the tempered egg mixture back into the saucepan with the remaining hot milk and cream. Continue to cook over medium-low heat, whisking constantly, until the custard visibly thickens. This usually takes about 5-8 minutes. The custard should coat the back of a spoon, and when you run your finger across it, the line should hold. Do not bring it to a rolling boil, as this can curdle the eggs. Once thickened, remove from heat and stir in the pure vanilla extract. For an extra infusion of flavor, consider using the scraped seeds from a vanilla bean pod. Strain the custard through a fine-mesh sieve into a clean bowl to ensure ultimate smoothness, removing any potential bits of cooked egg or lumps. Place plastic wrap directly on the surface of the custard to prevent a skin from forming as it cools.
Assembling Your Vanilla Custard Squares
With your buttery crust baked and cooled, and your velvety vanilla custard prepared, the next exciting step is to bring these components together into a cohesive and delicious dessert. Assembling your easy custard squares is a straightforward process, but paying attention to a couple of details here will ensure a clean, professional-looking finish and the perfect distribution of flavors and textures. The careful layering is what transforms individual elements into a harmonious sweet treat, ready for its final transformation in the refrigerator. This part of the recipe is where your hard work truly comes together.
Pouring Custard Over Baked Crust
Once your baked crust has cooled completely in the pan, remove the plastic wrap from your prepared custard. Give the custard a gentle whisk to ensure it’s still smooth and pourable. Carefully pour the vanilla custard filling evenly over the cooled crust. Use a spatula to gently spread the custard all the way to the edges of the crust, ensuring a consistent layer across the entire surface. This even distribution is important for both the appearance and the structural integrity of your finished squares. Avoid disturbing the crust too much while pouring and spreading. Take your time to create a neat, uniform layer.
Cooling Before Refrigeration
After pouring the custard, do not immediately transfer the baking dish to the refrigerator. Allow the assembled squares to cool at room temperature for about 30-60 minutes. This initial cooling period prevents a sudden temperature shock, which can sometimes lead to condensation or affect the custard’s texture. Once the squares have cooled slightly, cover the baking dish loosely with plastic wrap. Ensure the plastic wrap doesn’t touch the custard surface directly, or if it does, gently lay it on top to prevent a skin from forming, similar to how you covered the custard in the bowl earlier. This step readies your cream squares for their crucial chilling phase.
Chilling Your Cream Squares to Perfection
The chilling phase is arguably one of the most critical steps in preparing your easy vanilla custard squares. It’s not just about making them cold; it’s about allowing the custard to fully set, firm up, and for all the flavors to meld beautifully. Rushing this step will result in soft, wobbly squares that are difficult to cut and less satisfying to eat. Proper chilling transforms the custard from a warm, pourable liquid into a sliceable, creamy delight that holds its shape. Patience here will be greatly rewarded with a superior dessert. This is a common requirement for many pastry recipes, ensuring stability and a pleasant mouthfeel.
How Long to Chill Properly
For your vanilla custard cream squares to achieve their ideal firm texture and rich flavor, they require a minimum of 4 hours of chilling in the refrigerator. However, for the very best results and a truly firm set, it’s highly recommended to chill them for at least 6 hours, or even better, overnight. This extended chilling time allows the cornstarch and egg yolks in the custard to fully gel and stabilize, resulting in squares that are clean-cutting and perfectly creamy. The longer chilling also deepens the vanilla flavor, making each bite even more satisfying. Ensure the dish remains covered during this time to prevent the custard from absorbing any refrigerator odors or drying out on the surface. Once properly chilled, your homemade dessert will be ready to serve and impress.
Serving Up Delicious Custard Cream Squares
After all your hard work and patient chilling, the moment arrives to serve your delicious custard cream squares. Presentation plays a significant role in enhancing the eating experience, turning a simple dessert into a memorable one. While the flavor is undoubtedly the star, neat slices and thoughtful garnishes can elevate your squares to a bakery-worthy status. This section focuses on how to best present your creamy creations, ensuring every square looks as good as it tastes and leaves a lasting impression on your guests. Perfecting your serving technique adds the final touch to your culinary masterpiece.
Slicing for Neat Presentation
To achieve clean, crisp slices, remove the chilled baking dish from the refrigerator. If your dish isn’t lined with parchment paper for easy lifting, you’ll need to slice directly in the pan. Run a thin, sharp knife under hot water and wipe it dry before each cut. This technique helps the knife glide through the custard and crust without sticking or dragging, creating smooth edges. Slice the squares to your desired size, usually 9 squares from an 8×8 or 9×9 inch pan. For an even more professional look, use a straight-edged ruler as a guide. Carefully lift each square out with a wide spatula, ensuring the delicate custard remains intact. This careful slicing is crucial for serving a beautiful, delicious treat.
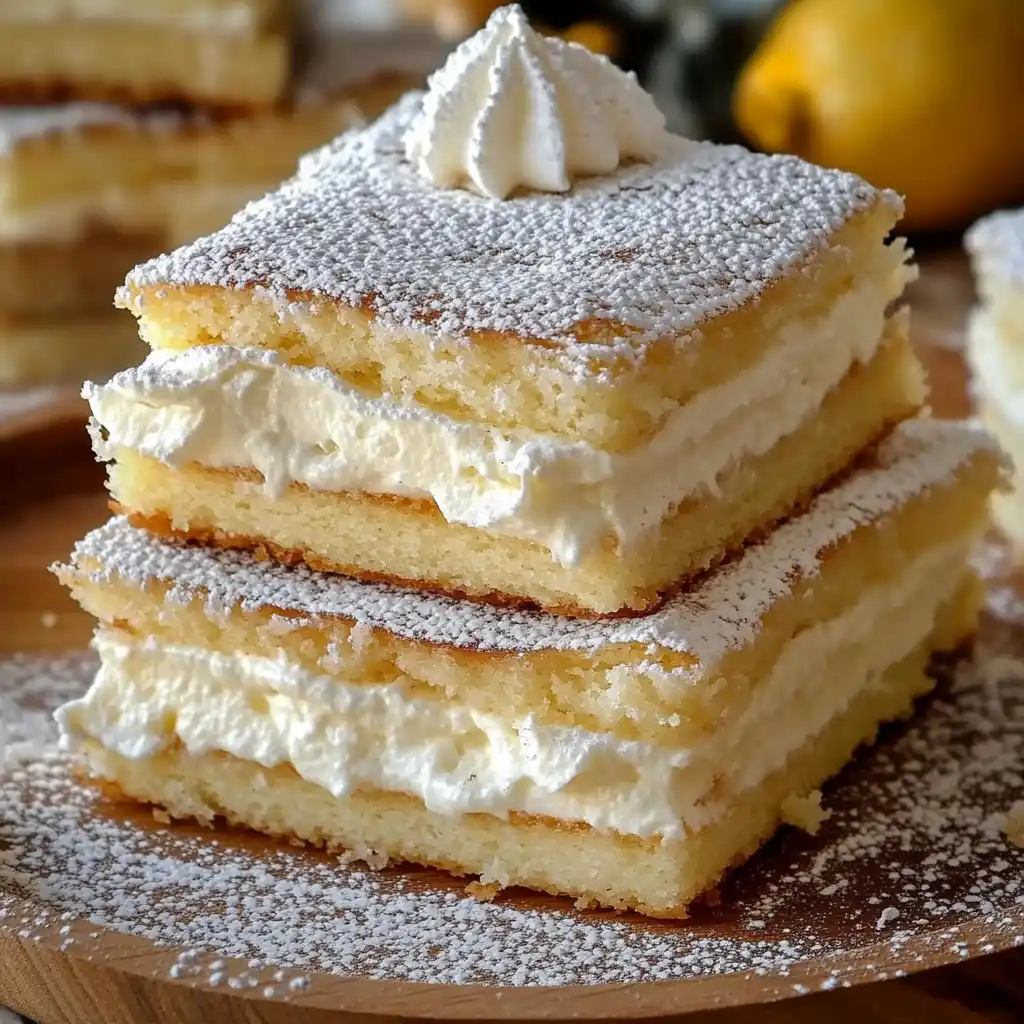
Dusting with Powdered Sugar
A simple dusting of powdered sugar is a classic and elegant finishing touch for vanilla custard cream squares. It adds a subtle sweetness and a beautiful visual contrast against the pale yellow custard. To apply, place a small amount of powdered sugar in a fine-mesh sieve and gently tap it over the top of the sliced squares just before serving. This creates a delicate, even coating. The powdered sugar not only enhances the appearance but also offers a slight textural variation, melting delicately on the tongue alongside the creamy custard. This small step makes a big difference in presentation.
Optional Garnishes and Pairings
While delicious on their own, custard squares can be enhanced with various garnishes and pairings. Consider a sprinkle of cinnamon or nutmeg for a warm spice note. Fresh berries, such as raspberries or blueberries, add a burst of color and a tart counterpoint to the sweet custard. A drizzle of homemade raspberry coulis or chocolate sauce can also add visual appeal and extra flavor. For pairings, these squares go wonderfully with a cup of coffee, tea, or even a light dessert wine. Don’t forget to check out our Carina Recipes Pinterest for more visual inspiration on garnishes and presentations for all your baking endeavors!
Tips for Amazing Custard Cream Squares
Achieving truly amazing vanilla custard cream squares involves more than just following the steps; it requires understanding a few key techniques and common pitfalls. These expert tips will help you navigate potential challenges and ensure your dessert turns out perfectly every time. From preventing curdling to guaranteeing a firm set, these insights are designed to give you confidence in your baking journey. Mastering these nuances will elevate your homemade dessert from good to absolutely outstanding, making you a pro at creating smooth, luscious cream squares that everyone will adore and request again and again.
Avoiding Custard Curdling
Curdling is a common concern when making custard, often caused by cooking the eggs too quickly or at too high a temperature. To avoid this, always temper your egg yolks by slowly whisking a small amount of hot milk mixture into them before adding the egg mixture back into the main pot. This gradually raises the eggs’ temperature. Secondly, cook the custard over medium-low heat and whisk constantly. Never let the custard come to a rolling boil. If you notice any lumps forming, immediately remove the pot from the heat and whisk vigorously, or pass the custard through a fine-mesh sieve. Keeping the heat consistent and using gentle, continuous whisking are your best defenses against a grainy or curdled custard.
Ensuring a Firm Set
A firm, yet creamy, set is crucial for sliceable custard squares. The main culprits for a runny custard are insufficient cooking or not enough thickening agent. Ensure you cook the custard until it visibly thickens and coats the back of a spoon, and a clear path remains when you swipe your finger across it. If it still seems too thin after cooking, you might have undercooked it. Also, verify that you used the correct amount of cornstarch or flour specified in the recipe. Finally, and perhaps most importantly, allow ample chilling time. The starches and proteins in the custard need several hours in the refrigerator to fully set and firm up. Patience during chilling is key; an overnight chill yields the best results. For other perfectly set desserts, check out our recipe for funnel cake bites, where texture is everything.
Easy Variations for Your Custard Squares
While the classic vanilla custard cream squares are undeniably delicious, the beauty of this easy dessert recipe lies in its versatility. Once you’ve mastered the basic technique, you can effortlessly introduce various flavor twists and different crust options to cater to diverse tastes and occasions. These simple variations allow you to customize your homemade dessert, making it fresh and exciting every time you bake. Don’t be afraid to get creative and experiment with combinations that appeal to you. This adaptability makes custard squares a truly dynamic sweet treat for any home baker.
Flavor Twists to Try
To infuse different flavors into your custard, consider these simple additions. For a lemon custard, add lemon zest and a splash of lemon juice to the milk mixture, or infuse with Earl Grey tea bags for a delicate tea-flavored custard. You could also swirl in a tablespoon of cocoa powder or melted chocolate for a chocolate custard. Almond extract can replace or complement vanilla for an almond-flavored custard. Even a hint of coffee liqueur can create an espresso custard. Remember to adjust sugar levels slightly if you add anything that might significantly alter the sweetness. These variations offer endless possibilities for your cream squares.
Different Crust Options
Beyond the traditional buttery shortbread crust, several other options can dramatically change the character of your custard squares. A graham cracker crust, made with crushed graham crackers, melted butter, and a bit of sugar, offers a quicker, no-bake alternative. For a nutty flavor, try a crust made from crushed digestive biscuits mixed with ground almonds. You could also use a pastry crust enriched with lemon zest for a citrusy base. Experiment with gluten-free flour blends for a gluten-free crust, or even a thin layer of puff pastry for a flakier texture. Each crust option brings its unique flavor and texture profile, making the easy custard squares feel like a completely new dessert. Don’t forget to share your creative crusts on our Carina Recipes Instagram!
Storing Your Vanilla Custard Squares Safely
Proper storage is key to maintaining the freshness, texture, and safety of your vanilla custard cream squares. Since they contain dairy and eggs, these homemade desserts are perishable and require careful handling. Understanding the best practices for both short-term refrigeration and longer-term freezing will ensure you can enjoy your delicious treat for as long as possible without compromising quality or taste. Following these guidelines will help you savor every last bite of your easy custard squares, whether you plan to enjoy them tomorrow or next month. This extends the life of your culinary efforts.
Fridge Storage Guidelines
Vanilla custard cream squares must be stored in the refrigerator due to their dairy and egg content. Once cooled and completely chilled, transfer any leftover squares to an airtight container. If storing the entire pan, cover it tightly with plastic wrap or aluminum foil. Stored properly, the squares will remain fresh and delicious for 3-4 days in the refrigerator. Beyond this, the crust might start to soften, and the custard could lose its optimal texture. Always ensure the container is sealed to prevent the squares from absorbing odors from other foods in the fridge.
Freezing for Later Enjoyment
Yes, you can absolutely freeze vanilla custard cream squares for longer enjoyment! To do so, ensure the squares are fully chilled and firm. Slice them into individual servings. Wrap each square tightly in plastic wrap, then again in aluminum foil, or place them in a freezer-safe airtight container with parchment paper between layers to prevent sticking. Properly frozen, these easy custard squares can last for up to 1-2 months. When ready to serve, thaw them overnight in the refrigerator. The texture of the custard might be slightly softer after thawing, but they will still be a delightful sweet treat.
Quick Answers to Custard Squares FAQs
Baking can sometimes lead to questions, especially when perfecting a new recipe like easy vanilla custard squares. This section addresses some of the most frequently asked questions to help troubleshoot common issues and provide clarity on preparation and timing. Having these quick answers at your fingertips can save you time and stress, ensuring your baking process is as smooth as your custard. These insights cover critical aspects, from making ahead to resolving thickening problems, helping you gain confidence in creating this delicious dessert.
Can You Make Them Ahead?
Absolutely! Vanilla custard cream squares are an excellent make-ahead dessert. In fact, making them a day in advance is often recommended, as it allows the custard to chill thoroughly and the flavors to fully meld, resulting in a superior taste and texture. Prepare the crust, make the custard, assemble the layers, and chill them overnight in the refrigerator. Simply slice and garnish just before serving. This makes them perfect for entertaining, as you can have a beautiful homemade dessert ready without last-minute stress. Planning ahead ensures a perfectly set and delicious treat.
What If Custard Doesn’t Thicken?
If your vanilla custard isn’t thickening, don’t panic! This is a common issue with a few possible causes and solutions. First, ensure you cooked it long enough. Return the pot to medium-low heat and continue whisking constantly. Make sure it reaches a gentle simmer and coats the back of a spoon. If after a few more minutes it still hasn’t thickened, you might need a bit more thickening agent. In a small bowl, whisk a tablespoon of cornstarch (or flour) with two tablespoons of cold milk to create a slurry. Gradually whisk this slurry into the simmering custard and continue to cook and whisk until it reaches the desired consistency. Ensure you measure your ingredients accurately in the future, especially the cornstarch, as this is critical for a firm set.
Pro Chef Notes: Easy Custard Squares
Taking your easy vanilla custard squares from good to truly exceptional often comes down to incorporating a few professional insights. These “chef notes” go beyond the basic recipe steps, offering nuanced tips that can significantly enhance the flavor, texture, and overall presentation of your homemade dessert. From deep flavor infusions to understanding ingredient temperatures, these expert pieces of advice are designed to refine your technique and elevate your baking game. Embrace these small adjustments, and prepare to create a truly delicious treat that rivals any bakery offering.
Infusing Extra Vanilla Flavor
For an unparalleled vanilla flavor, don’t rely solely on extract. Consider using a vanilla bean. Split a vanilla bean pod lengthwise and scrape out the seeds. Add both the seeds and the pod to the milk and cream mixture when you heat it gently. Let it steep for about 15-20 minutes off the heat after simmering to fully infuse the flavor. Remove the pod before whisking in the egg mixture. You can still add a touch of vanilla extract at the end for an extra punch. This dual approach creates a more complex and aromatic vanilla profile, making your cream squares truly stand out. For a similar depth of flavor in other recipes, explore our vanilla bean creme brulee cheesecake cupcakes.
Room Temperature Ingredients Matter
While cold butter is essential for the crust, certain other ingredients for the custard benefit from being at room temperature. Specifically, allowing your egg yolks to come to room temperature before whisking them with sugar makes them easier to incorporate and reduces the risk of lumps. Room temperature eggs also emulsify more readily, creating a smoother custard base. This seemingly minor detail can make a noticeable difference in the consistency and texture of your final product, contributing to that perfectly smooth filling that defines excellent custard squares.
Creative Garnish Ideas
Beyond powdered sugar, consider creative garnishes to elevate your vanilla custard cream squares. A light sprinkle of toasted coconut flakes adds texture and a tropical note. Candied citrus zest (lemon or orange) provides a bright, zesty contrast. For a sophisticated touch, carefully place a single fresh berry or a small sprig of mint on each square just before serving. You could also create a simple chocolate stencil over the powdered sugar. These small, thoughtful additions not only enhance the visual appeal but can also introduce complementary flavors and textures, making each square a delightful culinary experience.