
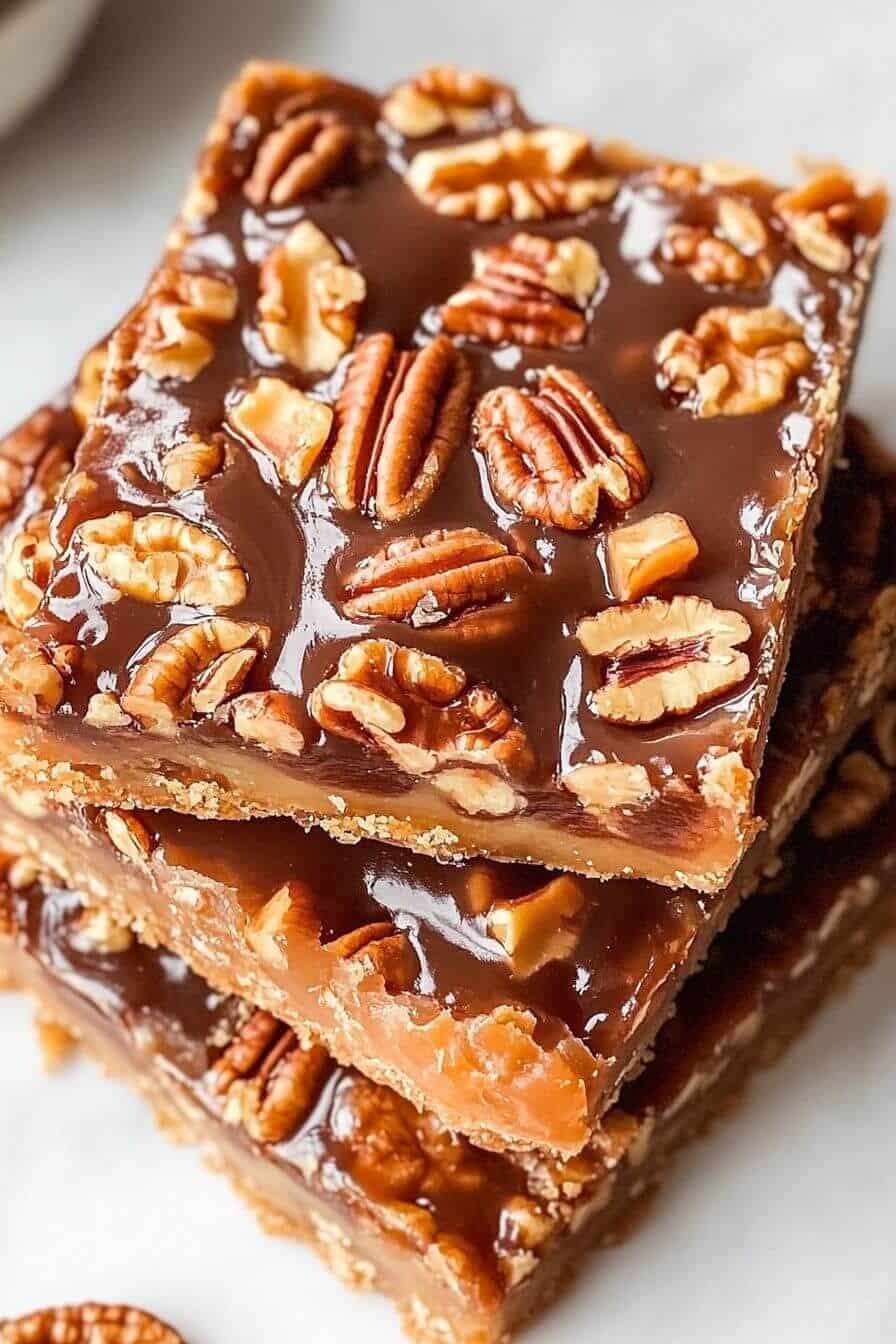
Pecan Turtle Bars are a delightful sweet treat that combines a buttery shortbread crust with a rich, chewy homemade caramel layer. Topped with crunchy pecans and smooth chocolate, this easy dessert recipe is simple to make and always impresses. It’s perfect for parties or a cozy night in.
Key Takeaways
- Simple steps for a delightful pecan turtle bar recipe.
- Homemade caramel is easier than you think to prepare.
- Tips for creating the perfect buttery crust and smooth topping.
- Storage and serving suggestions ensure lasting freshness and enjoyment.
These bars are a delightful confection. They feature layers of sweet indulgence. A buttery crust starts it off. Rich caramel and pecans follow. Chocolate finishes this tempting treat.
Start Your Easy Pecan Turtle Bars
Beginning your journey to making homemade Pecan Turtle Bars is an exciting step towards creating a truly memorable dessert. These bars are a celebration of contrasting textures and harmonious flavors—a crisp, buttery crust provides the foundation for a luscious, chewy caramel, studded with earthy pecans and crowned with a smooth layer of melted chocolate. This easy dessert recipe is designed for bakers of all skill levels, ensuring a rewarding experience and an impressive outcome that your family and friends will adore. Let’s make sure you’re properly set up for success by taking care of the initial preparation steps, which are crucial for a smooth baking process and perfect results. The proper pan preparation prevents sticking and ensures your bars can be easily cut and served, while preheating the oven creates the ideal environment for even baking.
Preheat Oven to 350°F
Setting your oven to the correct temperature before you begin assembling your ingredients is a fundamental step in baking any treat, especially these delicious Pecan Turtle Bars. A properly preheated oven ensures that your crust bakes evenly from the moment it enters the heat, preventing uneven cooking or raw spots. Give your oven at least 15-20 minutes to reach and stabilize at 350°F (175°C) once it indicates it’s preheated. This allows the internal temperature to be consistent, which is vital for achieving that perfectly golden and tender crust that forms the base of your delightful bars.
Grease Your Baking Pan
For effortless removal and perfectly shaped bars, properly greasing your baking pan is essential. For this recipe, a 9×13 inch baking pan is ideal, providing ample surface area for an even crust and a generous batch of bars. You can grease the pan with butter, shortening, or a non-stick cooking spray. For an even easier removal process and cleaner cuts, consider lining your pan with parchment paper, leaving an overhang on the sides. This “sling” allows you to lift the entire batch of baked and cooled bars out of the pan before slicing, making the serving process incredibly simple and clean. Make sure the parchment covers the bottom and goes up the sides of the pan.
Ingredients for Pecan Turtle Bars
Crafting these delectable Pecan Turtle Bars requires a selection of readily available ingredients, divided into components for the crust, the rich caramel layer, and the luxurious topping. Gathering all your ingredients before you start, known as mise en place, will make the baking process incredibly smooth and enjoyable, preventing any last-minute searches. Each ingredient plays a vital role in achieving the perfect balance of sweetness, chewiness, and crunch that defines this beloved homemade dessert.
For the Crust:
- 1 cup (2 sticks) unsalted butter, softened
- 1/2 cup granulated sugar
- 2 cups all-purpose flour
For the Caramel Layer:
- 1/2 cup (1 stick) unsalted butter
- 1 cup packed light brown sugar
- 1/4 cup granulated sugar
- 1/4 teaspoon salt
- 1 (14-ounce) can sweetened condensed milk
- 1 teaspoon vanilla extract
For the Pecan and Chocolate Topping:
- 1 1/2 cups chopped pecans (or whole pecan halves for a decorative look)
- 1 cup semi-sweet chocolate chips (or milk chocolate chips, if preferred)
Having these ingredients at room temperature, especially the butter and sweetened condensed milk, will help them incorporate more smoothly into your mixtures, ensuring a consistent texture for your crust and a velvety caramel layer. Fresh pecans are key for that authentic nutty flavor. If you’re looking for other amazing dessert recipes, check out our collection of sweet treats!
Prepare the Delicious Crust
The crust is the foundation of your Pecan Turtle Bars, offering a delightful buttery crunch that perfectly complements the rich layers above. This simple shortbread crust comes together with minimal effort and provides a sturdy base without being too dense. Achieving the right consistency is key for a tender, flaky texture that holds up well once the bars are cut. Pay attention to how you mix the ingredients and bake it, as this initial step sets the stage for the entire dessert. A perfectly baked crust will be lightly golden brown and just firm enough to support the caramel and chocolate without crumbling.
Mix Flour and Sugar
In a medium mixing bowl, combine the all-purpose flour and granulated sugar. Use a whisk to gently mix them together, ensuring there are no lumps and the sugar is evenly distributed throughout the flour. This simple step helps to aerate the dry ingredients and prevents pockets of unmixed sugar, contributing to a uniform texture in your baked crust. While it might seem like a minor detail, proper blending of dry ingredients is fundamental for a consistent and delicious result in any baking endeavor, laying the groundwork for the butter to be evenly incorporated in the next step.
Add Softened Butter
Once your dry ingredients are mixed, it’s time to incorporate the softened butter. Ensure your butter is truly softened to room temperature—it should yield easily to pressure but not be melted. Cut the butter into several smaller pieces and add them to the flour and sugar mixture. Using a pastry blender, a fork, or your fingertips, work the butter into the dry ingredients until the mixture resembles coarse crumbs. The goal is to have small, pea-sized pieces of butter distributed throughout the flour, which will create pockets of steam during baking, resulting in a tender and flaky crust. Avoid overmixing, as this can develop the gluten too much, leading to a tough crust.
Press and Bake Crust
Transfer the crumbly crust mixture into your prepared 9×13 inch baking pan. Using your fingertips or the bottom of a flat glass, press the mixture firmly and evenly across the bottom of the pan. It’s important to create a compact, uniform layer so the crust bakes consistently and provides a solid base for the caramel. Once pressed, place the pan in your preheated 350°F (175°C) oven and bake for 15-18 minutes, or until the edges are lightly golden brown. This pre-baking step, known as blind baking, helps to set the crust and prevents it from becoming soggy once the caramel layer is added. Remove it from the oven and set it aside to cool slightly while you prepare the caramel. For another fantastic treat that starts with a great base, consider making a quick Italian cream cake.
Make the Rich Caramel Layer
The gooey, luscious caramel layer is undoubtedly the heart of these Pecan Turtle Bars, providing that signature chewiness and deep, buttery sweetness. Creating homemade caramel might sound daunting, but with a few simple steps and careful attention, you can achieve a perfectly rich and smooth consistency. The key is patience and constant stirring to prevent scorching and ensure all the sugars dissolve properly. This caramel is a combination of classic ingredients that melt down to create a truly irresistible filling, making these bars a standout sweet treat.
Melt Butter and Sugars
In a large, heavy-bottomed saucepan, combine the 1/2 cup (1 stick) unsalted butter, 1 cup packed light brown sugar, 1/4 cup granulated sugar, and 1/4 teaspoon salt. Place the saucepan over medium heat. Stir constantly with a wooden spoon or heatproof spatula until the butter is completely melted and the sugars have dissolved, forming a smooth, bubbling mixture. The heavy bottom of the pan is crucial here as it helps distribute heat more evenly, reducing the risk of the sugars burning. This initial step creates the base of your caramel, marrying the rich flavors of butter and brown sugar.
Add Sweetened Condensed Milk
Once the butter and sugars are fully melted and combined, carefully pour in the 14-ounce can of sweetened condensed milk. Stir this in thoroughly until it’s fully incorporated into the sugar mixture. The sweetened condensed milk adds a significant creamy texture and contributes to the characteristic chewiness of the caramel. It’s important to keep stirring continuously during this stage, ensuring that all ingredients are well blended and no part of the mixture sticks to the bottom of the pan, which could lead to burning. Continue cooking over medium heat, bringing the mixture to a gentle simmer.
Simmer Until Thickened
After incorporating the condensed milk, continue to simmer the caramel mixture over medium-low heat. This is the stage where the magic happens and the caramel truly thickens. Maintain a gentle simmer, stirring constantly for about 5-7 minutes. The caramel is ready when it thickens to a consistency that coats the back of a spoon and when you drag your spoon across the bottom of the pan, it briefly reveals the pan before the caramel flows back in. A key indicator is also seeing small bubbles across the entire surface rather than just around the edges. Once thickened, remove the pan from the heat and stir in the 1 teaspoon of vanilla extract. The aroma will be incredible! This ensures the vanilla flavor isn’t cooked off. This rich caramel will be the sticky, sweet glue that holds your bars together, creating an unforgettable experience. You can find more desserts like this one on our website.
Add Pecans to Caramel
With your rich, buttery caramel now perfectly simmered and thickened, it’s time to introduce the star ingredient that gives these bars their distinctive “turtle” character: pecans. The addition of pecans provides a wonderful contrast in texture, breaking up the chewiness of the caramel with a satisfying crunch and lending an earthy, nutty flavor that balances the sweetness. Whether you choose chopped pecans for an even distribution or whole halves for a more traditional look, integrating them properly is crucial for achieving the desired taste and texture profile in your Pecan Turtle Bars. This step brings the classic combination of flavors to life, elevating the simple caramel into something truly special.
Carefully fold the 1 1/2 cups of chopped pecans into the warm caramel mixture. Stir gently but thoroughly, ensuring that the nuts are evenly coated and distributed throughout the caramel. The warmth of the caramel will slightly toast the pecans, further enhancing their natural flavor. If you wish, you can even lightly toast your pecans in a dry skillet for a few minutes before adding them to intensify their nuttiness, a trick often employed by experienced bakers for a deeper flavor. Once the pecans are fully incorporated, immediately pour this pecan-caramel mixture evenly over the pre-baked and slightly cooled crust in your 9×13 inch pan. Use an offset spatula or the back of a spoon to spread it out smoothly to the edges. Working quickly is beneficial here, as the caramel will begin to set as it cools. The generous layer of nuts and caramel will look incredibly tempting even before baking, promising an indulgent bite. To learn more about this versatile nut, consider checking out the Pecan Wikipedia page.
Bake Your Pecan Turtle Bars
After assembling the crust and the luscious pecan-caramel layer, your Pecan Turtle Bars are ready for their final bake. This baking stage is crucial for allowing the caramel to meld with the crust and reach its ultimate chewy texture, while also ensuring the entire bar sets properly. The oven heat will continue to develop the flavors and aromas, creating a cohesive and irresistible treat. Proper baking ensures that the caramel is perfectly gooey but firm enough to hold its shape once cooled, making these bars not only delicious but also easy to handle and serve. Pay close attention to the visual cues to know when they’re perfectly done.
Return Pan to Oven
Once the pecan-caramel mixture has been spread over the pre-baked crust, carefully return the pan to your preheated 350°F (175°C) oven. Place it on the center rack to ensure even heat distribution. This second bake is shorter than the initial crust bake, as its primary purpose is to allow the caramel to deepen in flavor, set slightly, and fully adhere to the crust. The entire kitchen will soon fill with the irresistible scent of toasted pecans and rich, bubbling caramel, a true sign that something delicious is in the making. Keep an eye on it to prevent over-baking, which could make the caramel too hard.
Bake Until Bubbly
Continue baking the Pecan Turtle Bars for approximately 18-22 minutes. The main indicator that they are done is when the caramel layer is visibly bubbly across the entire surface and the edges appear set and slightly darker. The center might still look a little soft, but it will firm up considerably as the bars cool. It’s important not to overbake, as this can lead to a hard, brittle caramel rather than the desired soft and chewy texture. Once you observe these visual cues, carefully remove the pan from the oven. The bars will be extremely hot, so handle with care. Allow them to sit on a wire rack for a few minutes before moving on to the final topping, which will melt beautifully over the warm caramel. This ensures that the texture of the caramel remains perfectly gooey for your family to enjoy. For more sweet creations, don’t forget to visit our Instagram page!
Melt and Spread Chocolate
The final crowning glory for your Pecan Turtle Bars is a smooth, decadent layer of melted chocolate. This layer not only adds to the visual appeal but also introduces another dimension of flavor and texture, perfectly complementing the sweet caramel and crunchy pecans. The beauty of this step is its simplicity; the residual heat from the freshly baked bars does most of the work for you, creating an effortless spread. This chocolate topping truly completes the “turtle” profile, making each bite a harmonious blend of classic confectionery elements. It’s the perfect finish to this easy dessert recipe.
Sprinkle Chocolate Chips
Immediately after removing the pan of hot Pecan Turtle Bars from the oven, generously sprinkle the 1 cup of semi-sweet chocolate chips evenly over the warm caramel layer. The heat retained in the caramel will gradually begin to melt the chocolate chips. There’s no need for a double boiler or microwave here; the natural warmth of the freshly baked bars is sufficient to create a perfectly smooth, spreadable chocolate topping. Ensure the chips are distributed across the entire surface, so every square of your finished bar will have that irresistible chocolate touch. You can experiment with milk chocolate or even white chocolate for different flavor profiles.
Spread Evenly Over Top
Allow the chocolate chips to sit on the hot caramel for about 5-7 minutes. This gives them enough time to soften and melt thoroughly. Once they appear glossy and soft, use an offset spatula or the back of a spoon to gently spread the melted chocolate evenly across the entire surface of the bars. Work quickly and smoothly to achieve a uniform, beautiful layer. This will create a pristine finish that’s not only appealing to the eye but also ensures a delightful chocolate experience in every bite. The contrast of the dark chocolate against the golden caramel and pecans makes for a stunning presentation, ensuring these homemade chocolate bars are a definite crowd-pleaser.
Cool and Set Your Bars
Patience is a virtue, especially when it comes to cooling and setting your freshly baked Pecan Turtle Bars. While the aroma might be incredibly tempting, allowing the bars to cool and set properly is critical for achieving the perfect texture and for making clean, appealing cuts. Rushing this stage can result in a gooey mess, making the bars difficult to slice and handle. The cooling process allows the caramel to firm up and the chocolate to harden, creating defined layers that hold their shape beautifully. This final step is essential for both the structural integrity and the ultimate enjoyment of this sweet treat.
Cool at Room Temperature
Once the chocolate layer has been spread, leave the pan of Pecan Turtle Bars on a wire rack to cool completely at room temperature. This gradual cooling process is important for allowing all the layers—the crust, caramel, and chocolate—to set naturally and uniformly. Depending on your kitchen’s temperature, this could take anywhere from 1 to 2 hours. Resist the urge to move them or cut them too early. Cooling slowly helps prevent the chocolate from cracking and ensures the caramel firms up to that ideal chewy consistency without becoming overly brittle. A properly cooled bar will be stable and ready for the next step.
Refrigerate to Firm Up
After the bars have cooled completely at room temperature and the chocolate is no longer soft to the touch, transfer the pan to the refrigerator. Chilling the bars for at least 30 minutes to 1 hour, or until they are very firm, will make them much easier to cut into neat squares. The cold helps solidify the caramel and chocolate, providing clean edges when slicing. This step is particularly helpful if you’re planning to serve them soon after they’ve cooled. If you’re not in a hurry, you can simply leave them at room temperature for longer. Once firm, they are ready for slicing, ensuring a professional and appealing presentation for your easy dessert. For other delicious no-bake or chilled desserts, check out our recipe for butterfinger balls.
Serve Your Easy Pecan Turtle Bars
The moment you’ve been waiting for has arrived: serving your homemade Pecan Turtle Bars! After all the delightful anticipation, presenting these bars beautifully is the final touch to a successful baking endeavor. Proper cutting techniques ensure clean, appealing squares, while smart storage tips will keep any leftovers fresh and delicious for future enjoyment. These bars are a fantastic addition to any dessert table, a thoughtful gift, or a satisfying treat for yourself. Their rich flavor and appealing layers make them a popular choice, and knowing how to handle them post-baking ensures their quality endures.
Cut Into Squares
Once your Pecan Turtle Bars are fully chilled and firm, remove the pan from the refrigerator. If you lined your pan with parchment paper, use the overhang to carefully lift the entire slab of bars out onto a cutting board. For clean, precise cuts, use a large, sharp knife. To prevent the chocolate from cracking, you can run your knife under hot water and wipe it dry between each cut. This creates a smoother pass through the chocolate layer. Begin by trimming the edges for a neat presentation, then slice the slab into even squares or rectangles, typically yielding about 24-36 bars depending on your desired size. Wipe the knife clean between cuts for the best results, ensuring each piece looks as perfect as it tastes.
Store Leftovers Properly
Should you be fortunate enough to have any Pecan Turtle Bars left over (a rare occurrence!), proper storage is key to maintaining their freshness and texture. Store the cut bars in an airtight container at room temperature for up to 3-4 days. For longer storage, you can refrigerate them for up to a week. If stacking, place parchment or wax paper between layers to prevent them from sticking together. For an extended shelf life, these bars also freeze beautifully. Wrap individual bars tightly in plastic wrap, then place them in a freezer-safe bag or container for up to 2-3 months. Thaw at room temperature for about 30 minutes before serving. This ensures that every time you reach for a homemade caramel pecan bar, it’s just as delicious as the first. Want to find more main course recipes to pair with this dessert?
Time for This Easy Recipe
Understanding the time commitment for any recipe, especially a baked good like Pecan Turtle Bars, helps you plan your baking day efficiently. While these bars boast rich, complex flavors, the actual hands-on preparation time is surprisingly minimal, making them an ideal choice for when you want an impressive dessert without spending hours in the kitchen. The total time includes both active prep and passive baking/cooling, giving you a full picture of when you can expect to enjoy your homemade sweet treat. This recipe balances quick actions with necessary waiting periods, ensuring a successful outcome for every baker.
Quick Preparation Time
The active preparation time for these Pecan Turtle Bars is relatively short, making them a fantastic option for a busy schedule. You can expect to spend approximately 20-30 minutes on hands-on tasks, which includes mixing the crust, preparing the caramel, folding in the pecans, and sprinkling the chocolate chips. This efficiency comes from straightforward steps and minimal specialized techniques. Gathering your ingredients beforehand will further streamline this process, allowing you to move smoothly from one stage to the next without interruption. Most of the ‘waiting’ time occurs during the baking and cooling phases, leaving your hands free for other tasks.
Total Baking Time
The total baking time for your Pecan Turtle Bars is split into two distinct phases. The initial bake for the crust is about 15-18 minutes, followed by a second bake for the pecan-caramel layer, which takes approximately 18-22 minutes. This brings the total oven time to roughly 33-40 minutes. Beyond the oven time, remember to account for cooling and setting. The bars need to cool at room temperature for 1-2 hours, and then chilling in the refrigerator for at least 30-60 minutes for optimal slicing. So, while active prep is quick, factor in at least 2.5 to 3 hours from start to serving, ensuring all layers set perfectly for that ultimate chewy, chocolatey delight. For more insights on confectionery techniques, consult the Caramel Wikipedia page.
Pecan Turtle Bar Nutrition
When indulging in a delightful homemade dessert like Pecan Turtle Bars, it’s natural to consider their nutritional aspects. These bars are certainly a rich and satisfying sweet treat, packed with calories primarily from sugars, fats, and carbohydrates. While they are not a low-calorie or diet-friendly option, they offer an undeniable burst of flavor and comfort, often enjoyed in moderation as a special occasion treat. Understanding the general nutritional profile can help you make informed choices, emphasizing that these bars are best savored as an occasional indulgence rather than a daily staple, fitting perfectly into a balanced eating plan.
Given the ingredients—butter, sugars, sweetened condensed milk, flour, pecans, and chocolate—Pecan Turtle Bars are calorie-dense. A typical serving (one square, assuming 24-36 pieces per 9×13 inch pan) would contain a significant amount of sugar, contributing to quick energy. The fats come from the butter, pecans, and chocolate, which include both saturated and unsaturated fats. Pecans themselves offer beneficial nutrients like healthy fats, fiber, and some vitamins and minerals, adding a touch of goodness to the indulgence. However, the overall profile is geared towards a high-energy, high-sugar dessert. Individuals watching their sugar intake or managing specific dietary needs should enjoy these bars sparingly. As homemade recipes can vary, precise nutritional values depend on exact ingredient quantities and serving sizes. It’s best to view Pecan Turtle Bars as a delicious treat for special moments.
Tips Your Family Will Love
Making your Pecan Turtle Bars truly unforgettable often comes down to a few simple tips that can elevate their flavor and appeal. These small adjustments can enhance the richness, texture, and overall experience, transforming a great dessert into an extraordinary one. Sharing these insights ensures that every batch you bake is met with enthusiastic praise, making your family and friends eager for another bite. From subtle flavor variations to simple preparation enhancements, these tips are designed to maximize the deliciousness of your homemade treat, securing its place as a cherished family favorite.
Try Dark Chocolate
While semi-sweet chocolate chips are a classic choice for Pecan Turtle Bars, experimenting with dark chocolate chips can add an intriguing layer of complexity to your dessert. Dark chocolate, especially varieties with 60-70% cacao, offers a more intense and slightly bitter contrast to the sweet caramel and buttery crust. This creates a sophisticated flavor profile that appeals to those who enjoy a less sugary, more balanced sweet treat. The depth of the dark chocolate cuts through the richness of the caramel beautifully, preventing the bars from being overly sweet and adding a gourmet touch that your family will appreciate. It’s an easy swap that makes a big difference in taste.
Toast Your Pecans
One of the simplest yet most impactful tips for enhancing the flavor of your Pecan Turtle Bars is to toast your pecans before incorporating them into the caramel layer. Toasting pecans, either in a dry skillet over medium-low heat for 5-7 minutes or on a baking sheet in a 350°F (175°C) oven for 8-10 minutes, brings out their natural oils and deepens their nutty flavor. This process makes the pecans more aromatic and gives them a more pronounced crunch, which will shine through the rich caramel. Be sure to let them cool completely before adding them to the caramel. This extra step takes minimal effort but yields a significant improvement in the overall taste and texture of your finished bars, making them even more irresistible. Don’t forget to follow us on Pinterest for more amazing baking ideas!