
Homemade Naan Bread is a delightful flatbread, perfect for scooping up curries or enjoying on its own. This easy naan recipe simplifies the process, bringing the flavors of this popular Indian bread right into your kitchen. You’ll love the warm, soft, and fluffy naan straight from the skillet.
Key Takeaways
- Activating yeast properly ensures a light, fluffy naan dough.
- Simple ingredients like flour, yogurt, and oil create authentic flavor.
- Allowing sufficient rising time is crucial for the best texture.
- Cooking on a hot skillet yields perfectly golden, bubbly bread.
- Naan is versatile; enjoy it fresh or store leftovers for later.
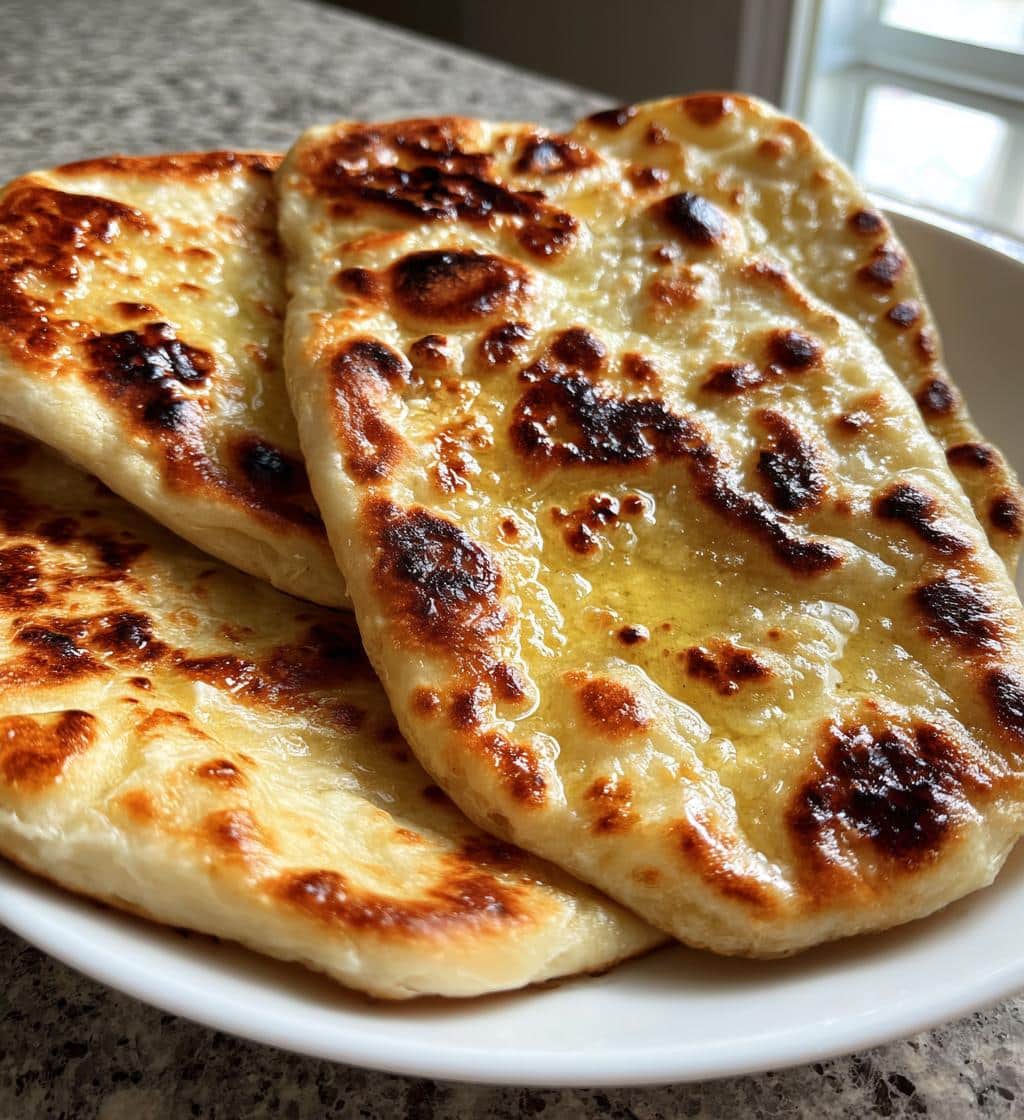
There is nothing quite like warm, fresh naan. The aroma fills your kitchen. It is soft, chewy, and totally satisfying. This easy flatbread is truly a simple joy.
Make Easy Homemade Naan Bread
Making delicious, fluffy naan bread at home is a rewarding experience that might seem daunting at first, but with a clear, straightforward recipe, it becomes incredibly simple. This process demystifies traditional baking, allowing you to create the soft, chewy texture and characteristic bubbles that make naan so beloved. Forget store-bought versions; the satisfaction of pulling a warm, aromatic piece of homemade naan from your own kitchen is unparalleled. Our easy naan recipe ensures success, even for beginner bakers, guiding you through each step to achieve perfect results.
Why Make Naan at Home?
There are numerous benefits to making naan at home, beyond just the pride of creation. Firstly, you have complete control over the ingredients, ensuring freshness and quality. This means you can avoid preservatives often found in commercial naan and even tailor the recipe to dietary needs. Secondly, the taste of freshly cooked naan is far superior; it’s soft, warm, and boasts a unique flavor profile that cools and hardens quickly after leaving the oven or skillet. Lastly, it’s a cost-effective way to enjoy this popular Indian bread whenever a craving strikes. Plus, the process itself is a fun and engaging culinary adventure for the whole family, adding a delightful aroma to your home.
Simple Ingredients for Naan Bread
One of the beauties of this easy naan recipe is its reliance on readily available, simple ingredients. You likely have most of these staples in your pantry already, making it convenient to whip up a batch whenever the mood strikes. The quality of your ingredients directly impacts the final product, so opt for fresh yeast and good quality all-purpose flour for the best results. The combination of these basic items creates a surprisingly complex and utterly delicious flatbread, proving that culinary magic doesn’t always require an extensive shopping list. This straightforward approach allows you to focus on technique rather than ingredient hunting.
List of Naan Dough Items
- All-purpose flour: The foundation of our naan dough, providing structure.
- Active dry yeast: Essential for the fluffy texture and characteristic rise.
- Granulated sugar: Feeds the yeast, helping it activate and rise effectively.
- Warm water: Crucial for activating the yeast; ensure it’s not too hot or cold.
- Plain yogurt: Adds tenderness, a slight tang, and keeps the naan moist.
- Olive oil (or vegetable oil): Contributes to a soft dough and helps with pliability.
- Salt: Enhances flavor and helps control yeast activity.
- Melted butter (optional): For brushing on the cooked naan, often infused with garlic.
- Garlic (optional): Minced, to be added to melted butter for a delicious garlic naan finish.
These components work in harmony to create the perfect balance of flavor and texture, resulting in a truly satisfying yogurt naan experience. For another delightful side dish, consider making Crispy Cauliflower to accompany your freshly made bread.
Prepare Yeast for Fluffy Naan
The secret to wonderfully soft and fluffy naan lies significantly in how you prepare your yeast. Yeast is a living organism that needs the right conditions to thrive and produce the carbon dioxide bubbles responsible for the bread’s airy texture. If your yeast isn’t properly activated, your naan dough won’t rise, resulting in dense, flat bread instead of the light, bubbly texture you desire. Paying close attention to this initial step sets the stage for success in your homemade naan journey, ensuring a delightful culinary outcome. This preparation is a fundamental aspect of many bread recipes.
Warm Water and Yeast Mix
Begin by combining your active dry yeast with a small amount of warm water and a pinch of sugar. The water should be comfortably warm to the touch, ideally between 105-115°F (40-46°C). Water that is too hot will kill the yeast, while water that is too cold will prevent it from activating. The sugar acts as food for the yeast, encouraging it to “wake up” and become active. Stir gently and let the mixture sit for 5-10 minutes. During this time, the yeast should dissolve and then begin to foam or bloom on the surface. This foamy layer indicates that your yeast is alive and active, ready to work its magic on your naan dough. If no foam appears, your yeast might be old or the water temperature was incorrect, and you should start over with fresh yeast.
For more insights into the science of yeast in baking, you can refer to the Yeast Wikipedia page. Understanding this basic principle is key to achieving consistent results not just in naan, but in many other leavened baked goods.
Combine Dough for Homemade Naan
Once your yeast is active and bubbly, you’re ready to bring together the rest of the ingredients to form your homemade naan dough. This stage involves carefully measuring and mixing, ensuring all components are well incorporated for a cohesive and pliable dough. Precision here contributes to the overall texture and workability of the dough later on. Don’t rush this process; taking your time to combine everything thoroughly will pay off with a smoother dough that’s easier to knead and shape. The combination of wet and dry ingredients starts the transformation from individual components to a unified base for your delicious bread.
Adding Flour, Yogurt, and Oil
In a large mixing bowl, whisk together the flour and salt. Create a well in the center of the dry ingredients. Pour the activated yeast mixture, plain yogurt, and olive oil into this well. Using a spoon or your hands, gradually incorporate the dry ingredients into the wet ones, mixing until a shaggy dough forms. The yogurt is especially important, as it contributes significantly to the characteristic softness and slight tang of authentic naan. The oil helps keep the dough pliable and prevents it from becoming too stiff. Continue mixing until all the flour is hydrated and the dough just begins to come together. At this point, it will likely be sticky, but resist the urge to add too much extra flour. Transfer the shaggy dough to a lightly floured surface for the next step: kneading.
Knead Naan Dough Until Smooth
Kneading is a critical step in developing the gluten structure in your naan dough, which is essential for achieving that distinctive chewy yet soft texture. This process transforms a shaggy, somewhat sticky mixture into a smooth, elastic ball. While it requires a bit of effort, the payoff is immense: well-kneaded dough leads to beautifully textured naan that puffs up perfectly when cooked. Think of kneading as a workout for your dough, strengthening its internal network to hold all those wonderful yeast-produced gases. Take your time and enjoy the tactile experience of turning simple ingredients into something truly special.
Achieve Perfect Dough Texture
Turn the shaggy dough out onto a lightly floured surface. Begin to knead the dough by pressing it away from you with the heels of your hands, then folding it back towards you. Rotate the dough slightly and repeat the process. Continue kneading for about 8-10 minutes. Initially, the dough might be quite sticky, but as you knead, it will gradually become smoother, more elastic, and less tacky. You’ll notice it becoming springier and easier to handle. The goal is to achieve a dough that is soft, supple, and bounces back slowly when gently poked with a finger. Avoid adding too much flour during kneading, as this can make the naan tough. Just use enough to prevent sticking. Once the dough reaches this ideal consistency, form it into a smooth ball. This perfect dough texture is what will give you truly fluffy naan.
For those interested in exploring different main course options that would pair wonderfully with this naan, check out our main course recipes. Perhaps a creamy butter chicken? Or for something unique, visit Carina Recipes on Pinterest for more ideas.
Allow Your Naan Dough to Rise
Patience is a virtue, especially when it comes to baking, and allowing your naan dough to rise is where that virtue truly shines. This resting period, often called proofing, is vital for the yeast to do its work, producing gases that create the airy pockets and soft texture characteristic of well-made naan. Skipping or rushing this step will result in a denser, less palatable bread. The rising process not only contributes to the dough’s texture but also develops its flavor, giving it a more complex and satisfying taste. Provide a warm, undisturbed environment, and let the magic unfold naturally.
Resting Time for Best Naan
Once your dough is smoothly kneaded, lightly grease a large bowl with a little olive oil. Place the dough ball in the bowl, turning it once to coat all sides with oil. Cover the bowl tightly with plastic wrap or a clean kitchen towel. Find a warm, draft-free spot in your kitchen – perhaps near a sunny window, on top of a warm oven, or in a slightly warmed (but turned off) oven. Allow the dough to rise for approximately 1 to 1.5 hours, or until it has doubled in size. The exact timing can vary depending on the ambient temperature and the activity of your yeast. A longer, slower rise often results in a more flavorful dough. Once doubled, gently punch down the dough to release the air, and it will be ready for shaping. This crucial resting time is what makes for the best naan.
Shape Easy Naan Bread Portions
After your dough has completed its restful rise, the next enjoyable step is shaping your individual naan portions. This stage allows you to transform the large, puffy dough ball into the distinct flatbreads that will soon become your warm, homemade naan. While perfect circles aren’t strictly necessary – naan is often rustic in shape – aiming for even thickness is important for consistent cooking. This is where your hands-on interaction with the dough truly comes into play, preparing each piece for its transformation on the hot skillet. Shaping is part art, part technique, and a lot of fun!
Dividing and Rolling Naan Balls
Gently transfer the risen dough to a lightly floured surface. Divide the dough into 8-10 equal portions. You can use a kitchen scale for precision, or simply eyeball it. Roll each portion into a smooth ball. Now, working with one ball at a time (keeping the others covered to prevent drying), flatten it lightly with your hand and then use a rolling pin to roll it out into an oval or teardrop shape, approximately 6-8 inches long and 1/4 inch thick. Aim for an even thickness throughout, as this helps the naan cook evenly and puff up beautifully. Don’t worry if your shapes aren’t perfectly uniform; the rustic charm of homemade naan is part of its appeal. Place the shaped pieces on a lightly floured baking sheet or parchment paper, ensuring they don’t touch, while you continue with the remaining dough portions. This preparation is key for making truly easy naan bread.
Cook Naan on a Hot Skillet
The cooking method is what truly distinguishes naan from other flatbreads. Traditionally cooked in a tandoor oven, replicating that intense heat on a home stovetop is best achieved with a very hot cast-iron skillet or griddle. This high heat is essential for developing the characteristic bubbles, slightly charred spots, and tender interior of authentic naan. Cooking quickly and at the right temperature is key to preventing the naan from drying out and becoming tough. This method brings the excitement of Indian cooking directly into your kitchen, delivering fresh, warm bread in minutes. Mastering the skillet technique means you’ll consistently produce wonderful skillet naan.
How to Get Golden Naan
Heat a heavy-bottomed cast-iron skillet or non-stick pan over medium-high heat until it is smoking hot. Do not add any oil to the pan at this stage. Carefully place one shaped naan dough piece onto the hot, dry skillet. You will immediately see bubbles forming on the surface of the dough. Cook for 1-2 minutes, or until large bubbles appear and the underside is lightly golden brown with some charred spots. Flip the naan over using tongs or a spatula. Cook for another 1-2 minutes on the second side, until it puffs up and develops similar golden-brown spots. The high heat creates steam inside the dough, causing it to puff dramatically. Remove the cooked naan from the skillet and place it on a plate, covering it with a clean kitchen towel to keep it warm and soft while you cook the remaining pieces. This technique is how you get golden naan every time.
Brush with Melted Butter
As soon as each piece of naan comes off the hot skillet, brush it generously with melted butter. For an extra layer of flavor, you can melt the butter with a clove or two of minced garlic, creating a delicious garlic naan. The warmth of the freshly cooked bread will absorb the butter beautifully, adding richness and a lovely sheen. This step is optional but highly recommended, as it enhances both the flavor and the aroma of your homemade naan. The butter also helps keep the naan soft and pliable. Serve immediately for the best experience. For more quick and satisfying meals, explore options like our cheesy chicken and rice casserole, which also makes a great pairing.
Secrets for Fluffy Naan Revealed
Achieving truly fluffy naan consistently involves a few key details that can make all the difference. While the recipe steps are straightforward, paying attention to these nuances elevates your homemade naan from good to extraordinary. These are the small adjustments and considerations that experienced bakers instinctively make, and by understanding them, you can replicate their success. Think of these as the “chef’s notes” that ensure a perfect outcome every time you decide to make this delightful Indian bread. These tips are particularly helpful for achieving that coveted light and airy texture.
Warm Water Yeast Tip
The temperature of your warm water for yeast activation is paramount. As mentioned, water that’s too hot will kill the yeast, preventing any rise. Conversely, water that’s too cold won’t activate it sufficiently, leading to a slow or nonexistent rise. Aim for a temperature that feels like a warm bath on your wrist, typically between 105°F and 115°F (40°C-46°C). Using a kitchen thermometer can help ensure accuracy, especially if you’re new to baking with yeast. Properly activated yeast is the foundational secret to a beautifully risen, light, and airy naan. This simple step is non-negotiable for success with any Naan recipe.
Adjusting Dough Consistency
The ideal naan dough should be soft, slightly sticky, and elastic. If your dough feels too dry and stiff after combining ingredients, you might need to add a tiny bit more warm water, a teaspoon at a time, until the desired consistency is reached. If it’s too wet and excessively sticky, incorporate a small amount of flour, also a teaspoon at a time, until it becomes manageable. Remember, a slightly sticky dough is better than a dry one for soft naan. Over-flouring can lead to tough bread. Trust your touch and adjust as needed, as humidity and flour types can vary. This intuitive adjustment ensures your naan will be tender and pliable. You can also find more delicious dinner ideas by following Carina Recipes on Instagram.
Enjoying Your Warm Homemade Naan
There’s nothing quite like the experience of enjoying freshly made, warm homemade naan straight from the skillet. The aroma, the softness, and the slightly crisp edges make it an irresistible treat. Naan is incredibly versatile, making it a fantastic addition to a variety of meals. It’s perfect for scooping up rich curries like our Fiery Dragon Chicken, creamy dals, or flavorful stews. It also makes an excellent base for mini pizzas, a side for grilled meats, or simply enjoyed on its own with a sprinkle of herbs and a dip in olive oil. Share it with family and friends, or savor a moment of culinary bliss all to yourself. This truly is the highlight of making your own quick naan.
Quick Look at Naan Nutrition
While homemade naan is undeniably delicious and comforting, it’s also helpful to have a general understanding of its nutritional profile, especially if you’re monitoring your dietary intake. The exact nutritional content can vary based on specific ingredients and portion sizes, but a typical serving provides a good source of carbohydrates, which are essential for energy. Knowing the approximate values allows you to integrate this wonderful flatbread into a balanced diet, appreciating it not just for its taste but also for its contribution to your meal plan.
Calories, Fat, and Protein
A single piece of homemade naan (approximately 60-80g) typically contains around 180-250 calories. The fat content can range from 4-8 grams, depending on the amount of oil and butter used in the dough and for brushing. Most of the fat comes from healthy olive oil and, if used, dairy fat from yogurt and butter. Protein content is usually around 5-7 grams per serving, contributed by the flour and yogurt. Carbohydrates are the most abundant macronutrient, typically 30-45 grams per piece. These figures are estimates; for precise nutritional information, it’s always best to calculate based on the specific ingredients and quantities in your recipe. Nonetheless, it’s a filling and satisfying component to any meal.
Store Leftover Easy Homemade Naan
While homemade naan is best enjoyed fresh off the skillet, it’s also practical to know how to store any leftovers. Properly stored, your naan can retain its softness and flavor for a day or two, making it convenient for quick meals or snacks later. This ensures that none of your delicious efforts go to waste, and you can enjoy the fruits of your labor over multiple sittings. Knowing the right storage methods helps maintain the quality and prevents the bread from becoming stale or dry too quickly, preserving that wonderful fluffy naan texture.
Keeping Naan Fresh
To keep your leftover naan fresh, allow it to cool completely to room temperature. Once cool, stack the naan pieces and wrap them tightly in aluminum foil, or place them in an airtight container or a resealable plastic bag. Store at room temperature for up to 2 days. For longer storage, you can freeze naan for up to 1 month. To reheat, sprinkle a little water on the naan and warm it in a microwave for 15-30 seconds, or on a dry skillet over medium heat for about 1 minute per side until soft and warm. You can also wrap it in foil and heat in a preheated oven at 350°F (175°C) for 5-7 minutes. These methods help revive its soft texture, making it almost as good as fresh.