
Making easy dog treats at home is a rewarding way to show your furry friend some love. This no-bake recipe simplifies the process, allowing you to create delicious, healthy pet snacks with ingredients you trust. Prepare delightful, safe homemade dog treats in minutes.
Key Takeaways
- Homemade dog treats are simple to make with minimal ingredients and no baking required.
- Prioritize your pet’s health by using natural, dog-safe components like oats, peanut butter, and applesauce.
- Always check for potential pet allergies and avoid harmful ingredients, especially xylitol.
- These treats are quick to prepare, requiring only chilling before serving, and store well for up to a week.
- Get creative with shapes and flavors, but always consult your vet before introducing new foods to your dog’s diet.
A homemade dog treat brings immense joy. Your pet will appreciate the effort. These treats are easy to prepare. They are also incredibly healthy. Give them a try today.
Making Easy Dog Treats at Home
Creating delicious and nutritious treats for your canine companion doesn’t have to be a complicated affair. Forget the long ingredient lists and elaborate baking steps; our focus here is on simplicity, quality, and your dog’s happiness. This article will walk you through a straightforward, no-bake recipe that allows you to whip up a batch of delightful snacks in no time. Homemade treats offer a significant advantage over store-bought options: complete control over ingredients, ensuring no unwanted additives or preservatives find their way into your pet’s diet. It’s a wonderful way to bond with your dog and provide them with treats tailored to their needs and preferences.
Healthy snacks for your pet
The health of your pet is paramount, and these homemade treats are designed with wellness in mind. We emphasize using ingredients that are not only tasty but also beneficial. Rolled oats provide fiber and essential nutrients, while natural peanut butter offers a good source of protein and healthy fats. Unlike many commercial treats that can be laden with fillers and artificial flavors, these snacks contribute positively to your dog’s overall diet. You’ll be able to see the wholesome components, giving you peace of mind that you’re offering the best. For another healthy, human-friendly option you might enjoy, consider checking out our beet salad with feta recipe, which also focuses on fresh, nutritious ingredients.
Simple ingredients you trust
One of the greatest benefits of making dog treats at home is the transparency of ingredients. You know exactly what goes into every bite. This recipe calls for common pantry staples, making it accessible for any pet owner. We prioritize natural sweeteners and fats, steering clear of anything artificial. When selecting ingredients, always opt for high-quality, pet-safe versions. For instance, always use natural peanut butter free of xylitol, an artificial sweetener that is highly toxic to dogs. By choosing ingredients you would feel comfortable eating yourself, you ensure the highest standard of nutrition and safety for your beloved dog. This trust in your ingredients translates directly to a healthier, happier pet.
No Bake Peanut Butter Dog Treats
The beauty of this recipe lies in its utter simplicity. There’s no need to preheat an oven, monitor baking times, or worry about tricky textures. These peanut butter dog treats are truly “no bake,” relying on the chilling process to firm them up to a perfect consistency. This makes them an ideal choice for busy pet owners or anyone looking for a quick and easy way to spoil their dog without compromising on quality or nutrition. The process is so straightforward that even novice cooks can achieve fantastic results, making it a fun activity for the whole family.
Quick, simple recipe overview
At a glance, the recipe involves just a few key steps: combining ingredients, shaping, and chilling. First, you’ll mix the dry and wet ingredients in a bowl until a dough-like consistency is achieved. Then, the mixture is shaped into small balls or flattened into cut-outs, whatever you prefer. Finally, a short stint in the refrigerator transforms the soft mixture into firm, ready-to-eat treats. This entire process is designed to be hassle-free, allowing you more time to enjoy with your pet rather than slaving away in the kitchen. It’s truly a game-changer for homemade pet snacks, much like how a one-pot or one-pan meal simplifies human dinner preparations.
Ready in under ten minutes
From start to finish, the hands-on preparation time for these peanut butter oats treats is remarkably brief—often less than ten minutes. This speed is a huge advantage, especially when you need a quick reward or a spontaneous gesture of affection for your dog. While they do require chilling time to set, the active cooking phase is virtually non-existent. This rapid preparation makes it incredibly convenient to whip up a fresh batch whenever your supply runs low, ensuring your dog always has access to tasty, homemade goodness. Just remember to account for the chilling period before serving!
Ingredients for Your Dog Treats
Gathering the right ingredients is the first step towards making these delectable dog treats. The list is intentionally short and focused on components that are not only safe for dogs but also offer nutritional benefits. By understanding the role each ingredient plays, you can appreciate the thought put into creating a balanced and appealing snack for your furry friend. Always double-check ingredient labels to ensure purity and absence of any dog-toxic substances, particularly for products like peanut butter. Sourcing quality ingredients is key to both taste and safety.
Essential oats and peanut butter
The foundation of these treats rests on two powerhouse ingredients: rolled oats and natural peanut butter. Rolled oats are an excellent source of dietary fiber, helping with digestion, and contain B vitamins, which are good for healthy skin and coat. They also provide sustained energy. When choosing oats, opt for plain, unsweetened varieties. Natural peanut butter is the star flavor and provides healthy fats, protein, and vitamins B and E. As mentioned, it is absolutely critical to select a peanut butter that contains NO xylitol. Xylitol, an artificial sweetener, is extremely toxic to dogs and can be fatal even in small amounts. Always read the ingredient label carefully to confirm it only contains peanuts, and possibly a little salt. For more information on ingredients like these, you can consult Wikipedia’s page on dog food.
Applesauce, honey, carob chips
To enhance flavor and binding, we incorporate applesauce, honey, and optional carob chips. Unsweetened applesauce adds moisture and a touch of natural sweetness without extra sugar. It’s also a good source of vitamins and fiber. Always ensure it’s plain and contains no added sugars or spices like nutmeg, which can be harmful. A small amount of honey acts as a natural binder and provides additional sweetness that dogs enjoy. Honey also has some antibacterial and anti-inflammatory properties. Finally, carob chips are a fantastic dog-safe alternative to chocolate chips, which are toxic to dogs. Carob has a naturally sweet, earthy flavor and can be found in most health food stores or online. These additions make the treats even more appealing and provide a well-rounded flavor profile that your dog will adore, much like how specific additions can elevate a peanut butter dessert for humans.
Mixing Your No Bake Dog Treats
The mixing process is straightforward and requires minimal effort, embodying the “easy” aspect of these homemade dog treats. Proper mixing ensures that all ingredients are evenly distributed, leading to a consistent texture and flavor in every treat. A large mixing bowl and a sturdy spoon or spatula are all you need to get the job done. This hands-on step is simple enough for children to assist, making it a fun family activity that results in delightful snacks for your beloved pet. Always ensure your hands are clean before you begin, and gather all your measured ingredients beforehand to make the process even smoother.
Combine all ingredients well
In a large mixing bowl, start by combining the wet ingredients: the natural peanut butter, unsweetened applesauce, and honey. Mix these until they are smooth and thoroughly incorporated. Next, gradually add the rolled oats. It’s often best to add the oats in two or three stages, mixing well after each addition. This allows the oats to fully absorb the wet mixture, creating a firm, pliable dough. Continue to mix until all ingredients are uniformly combined and the mixture is no longer sticky to the touch. The goal is to achieve a consistency that can be easily rolled or shaped without crumbling. This ensures the treats will hold their form after chilling.
Add carob chips carefully
If you’ve opted to include carob chips, this is the stage to gently fold them into the dough. Once the main peanut butter and oat mixture is well combined, sprinkle the carob chips over the surface and use your hands or a spoon to carefully distribute them throughout the dough. Avoid overmixing once the carob chips are added, as excessive handling can sometimes cause them to break apart. The carob chips provide an extra burst of flavor and a delightful texture, making the treats even more exciting for your dog. For more delicious snack ideas, both for humans and potentially adaptable for pets (with strict ingredient checks), browse our snacks category.
Shaping Your Peanut Butter Oats
Once your no-bake dog treat mixture is perfectly combined, the fun of shaping begins! This step allows for a lot of creativity and can be customized to your dog’s size and your aesthetic preferences. Whether you opt for simple hand-rolled balls or intricate cookie-cutter shapes, the process is quick and enjoyable. It’s also a great way to control portion sizes, ensuring your dog receives an appropriate amount of treat. Prepare your workspace by laying out a sheet of parchment paper on a baking tray or flat surface; this will prevent sticking and make the transfer to the refrigerator much easier.
Roll into desired shapes
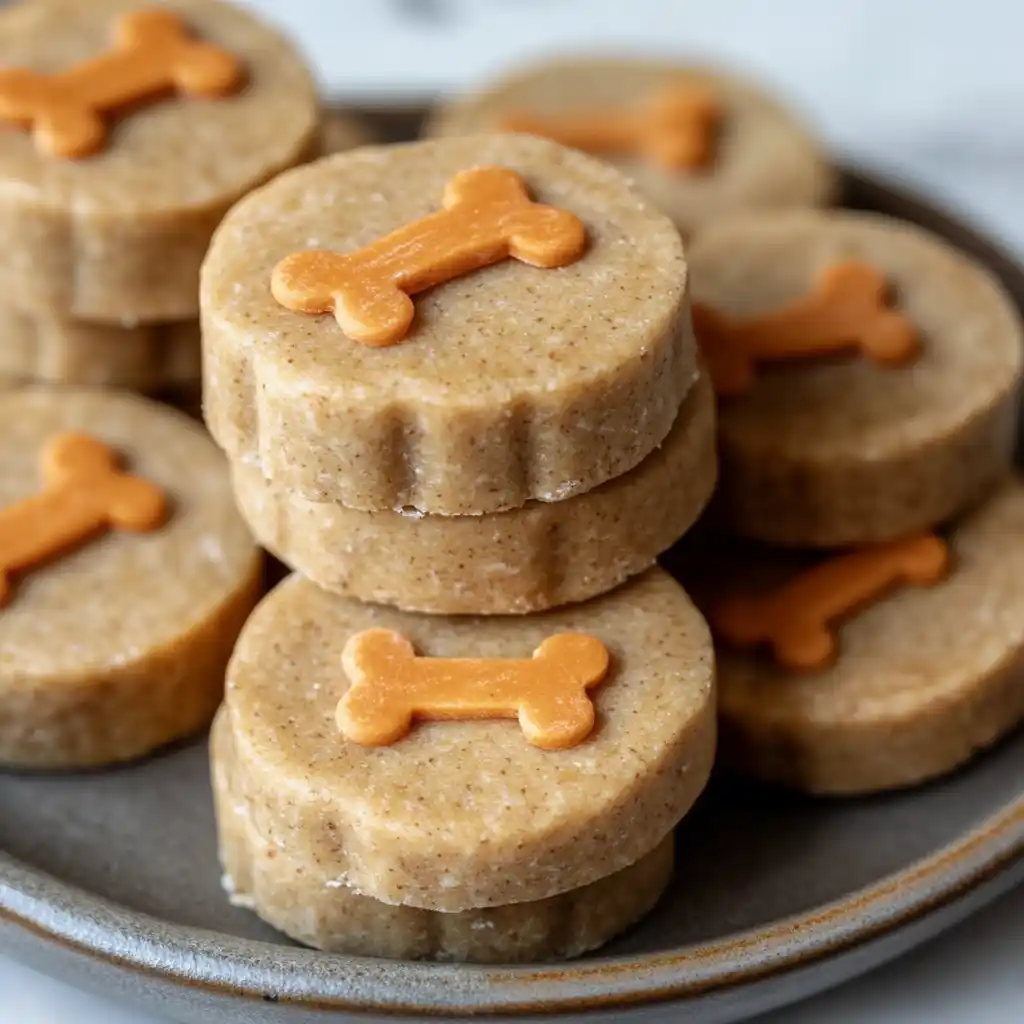
There are several easy ways to shape your peanut butter oat dough. The simplest method is to roll small portions of the mixture between your palms to create bite-sized balls. These are incredibly convenient and perfect for training or quick rewards. Alternatively, you can flatten the entire dough mixture onto a piece of parchment paper to about 1/4 to 1/2 inch thickness, then use your favorite cookie cutters to create fun shapes like bones, hearts, or stars. If you don’t have cookie cutters, simply cut the flattened dough into squares or rectangles using a knife. Remember to keep the treat size appropriate for your dog’s mouth and chewing habits. For tips on managing sticky doughs, or for exploring other delicious recipes, feel free to visit our Pinterest page.
Place on parchment paper
As you shape each treat, carefully place it onto the parchment-lined baking sheet. Ensure there’s a little space between each treat to prevent them from sticking together as they chill. Parchment paper is crucial here as it makes removing the firm treats much easier once they’ve set, eliminating the need for greasing the tray. If you’re making a large batch, you might need multiple trays or to stack layers of treats separated by additional sheets of parchment paper. This preparation ensures that your beautifully shaped treats maintain their form and are ready for the next crucial step: chilling.
Chill to Set Your Dog Treats
The chilling phase is perhaps the most critical step for these no-bake dog treats. It’s during this time that the ingredients truly meld and the treats solidify, achieving their ideal texture. Patience here pays off, as properly chilled treats are much more enjoyable and easier to handle. This process highlights the convenience of no-bake recipes, relying on cold temperatures rather than heat to transform the raw ingredients into a delightful snack. Think of it as a low-energy, high-reward step that completes your homemade dog treat masterpiece.
Refrigerate for firmness
Once all your treats are shaped and neatly arranged on the parchment-lined tray, transfer them to the refrigerator. The cool environment will cause the peanut butter and other binding agents to firm up, making the treats solid and less crumbly. This firmness is essential for both ease of handling and for a satisfying texture when your dog enjoys them. Ensure the treats are placed on a flat surface in the fridge where they won’t be disturbed or squashed by other items. Good refrigeration practices are important for both human and pet foods, maintaining freshness and integrity. For more human recipes that rely on chilling, like various desserts, feel free to browse our site.
Allow 30 to 60 minutes
For most batches of these peanut butter oat treats, a chilling time of 30 to 60 minutes in the refrigerator is sufficient to achieve the desired firmness. Smaller, thinner treats might set faster, while larger or thicker ones could benefit from the full hour. You’ll know they’re ready when they feel firm to the touch and hold their shape without easily deforming. If you’re in a hurry, you can even place them in the freezer for about 15-20 minutes for a quicker set, though this isn’t usually necessary. The exact time can vary slightly depending on your refrigerator’s temperature and the humidity, so always test a treat for firmness before considering the batch complete. A well-chilled treat is a perfect treat!
Serving Your Dog’s Homemade Treats
Once your homemade dog treats are perfectly chilled and firm, they are ready to be served to your eagerly awaiting companion! The moment of offering a special, homemade snack is incredibly rewarding, strengthening the bond between you and your pet. However, even with healthy, natural ingredients, moderation is key. These treats are meant to be a supplement to your dog’s regular diet, not a replacement. Observing your dog’s reaction and ensuring their well-being after introducing new foods is an important aspect of responsible pet ownership. This ensures they enjoy their snacks safely and happily.
Offer in moderate portions
While these peanut butter oat treats are made with wholesome ingredients, they still contain calories. It’s important to offer them in moderate portions appropriate for your dog’s size, age, and activity level. A good rule of thumb is that treats should not make up more than 10% of your dog’s daily caloric intake. For smaller dogs, one small treat might be enough, while larger breeds might enjoy a couple. Overfeeding treats, even healthy ones, can lead to weight gain or an imbalance in their diet. Distribute them throughout the day as rewards, training aids, or simply as a loving gesture. Remember, a little goes a long way in showing your dog you care.
Check for pet allergies
Even though this recipe uses generally dog-safe ingredients, it is always crucial to be vigilant about potential pet allergies. Just like humans, dogs can develop sensitivities to certain foods. If this is your dog’s first time trying these specific ingredients (like oats, peanut butter, or carob), introduce them slowly. Offer a very small portion first and monitor your dog for any adverse reactions such as digestive upset, itching, or lethargy over the next 24-48 hours. If you notice any unusual symptoms, discontinue feeding the treats and consult your veterinarian. Prioritizing your dog’s health means being attentive to their individual needs and reactions. For more general information on common dog allergies, resources like Wikipedia’s article on dogs often have sections on health and diet.
Storing Your Easy Dog Treats
Proper storage is essential to maintain the freshness, texture, and safety of your homemade dog treats. Since these are made with natural ingredients and contain no artificial preservatives, they require a little more care than store-bought options. Following simple storage guidelines will ensure that each treat remains as delicious and appealing as the first, allowing your dog to enjoy them for as long as possible. Good storage also prevents spoilage and keeps the treats free from contamination, making them safe for your pet over time.
Keep in airtight container
To maximize their freshness and prevent them from drying out or absorbing odors from other foods, it’s vital to store your chilled dog treats in an airtight container. A plastic food storage container with a tight-fitting lid or a glass jar with a sealed top works perfectly. This barrier protects the treats from air exposure, which can lead to staleness, and helps to maintain their soft, chewy texture. Storing them correctly will keep them palatable and appealing for your dog, ensuring they look forward to every single one.
Lasts up to one week
When stored correctly in an airtight container in the refrigerator, these homemade no-bake dog treats typically last for up to one week. The cool temperature helps to inhibit bacterial growth and preserves the integrity of the ingredients. If you notice any signs of spoilage, such as mold, an off smell, or changes in texture, discard the treats immediately. For longer storage, consider freezing them, which is an excellent option for preserving larger batches, as discussed in a later section. Proper storage ensures your treats remain a safe and delightful snack for your dog throughout the week. You can find more cooking and storage tips on our Instagram page.
Important Dog Treat Safety Notes
While homemade treats offer many benefits, ensuring their safety is absolutely paramount. It’s not just about what to include, but also what to strictly avoid. Being a responsible pet owner means being educated about ingredients that are toxic to dogs, even if they are harmless to humans. Always prioritize your dog’s health above all else, making informed choices about their diet. This section covers critical safety precautions to keep your furry friend happy and healthy when enjoying their special treats, preventing any accidental harm.
Avoid xylitol at all costs
This point cannot be stressed enough: xylitol is highly toxic to dogs and must be avoided at all costs. Xylitol is an artificial sweetener commonly found in many “sugar-free” products, including some brands of peanut butter, chewing gum, candies, toothpaste, and even some medications. In dogs, even small amounts of xylitol can cause a rapid and severe drop in blood sugar (hypoglycemia), liver failure, seizures, and can be fatal. Always read the ingredient labels of *every* product you use in dog treats, especially peanut butter, to ensure it is completely xylitol-free. When in doubt, choose a natural, unsweetened peanut butter that lists only peanuts as an ingredient.
Consult vet before new foods
Introducing any new food, including homemade treats, into your dog’s diet should ideally be done with a nod from your veterinarian. Your vet knows your dog’s specific health history, existing conditions, and any dietary sensitivities they may have. They can offer personalized advice on appropriate ingredients, portion sizes, and frequency, especially if your dog has allergies, diabetes, or other health concerns. This precautionary step ensures that your thoughtful gesture of homemade treats aligns perfectly with your dog’s overall health and well-being, providing peace of mind for you and safety for your beloved pet.
Creative Variations for Dog Treats
While the basic peanut butter oat recipe is a fantastic starting point, there’s ample room for creativity! Customizing these homemade dog treats allows you to cater to your dog’s specific tastes or simply to offer variety. Experimenting with different shapes and dog-safe flavor additions can make treat time even more exciting and engaging for your furry friend. Remember, any additions should be introduced cautiously and approved by your vet, especially if your dog has dietary sensitivities. Unleash your inner chef and create a treat that’s uniquely perfect for your pup!
Experiment with treat shapes
Beyond simple balls or squares, you can have a lot of fun with the shapes of your dog treats. Using different cookie cutters can transform a plain treat into an adorable bone, paw print, or even seasonal shapes like pumpkins or snowflakes. You can find specialty dog-themed cookie cutters online or at pet supply stores. For a touch of texture, you could even press a fork into the top of each treat before chilling, much like a classic peanut butter cookie. Getting creative with shapes adds a personal touch and makes the treats visually appealing, both for you and your furry recipient. These visually appealing treats are almost as fun to make as some gourmet human meals.
Try toasted oats, yogurt
To further enhance the flavor and texture, consider slight variations to the core ingredients. Lightly toasting the rolled oats before mixing can add a nutty, deeper flavor profile. Simply spread the oats on a baking sheet and toast in a preheated oven at 300°F (150°C) for about 5-7 minutes, letting them cool completely before adding to the mixture. Another excellent addition is a swirl of plain, unsweetened, dog-safe yogurt. After shaping your treats, you can drizzle or dip them in a thin layer of yogurt and then freeze them briefly to set the coating. Ensure the yogurt contains live active cultures and no artificial sweeteners. Always double-check ingredient lists for any new additions to confirm they are safe for canine consumption.
Tips for Firmer Dog Treats
Sometimes, despite following the recipe, you might find your no-bake dog treats a little softer than desired. Achieving the perfect firmness is key for easy handling, storage, and a satisfying chew for your dog. Luckily, there are a couple of simple adjustments you can make to ensure your treats come out perfectly solid every time. These tips are especially useful if you live in a warmer climate or if you prefer a harder treat that lasts longer during outdoor activities. Slight modifications can make a big difference in the final product’s consistency and durability.
Increase oat content slightly
If your treats feel too soft or crumbly, the simplest solution is to incrementally increase the amount of rolled oats in your mixture. Oats act as the primary dry binding agent, absorbing moisture from the wet ingredients. Start by adding an extra tablespoon or two of oats to the recipe, mixing thoroughly until you achieve a stiffer, more manageable dough consistency. Continue adding small amounts until the dough feels firm enough to hold its shape well without being overly dry. This slight adjustment can significantly improve the final texture, giving you a treat that is less prone to breaking apart and more satisfying for your dog to chew. Similar adjustments are sometimes needed when making a snickerdoodle cobbler, where flour content affects consistency.
Chill for longer periods
Another effective way to achieve firmer dog treats is simply to extend the chilling time. While 30-60 minutes is usually sufficient, leaving them in the refrigerator for a few hours, or even overnight, will allow them to set even more completely. The longer exposure to cold temperatures helps the fats in the peanut butter solidify further and allows the oats to fully hydrate and bind, resulting in a significantly firmer treat. If you’ve tried increasing the oat content and still desire more firmness, a prolonged chill is often the answer. For extra firm treats, you can even place them in the freezer for about 20-30 minutes after initial refrigeration, which can create a denser, almost frozen texture that some dogs enjoy, especially in warmer weather.
Make a Big Batch of Treats
Once you’ve mastered the basic recipe and perhaps experimented with a few variations, you might find yourself wanting to make larger quantities. Batch cooking these homemade dog treats is a fantastic way to save time and ensure you always have a healthy supply on hand for your furry friend. This approach is not only efficient but also guarantees that your dog never runs out of their favorite snacks. Scaling up the recipe is straightforward, and with proper storage, you can enjoy the convenience of pre-made treats for an extended period, making life easier for both you and your pet.
Double the recipe easily
Scaling up this no-bake dog treat recipe is incredibly simple. You can easily double or even triple the quantities of all ingredients without needing to adjust cooking times (since there isn’t any!) or significantly alter the mixing process. Just ensure you have a large enough mixing bowl to accommodate the increased volume. When doubling the recipe, you’ll still follow the same steps: combine wet ingredients, gradually add oats, then fold in any optional additions like carob chips. You might need an extra baking sheet for shaping and chilling the larger batch, but the simplicity of the recipe holds true regardless of the quantity. This makes preparing a bulk supply just as stress-free as making a small one, much like batch preparing ingredients for main course recipes for the week.
Freeze for future use
For long-term storage of larger batches, freezing your homemade dog treats is an excellent solution. Once the treats are fully chilled and firm, transfer them to a freezer-safe airtight container or a heavy-duty freezer bag. You can place parchment paper between layers of treats to prevent them from sticking together. Frozen treats will last for several months, allowing you to have a convenient supply ready whenever you need them. When you’re ready to serve, simply take out the desired number of treats and let them thaw in the refrigerator for a few hours, or at room temperature for about 30 minutes, until they reach a pleasant consistency. Freezing is a fantastic way to keep your dog’s favorite snacks fresh and accessible for extended periods.