
Homemade cheesy garlic breadsticks are a wonderful treat, perfect for any meal or gathering. This easy recipe guides you through creating golden, flavorful breadsticks with rich garlic butter and gooey mozzarella. It’s a delightful savory snack that your whole family will love, ensuring a perfect appetizer every time.
Key Takeaways
- Crafting homemade cheesy garlic breadsticks from scratch is rewarding and simpler than you think.
- Proper yeast activation and dough kneading are crucial for achieving the perfect texture.
- A hot oven and pizza stone ensure a golden-brown, crispy exterior and tender interior.
- Generous garlic butter and a blend of cheeses create an irresistible savory flavor.
- These breadsticks make a versatile side dish or a fantastic appetizer for any occasion.
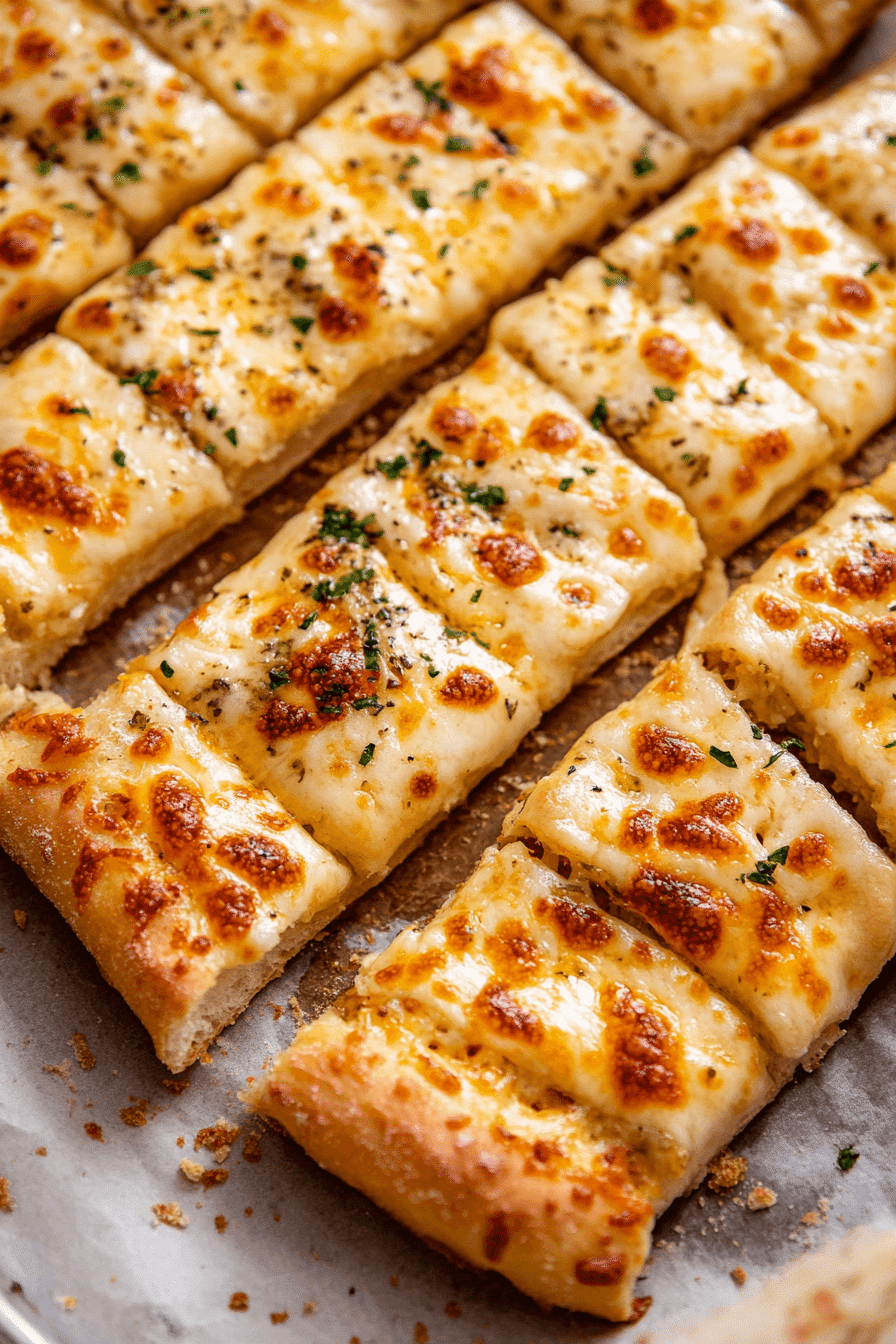
Freshly baked breadsticks offer unmatched flavor. They’re warm, soft, and so satisfying. A true family favorite. Perfect for dipping, truly delicious. This recipe makes it easy.
Why Make Homemade Cheesy Garlic Breadsticks?
Making homemade cheesy garlic breadsticks offers an unparalleled experience compared to store-bought options. The aroma that fills your kitchen as they bake is simply incredible, instantly making your home feel cozy and inviting. When you prepare them yourself, you control every ingredient, ensuring fresh, high-quality flavors and avoiding any unwanted additives. These breadsticks are incredibly versatile; they can serve as a perfect appetizer alongside your favorite pasta dish, complement a hearty soup, or even be a standalone savory snack for movie night. The process of making the dough, watching it rise, and shaping the breadsticks can be a fun and relaxing activity, perfect for engaging the whole family or enjoying some peaceful kitchen time. Plus, the satisfaction of serving warm, golden-brown breadsticks, oozing with melted cheese and rich garlic butter, knowing you made them from scratch, is truly priceless. They bring a restaurant-quality taste right to your dining table, transforming an ordinary meal into something special. For other cheesy and satisfying main courses, consider trying a creamy baked mac and cheese.
Ingredients for Easy Cheesy Garlic Breadsticks Recipe
Gathering the right ingredients is the first step toward creating these irresistible cheesy garlic breadsticks. The beauty of this recipe lies in its use of common pantry staples, transformed into something extraordinary with a little effort and a lot of love. Each component plays a vital role in achieving that perfect texture and flavor profile that makes these breadsticks a family favorite.
Yeast and Water for Dough
The foundation of any great bread lies in its yeast. For these breadsticks, you’ll need active dry yeast. This microscopic fungus is responsible for the dough’s rise, creating a light and airy texture. Warm water, precisely between 105-115°F (40-46°C), is crucial for activating the yeast. Water that is too hot will kill the yeast, while water that is too cold won’t allow it to activate properly, resulting in dense breadsticks. A pinch of sugar will also be added to the warm water, providing immediate food for the yeast and helping it to bloom effectively.
Flour, Oil, Salt, and Vinegar
All-purpose flour forms the bulk of our dough, providing the structure. While other flours can be used, all-purpose is ideal for its balance of gluten content, leading to a tender yet chewy breadstick. Olive oil adds richness and moisture to the dough, contributing to its soft interior and helping to achieve a golden crust. Salt is not just for flavor; it also helps to control yeast activity and strengthen the gluten network. A touch of white vinegar is a secret ingredient that slightly acidifies the dough, enhancing the yeast’s performance and tenderizing the bread, giving it a subtle tang and an even better crumb structure.
Garlic, Butter, and Cheeses
The star flavors of these breadsticks come from fresh garlic, high-quality butter, and a generous blend of cheeses. Fresh garlic, minced finely, provides that pungent, aromatic kick that defines garlic bread. Melted unsalted butter will be infused with this garlic to create the rich, fragrant topping brushed over the dough. For the cheesy goodness, we’ll use a combination of freshly grated Parmesan and shredded mozzarella. Parmesan offers a sharp, salty flavor and a slightly nutty depth, while mozzarella brings that classic gooey, stretchy texture when melted, ensuring every bite is wonderfully decadent. Learning about the different types of cheese, such as mozzarella, can enhance your culinary understanding.
Starting Your Breadsticks Dough: Yeast Prep
The success of your homemade cheesy garlic breadsticks largely depends on how well you prepare your yeast. This initial step is vital for ensuring your dough rises beautifully, resulting in light, airy, and soft breadsticks. Don’t rush this process; giving your yeast the right conditions to thrive will pay off with a superior final product. It’s an exciting start to the baking adventure, and seeing the yeast come alive is a satisfying part of the process.
Activating Yeast and Sugar
Begin by gently warming your water to the optimal temperature range of 105-115°F (40-46°C). You can use a thermometer for precision, or if you don’t have one, it should feel comfortably warm to the touch, like a warm bath, but not hot. Pour this warm water into a large mixing bowl. Sprinkle the active dry yeast evenly over the surface of the water, followed by a pinch of sugar. The sugar acts as food for the yeast, giving it a boost to start fermenting. Gently stir the mixture to combine, ensuring the yeast is fully submerged. It’s important to give the yeast enough space to activate without overcrowding it. This step is often referred to as “proofing” the yeast, and it’s your way of checking if your yeast is still alive and active before committing to the full recipe.
Foamy Mixture is Ready
Once the yeast, water, and sugar are combined, let the mixture sit undisturbed for about 5-10 minutes. During this time, the yeast will begin to consume the sugar and release carbon dioxide gas. You’ll know your yeast is active and ready when the surface of the water becomes noticeably foamy and frothy, resembling the head on a beer. This indicates that the yeast is alive and well, and vigorously working, which is exactly what you want for a successful dough rise. If, after 10 minutes, your mixture does not show any signs of foam, your yeast may be old or the water temperature was incorrect. In this case, it’s best to discard it and start again with fresh yeast and carefully measured water to prevent disappointment. For more about this fascinating ingredient, you can read up on yeast on Wikipedia.
Mixing and Kneading Dough for Breadsticks
Once your yeast is active and bubbly, you’re ready to bring all the ingredients together to form the dough. This stage is where the magic truly begins, as separate components transform into a cohesive mass that will eventually become your delicious breadsticks. Proper mixing and kneading are paramount for developing the gluten structure, which gives the breadsticks their characteristic chewiness and helps them hold their shape during baking. It’s a hands-on process that can be incredibly therapeutic and rewarding, leading to a perfectly textured dough ready for its rise.
Combining Wet and Dry Ingredients
To your foamy yeast mixture in the large mixing bowl, add the olive oil, salt, and white vinegar. Give these wet ingredients a quick stir to combine them thoroughly. Next, gradually add the all-purpose flour, one cup at a time, mixing with a wooden spoon or a stand mixer with a dough hook attachment. Initially, the mixture will be shaggy and sticky. As you continue to add flour, it will start to come together into a rough ball. Be careful not to add too much flour too quickly, as this can make the dough tough. The goal is to incorporate enough flour so that the dough just begins to pull away from the sides of the bowl, but still retains some stickiness. This gradual addition ensures you achieve the correct hydration for a soft and pliable dough.
Kneading Until Smooth
Once the dough has formed a rough ball, transfer it to a lightly floured surface for kneading. If using a stand mixer, let the dough hook do the work. Kneading is the process of stretching and folding the dough, which develops the gluten network. This network traps the gases produced by the yeast, creating a light and airy texture. Hand kneading typically takes about 8-10 minutes, while a stand mixer might take 5-7 minutes on medium-low speed. You’ll know the dough is properly kneaded when it becomes smooth, elastic, and springs back slowly when gently poked with a finger. It should no longer be excessively sticky, but still soft and pliable. A well-kneaded dough is the secret to breadsticks that are not only delicious but also have a satisfying chew. This fundamental technique is also crucial for other baked goods like those found in our bread category.
Letting Your Dough Rise to Perfection
The rising, or proofing, of the dough is a critical stage in bread making, often referred to as the “first rise.” This is where the yeast truly gets to work, fermenting the sugars and producing carbon dioxide, which creates the air pockets that give bread its light and tender texture. Patience is key here; rushing this step can result in dense, heavy breadsticks. Providing the right environment for your dough to rise will ensure a perfect, airy crumb.
Cover and Rest Dough
After kneading, lightly grease a clean large bowl with a small amount of olive oil. Place your smooth, elastic dough ball into the bowl, turning it once to coat the entire surface with oil. This prevents the dough from drying out and sticking to the bowl as it rises. Cover the bowl tightly with plastic wrap or a clean kitchen towel. The covering helps to trap warmth and moisture, creating a humid environment that encourages the yeast to work efficiently. Find a warm, draft-free spot in your kitchen for the dough to rest. Ideal locations include a sunny windowsill (if not too hot), near a warm oven, or in a microwave (turned off) with a cup of hot water next to it to create a steamy environment.
Doubled in Size in an Hour
Allow the dough to rise for approximately 60 to 90 minutes. The exact time will depend on the temperature of your kitchen and the vitality of your yeast. You’ll know the dough has risen sufficiently when it has visibly doubled in size. To check if it’s ready, gently press two fingers into the dough; if the indentations remain, it’s ready for the next step. If it springs back too quickly, it needs more time. A proper first rise contributes significantly to the breadsticks’ flavor and texture, developing depth and complexity that cannot be achieved with a rushed rise. This patient waiting ensures your dough is perfectly proofed for shaping and baking.
Preheat Oven and Stone for Baking
Achieving perfectly golden and crispy cheesy garlic breadsticks requires a very hot oven. The high heat is essential for a quick rise (oven spring) and for creating a beautifully browned, slightly crisp exterior while keeping the interior soft and fluffy. Don’t underestimate the importance of this step; a well-preheated oven is just as crucial as a well-made dough. Using a pizza stone takes these breadsticks to the next level, mimicking the results of a professional brick oven.
Set Temperature to 475°F
About 30-45 minutes before you plan to bake your breadsticks, set your oven temperature to a scorching 475°F (245°C). This high temperature is key to getting that desirable crispy crust and ensuring the breadsticks cook through quickly without drying out. Giving the oven ample time to reach and maintain this temperature is crucial. Don’t just wait for the preheat light to come on; allow it to heat for an additional 15-20 minutes after it signals readiness to ensure the internal components, especially the pizza stone, are thoroughly heated.
Place Pizza Stone Inside
For the best results, place your pizza stone (or a heavy baking sheet if you don’t have a stone) in the oven on the middle rack before you turn it on. Allowing the stone to heat up with the oven is vital. A hot pizza stone provides a direct, intense heat source to the bottom of the breadsticks, which helps to create a wonderfully crispy bottom crust and promotes a rapid rise. This “oven spring” is what makes your bread light and airy. Trying this method is a game-changer for homemade baked goods and will significantly improve the texture of your breadsticks, giving them a professional finish. It’s a similar principle used when baking other items, like those detailed in our baking method section.
Shaping Delicious Cheesy Garlic Breadsticks Dough
After the dough has completed its first rise, it’s time for the fun part: shaping your breadsticks. This process is relatively straightforward and allows you to create uniform pieces that will bake evenly. The goal is to handle the dough gently to retain as much of the air created during the rise as possible, while still forming neat, elongated breadsticks. This step is where your homemade cheesy garlic breadsticks truly start to take their recognizable form, promising a delightful treat.
Punch Down and Transfer Dough
Once your dough has doubled in size and passed the poke test, gently “punch it down.” This action releases the accumulated gases and helps to equalize the temperature within the dough, making it easier to handle and shape. Avoid deflating it too aggressively. Lightly flour a clean work surface and carefully transfer the dough from the bowl onto it. You’ll notice the dough is much more pliable and less sticky after its rise. A gentle touch is best here to maintain the tender texture. This step prepares the dough for its transformation into individual breadsticks.
Form a Rectangle on Parchment
Roll or gently press the dough into a large rectangle, approximately 12×16 inches and about 1/2 inch thick, directly onto a piece of parchment paper. Doing this on parchment paper is a smart move, as it allows for easy transfer to the hot pizza stone later. A rolling pin will help achieve an even thickness, ensuring consistent baking. Once you have your rectangle, use a pizza cutter or a sharp knife to cut the dough into roughly 1-inch wide strips. You can make them as long or short as you prefer, but typical breadstick length is about 6-8 inches. Lay the strips out on the parchment paper, leaving a small space between each one to allow for a little more expansion during baking. These shaped strips are now ready for their delicious topping.
Brush with Garlic Butter and Cheeses
This is where the “cheesy garlic” in “cheesy garlic breadsticks” really comes to life! The combination of aromatic garlic-infused butter and a generous layer of melted cheeses transforms plain dough strips into incredibly flavorful and irresistible treats. This topping not only adds immense taste but also contributes to the golden-brown crust and gooey texture that makes these breadsticks so addictive. Don’t skimp on these ingredients, as they are central to the breadsticks’ appeal.
Melted Butter and Minced Garlic
In a small microwave-safe bowl or a saucepan, melt the unsalted butter. Once melted, stir in the finely minced fresh garlic. Fresh garlic is absolutely key here for its vibrant, pungent flavor; garlic powder simply won’t yield the same depth. You can also add a pinch of dried parsley or Italian seasoning to this butter mixture for an extra layer of herbal notes. Allow the garlic to steep in the warm butter for a few minutes while you prepare the cheeses; this helps to infuse the butter with maximum garlic flavor. This aromatic concoction will be generously brushed over each breadstick, ensuring every bite bursts with garlicky goodness.
Top with Parmesan and Mozzarella
Once the garlic butter is ready, use a pastry brush to lightly coat the tops of all the breadstick strips. Be thorough but avoid saturating the dough completely. After brushing with garlic butter, liberally sprinkle the grated Parmesan cheese over the breadsticks. Parmesan offers a sharp, salty, and savory punch that complements the garlic beautifully. Following this, scatter the shredded mozzarella cheese over the top. Mozzarella is vital for that classic gooey, melty texture. You can be quite generous with the cheese; more cheese often means more deliciousness! The combination of these two cheeses creates a perfect balance of flavor and texture, ready to bake into golden, bubbly perfection. For other cheesy delights, consider our cheesy chicken and rice casserole recipe.
Baking Golden Cheesy Garlic Breadsticks Perfectly
The moment of truth arrives when your beautifully topped breadsticks enter the super-hot oven. Baking at the correct temperature for the right duration is crucial for achieving that ideal balance of a golden, slightly crispy exterior and a soft, chewy interior. A perfectly baked breadstick should have a lovely color and a tantalizing aroma that promises pure delight. The high heat, especially from a preheated pizza stone, plays a significant role in this transformation.
Transfer to Hot Stone
Carefully slide the parchment paper with the shaped and topped breadsticks directly onto the screaming hot pizza stone in the oven. The preheated stone provides an immediate burst of heat to the bottom of the dough, helping it achieve a crispier base—a hallmark of excellent breadsticks. Work quickly but safely to minimize heat loss from the oven. If you don’t have a pizza stone, a heavy baking sheet that has been preheated in the oven will work as a good alternative, though the results might be slightly less crisp on the bottom. The direct contact with the hot surface is what makes a significant difference in the final texture.
Bake Until Golden Brown
Bake the cheesy garlic breadsticks for approximately 8-12 minutes. Keep a close eye on them, as oven temperatures can vary. They are done when the edges are beautifully golden brown, and the cheese on top is melted, bubbly, and slightly caramelized in spots. The garlic butter will have seeped into the bread, creating an incredibly aromatic and flavorful crust. If you notice some areas browning faster than others, you can rotate the parchment paper halfway through baking for even coloration. The heavenly scent filling your kitchen will be a clear indicator that your delicious homemade breadsticks are almost ready to be enjoyed. The baking process is similar to achieving crispy results in dishes like crispy cauliflower.
Serving Your Easy Cheesy Garlic Breadsticks Warm
There’s nothing quite like pulling a batch of warm, fragrant cheesy garlic breadsticks from the oven. The irresistible aroma and the visual appeal of golden, bubbly cheese are enough to get anyone’s mouth watering. Serving them correctly ensures that every bite is as enjoyable as possible, maximizing their flavor and texture. These easy cheesy garlic breadsticks are a delight, especially when presented fresh and hot from the oven, making them a true family favorite.
Cool Briefly Before Slicing
Once your breadsticks are perfectly baked and glistening with melted cheese, carefully remove the parchment paper with the breadsticks from the oven. Transfer them to a wire cooling rack. It’s important to let them cool for just 5-10 minutes before slicing and serving. This brief cooling period allows the cheese to set slightly, preventing it from sliding off, and also helps the internal structure of the breadsticks to firm up, making them easier to handle and ensuring a better texture. While tempting to dig in immediately, this short wait makes a big difference.
Dip with Marinara or Ranch
After a short cooling period, slice your breadsticks into individual portions, if they weren’t already separated. Arrange them on a platter and serve warm. They are absolutely delicious on their own, but for an even more satisfying experience, offer them with classic dipping sauces. Warm marinara sauce provides a tangy, savory counterpoint, making them an ideal appetizer. Alternatively, a creamy ranch dressing offers a cool, herbaceous flavor that pairs wonderfully with the rich garlic and cheese. Offering a choice of dips allows everyone to customize their savory snack experience. Find more recipe inspiration on our Pinterest and Instagram pages.
Tips for Amazing Cheesy Garlic Breadsticks
While the recipe itself is straightforward, a few expert tips can elevate your cheesy garlic breadsticks from good to truly amazing. These suggestions focus on ingredient choices, flavor enhancements, and creative twists that can make each batch uniquely delicious. Paying attention to these details can significantly impact the final taste and texture, ensuring your homemade breadsticks are always a hit.
Flour Type and Yeast Choice
For the best texture, stick with good quality all-purpose flour. However, for a chewier breadstick, you could experiment with a small percentage of bread flour. Ensure your active dry yeast is fresh; old yeast will result in a poor rise. Always store yeast in an airtight container in the refrigerator or freezer to prolong its potency. If you prefer a faster rise, instant yeast can be used, often without proofing, but follow package directions for exact measurements and adjustments to rising times. These foundational choices are critical for successful baking outcomes.
Adding Spice or Extra Cheese
If you love a little heat, sprinkle a pinch of red pepper flakes into your garlic butter mixture before brushing, or directly over the cheese before baking. This adds a subtle warmth that complements the savory flavors. For an even more decadent breadstick, consider adding another type of cheese, such as smoked provolone or a sharp cheddar, to the mozzarella and Parmesan blend. A sprinkle of fresh herbs like chopped basil or oregano over the finished breadsticks can also add a burst of freshness and visual appeal. Don’t be afraid to customize your perfect appetizer to suit your taste.
Creative Variations to Try
Beyond the classic, there are many ways to get creative with your breadsticks. You could make a “pizza breadstick” by adding a thin layer of marinara sauce before the cheese and a sprinkle of mini pepperonis. For a different flavor profile, try a “herb and Parmesan” breadstick, focusing on rosemary, thyme, and extra Parmesan. Another idea is to twist the dough strips before placing them on the parchment for a fun, rustic look. You can even experiment with garlic-infused olive oil in the dough for an intensified garlic flavor throughout. The possibilities are endless, making these homemade breadsticks a truly versatile treat.
Storing and Reheating Leftover Breadsticks
It’s rare to have leftovers when it comes to these delicious homemade cheesy garlic breadsticks, but if you do, proper storage and reheating techniques will help keep them tasting great. While they are always best fresh from the oven, knowing how to preserve their flavor and texture means you can enjoy them for a little longer. These tips will help maintain their quality, ensuring that even reheated, they remain a delightful savory snack.
Room Temperature or Fridge Storage
For short-term storage, cooled breadsticks can be kept at room temperature in an airtight container for up to 1-2 days. This is ideal if you plan to enjoy them again soon. If you need to store them for a bit longer, placing them in an airtight container in the refrigerator will keep them fresh for up to 3-4 days. While refrigeration can sometimes alter the texture of bread slightly, the garlic butter and cheese help to maintain moisture and flavor. Always ensure they are completely cooled before storing to prevent condensation, which can make them soggy.
Freezing for Longer Keeping
If you’ve made a large batch or want to prepare them in advance, these cheesy garlic breadsticks freeze beautifully. Once completely cooled, wrap individual breadsticks tightly in plastic wrap, then place them in a freezer-safe bag or container. They can be frozen for up to 2-3 months. When you’re ready to enjoy them, there’s no need to thaw. Simply follow the reheating instructions directly from frozen, adding a few extra minutes to the baking time. This is a fantastic way to always have a quick, perfect appetizer or savory snack on hand.
Reheat in Oven or Microwave
To reheat refrigerated breadsticks, the oven is your best friend. Preheat your oven to 350°F (175°C) and bake for 5-10 minutes, or until warmed through and the cheese is bubbly again. For frozen breadsticks, bake at 350°F (175°C) for 15-20 minutes. This method helps to restore their crispy exterior. The microwave can be used for a quicker reheat, but be aware that it might soften the crust and make the cheese less crisp. If using a microwave, heat for 20-30 seconds per breadstick, or until warm. Whichever method you choose, you’ll still have delicious cheesy garlic breadsticks to enjoy!