
Easy Bisquick cinnamon rolls offer a fantastic solution for busy mornings or unexpected cravings. This quick 25-minute recipe lets you enjoy warm, freshly baked cinnamon rolls without the usual fuss. It’s a simple baking method ensuring delicious rolls every time.
Key Takeaways
- Quickly bake delicious cinnamon rolls in just 25 minutes.
- Utilizes Bisquick for a convenient and simple dough.
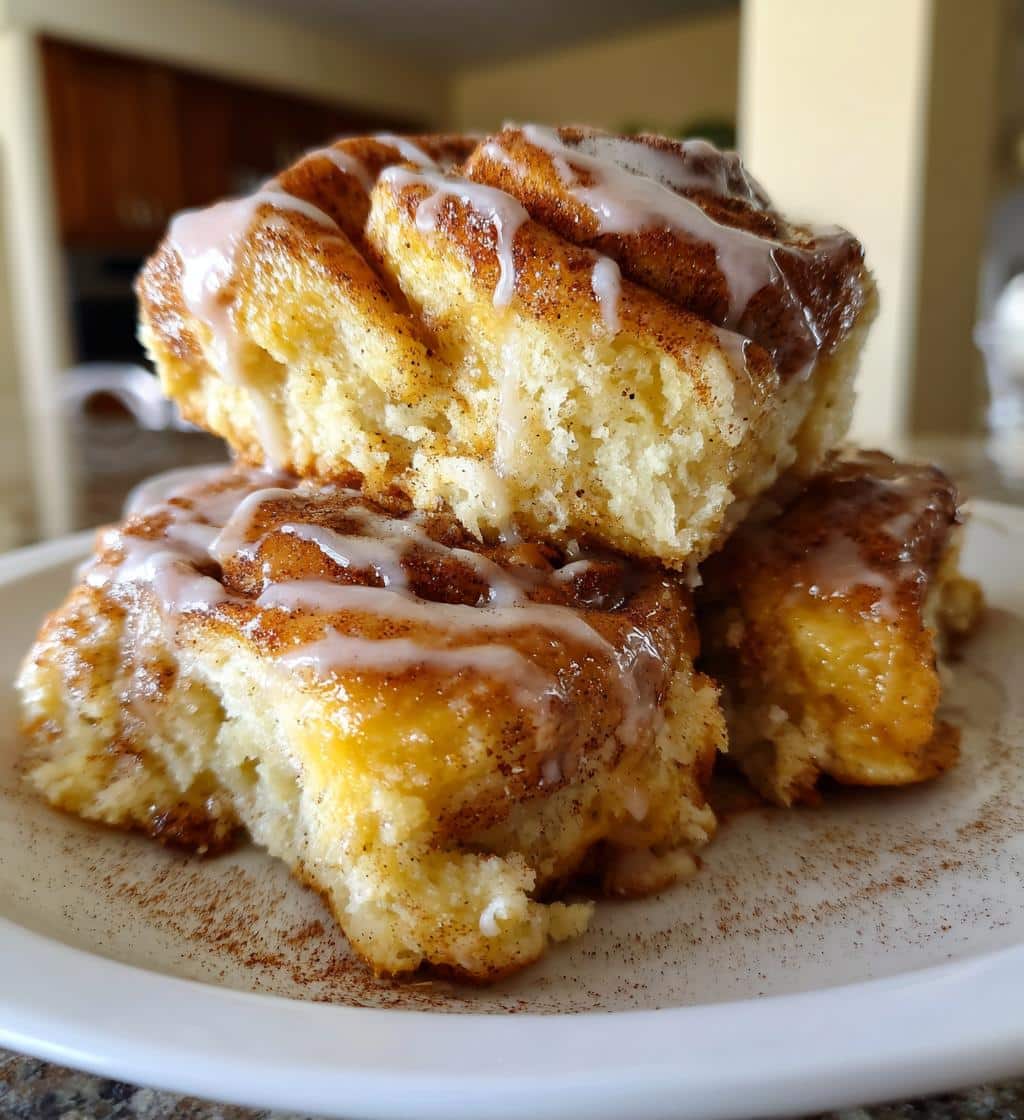
- Features a sweet cinnamon-sugar filling and easy powdered sugar glaze.
- Perfect for busy mornings or as a delightful family treat.
Freshly baked cinnamon rolls are pure bliss. Their aroma fills the kitchen. A soft, warm treat awaits. This recipe makes it simple. Enjoy them any morning.
Why Easy Bisquick Cinnamon Rolls?
When time is precious, but the craving for a warm, sweet breakfast treat strikes, easy Bisquick cinnamon rolls become your go-to solution. This recipe is specifically designed for speed and simplicity, cutting down on preparation and cooking time significantly compared to traditional methods. You won’t need to wait for dough to rise, making it a perfect choice for those spontaneous baking moments or when you simply don’t have hours to spare in the kitchen. The convenience of using a pantry staple like Bisquick simplifies the dough-making process, ensuring a consistent and fluffy texture every time.
Enjoy Quick 25-Minute Cinnamon Rolls
Imagine enjoying homemade cinnamon rolls in under half an hour. This quick 25-minute recipe transforms that dream into reality. From mixing the few ingredients to pulling golden brown perfection from the oven, the entire process is streamlined. It’s ideal for weekend brunches, unexpected guests, or just when you need a little sweet pick-me-up. The fast turnaround means less waiting and more savoring, allowing you to indulge in a warm, gooey cinnamon roll without the extensive time commitment. For more quick breakfast ideas, check out our breakfast recipes category.
Simple Baking for Busy Mornings
Busy mornings often leave little room for elaborate cooking, but that doesn’t mean sacrificing deliciousness. These Bisquick cinnamon rolls are designed for simple baking, making them an excellent choice for a quick family favorite. The straightforward steps and minimal ingredients mean even novice bakers can achieve impressive results. No complicated kneading or proofing is required, freeing up your time to focus on other morning tasks or simply enjoying a peaceful start to your day. It’s a smart way to bring the joy of homemade pastries into your routine with minimal effort. You can also whip up Hawaiian Roll French Toast for another quick morning delight.
Gather Your Cinnamon Roll Ingredients
Successful baking, even quick baking, starts with having all your ingredients ready. For these easy Bisquick cinnamon rolls, you’ll find most items are common pantry staples. This recipe minimizes specialty ingredients, focusing on accessibility and ease. Before you begin, take a moment to measure everything out. This mise en place approach will make the entire baking process smoother and even faster, helping you maintain that “ready in minutes” promise. Ensuring fresh ingredients, especially your leavening agent in the Bisquick, will contribute to the rolls’ desired fluffy texture.
What You Need: Bisquick Basics
The foundation of our simple cinnamon rolls is Bisquick. This versatile baking mix already contains flour, leavening, and shortening, making it perfect for a quick dough. You’ll also need milk (dairy or non-dairy works) and a touch of granulated sugar to sweeten the dough just slightly. Always check the expiration date on your Bisquick to ensure its leavening power is still active, which is crucial for achieving light and airy rolls. Using cold milk can also help in keeping the dough manageable during mixing and rolling. This combination creates a forgiving dough that is easy to handle and bakes beautifully.
Sweet Filling and Glaze Supplies
What’s a cinnamon roll without its signature sweet filling and decadent glaze? For the filling, you’ll need softened unsalted butter, a generous amount of ground cinnamon, and brown sugar. The brown sugar adds a deep, molasses-rich sweetness and helps create that wonderful gooey center. For the simple glaze, gather powdered sugar (confectioners’ sugar) and a small amount of milk. A touch of vanilla extract is optional but highly recommended to enhance the glaze’s flavor. This simple trio for the glaze will provide the perfect sweet topping, balancing the richness of the cinnamon filling. The key to a good glaze is consistency, so have extra powdered sugar or milk on hand to adjust as needed.
Making the Bisquick Cinnamon Roll Dough
Creating the dough for these quick cinnamon rolls is where the magic of Bisquick truly shines. Unlike traditional recipes that require multiple steps of mixing, kneading, and rising, our Bisquick-based dough comes together in a flash. The goal is to mix until just combined, avoiding overworking, which can lead to tough rolls. This simplicity ensures that even beginners can achieve a soft, pliable dough that’s a joy to work with. The process is designed to be mess-free and efficient, keeping in line with the “25-minute” promise of the recipe.
Mixing Bisquick, Milk, and Sugar
In a medium mixing bowl, combine the Bisquick baking mix with the granulated sugar. Stir them briefly to ensure even distribution. Then, gradually add the milk, mixing with a spoon or your hands until a soft, slightly sticky dough forms. Be careful not to overmix; just combine until there are no dry spots. The dough should be cohesive enough to handle but still soft. If it feels too sticky, add a tiny bit more Bisquick. If it’s too dry, add a teaspoon of milk at a time. This quick mixing process sets the stage for fast and easy rolling. The texture should resemble a biscuit dough, ready for shaping.
Rolling Dough for Perfect Shape
Once your dough is ready, lightly flour a clean surface or use a silicone mat. Turn the dough out and gently shape it into a rough rectangle. Using a rolling pin, carefully roll the dough into a rectangle approximately 12×8 inches and about ¼ inch thick. Aim for an even thickness across the entire sheet of dough, as this will help ensure your cinnamon swirls bake uniformly and look visually appealing. A consistent thickness also helps in rolling a tight spiral. Don’t worry if the edges aren’t perfectly straight; you can trim them slightly later if desired. This stage is crucial for achieving that iconic cinnamon swirl when the rolls are baked.
Creating That Delicious Cinnamon Filling
The heart of any great cinnamon roll lies in its rich, aromatic filling. This simple yet effective blend of butter, cinnamon, and brown sugar transforms plain dough into a sweet, spiced delight. The key to a fantastic filling is not just the ingredients, but also their proper consistency and application. A well-prepared filling will spread easily, adhere to the dough, and melt into a gooey, flavorful layer during baking, creating that irresistible cinnamon swirl experience.
Butter, Cinnamon, Brown Sugar Mix
In a small bowl, combine the softened unsalted butter, ground cinnamon, and light brown sugar. Use a fork or a small spatula to mix these ingredients together until they form a thick, spreadable paste. The butter should be soft enough to cream easily but not melted, as a melted butter mixture will seep out of the rolls during baking. Ensure the cinnamon and brown sugar are fully incorporated into the butter for an even flavor distribution. Once mixed, generously spread this flavorful paste evenly over the rolled-out dough, leaving a small border (about half an inch) along one of the long edges. This border will help seal the roll when you begin to form your cinnamon swirl, preventing the filling from oozing out excessively.
Roll Dough, Slice Into Rolls
This stage is where your Bisquick dough begins to transform into recognizable cinnamon rolls. The technique of rolling and slicing is critical for achieving that classic spiral appearance and ensuring even baking. Taking your time here will result in beautiful, uniformly shaped rolls that are a pleasure to serve and eat. The goal is a compact roll that holds its shape well, leading to impressive golden brown perfection once baked. Consider browsing our Snickerdoodle Cobbler recipe for another delightful sweet treat.
Tight Roll for Best Cinnamon Swirls
Starting from the long edge opposite the one you left a border, carefully begin to roll the dough tightly. The tighter you roll, the more distinct and beautiful your cinnamon swirls will be. Maintain even pressure as you roll, ensuring the log is uniform in thickness. This helps prevent the center from being too loose or the ends too thin. Once you’ve rolled the entire dough into a log, gently pinch the seam closed along the edge you left clear of filling. This creates a secure seal, keeping the cinnamon filling neatly tucked inside during baking. A tight roll is the secret to achieving those visually appealing, perfectly spiraled rolls.
Cutting 1-inch Rolls Evenly
With your cinnamon-filled dough log ready, it’s time to slice it into individual rolls. For best results, use a sharp, un-serrated knife or, even better, a piece of unflavored dental floss or strong thread. If using floss, slide it under the log, cross the ends over the top, and pull to cut cleanly through the dough. This method prevents squishing the rolls and keeps their shape intact. Aim for rolls approximately 1 inch thick. This size allows for optimal baking—not too thin that they dry out, and not too thick that the center remains raw. You should get about 12 delicious rolls from one log. Arrange the cut rolls into a greased 9×13 inch baking dish, ensuring they are slightly spaced apart to allow for expansion during baking. For more delicious dessert ideas, you might enjoy our recipe for Peanut Butter Brownie Swirl Cookies.
Baking Your Easy Cinnamon Rolls Quickly
The baking phase is where your prepared Bisquick cinnamon rolls truly come to life, transforming from simple dough into golden brown perfection. Given the expedited nature of this recipe, precise oven temperature and monitoring are key to ensuring even cooking and a beautifully caramelized exterior. The rapid baking time is a testament to the efficient design of this “ready in minutes” approach, delivering fresh, warm rolls without the prolonged wait.
Preheating Oven to 400°F Correctly
Accuracy in preheating is crucial for quick baking recipes like these. Make sure your oven is fully preheated to 400°F (200°C) before placing the cinnamon rolls inside. An oven that hasn’t reached the correct temperature can lead to uneven baking, denser rolls, or even rolls that don’t puff up as much as they should. Using an oven thermometer can help verify your oven’s accuracy. A hot oven immediately sets the dough, allowing it to rise quickly and achieve that desired fluffy texture, while also ensuring the filling heats through and becomes deliciously gooey. Proper preheating is a fundamental step in achieving successful baking results.
Bake Until Golden Brown Perfection
Place your baking dish with the rolls into the preheated oven. Bake for approximately 15-20 minutes, or until the tops are golden brown and the rolls are cooked through. Keep an eye on them, as oven temperatures can vary. The rolls should look puffy and feel set to the touch. The edges might be slightly darker and caramelized, adding to their appeal. Once baked to golden brown perfection, carefully remove the dish from the oven. The aroma filling your kitchen will be incredible, signaling that your delicious rolls are almost ready to be enjoyed. Let them cool slightly in the pan for a few minutes before glazing.
Whipping Up a Simple Glaze
No cinnamon roll is truly complete without a luscious glaze drizzled generously over its warm surface. Our simple glaze recipe is designed to be as quick and easy as the rolls themselves, providing the perfect balance of sweetness and a beautiful finish. This glaze adds a touch of moisture and shine, complementing the spiced filling and fluffy texture of the rolls. It’s the final flourish that makes these a true sweet breakfast treat.
Powdered Sugar and Milk Blend
While your cinnamon rolls are baking or cooling slightly, prepare the glaze. In a small bowl, combine powdered sugar (also known as confectioners’ sugar) with a tablespoon of milk. Whisk thoroughly until smooth. The goal is a thick but pourable consistency. If it’s too thick, add a few drops more milk at a time until desired consistency is reached. If it’s too thin, stir in a little more powdered sugar. For an extra layer of flavor, you can add a quarter teaspoon of vanilla extract to the mixture. This simple blend creates a classic glaze that will perfectly complement your warm rolls.
Drizzle Warm Rolls for Best Taste
The best time to glaze your easy Bisquick cinnamon rolls is when they are still warm, but not piping hot. The warmth of the rolls will allow the glaze to melt slightly and seep into the nooks and crannies, enhancing their flavor and texture. Using a spoon, drizzle the glaze generously over all the rolls in the baking dish. Don’t be shy! The glaze will set as the rolls cool slightly, creating a delightful, slightly sticky coating. Serve immediately for the ultimate “warm rolls” experience. You can see more delicious recipes and plating ideas on our Pinterest and Instagram pages!
Serving Your 25-Minute Cinnamon Rolls
The moment has arrived! Your easy Bisquick cinnamon rolls are baked to perfection and generously glazed. Serving these warm, sweet delights is arguably the best part of the entire quick 25-minute recipe. The aroma alone is enough to bring smiles to faces, and enjoying them fresh from the oven is an experience that truly highlights their deliciousness. These rolls are perfect for any occasion that calls for a comforting, homemade sweet breakfast treat.
Best Ways to Enjoy Fresh Rolls
These cinnamon rolls are best enjoyed fresh and warm. Carefully remove individual rolls from the baking dish using a spatula. Serve them alongside a cup of coffee, tea, or a glass of cold milk for a complete breakfast or delightful snack. While delicious on their own, some people love to add a sprinkle of chopped nuts (like pecans or walnuts) on top of the glaze, or even a dollop of cream cheese frosting for extra richness. For a special touch, you can also serve them with fresh berries. Whether for a leisurely weekend breakfast or a quick weekday indulgence, these rolls are sure to be a hit and quickly become a family favorite.
Easy Bisquick Cinnamon Rolls Overview
This recipe for easy Bisquick cinnamon rolls stands out due to its remarkable efficiency without compromising on flavor or that comforting homemade feel. It’s a testament to how simple baking can yield impressive results, making it accessible for anyone, regardless of their baking experience. The focus on speed and minimal ingredients ensures that you can enjoy fresh, delicious rolls whenever the craving strikes, making it a perfect breakfast solution for “busy mornings.”
Quick Prep and Cook Times
One of the most appealing aspects of this recipe is its incredibly quick prep and cook times. The preparation phase, including mixing the dough, spreading the filling, and rolling/slicing, typically takes around 10-15 minutes. The baking process then adds another 15-20 minutes, followed by a quick minute or two for glazing. This efficient timeline means you can have warm, freshly baked cinnamon rolls on your table in approximately 25-35 minutes from start to finish. This makes it an ideal choice for spontaneous baking or when you need a speedy, satisfying sweet breakfast treat.
Yields 12 Delicious Rolls
This recipe is perfectly portioned to yield 12 delicious rolls. This is a great quantity for a family breakfast, a small gathering, or for having a few extra to enjoy later. Each roll offers a generous serving, packed with that delightful cinnamon swirl and sweet glaze. The consistent yield makes it easy to plan for servings, ensuring everyone gets to savor a fluffy texture. If you need more, the recipe can easily be doubled by using a larger baking dish, though you might need to adjust baking time slightly. This consistent output makes it a reliable recipe for any baker.
Understanding Cinnamon Roll Nutrition
While these easy Bisquick cinnamon rolls are designed for indulgence and enjoyment, it’s helpful to have a general idea of their nutritional content. As with most sweet baked goods, they are a treat to be enjoyed in moderation. The exact nutritional values can vary based on specific ingredient brands, exact measurements, and any additions or substitutions you make.
Per Roll: Calories and Sugar
A single easy Bisquick cinnamon roll typically contains around 200-250 calories. A significant portion of these calories comes from the sugars in the filling and glaze, along with the carbohydrates in the Bisquick mix. Expect approximately 20-30 grams of sugar per roll. This makes them a delicious sweet breakfast treat, providing a quick burst of energy. These figures are estimates and can fluctuate; for precise nutritional information, a dedicated nutritional analysis would be required based on your exact ingredient choices and quantities.
Fat, Carbs, and Protein Breakdown
In addition to calories and sugar, these rolls also provide fat, carbohydrates, and a small amount of protein. Each roll may contain around 8-12 grams of fat, primarily from the butter in the filling and the shortening in the Bisquick. Carbohydrates will be the most abundant macronutrient, typically ranging from 35-45 grams per roll, largely from the flour and sugars. Protein content will be relatively low, usually around 3-5 grams per roll, coming from the milk and Bisquick components. Enjoy these delicious rolls as part of a balanced diet, recognizing they are a flavorful indulgence.
Easy Cinnamon Roll Pro Tips
Even with an already simple recipe, a few pro tips can elevate your easy Bisquick cinnamon rolls from good to outstanding. These suggestions help you personalize the flavor profile, add textural interest, and ensure every batch is as perfect as possible. These simple adjustments can make a big difference in the final taste and presentation, offering creative ways to enhance your sweet breakfast treat.
Taste Adjustments for Cinnamon, Sugar
The beauty of homemade baking is the ability to customize flavors to your preference. If you love a bolder cinnamon flavor, feel free to increase the amount of ground cinnamon in the filling by an extra half teaspoon. Similarly, if you prefer less sweetness, you can slightly reduce the brown sugar in the filling or the powdered sugar in the glaze. Alternatively, if you have a sweet tooth, a little extra sugar in either component will be welcome. Taste as you go when mixing the filling and glaze to find your perfect balance. These small taste adjustments ensure the “golden brown perfection” is exactly to your liking.
Adding Nuts or Raisins Option
To add more texture and flavor complexity, consider incorporating extra ingredients into your cinnamon rolls. After spreading the cinnamon-sugar mixture, sprinkle about a quarter cup of finely chopped nuts, such as pecans or walnuts, evenly over the filling before rolling the dough. If you enjoy a fruity element, a quarter cup of plump raisins or dried cranberries can also be added. Ensure any additions are small enough to roll easily without tearing the dough. These additions introduce new dimensions of flavor and texture, making your “delicious rolls” even more special. This option makes a simple baking process even more versatile.
Storing Your Bisquick Cinnamon Rolls
While these easy Bisquick cinnamon rolls are definitely best enjoyed fresh and warm, it’s entirely possible you might have a few leftover. Proper storage is key to keeping rolls fresh longer and preserving their delightful taste and texture for future enjoyment. The goal is to prevent them from drying out, which can happen quickly with baked goods.
Keeping Rolls Fresh Longer
To keep your baked and glazed cinnamon rolls fresh longer, store them in an airtight container at room temperature for up to 2-3 days. This prevents them from drying out and helps maintain their soft texture. If you plan to store them for a longer period, they can be refrigerated for up to a week. For the best taste and texture after refrigeration, warm them slightly in the microwave for 15-30 seconds or in a preheated oven at 250°F (120°C) for about 5-10 minutes. This will restore some of their original warmth and gooeyness. For even longer storage, unglazed rolls can be frozen for up to 2 months. Thaw, glaze, and warm before serving for a delicious treat anytime.