
The Oreo Milkshake recipe is a delightful way to satisfy your sweet cravings with a homemade dessert. This easy recipe blends the iconic flavor of Oreo cookies into a creamy treat that’s perfect for any occasion. It’s a fun snack everyone will love, offering a quick sweet indulgence that cools you down. Enjoy this blended drink!
Key Takeaways
- Effortlessly prepare a delightful Oreo Milkshake at home.
- Requires only simple ingredients and basic kitchen tools.
- Easily customize consistency and enhance cookie flavor.
- Enjoy a quick sweet treat, ready in approximately 10 minutes.
Sweet cravings hit hard sometimes. An Oreo milkshake solves them. It is cool, creamy, and delightful. A perfect quick sweet treat. Everyone loves this blended drink.
Taste the Delight of Oreo Milkshake
Why Make This Sweet Treat?
There’s something undeniably magical about an Oreo Milkshake. It’s more than just a drink; it’s a nostalgic trip to childhood, a celebration of simple pleasures, and a perfect escape from the everyday. Crafting this homemade dessert allows you to control the ingredients, ensuring a fresh, creamy treat exactly to your liking. Forget the drive-thru; your kitchen can produce a superior, more satisfying version. This easy recipe transforms classic cookies into a luscious, blended drink that’s ideal for beating the heat or simply indulging your sweet cravings.
Making an Oreo Milkshake isn’t just about taste; it’s about the joy of creation. It’s a fun snack that brings smiles, whether you’re making it for yourself or sharing it with loved ones. Its quick preparation time makes it an accessible cold indulgence, perfect for an impromptu treat. You can adjust the richness, sweetness, and even the texture to suit your mood, making each sip a personalized delight. It’s a versatile recipe that promises to be a hit, offering a comforting yet exciting way to enjoy the beloved cookies and cream flavor in a new, refreshing format. Consider it as delightful as preparing decadent treat for any celebration.
All Ingredients for Your Milkshake
Dairy and Cookie Essentials
Creating the perfect Oreo Milkshake starts with quality ingredients. For the dairy base, you’ll need cold whole milk and premium vanilla ice cream. Whole milk lends a richer, creamier texture, while a good quality vanilla ice cream provides a smooth foundation without overpowering the star ingredient: Oreo cookies. These iconic chocolate sandwich cookies with their sweet, creamy filling are what give the milkshake its signature flavor. Make sure you have enough on hand for blending and extra for garnishing, as they are crucial for achieving that delightful “cookies and cream” taste that makes this treat so special.
Toppings and Garnish Options
While the milkshake itself is delicious, toppings elevate it from good to extraordinary. Classic choices include a generous swirl of whipped cream, a drizzle of rich chocolate syrup, and extra crushed Oreo cookies. For an added touch of elegance and crunch, consider topping your shake with a whole Oreo cookie or even a maraschino cherry for a pop of color. These additions not only enhance the visual appeal but also add layers of flavor and texture, making each sip and bite a truly indulgent experience. Don’t shy away from experimenting with other favorites like sprinkles or caramel syrup to truly customize your blended drink.
Simple Tools for Blending Success
What You Will Need
Fortunately, whipping up an Oreo Milkshake requires only a few basic kitchen tools that you likely already own. The most critical item is a reliable blender. A powerful blender will ensure a smooth, creamy consistency, effortlessly crushing the cookies and blending the ice cream and milk. You’ll also need measuring cups and spoons to ensure accurate ingredient proportions, which are key for a balanced flavor. Finally, gather your favorite glasses for serving and some sturdy straws to enjoy every last drop of your delicious, creamy treat. Having these simple tools ready makes the preparation process quick and seamless.
Beyond the essential blender, consider having a spatula or spoon on hand to scrape down the sides of the blender if ingredients get stuck. A sturdy cutting board and a rolling pin (or even a heavy glass) can be useful for crushing cookies if you don’t have a food processor. Chilled glasses can also make a significant difference in keeping your milkshake cold longer. These modest tools empower you to create a fantastic homemade dessert without any specialized equipment, proving that making a delicious, fun snack can be incredibly straightforward and enjoyable.
Preparing Oreo Cookies for Blending
Crushing Them Perfectly Smooth
The secret to a great Oreo Milkshake lies in how you prepare your cookies. For a perfectly smooth blend with integrated cookie flavor, you’ll want to crush your Oreo cookies effectively. You can achieve this in a couple of ways. A food processor is the quickest method, turning the cookies into fine crumbs in seconds. If you don’t have one, place the cookies in a sturdy Ziploc bag, seal it, and use a rolling pin or the bottom of a heavy pan to crush them. Aim for a mix of fine crumbs and slightly larger pieces to give your milkshake both a smooth texture and delightful, tiny cookie bits. Remember to reserve a few whole or roughly chopped cookies for garnish later, adding that extra appeal to your dessert.
Ensure that the cookies are broken down enough so they don’t clog your blender or create unpleasantly large chunks in your drink. This step is vital for the “cookies and cream” experience, ensuring every sip is infused with that unmistakable Oreo taste. Properly crushed cookies integrate beautifully with the ice cream and milk, contributing to the milkshake’s rich flavor and pleasing consistency. It’s a simple yet crucial preparation step that makes all the difference in achieving a truly enjoyable, blended drink.
Blending Your Perfect Oreo Milkshake
Combining Milk, Ice Cream, Cookies
With your ingredients prepped, it’s time to bring your Oreo Milkshake to life. Start by pouring the cold milk into your blender. Adding the liquid first helps the blades spin freely and prevents the heavier ingredients from getting stuck at the bottom. Next, scoop in the vanilla ice cream. Finally, add your perfectly crushed Oreo cookies. This order ensures a more efficient blend and helps achieve that consistently creamy texture we all crave in a homemade dessert. Secure the lid and prepare for the magic to happen, turning simple components into a delicious, fun snack.
Achieving Ideal Creamy Texture
The key to a truly satisfying Oreo Milkshake is its texture. Start blending on a low speed, gradually increasing to high, and blend until the mixture is smooth and creamy. You might need to stop and scrape down the sides of the blender with a spatula to ensure all the cookie bits are incorporated. Avoid over-blending, as this can warm up the milkshake and make it less thick. The ideal consistency is thick enough to slowly fall off a spoon but thin enough to be sippable through a straw, a perfect “cold indulgence” for your sweet cravings. If it’s too thick, add a tiny splash more milk; too thin, add another small scoop of ice cream. Enjoy the perfect milkshake every time.
Adjusting Your Milkshake Consistency
Add More Milk if Desired
The beauty of making a homemade dessert like an Oreo Milkshake is the ability to customize it to your exact preference, especially when it comes to consistency. If your milkshake turns out too thick for your liking, don’t worry—it’s an easy fix. Simply add a small splash of cold milk, about a tablespoon at a time, and blend again for a few seconds. Repeat this process until you achieve your desired sipping consistency. This incremental approach prevents you from accidentally thinning it out too much. Conversely, if you prefer an even thicker, more spoonable creamy treat, you can add another scoop of ice cream. This control ensures your blended drink is always just right for you.
Remember that different types of milk (whole, 2%, skim) and varying softness of ice cream can affect the initial consistency. If you’re using very firm ice cream or minimal milk, you’ll naturally get a thicker shake. Don’t hesitate to experiment with these ratios. The goal is a perfect balance that satisfies your “sweet cravings” and delivers an optimal “cold indulgence.” Adjusting the consistency is a simple step that guarantees your personalized, fun snack is exactly how you love it.
Serving Your Delicious Oreo Milkshake
Pouring Into Your Favorite Glasses
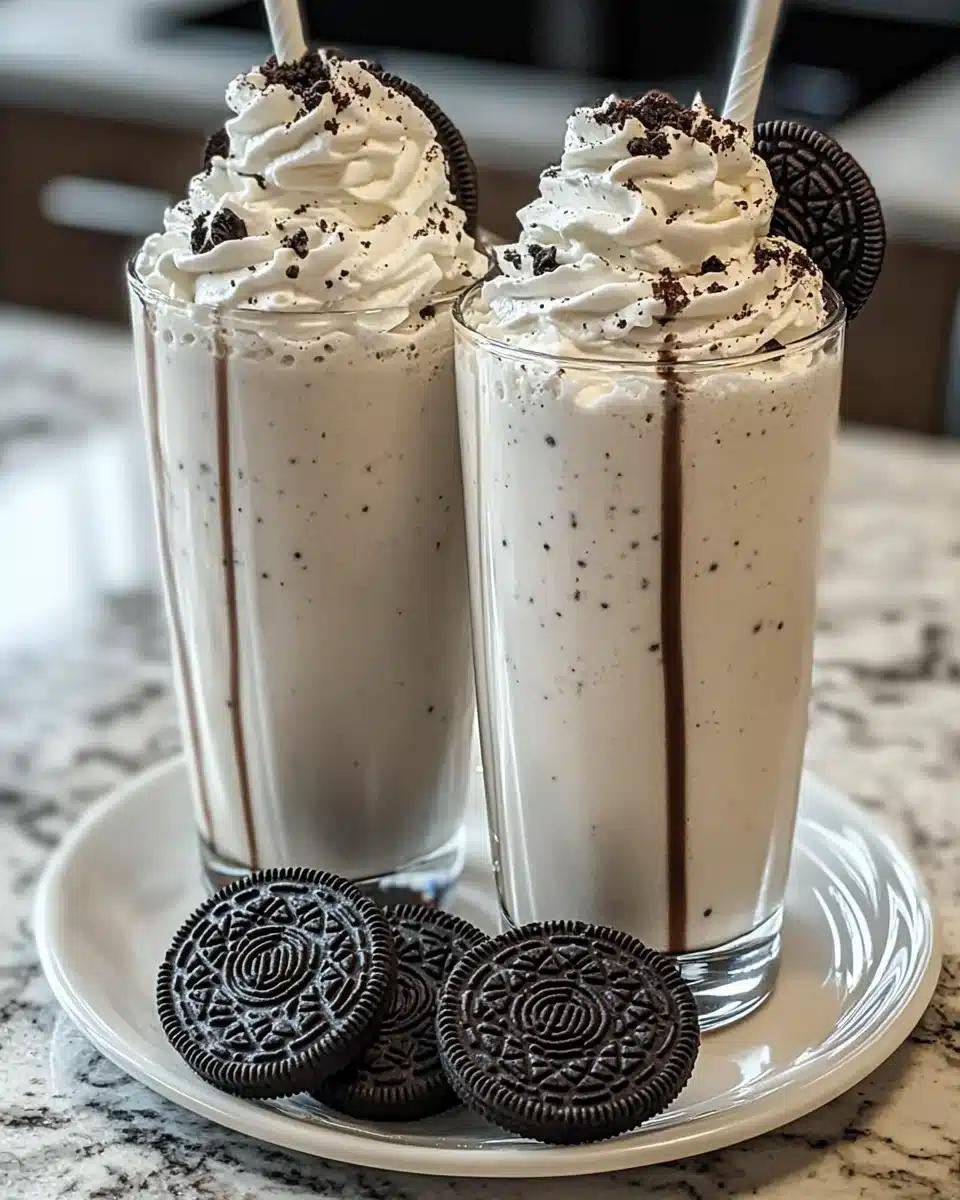
Presentation is key to enhancing the enjoyment of your homemade dessert. Once your Oreo Milkshake has reached its ideal creamy texture, carefully pour it into your favorite chilled glasses. Chilling the glasses beforehand helps to keep the milkshake colder for longer, preserving that delightful “cold indulgence” sensation. Whether you opt for classic soda fountain glasses, sturdy tumblers, or even whimsical jars, selecting the right vessel adds to the overall experience. The rich, dark color of the cookies against the creamy white milkshake creates an appealing visual contrast that makes this easy recipe even more enticing.
Adding Whipped Cream and Syrup
To truly complete your delicious Oreo Milkshake, don’t skip the classic toppings. A generous swirl of freshly whipped cream or a dollop of store-bought whipped cream adds an airy sweetness and luxurious texture. Follow this with a drizzle of rich chocolate syrup, letting it cascade down the sides of the glass for an artistic touch. This not only enhances the flavor profile but also makes your “cookies and cream” blended drink look incredibly appetizing. These simple additions transform a great treat into an extraordinary one, ready to be enjoyed as a decadent fun snack.
Garnishing for Extra Milkshake Appeal
Top with Whole Oreo Cookies
Elevate your Oreo Milkshake from a simple drink to a show-stopping homemade dessert with thoughtful garnishes. Beyond whipped cream and chocolate syrup, consider adding a sprinkle of extra crushed Oreo cookies over the whipped topping. For an extra touch of flair, place a whole Oreo cookie on the rim of the glass or gently float one directly on top of the whipped cream. These visual cues immediately communicate the star flavor and make the milkshake even more appealing as a “fun snack” or a special “cold indulgence.”
Serve Immediately and Enjoy
The absolute best way to enjoy an Oreo Milkshake is immediately after blending. Its creamy texture and refreshing coolness are at their peak when served fresh. Gather your straws, perhaps even some long spoons for scooping up the delightful cookie bits at the bottom, and serve without delay. This easy recipe is designed for instant gratification, providing a quick sweet escape that satisfies those “sweet cravings” instantly. Don’t let it sit too long, as the ice cream will melt and the texture will change. Dive in and savor every delightful sip!
For more inspiration and delicious recipes, be sure to check out our Carina Recipes Pinterest page, where you’ll find a wealth of culinary delights to explore and enjoy.
Quick Recipe Times for This Treat
Only 10 Minutes Total Time
One of the most appealing aspects of the Oreo Milkshake recipe is its incredible speed. From gathering your ingredients to the first delightful sip, this “quick sweet” treat requires only about 10 minutes of your time. This makes it a perfect solution for spontaneous “sweet cravings,” a last-minute homemade dessert, or a fast “fun snack” when you need a little pick-me-up. The minimal preparation and blending time mean you can enjoy a rich, creamy indulgence without a lengthy wait, making it a go-to option for busy days or unexpected guests. This efficiency doesn’t compromise on flavor, delivering a consistently delicious blended drink every time.
The simplicity of this recipe ensures that even novice cooks can achieve fantastic results. There’s no complex cooking involved, just a few quick steps in the blender, demonstrating how easy it is to create a satisfying cold indulgence. This rapid turnaround time is especially beneficial for parents looking for a speedy treat for their children or anyone desiring a quick sweet without fuss. Embrace the speed and enjoy the creamy goodness of your freshly made Oreo Milkshake in under a quarter of an hour.
Recipe Yield and Key Nutrition Facts
Makes Two Generous Servings
This Oreo Milkshake recipe is designed to produce two generous servings, making it perfect for sharing with a friend or enjoying a larger “cold indulgence” yourself. The quantities of milk, ice cream, and cookies are carefully balanced to yield a rich, satisfying amount for two standard-sized milkshake glasses, providing a substantial treat. This convenient yield means you can easily scale the recipe up or down depending on your needs, whether you’re craving a quick sweet moment for one or preparing a fun snack for a small group. Understanding the recipe’s output helps with portion control and planning your homemade dessert. While the precise nutrition facts vary with specific ingredient choices, this recipe consistently delivers a delightful experience for two, ensuring you can manage servings for your “sweet cravings.”
Customizing Your Oreo Milkshake Experience
For a Thicker, Richer Shake
If you prefer a truly decadent and thick Oreo Milkshake, there are several ways to achieve a richer consistency. Reduce the amount of milk slightly, or add an extra scoop of high-quality vanilla ice cream. For an even more indulgent twist, consider adding a small amount of cream cheese or a frozen banana to the blend; the banana also adds natural sweetness and a velvety texture without overpowering the “cookies and cream” flavor. These adjustments ensure a more substantial, spoon-worthy “creamy treat” that perfectly satisfies those intense “sweet cravings.”
Adding More Oreo Cookie Flavor
For the ultimate Oreo enthusiast, boosting the cookie flavor is a must. Simply increase the number of Oreo cookies you add to the blender. You can also experiment with using different flavored Oreos, like mint or peanut butter, for a creative twist. Another trick is to crush some cookies into a fine powder and incorporate them directly into the milk before adding other ingredients, allowing the flavor to infuse deeply. Don’t forget to generously garnish with extra crushed Oreos to maximize that iconic taste in every bite and sip of your “blended drink.”
Doubling Recipe for More Fun
This Oreo Milkshake recipe is perfectly scalable, making it ideal for entertaining or simply enjoying more of this delightful “fun snack.” To double the recipe, simply multiply all the ingredient quantities by two. Ensure your blender can accommodate the increased volume. When making larger batches, you might need to blend in smaller portions or extend the blending time slightly to achieve the same smooth, creamy consistency. Preparing more means more joy to share, whether it’s for a family treat or a party. Consider serving alongside other comforting dishes like creamy baked mac and cheese for a truly varied meal experience.
Nutrition Breakdown of Your Treat
Calories, Sugar, and Fat Details
While an Oreo Milkshake is undeniably a delicious and satisfying “cold indulgence,” it’s also important to be mindful of its nutritional content. As a rich “creamy treat,” it typically contains higher levels of calories, sugar, and fat due to the ice cream, milk, and of course, the Oreo cookies. The exact values will vary significantly depending on the specific ingredients used (e.g., whole milk vs. skim milk, regular ice cream vs. low-fat), as well as the portion size and any added toppings like whipped cream and chocolate syrup. This “homemade dessert” is best enjoyed as an occasional treat rather than a daily staple, fitting perfectly into a balanced diet as a “fun snack” for special moments or to curb those intense “sweet cravings.” Always consider your dietary needs when preparing such a delightful blended drink.
For more culinary inspiration and daily recipe updates, follow us on Carina Recipes Instagram. We share delightful ideas for every meal!
