
Homemade eggnog offers a rich, creamy, and delightful treat, especially during the festive season. This easy recipe ensures you can craft this classic holiday drink right in your kitchen. We’ll cover everything from gathering your ingredients to chilling for the best flavor, ensuring a perfectly smooth and delicious beverage for everyone to enjoy.
Key Takeaways
- Quick and easy no-cook eggnog preparation.
- Simple ingredients yield a wonderfully creamy texture.
- Options available for both spiked and non-alcoholic versions.
- Optimal chilling and serving techniques enhance flavor.
- Guidance on storage and making eggnog ahead for convenience.
Eggnog is a cherished seasonal beverage. It brings warmth and cheer. Making it fresh is truly rewarding. Enjoy creamy, rich, spiced flavors. Your holidays will be brighter.
Homemade Eggnog Recipe at a Glance
Preparing homemade eggnog doesn’t have to be a daunting task. Our streamlined eggnog recipe provides clear, easy steps to create a luxurious and satisfying beverage. This timeless classic is perfect for holiday gatherings or a quiet evening at home, offering a customizable flavor profile that store-bought versions simply can’t match. Embracing this simple method allows you to control the quality of ingredients and the final taste, ensuring a perfectly balanced drink every time. Forget complicated cooking processes; this method focuses on fresh ingredients and proper mixing techniques to deliver a wonderfully smooth and flavorful result. Whether you’re a seasoned chef or a kitchen novice, this recipe is designed for success, making homemade eggnog accessible to all who wish to enjoy this festive delight. For more delightful beverages, check out our drinks category.
Quick prep, zero cook time
One of the most appealing aspects of this homemade eggnog recipe is its efficiency. With quick prep and absolutely zero cook time, you can have a batch ready for chilling in under 15 minutes. This makes it an ideal option for busy individuals or those who prefer not to use a stove for their holiday drink creations. The “no-cook” approach relies on fresh, high-quality ingredients and thorough whisking to achieve the desired consistency and blend of flavors. This simple process eliminates the need for tempering eggs or dealing with potential curdling, making the entire experience enjoyable and stress-free. It’s perfect when you need a delicious treat without a lengthy commitment.
Serves 8 guests easily
This eggnog recipe is thoughtfully portioned to serve 8 guests easily, making it fantastic for entertaining. The generous yield ensures that everyone can enjoy a refreshing glass of this delightful holiday beverage. If you’re hosting a larger gathering, simply double the ingredients to accommodate more people without compromising on taste or quality. The scalable nature of this easy eggnog recipe allows for flexibility, whether you’re preparing it for a small family gathering or a larger festive party. You can confidently offer your guests a beautifully crafted, homemade option that’s sure to impress and satisfy.
Gather Your Eggnog Recipe Ingredients
The foundation of truly delicious homemade eggnog lies in selecting fresh, quality ingredients. Each component plays a crucial role in creating the rich, creamy texture and comforting flavor profile that defines this classic holiday drink. While the list might seem simple, paying attention to the freshness and quality of your dairy and eggs will make a significant difference in the final product. Using fresh ingredients not only enhances the taste but also contributes to the overall safety and enjoyment of your no-cook eggnog recipe. Prioritizing quality ensures that every sip is a delightful experience, perfectly capturing the essence of a traditional holiday beverage.
Dairy: milk and heavy cream
For an exceptionally creamy eggnog texture, the choice of dairy is paramount. This recipe calls for a combination of whole milk and heavy cream. Whole milk provides a good base, while the heavy cream adds luxurious richness and a velvety mouthfeel that is characteristic of premium homemade eggnog. Avoid using low-fat alternatives, as they will compromise the desired thickness and creamy consistency. The fat content in both ingredients is essential for achieving that indulgent, smooth finish. Ensuring your dairy products are fresh will also contribute to a clean and delightful flavor profile, allowing the other spices to shine through without any off-notes.
Eggs, sugar, vanilla, nutmeg
These core ingredients are the heart of any authentic eggnog recipe. Fresh eggs are non-negotiable for a no-cook preparation; they provide structure and richness. Granulated sugar sweetens the mixture and also helps to “cook” the eggs through whisking, creating a smooth base. Pure vanilla extract adds a warm, aromatic depth that complements the dairy and spices beautifully. And, of course, freshly grated nutmeg is the signature spice that gives homemade eggnog its distinctive aroma and taste. Always opt for fresh nutmeg over pre-ground if possible, as its flavor and potency are far superior. These elements combine to create a balanced and traditional flavor.
Bourbon or rum (optional)
While the non-alcoholic version is equally delicious, many prefer a spiked eggnog for adult gatherings. Bourbon or rum are the traditional choices, each lending a unique character. Bourbon offers a warm, oaky, and slightly sweet note, enhancing the overall richness. Dark rum, on the other hand, contributes a complex sweetness with hints of caramel and spice. The choice between them often comes down to personal preference or what complements other holiday flavors you might be serving. You can also experiment with a combination of both for a multi-layered alcoholic eggnog. Remember, the alcohol is optional, allowing everyone to enjoy a version that suits their taste.
Easy Steps to Make Homemade Eggnog
Creating your own creamy eggnog at home is surprisingly straightforward, especially with this easy recipe. The key lies in following a few simple steps that ensure a smooth consistency and a perfectly blended flavor. This no-cook method prioritizes freshness and technique over complicated kitchen maneuvers, making it accessible for anyone to master. By carefully executing each stage, you’ll produce a homemade eggnog that rivals any store-bought variety, offering a depth of flavor and a luxurious texture that speaks of homemade care and quality. Get ready to enjoy the satisfaction of crafting this beloved holiday drink from scratch.
Whisk eggs and sugar well
The initial step is crucial for both flavor and safety. In a large bowl, combine the fresh eggs and granulated sugar. Using an electric mixer or a sturdy whisk, beat these ingredients together vigorously for several minutes. The mixture should become pale yellow, thick, and almost frothy. This thorough whisking not only incorporates air for a lighter texture but also helps to dissolve the sugar completely and effectively “cook” the raw eggs through friction and aeration, ensuring a safe and palatable base for your eggnog. Don’t rush this step, as proper whisking is key to a smooth and creamy result.
Mix in milk and cream
Once your egg and sugar mixture is light and airy, it’s time to incorporate the dairy. Gradually pour in the whole milk and heavy cream, whisking continuously as you add them. This slow addition helps to prevent lumps and ensures a seamless blend. Continue to whisk until all the dairy is fully integrated, and the mixture is consistently smooth. The aim is a uniform liquid base that will become the signature creamy eggnog you desire. This careful mixing process contributes significantly to the final velvety texture and rich flavor profile of your homemade beverage.
Add flavors and alcohol
With the liquid base established, the final stage is to infuse your eggnog with its characteristic flavors. Stir in the vanilla extract and a generous amount of freshly grated nutmeg. If you’re opting for a spiked eggnog, now is the time to add your chosen bourbon or rum. Mix everything thoroughly to ensure the flavors are evenly distributed throughout the batch. Taste a small amount and adjust the nutmeg or vanilla if desired, keeping in mind that the flavors will deepen and meld further during chilling. This step allows for personalization, letting you tweak your homemade eggnog to your exact preference.
Chilling for Best Eggnog Flavor
While the preparation of your homemade eggnog is swift, the chilling process is where the magic truly happens for the best flavor. This resting period is not merely about achieving a cold temperature; it’s a vital stage for the ingredients to meld and deepen. Just like a fine stew or sauce, eggnog benefits immensely from time to allow its various components to harmonize. The spices become more pronounced, the sweetness integrates smoothly, and the dairy develops an even richer mouthfeel. Skipping or shortening this step means missing out on the full potential of your carefully crafted beverage. Proper chilling ensures a refreshing, flavorful experience.
Refrigerate for two hours
After all the ingredients are combined, transfer your homemade eggnog to an airtight container. Refrigerate it for a minimum of two hours. While two hours is the recommended minimum to achieve a pleasant chill and initial flavor melding, allowing it to chill for four hours or even overnight will yield an even more superior taste. The extended chilling time permits the vanilla and fresh nutmeg to fully infuse the dairy and egg base, resulting in a more complex and satisfying flavor profile. A well-chilled eggnog is not only more refreshing but also has a slightly thicker, more luxurious consistency, making it a perfect chilled eggnog treat.
Serving Your Homemade Eggnog Fresh
Presenting your homemade eggnog is as important as its preparation. Serving it fresh and with the right garnishes elevates the entire experience, transforming a simple drink into a festive indulgence. The appearance and aroma play a significant role in enticing your guests, making the first sip even more enjoyable. Thoughtful presentation showcases the effort you put into crafting this creamy eggnog and adds a touch of elegance to your holiday spread. Remember, a beautifully served drink enhances the overall enjoyment, making every glass a special moment.
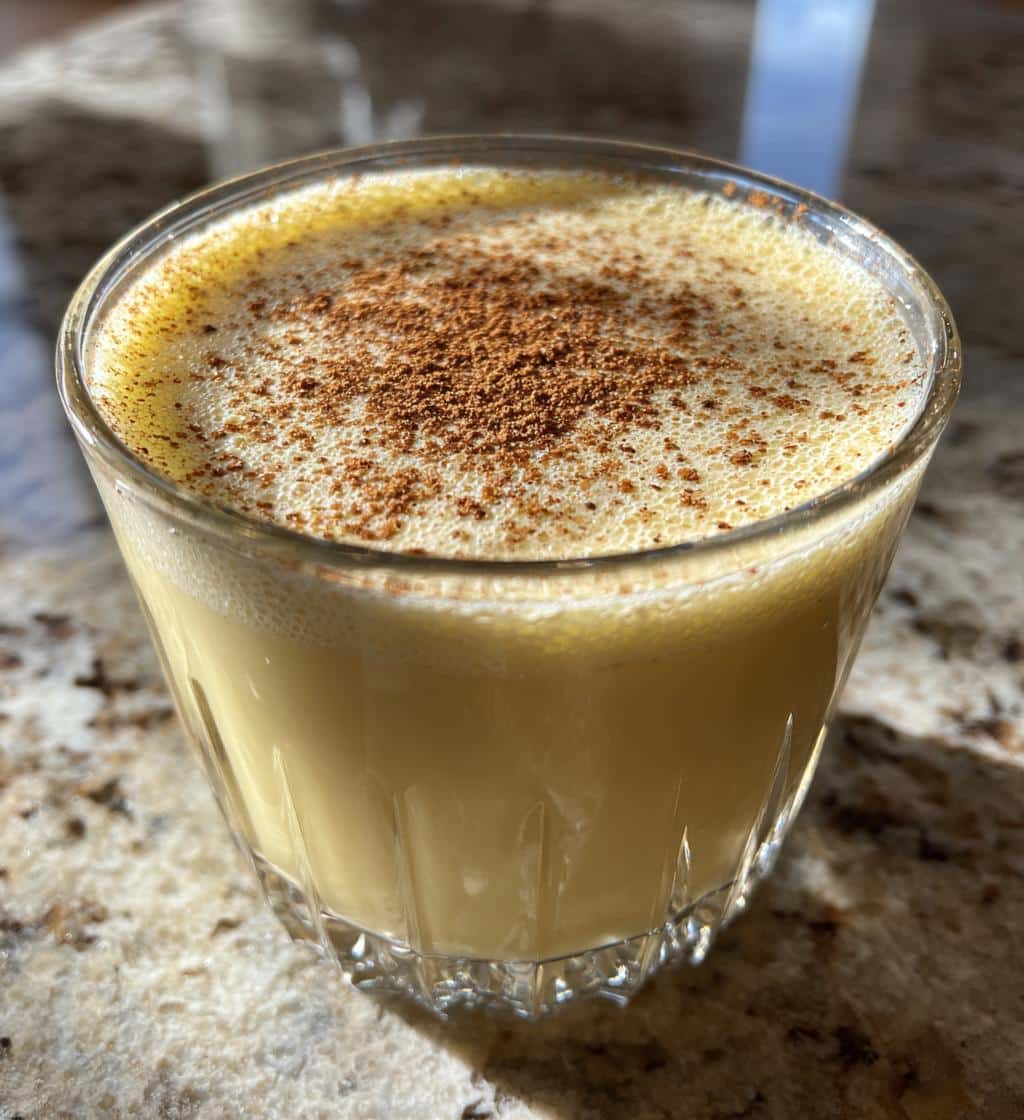
Garnish with fresh nutmeg
The ultimate serving tip for homemade eggnog is to garnish each glass with a generous dusting of fresh nutmeg. Using a microplane or fine grater, grate whole nutmeg directly over the top of the beverage just before serving. This not only adds a beautiful visual appeal but, more importantly, releases a powerful, aromatic scent and flavor that perfectly complements the creamy drink. The volatile oils in fresh nutmeg are far more potent and fragrant than pre-ground versions, offering an incomparable sensory experience. It’s the signature finishing touch that truly defines a classic eggnog. You can learn more about nutmeg’s properties on Wikipedia.
Beyond nutmeg, consider other subtle garnishes. A cinnamon stick can be a charming stirrer, adding a hint of spice as it infuses. A thin slice of orange peel or a sprig of fresh mint can offer a contrasting color and a fresh aroma, enhancing the overall presentation of your delicious eggnog. For those who enjoy a touch of sweetness, a dollop of whipped cream on top can be a delightful addition before dusting with nutmeg, making each serving a truly decadent treat.
Optional Spiked Eggnog Additions
For many adults, eggnog is synonymous with a bit of a kick, making optional spiked eggnog additions a popular choice for holiday festivities. Incorporating spirits not only adds a layer of warmth but also introduces complex flavor notes that interact beautifully with the creamy base and spices. The alcohol helps to preserve the eggnog slightly and can deepen the overall aroma. When choosing your spirit, consider the nuances it brings to the drink. The key is to select quality alcohol that complements, rather than overwhelms, the delicate flavors of your homemade eggnog. Find out more about the history of eggnog on Wikipedia.
Use bourbon or rum
The traditional choices for spiked eggnog are bourbon or dark rum, both offering distinct profiles. Bourbon contributes a rich, caramel-like sweetness with hints of vanilla and oak, providing a classic, robust flavor. Dark rum, on the other hand, brings a smoother, molasses-rich sweetness with notes of spice and fruit, often resulting in a lighter-tasting, yet equally satisfying, spiked eggnog. You can start with about 1.5 to 2 ounces of spirit per serving, or add it to the entire batch, allowing it to meld during chilling. For an extra layer of flavor, some enjoy a splash of brandy in addition to, or instead of, bourbon or rum. Feel free to experiment with combinations to find your perfect balance, tailoring the strength and flavor to your liking. Always remember to drink responsibly.
Non-Alcoholic Eggnog Version Tips
Not everyone desires an alcoholic beverage, especially during family-friendly holiday gatherings. Fortunately, creating a delicious non-alcoholic eggnog is incredibly simple and results in a creamy, flavorful drink that everyone can enjoy, regardless of age or preference. This version ensures that the comforting taste and festive spirit of homemade eggnog are accessible to all. The rich dairy, sweet eggs, and aromatic spices provide ample flavor on their own, proving that you don’t need alcohol to create a truly delightful and satisfying beverage. It’s a fantastic option for designated drivers, children, or anyone simply preferring a booze-free treat.
Omit the alcohol entirely
The simplest tip for a non-alcoholic eggnog is to omit the alcohol entirely. This recipe is designed to be delicious and robust even without bourbon or rum. To enhance the flavor profile in the absence of spirits, you might consider slightly increasing the amount of vanilla extract or adding a tiny pinch of ground cloves or allspice to the mixture. These subtle adjustments can help round out the flavors and add an extra layer of warmth without introducing any alcohol. The focus remains on the fresh, quality ingredients and the rich, creamy texture, ensuring that your non-alcoholic eggnog is every bit as enjoyable and festive as its spiked counterpart, making it a perfect holiday drink for all.
Tips for Creamy Eggnog Texture
Achieving that coveted creamy eggnog texture is paramount to a truly exceptional homemade eggnog. It’s the hallmark of a well-made beverage, promising a smooth, velvety mouthfeel with every sip. Several factors contribute to this luxurious consistency, from the initial ingredient selection to the final chilling process. By paying close attention to these details, you can ensure your eggnog is free from lumps and possesses the perfect richness. Mastering these tips will elevate your homemade eggnog from good to truly outstanding, making it a highlight of your festive spread and ensuring a delightful creamy eggnog for all.
Use fresh, quality ingredients
The foundation of a creamy eggnog texture begins with the quality of your ingredients. Always use fresh, large eggs and high-fat dairy products like whole milk and heavy cream. Fresh eggs contribute to a smoother emulsion when whisked, while the fat content in the dairy is essential for richness and body. Avoid using skim milk or half-and-half, as they will result in a thinner, less satisfying texture. Quality vanilla extract and freshly grated nutmeg also contribute to the overall sensory experience, ensuring that the primary flavors are clean and vibrant, enhancing the creamy feel without any artificial notes. This commitment to quality pays dividends in the final taste and texture.
Whisk eggs thoroughly
This step cannot be overstressed for a truly creamy eggnog. Vigorously whisking the eggs with the sugar until the mixture is pale, thick, and almost ribbon-like is crucial. This process not only dissolves the sugar but also creates an emulsion that traps air, contributing to the eggnog’s silky texture. Insufficient whisking can lead to a thinner consistency and visible egg strands, which detract from the desired creaminess. Use an electric mixer for best results, ensuring the mixture is significantly lighter in color and volume before moving on to incorporating the dairy. A well-whisked base is the secret to a professional-grade creamy eggnog.
Chill it really well
Proper chilling is perhaps the most underrated aspect of achieving a truly creamy eggnog. While the liquid ingredients are initially combined at room temperature, the cold temperature during chilling allows the fats in the dairy to solidify slightly and the mixture to thicken naturally. This process results in a noticeably richer and more viscous texture. A minimum of two hours is recommended, but chilling your homemade eggnog overnight will yield an even more luxurious, velvety consistency. The cold also mutes the immediate sweetness, allowing the subtle spice notes to come forward, making it a perfectly balanced and incredibly refreshing drink. Consider serving it alongside our delicious Peanut Butter Brownie Swirl Cookies for a delightful pairing.
Storing Leftover Delicious Eggnog
Proper storage of leftover delicious eggnog is essential to maintain its freshness, flavor, and safety. Given that homemade eggnog contains fresh dairy and eggs, it requires careful handling and refrigeration. While it’s often so delicious that leftovers are rare, knowing how to store it correctly ensures you can enjoy every last drop without worry. Following simple guidelines will help preserve the creamy texture and aromatic spices, allowing you to savor your homemade creation for a few extra days. Proper storage extends the enjoyment of this delightful holiday drink beyond its initial serving.
Refrigerate up to three days
To keep your delicious eggnog at its best, transfer any leftovers into an airtight container immediately after serving. A glass pitcher with a tight-fitting lid or a sealed jar works perfectly. Store it in the coldest part of your refrigerator. Homemade eggnog, due to its fresh ingredients, should be consumed within three days. While some recipes suggest longer, it’s always safer to err on the side of caution with dairy and raw eggs. Before serving chilled eggnog again, give it a gentle stir, as some separation may occur naturally. Always check for any off-odors or unusual textures before consuming to ensure it’s still fresh and safe to enjoy.
Make Ahead Eggnog for Holidays
Making eggnog ahead of time is a brilliant strategy for reducing holiday stress and ensuring your festive gatherings run smoothly. This approach not only frees up valuable time on the day of your event but also allows the flavors of your homemade eggnog to deepen and meld beautifully. Like many complex beverages, eggnog benefits significantly from a period of rest, allowing the vanilla, nutmeg, and any added spirits to fully integrate with the dairy and egg base. Planning ahead means you can simply pour and serve, providing a delightful, perfectly flavored holiday drink with minimal last-minute fuss, making your celebration more enjoyable.
Prepare a day or two early
To truly enhance the flavor of your homemade eggnog, prepare it a day or two before you plan to serve it. After completing all the mixing steps, transfer the eggnog to an airtight container and refrigerate it. During this extended chilling period, the individual notes of vanilla, fresh nutmeg, and any bourbon or rum will harmonize, creating a more complex, well-rounded, and utterly delicious flavor profile. This “aging” process allows the flavors to mature, resulting in a smoother, more refined holiday drink. It’s a simple trick that makes a considerable difference, delivering a richer and more satisfying taste experience that your guests will surely appreciate. Enjoy this rich treat with our Quick Italian Cream Cake for a truly decadent holiday spread.
Homemade Eggnog Nutrition Facts
Understanding the homemade eggnog nutrition facts can help you enjoy this classic holiday drink responsibly. While eggnog is undeniably a rich and indulgent treat, being aware of its general nutritional content allows for mindful consumption, especially during festive periods when tempting foods and beverages are abundant. It’s important to remember that exact nutritional values can vary significantly based on ingredient choices, specific brands of dairy, and whether alcohol is added. This section offers a general overview to help you make informed decisions while still savoring every delicious sip of your creamy eggnog.
Calories and sugar per serving
Given its ingredients, homemade eggnog is typically rich in calories and sugar. A single serving can vary but generally contains a moderate to high amount of calories, primarily from the whole milk, heavy cream, and added sugar. The sugar content is also considerable, contributing to the drink’s sweetness. If you’re monitoring your sugar intake, you might consider slightly reducing the sugar in the recipe or using a sugar substitute, though this may alter the texture. Keep in mind that a serving of spiked eggnog will also include additional calories from the alcohol. Moderation is key to enjoying this delightful holiday beverage without overindulging.
Fat, carbs, protein details
Homemade eggnog is also notably rich in fat, predominantly from the heavy cream and whole milk, contributing to its signature creamy texture and indulgent mouthfeel. Carbohydrates are primarily derived from the sugar, while eggs contribute a good amount of protein, making it a fairly balanced, albeit rich, nutritional profile within its category. While it’s not a low-fat or low-carb drink, it does offer some nutritional components. Enjoying a smaller portion or opting for the non-alcoholic version can help manage the overall intake of these macronutrients while still relishing the wonderful flavors of your homemade eggnog during the holiday season.
Adjust Your Eggnog Flavors
One of the great advantages of making homemade eggnog is the ability to adjust your eggnog flavors precisely to your personal preference. This customization allows you to create a unique version that perfectly suits your taste buds or complements your holiday menu. Don’t feel bound by the exact measurements in the recipe; think of them as a starting point. Experimentation is encouraged, giving you the freedom to explore different spice intensities or creative toppings. Personalizing your creamy eggnog ensures that every glass is a reflection of your culinary style, making it even more special and enjoyable for you and your guests.
Tweak nutmeg and vanilla
The core spices of eggnog are nutmeg and vanilla, and tweaking their amounts is the easiest way to adjust your eggnog flavors. If you love a bold, spicy kick, feel free to add a bit more freshly grated nutmeg. If you prefer a milder spice, reduce it slightly. Similarly, the vanilla extract can be increased for a more pronounced aromatic sweetness or slightly decreased if you want other flavors to stand out. Consider adding a pinch of other warm spices like cinnamon, allspice, or a tiny hint of clove for added complexity. Always taste and adjust incrementally until you hit your ideal balance, ensuring your homemade eggnog is perfectly spiced.
Experiment with toppings
Beyond the classic fresh nutmeg, experimenting with toppings can add an extra layer of flavor and visual appeal to your homemade eggnog. A dollop of whipped cream, dusted with cocoa powder or finely chopped chocolate shavings, can transform it into a decadent dessert drink. For a touch of festive color and a burst of flavor, try a few cranberries or a candied ginger piece. You can also rim your glasses with sugar and cinnamon for an extra sweet and spiced touch. Don’t forget to share your creative eggnog ideas on Pinterest and follow us on Instagram for more inspiration! These small additions can significantly enhance the drinking experience, making each glass of your delicious eggnog a truly personalized treat. For more sweet ideas, pair your eggnog with our Snickerdoodle Cobbler.
