
Valentine’s Day fudge is a delightful way to show affection. This simple homemade fudge recipe guarantees creamy, rich chocolate fudge perfect for sharing. With just a few ingredients, you can create sweet treats for your loved ones, making this holiday baking truly special. It’s an easy dessert everyone will adore.
Key Takeaways
- Homemade fudge is simple to prepare using minimal ingredients.
- Achieve a consistently creamy texture through careful melting and stirring.
- Customize your fudge with various festive toppings and unique flavor additions.
- Learn optimal methods for cooling, slicing, serving, and storing your delicious treat.
Making fudge is easier than you think. Enjoy the sweet aroma filling your kitchen. The process is straightforward and rewarding. Share this delightful treat with someone special. It’s a perfect gesture of love.
Crafting Perfect Valentine’s Day Fudge
Gather Your Essential Tools
Before you begin your sweet journey to homemade fudge, ensure you have all your essential tools ready. Preparation is key to a smooth and enjoyable baking experience. You’ll need a heavy-bottomed saucepan, preferably non-stick, to prevent scorching and ensure even heat distribution while melting your ingredients. A sturdy rubber spatula or wooden spoon will be indispensable for constant stirring, which is crucial for achieving that signature creamy fudge consistency. For setting, a square baking dish, typically 8×8 or 9×9 inches, is ideal. Lining this dish with parchment paper is a smart move; it makes lifting the fudge out incredibly easy once it’s set and simplifies the cleanup process. A pair of kitchen scissors to trim the parchment and a measuring cup and spoons will complete your basic setup. Having these items at hand before you start will help you craft perfect Valentine’s Day fudge effortlessly.
Essential Ingredients for Blissful Fudge
Creating blissful fudge for Valentine’s Day requires just a few high-quality ingredients. The magic lies in their combination and how they are handled. Opting for good quality chocolate and fresh dairy will significantly impact the final taste and texture of your homemade fudge, ensuring a truly indulgent experience for your romantic treats.
Chocolate Chips You Will Need
The star of any chocolate fudge is, naturally, the chocolate itself. For this easy dessert, semi-sweet chocolate chips are often preferred as they offer a balanced sweetness that isn’t overly intense. However, feel free to experiment with milk chocolate for a sweeter profile, or dark chocolate for a richer, more sophisticated flavor. High-quality chocolate chips melt more smoothly and consistently, contributing to a wonderfully creamy fudge texture. You’ll typically need a standard 12-ounce bag for most recipes, ensuring ample chocolatey goodness in every square.
Sweetened Condensed Milk Details
Sweetened condensed milk is the backbone of many no-bake dessert recipes, and fudge is no exception. This thick, sweet dairy product provides both the necessary sweetness and the creamy, emulsified base that holds the fudge together. Make sure you use sweetened condensed milk, not evaporated milk, as they are very different! The high sugar content helps prevent crystallization, resulting in a smooth, melt-in-your-mouth texture. It’s a simple ingredient that plays a pivotal role in achieving that perfect, luscious consistency.
Butter and Vanilla Needed
Butter adds richness and a lovely sheen to your chocolate fudge, contributing to its luxurious feel. A small amount goes a long way in enhancing the overall flavor and mouthfeel. Unsalted butter is usually recommended so you can control the saltiness, though salted butter can also be used, keeping in mind it will add a subtle savory note. Vanilla extract, on the other hand, is a flavor enhancer that beautifully complements the chocolate. Adding it towards the end of the cooking process preserves its delicate aroma and provides a warm, inviting finish to your festive sweets. These two simple ingredients work together to elevate the basic chocolate flavor, making your Valentine’s Day fudge truly special.
Simple Steps to Homemade Fudge
Making homemade fudge doesn’t have to be complicated. With just a few straightforward steps, you can create a batch of delightful Valentine’s Day treats that will impress your loved ones. This easy dessert is perfect for anyone, even those new to holiday baking.
Prepare Your Baking Dish
Before you even think about melting chocolate, prepare your baking dish. Line an 8×8 or 9×9 inch square baking dish with parchment paper, leaving an overhang on two sides. This overhang acts as handles, making it incredibly easy to lift the entire block of set fudge out of the pan later. You can also lightly grease the dish before lining to help the parchment paper stick better. This small step is crucial for effortless removal and clean-up, ensuring your beautiful creamy fudge maintains its perfect shape.
Combine and Melt Ingredients
Now, it’s time for the magic to happen. In your heavy-bottomed saucepan, combine the chocolate chips and sweetened condensed milk. Place the saucepan over low to medium-low heat. The key here is patience and gentle heat. Slowly, the chocolate chips will begin to melt into the thick, sweet condensed milk. Stir continuously with your spatula or spoon, ensuring the mixture doesn’t stick to the bottom or sides of the pan. This gentle, consistent stirring prevents scorching and promotes an even, smooth melt. As the chocolate fully incorporates, you’ll notice the mixture becoming glossy and thick. This careful melting process is fundamental to achieving a perfectly smooth fudge consistency, a hallmark of excellent homemade fudge.
Achieving Smooth Fudge Consistency
The quest for perfectly smooth fudge is a delightful one, and it’s within reach with careful attention to detail during the melting and mixing phases. The texture is what truly distinguishes exceptional chocolate fudge, making it irresistibly creamy and satisfying. Many find creating this rich texture to be as enjoyable as tasting the final product.
Continuous Stirring is Key
As your chocolate chips and sweetened condensed milk mingle over the heat, continuous stirring is paramount. This isn’t just about preventing the mixture from burning; it’s also about achieving a homogenous and velvety consistency. Stirring constantly ensures that all the chocolate melts evenly and fully integrates with the condensed milk, preventing any lumps or grainy textures. Use a rubber spatula to scrape the bottom and sides of the pan diligently, ensuring no part of the mixture gets left behind or overheats. This constant motion also helps to emulsify the ingredients, creating a stable and smooth base for your holiday baking creation. Without this crucial step, your sweet treats might end up with an undesirable, uneven texture.
Add Vanilla, Remove from Heat
Once the chocolate mixture is completely smooth and glossy, with no visible lumps, it’s time to remove it from the heat. This is the perfect moment to stir in your butter and vanilla extract. Adding vanilla after removing the pan from the heat helps to preserve its delicate flavor and aromatic qualities, as high heat can cause it to evaporate quickly. Stir vigorously until the butter is fully melted and incorporated, and the vanilla is evenly distributed throughout the fudge mixture. The addition of butter will lend a beautiful sheen and a richer mouthfeel to your Valentine’s Day fudge. You’ll notice the mixture becoming even more luxurious and shiny as you stir. This meticulous blending ensures every bite offers a wonderfully consistent and flavorful experience.
Pouring and Setting Your Fudge
After perfecting the consistency of your homemade fudge, the next crucial steps involve pouring it correctly and allowing it to set properly. These stages are vital for achieving the clean-cut squares and firm texture characteristic of delicious chocolate fudge, ready for serving as easy dessert or romantic gifts.
Spread Evenly in Dish
Carefully pour the warm fudge mixture into your prepared baking dish lined with parchment paper. Using your rubber spatula, spread the fudge evenly across the bottom of the dish, creating a smooth, uniform layer. For a truly professional finish, gently tap the dish on your countertop a few times to release any trapped air bubbles and help the fudge settle flat. This ensures that when you cut your fudge later, each piece will be consistently thick and visually appealing. An even spread is important not just for aesthetics but also for uniform setting, guaranteeing every piece of your Valentine’s Day fudge offers the same delightful experience.
Chill Until Firmly Set
Once the fudge is spread, it’s time for the chilling process. Place the baking dish in the refrigerator for at least 2 to 4 hours, or until the fudge is firmly set. The exact time can vary depending on your refrigerator’s temperature and the thickness of your fudge layer. You’ll know it’s ready when it’s cool to the touch and firm enough that a light press with your finger leaves no indentation. Rushing this step can result in soft, sticky fudge that is difficult to cut. For best results, allow it ample time to chill. Once firm, use the parchment paper overhangs to lift the entire block of fudge from the dish onto a cutting board, preparing it for slicing. This meticulous chilling ensures your sweet treats are perfectly firm and ready for enjoyment. For more dessert inspirations, you might enjoy trying this quick Italian cream cake.
Adding Festive Valentine’s Day Touches
While the rich, creamy chocolate fudge is delicious on its own, adding festive Valentine’s Day touches transforms it into an even more special holiday treat. These simple decorations elevate your easy dessert from homemade fudge to a celebratory delight, perfect for romantic treats or delightful gift ideas.
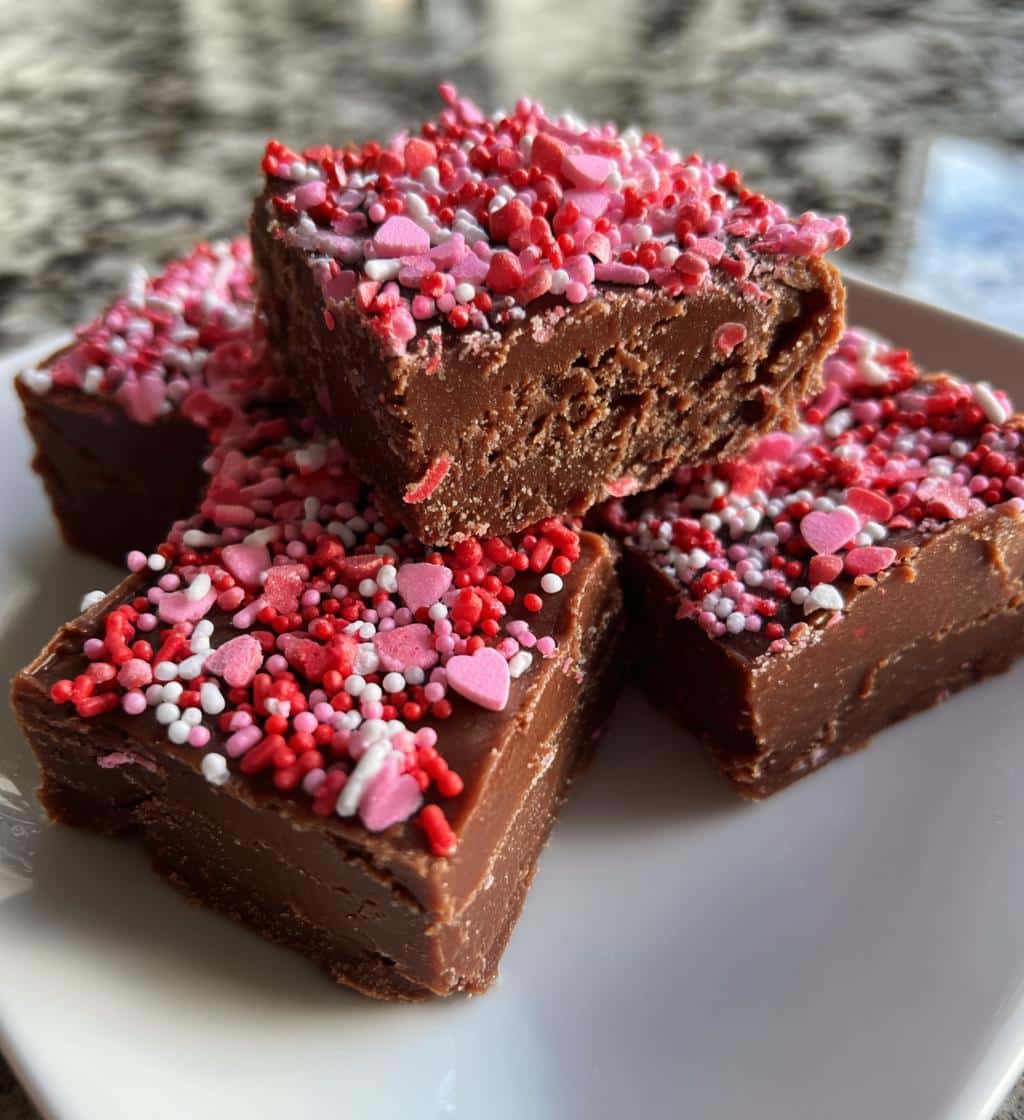
Sprinkle with Pink and Red
Once you’ve poured your warm fudge into the prepared dish, but before it begins to set, is the ideal time to add decorative sprinkles. A generous dusting of pink and red sprinkles, small candy hearts, or even edible glitter will instantly give your fudge a celebratory Valentine’s theme. The warmth of the fudge will help the sprinkles adhere, preventing them from falling off once cooled. You can create patterns or simply scatter them artfully. This small addition makes your sweet treats visually appealing and reinforces the holiday spirit. Get creative and make your Valentine’s Day fudge truly unique and personal. Consider visiting our Pinterest page for more visual inspiration on festive desserts!
Quick Times for Delicious Fudge
One of the many appealing aspects of this homemade fudge recipe is its relatively quick preparation time. This makes it an ideal easy dessert for busy schedules, allowing you to create impressive romantic treats without spending hours in the kitchen. Even though it’s quick, the result is a wonderfully rich and creamy fudge.
Prep and Cook Time
The hands-on time for crafting this delightful chocolate fudge is remarkably short. You can expect to spend about 10-15 minutes on prep work, which includes gathering your ingredients and lining your baking dish. The cooking process, involving melting and stirring the chocolate and sweetened condensed milk, typically takes an additional 10-15 minutes. This means your active kitchen time for this quick recipe is usually under 30 minutes, making it a fantastic option for a last-minute holiday baking project or sweet treats. The efficiency of this recipe allows you to focus more on the decorative touches and less on complex culinary steps, ensuring a stress-free experience.
Total Time to Enjoy
While the active preparation is quick, the fudge does require patience for setting. After the 20-30 minutes of prep and cook time, your Valentine’s Day fudge will need at least 2 to 4 hours of chilling in the refrigerator to become firm enough to cut and enjoy. For the best consistency and easiest slicing, many prefer to let it chill overnight. So, while the immediate work is minimal, plan for the necessary setting time to ensure your creamy fudge reaches its perfect texture. This total time ensures you have a perfectly firm, ready-to-serve dessert, making it one of the most rewarding gift ideas to prepare.
Serving and Storing Your Fudge
Once your Valentine’s Day fudge has perfectly set, the final steps involve cutting it into appealing pieces and understanding how to keep it fresh. Proper serving and storage methods ensure that your delicious sweet treats remain enjoyable for longer, whether they are for romantic treats or general dessert enjoyment.
Cut into Perfect Squares
After chilling, lift the fudge out of the pan using the parchment paper overhangs and place it on a clean cutting board. For clean, neat squares, use a large, sharp knife. Heat the knife under hot water and wipe it dry before each cut; this helps create smooth edges and prevents the fudge from sticking. Cut the fudge into 1-inch to 1.5-inch squares, depending on your preference. Wipe the knife clean between cuts for the sharpest results. These bite-sized portions are ideal for sharing and make elegant gift ideas or additions to a dessert platter. This quick recipe yields consistently delightful pieces.
Room Temperature Freshness Tips
Fudge, particularly chocolate fudge made with sweetened condensed milk, holds up well at room temperature for a few days. Store it in an airtight container to prevent it from drying out or absorbing other odors. Place a piece of parchment paper between layers of fudge to prevent sticking. Kept this way, your homemade fudge can remain fresh and delicious for up to 3-5 days. It’s often preferred at room temperature for its softer, melt-in-your-mouth texture.
Refrigerate for Longer Life
If you want to extend the shelf life of your Valentine’s Day fudge, refrigeration is the answer. Store the fudge in an airtight container in the refrigerator for up to 2-3 weeks. The colder temperature will make the fudge firmer, so you might want to let it sit out for 10-15 minutes before serving to soften slightly and bring out its full flavor. Again, separating layers with parchment paper is a good practice. This method is excellent if you’ve made a large batch or want to prepare your festive sweets well in advance. For more dessert recipes, check out our collection of desserts.
Nutrition Facts for Your Treat
When indulging in delightful homemade fudge, it’s helpful to have a general understanding of its nutritional content. While Valentine’s Day fudge is undeniably a sweet treat, knowing the approximate facts can help you enjoy it mindfully, especially if you’re gifting it as part of romantic treats or managing dietary considerations.
Calories and Fat per Square
Given its primary ingredients of chocolate, sweetened condensed milk, and butter, fudge is calorie-dense and rich in fats. A single 1-inch square of homemade fudge can typically range from 80-120 calories, depending on the exact recipe, ingredient brands, and any added customizations like nuts or extra chocolate. The fat content per square will also be significant, largely due to the cocoa butter in chocolate and the dairy fats. It’s important to remember that fudge is an indulgent dessert, meant to be enjoyed in moderation. These quick recipe notes serve as a general guideline for your sweet treats.
Carbohydrates and Protein Info
Fudge is primarily a source of carbohydrates, predominantly from the sugars in the sweetened condensed milk and chocolate. Each square can contain 10-15 grams of carbohydrates or more. While not a significant source of protein, there will be trace amounts from the milk solids in the condensed milk and chocolate. It’s a treat designed for sweetness and satisfaction, making it a perfect easy dessert for special occasions rather than a daily staple. If you’re looking for other savory meals to balance out your sweet indulgences, explore delicious options like this crispy parmesan chicken with a rich garlic sauce, which can be found in our main course category.
Creative Customization Ideas for Fudge
One of the joys of making homemade fudge is the endless possibilities for customization. Beyond the classic chocolate fudge, you can easily introduce new flavors and textures to create unique Valentine’s Day fudge variations that perfectly suit your taste or serve as truly personalized gift ideas. Don’t be afraid to experiment with these creative additions.
Adding Nuts or Flavors
Elevate your simple ingredients by incorporating crunchy nuts like walnuts, pecans, or almonds into the warm fudge mixture just before pouring it into the dish. Toasting the nuts beforehand can enhance their flavor significantly. For flavor variations, consider adding a teaspoon of peppermint extract for a minty chocolate treat, almond extract for a subtle nutty note, or even a touch of orange zest for a vibrant citrusy twist. These additions transform your easy dessert into a gourmet experience. If you enjoy experimenting with flavors, you might also like trying these Butterfinger balls for another delightful sweet treat.
Swirl in Peanut Butter
For peanut butter lovers, a simple swirl can add a delicious dimension to your chocolate fudge. After pouring about half of the chocolate fudge into the prepared dish, dollop spoonfuls of smooth peanut butter over it. Then, cover with the remaining chocolate fudge and use a knife or skewer to gently swirl the peanut butter through the top layer. This creates beautiful marbling and an irresistible flavor combination. Ensure the peanut butter is smooth and at room temperature for easier swirling. This DIY fudge technique results in stunning festive sweets.
Enhance with Pinch of Salt
A tiny pinch of sea salt, sprinkled over the top of the fudge just after it’s poured (or mixed into the warm fudge before setting), can dramatically enhance the chocolate flavor. The salt acts as a counterpoint to the sweetness, creating a more complex and balanced taste profile. This simple trick makes your creamy fudge even more addictive, drawing out the depth of the chocolate and making your sweet treats truly memorable. It’s a professional chef’s secret often used in dessert recipes to achieve a perfect flavor balance.
Smart Substitutions and Freezing
Understanding smart substitutions and proper freezing techniques can expand your fudge-making horizons, offering flexibility for dietary needs or future enjoyment. These tips ensure your Valentine’s Day fudge remains a versatile and convenient sweet treat for any occasion.
Chocolate Bar Alternatives
If you don’t have chocolate chips on hand, quality baking chocolate bars can be a great alternative. Simply chop them into small, uniform pieces to ensure they melt evenly. For a truly rich chocolate fudge, using high-quality baking bars with a higher cocoa percentage can yield a deeper, more intense flavor. Alternatively, a combination of good quality cocoa powder and a bit of extra butter or coconut oil can be used, though this might require slight adjustments to the liquid content to maintain the perfect consistency. Remember, the quality of your chocolate directly impacts the final taste of your easy dessert. Learn more about the history and variations of fudge on Wikipedia.
Dairy-Free Fudge Options
For those avoiding dairy, delicious dairy-free fudge is entirely possible. Substitute regular chocolate chips with dairy-free chocolate chips, which are readily available in most grocery stores. For the sweetened condensed milk, look for dairy-free alternatives made from coconut milk or oat milk. These alternatives perform similarly to their dairy counterparts, providing the necessary sweetness and creamy texture for your no-bake dessert. The resulting fudge will be just as rich and satisfying, allowing everyone to enjoy your homemade fudge. You can find out more about sweetened condensed milk on Wikipedia, including its history and various uses.
How to Freeze Safely
Fudge freezes exceptionally well, making it a perfect make-ahead sweet treat or a way to preserve leftovers. To freeze your Valentine’s Day fudge, cut it into squares first. Wrap each square tightly in plastic wrap, then place the wrapped pieces in an airtight freezer-safe container or a heavy-duty freezer bag. Label with the date. Fudge can be frozen for up to 3 months without significant loss of quality. When you’re ready to enjoy, simply transfer the desired amount of fudge from the freezer to the refrigerator overnight, or let it thaw at room temperature for a few hours. This is a fantastic solution for gift ideas or ensuring you always have a delightful treat on hand. Don’t forget to follow Carina Recipes on Instagram for more great recipes!
Valentine’s Day Fudge: Enjoy the Bliss!
Crafting Valentine’s Day fudge is more than just making a dessert; it’s an act of love. This easy homemade recipe provides a simple path to creating creamy, rich, and utterly blissful chocolate fudge. Whether you’re preparing it for a loved one, a festive gathering, or simply to treat yourself, the satisfaction of making your own sweet treats is unmatched. From gathering simple ingredients to adding those special festive touches, every step contributes to a memorable culinary experience. So go ahead, enjoy the process, savor each decadent bite, and spread the joy of these romantic treats. Happy holiday baking!