
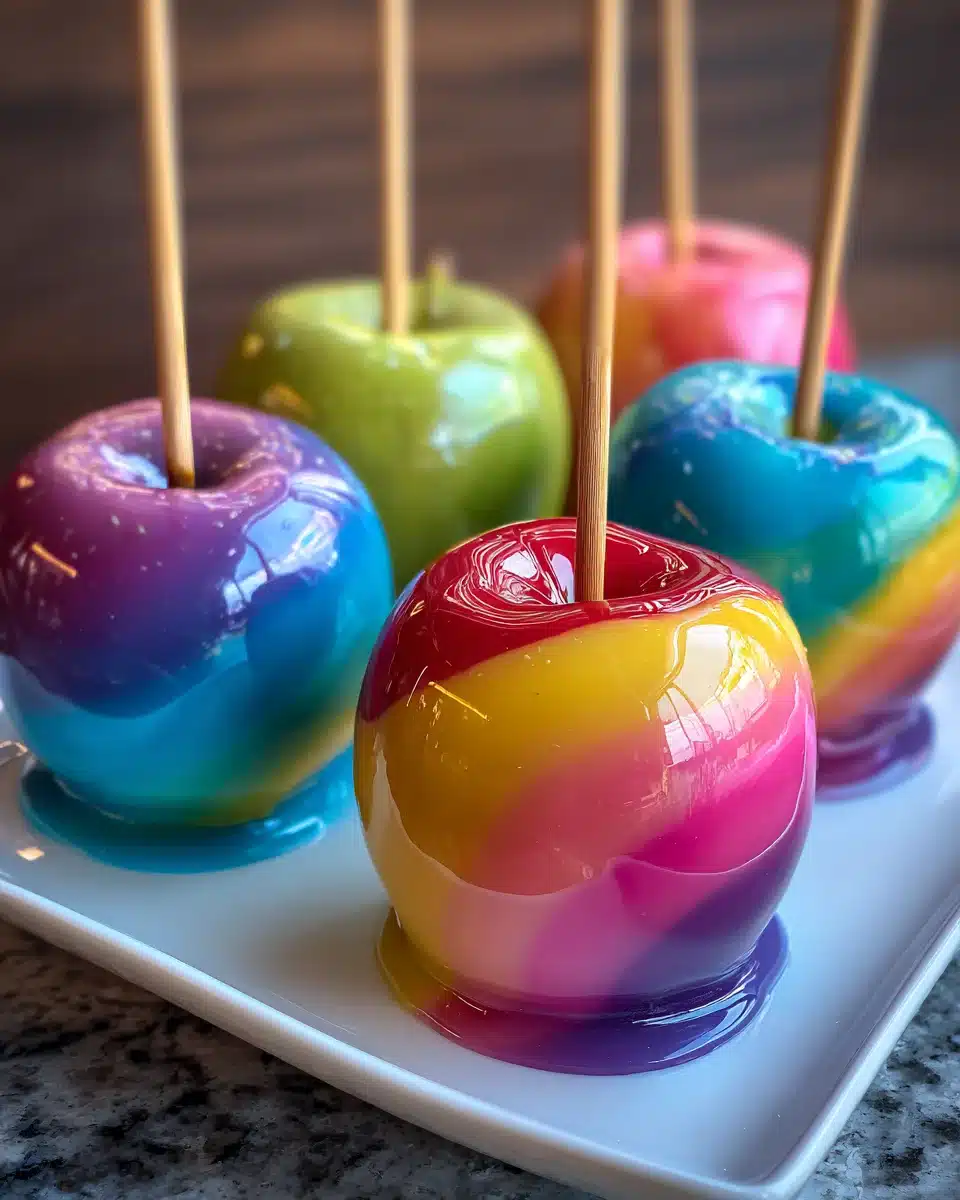
Rainbow candy apples are a delightful and visually stunning treat perfect for any occasion. Creating these sweet, colorful confections at home is simpler than you might think, offering a rewarding experience. They bring a festive touch to celebrations, making them a memorable snack for guests.
Key Takeaways
- Rainbow candy apples are festive and enjoyable to make, suitable for any celebration.
- Proper apple preparation and achieving the hard crack stage for the syrup are crucial for success.
- Divide and color the candy syrup to create stunning rainbow effects on each apple.
- Master quick dipping techniques, ensure proper cooling, and store correctly for optimal freshness.
- Explore fun variations like chocolate drizzle and understand basic nutrition.
These vibrant candy apples bring joy. Their crisp shell offers delightful crunch. Making them is a creative kitchen project. Share these sweet treats widely. They’re sure to impress everyone.
Why Make Rainbow Candy Apples?
Creating homemade candy apples, especially with a stunning rainbow swirl, offers more than just a sweet treat; it provides a memorable activity and a delightful outcome. These vibrant, crisp apples encased in a shimmering candy shell are a true feast for the eyes and the palate. They stand out from ordinary desserts, adding a whimsical touch to any gathering. The process itself is part of the fun, transforming simple ingredients into edible works of art. Whether you’re a seasoned baker or a kitchen novice, the satisfaction of crafting these colorful apples is immense.
Perfect for Celebrations
Rainbow candy apples are the quintessential party treat. Their bright, cheerful colors make them ideal for birthdays, holidays, themed parties, or even just a casual get-together with friends and family. Imagine the delighted faces as guests encounter these whimsical desserts. They serve as fantastic centerpieces, edible party favors, or simply a joyful dessert that sparks conversation. The visual appeal alone makes them a hit, especially when paired with other festive foods. For instance, alongside these colorful apples, you might serve something equally celebratory like a quick Italian cream cake for a varied dessert spread.
Fun and Easy Dessert
Despite their elaborate appearance, making rainbow candy apples is surprisingly straightforward. The steps involve basic candy-making principles, making it an accessible project for various skill levels. It’s a fantastic activity for families, allowing children (with adult supervision for the hot syrup) to participate in the artistic coloring and dipping process. The result is a homemade candy apple that is both beautiful and delicious, proving that stunning desserts don’t always require complex techniques. Plus, the rewarding crunch of the crisp apples beneath the sweet, hard candy shell is an experience everyone loves.
Essential Ingredients and Tools
Before you begin your candy apple adventure, gathering all the necessary ingredients and tools is crucial. This preparation ensures a smooth process, allowing you to focus on the fun parts of creating your rainbow swirl masterpiece. Having everything at hand will prevent last-minute rushes and ensure your candy apples turn out perfectly.
Fresh Apple Choices
The foundation of a great candy apple is, of course, a great apple. Choose firm, crisp apples that can withstand the heat of the syrup and offer a satisfying crunch. Popular choices include Granny Smith for a tart contrast to the sweet candy, or Honeycrisp and Fuji for a sweeter, equally crisp base. Avoid overly soft or mealy apple varieties. Small to medium-sized apples work best, as they are easier to handle and dip, and provide a more manageable serving size. Make sure they are free from bruises or blemishes, as these can affect both the appearance and texture of your finished treat.
Pantry Staples You Need
The candy coating itself requires simple pantry staples. You’ll need granulated sugar, light corn syrup (which helps prevent crystallization), and water. These three ingredients form the base of your clear candy shell. For the vibrant rainbow effect, gel food colors are absolutely essential. Liquid food colors can dilute the syrup, making it harder to reach the correct consistency, so always opt for concentrated gel colors for the best results. A touch of flavoring, such as vanilla extract, can also be added to the syrup for an extra layer of taste, though it’s optional.
Key Equipment for Success
Several pieces of equipment are indispensable for successful candy apple making. A heavy-bottomed saucepan is vital for cooking the syrup evenly and preventing scorching. A candy thermometer is non-negotiable; precise temperature control is key to achieving the hard crack stage (around 300-310°F or 149-154°C), which creates the perfect crisp candy shell. You’ll also need wooden candy apple sticks, parchment paper or a silicone mat for cooling, and several small heatproof bowls for dividing and coloring your syrup. Having a pastry brush on hand to wipe down sugar crystals from the sides of the saucepan can also be helpful.
Preparing Apples for Dipping
Proper apple preparation is often overlooked but is a critical step for ensuring the candy syrup adheres smoothly and evenly. Any wax or residue on the apple’s skin can prevent the candy from sticking, leading to a patchy, imperfect coating. Taking the time to prepare your apples correctly will save you frustration later and result in beautiful, glossy candy apples.
Washing and Drying Thoroughly
Most apples are coated with a natural wax or commercial food-grade wax to enhance their appearance and extend shelf life. This wax must be removed for the candy syrup to properly adhere. Wash your apples thoroughly under hot water, scrubbing gently with a vegetable brush or a clean cloth to remove any wax or residue. Some people even briefly dip apples in boiling water for about 10 seconds, then immediately into ice water, which helps melt and remove wax. After washing, it is absolutely crucial to dry the apples completely. Even a tiny bit of moisture can cause the candy syrup to seize or create imperfections in the coating. Use a clean towel to buff each apple until it is perfectly dry and shiny.
Inserting Wooden Sticks Firmly
Once your apples are clean and dry, it’s time to insert the candy apple sticks. Choose sturdy wooden sticks, often found in craft stores or baking supply sections. Insert each stick firmly into the stem end of the apple, pushing it about halfway through the apple’s core. This provides a stable handle for dipping and ensures the apple remains securely attached to the stick as you coat it with the hot syrup. If the apple feels loose on the stick, remove and reinsert it, or choose a different apple. A secure stick is essential for safe and effective dipping, preventing any accidents with the hot candy mixture. This step is as important as achieving the hard crack stage for the syrup, ensuring your candy apples are both delightful and manageable.
Crafting the Perfect Candy Syrup
The candy syrup is the heart of your rainbow candy apple. Achieving the correct consistency and temperature is paramount for a beautifully crisp, clear candy shell. This stage requires attention to detail and patience, but the results are incredibly rewarding when done right. Mastering this step is what transforms simple sugar into a delightful, hard candy coating.
Combining Sugar, Syrup, Water
In a heavy-bottomed saucepan, combine your granulated sugar, light corn syrup, and water. The corn syrup is critical here, as it helps prevent the sugar from crystallizing, which can lead to a grainy or dull candy shell. Stir the mixture gently over medium heat until the sugar completely dissolves. Avoid vigorous stirring once the sugar has dissolved, as this can encourage crystallization. Using a pastry brush dipped in water to wipe down any sugar crystals that form on the sides of the pan can also help maintain a smooth syrup. Attach your candy thermometer to the side of the pan, ensuring the tip does not touch the bottom.
Reaching Hard Crack Stage
Continue cooking the syrup without stirring until it reaches the hard crack stage, which is typically between 300-310°F (149-154°C). This precise temperature is where the sugar concentration is at its highest, resulting in a candy that is brittle and hard when cooled. Monitoring with a reliable candy thermometer is absolutely essential; guessing the temperature can lead to sticky, soft candy or burnt sugar. If the syrup doesn’t reach the hard crack stage, your candy coating will be soft and chewy, rather than brittle and satisfyingly crunchy. As the syrup cooks, watch for color changes; it will turn from clear to a very pale amber, which is normal for sugar syrup reaching high temperatures. For more information on candy making stages, you can refer to Wikipedia’s explanation of the hard crack stage. Once the correct temperature is reached, immediately remove the pan from the heat to prevent further cooking.
Adding Vibrant Rainbow Colors to Syrup
This is where the magic truly happens, transforming clear candy syrup into a spectrum of vibrant hues. Adding colors to your candy mixture is not just about aesthetics; it’s about creating an edible craft that will impress everyone. The key is to work efficiently and have all your colors ready before you begin.
Dividing Hot Candy Mixture
Once your candy syrup has reached the hard crack stage and has been removed from the heat, you need to work quickly. Carefully divide the hot candy mixture into several small, heatproof bowls. The number of bowls will depend on how many different rainbow colors you wish to create. For a classic rainbow, you might aim for 5-7 colors. Be extremely cautious when handling the hot syrup; it can cause severe burns. Use oven mitts and pour slowly and steadily. Having your bowls pre-arranged and ready for the syrup will ensure a smoother transition and prevent the syrup from cooling too much before coloring.
Tinting with Gel Food Colors
Now comes the fun part: adding the color! Use high-quality gel food colors for the best results. Unlike liquid food colors, gel colors are highly concentrated and won’t thin out your syrup, maintaining its ideal consistency for a crisp candy shell. Add a small drop of a different gel color to each bowl of syrup. Stir gently but quickly with a clean spoon or wooden stick until the color is evenly distributed. You can add more drops for a deeper, more intense hue. Remember that the color will appear slightly darker once the candy shell hardens. Work swiftly, as the syrup will begin to cool and thicken quickly. Once colored, your syrup is ready for the dipping process.
Dipping Apples for Swirl Effect
Dipping the apples is the most artistic and visually rewarding part of making rainbow candy apples. This is where your careful preparation truly pays off, as you transform ordinary apples into dazzling, colorful treats. Achieving the perfect swirl effect requires a delicate touch and quick movements, ensuring each apple receives an even, beautiful coating.
Quick Drizzling Technique
To create a mesmerizing rainbow swirl, you won’t fully dip each apple into a single color. Instead, you’ll use a drizzling technique with your various colored syrups. Start by lightly coating the bottom of your apple in one color, then quickly rotate it. Take another colored syrup in a separate bowl and, using a spoon, drizzle it in thin lines over the apple while rotating it. Repeat this with 2-3 additional colors, overlapping and swirling them as you go. The goal is to create distinct bands of color that merge slightly, giving that iconic rainbow look. Work quickly, as the syrup will cool and harden on the apple very fast. The warmer the syrup, the easier it will be to achieve a smooth, thin coat. Keep your syrup bowls in a warm place (like a warm water bath, if possible) to maintain fluidity, but be careful not to overheat and burn the sugar.
Coating Each Apple Evenly
After the initial drizzling for the swirl, you may want to ensure a more complete and even coating. If you have extra syrup from a primary color, or if you prefer a single-color base with rainbow drizzles, you can quickly dip and twist the apple to ensure full coverage. Hold the apple by its stick, immerse it into one of your chosen colored syrups, and twist it to coat evenly. Lift it out, let any excess drip off, and then proceed with the rainbow drizzling as described above, or apply sprinkles if desired. The key is to allow the excess syrup to drip back into the bowl to prevent puddles at the base of your apple. A gentle tap against the side of the bowl can help remove drips. Place each coated apple onto prepared parchment paper immediately after dipping to begin the cooling process.
Cooling and Hardening Process
Once your rainbow candy apples are beautifully dipped, the next crucial step is allowing them to cool and harden properly. This process transforms the hot, liquid syrup into a brittle, shiny candy shell, which is essential for the characteristic crunch of a perfect candy apple. Patience here ensures a professional-looking and satisfying result.
Using Prepared Parchment Paper
As soon as you finish dipping each apple, place it gently onto a sheet of parchment paper or a silicone baking mat that has been lightly oiled (though parchment paper often suffices without oil if the syrup is cooked correctly). Do not use wax paper, as the candy shell can stick to it, making it difficult to remove without damage. Arrange the apples with enough space between them to prevent them from sticking to each other. The parchment paper provides a non-stick surface, allowing the candy shell to cool and harden without adhering to the tray or counter. This also makes for easy cleanup later on, as any drips will simply lift off with the paper.
Waiting for Firm Candy Shell
Allow the candy apples to cool completely at room temperature. This can take anywhere from 30 minutes to an hour, depending on the thickness of the coating and the ambient temperature and humidity. Resist the urge to touch or move them before the candy shell is completely firm and hard to the touch. Rushing this step can result in fingerprints, smudges, or even cracking of the candy. You’ll know they are ready when the candy shell is shiny, hard, and no longer sticky. Once fully hardened, they are ready to be stored, served, or further decorated with additional toppings like a chocolate drizzle, as you might find on other delicious desserts.
Expert Tips for Best Results
Even with a solid recipe, a few expert tips can elevate your rainbow candy apples from good to absolutely perfect. These insights address common challenges and help you achieve the best possible texture, appearance, and overall experience when making and enjoying your homemade candy apples.
Working Quickly with Syrup
The candy syrup, especially after coloring, will begin to cool and thicken rapidly. Speed is key to achieving a smooth, thin coating and vibrant swirls. Have all your apples prepped, sticks inserted, and parchment paper laid out before you even start making the syrup. Once the syrup is at the hard crack stage, divide and color it immediately, and then begin dipping without delay. If the syrup becomes too thick to work with, you can gently reheat it over very low heat for a short period, but be careful not to burn it or alter its consistency. Working swiftly ensures uniform coats and prevents unsightly lumps or streaks.
Avoiding Bruises on Apples
A pristine apple is the secret to a flawless candy apple. Bruises can lead to soft spots or discoloration under the candy shell, compromising both the texture and appearance. Handle your chosen crisp apples with care from the moment you select them. Wash them gently and avoid dropping them or bumping them against hard surfaces. When inserting the wooden sticks, apply steady pressure rather than force to prevent cracking the apple. A small bruise might not seem like much, but it can become noticeable under the glossy candy coating. This attention to detail will ensure your beautiful treats are perfect from core to shell.
Easy Cleanup Advice
Cleaning up after making candy can sometimes be daunting, but a few tricks can make it surprisingly simple. For your saucepan and any bowls that held the candy syrup, fill them with hot water immediately after use and let them soak. The hot water will dissolve the hardened sugar, making it much easier to wash. You can even gently boil water in the saucepan to melt stubborn sugar residue. For any spills on your counter, a warm, damp cloth will usually do the trick. A little patience with soaking can save a lot of scrubbing, ensuring that the joy of making rainbow candy apples isn’t diminished by a difficult cleanup.
Storing Your Rainbow Candy Apples
Once your beautiful rainbow candy apples have fully hardened, proper storage is essential to maintain their crispness, shine, and overall quality. While they are a joy to make and eat, understanding how to store them correctly ensures you can enjoy them at their best for as long as possible.
Ideal Storage Conditions
To preserve the crisp candy shell and the freshness of the apple, store your rainbow candy apples individually wrapped in cellophane or small treat bags. This protects them from humidity, which is the enemy of hard candy, as it can make the shell sticky. Store them at room temperature in a cool, dry place. Avoid refrigeration, as the cold and humid environment of a refrigerator can cause the candy shell to “sweat” or become cloudy and sticky. An airtight container can also help, but individual wrapping is best to prevent them from sticking to each other. Proper storage will keep your homemade candy apples looking and tasting great.
Enjoying Optimal Freshness
While candy apples can last for several days if stored correctly, they are truly best enjoyed within 24-48 hours of making them. This timeframe ensures the apple remains at its crispiest and the candy shell retains its perfect crunch and shine. Over time, even with ideal storage, the apple will slowly release moisture, which can eventually soften the candy coating. Plan to make your rainbow candy apples close to the time you intend to serve them for the most optimal freshness and enjoyable experience. This is similar to how you’d enjoy freshly baked cookies for maximum delight.
Nutrition Information Per Apple
While rainbow candy apples are undeniably a fun dessert recipe and a sweet treat, it’s helpful to be aware of their nutritional content, especially when planning for parties or managing dietary intake. Knowing the typical calorie and sugar details can assist in mindful enjoyment.
Calories and Sugar Details
A single rainbow candy apple typically contains a significant amount of calories and sugar due to the generous candy coating. On average, one candy apple can range from 200 to 300 calories, with a substantial portion coming from sugar, often exceeding 30-50 grams per serving. The exact figures will vary based on the size of the apple and the thickness of the candy shell. The sugars are primarily simple carbohydrates, providing quick energy. While certainly not an everyday staple, these figures simply highlight that candy apples are indeed a special occasion treat rather than a healthy snack.
Dietary Notes for Consideration
For individuals with specific dietary needs, there are a few points to consider. Those managing blood sugar levels should be mindful of the high sugar content. While the core ingredient, the apple, offers some fiber and vitamins, the candy coating significantly changes its nutritional profile. For vegan options, ensure that the sugar used is bone-char-free if that is a concern, though most granulated sugars are now processed without it. Always check ingredient labels for corn syrup to ensure it aligns with any dietary preferences. Like other rich desserts such as snickerdoodle cobbler, moderation is key for this delightful sweet treat.
Fun Variations for Rainbow Candy Apples
While the classic rainbow swirl is spectacular on its own, there’s always room for creativity! Exploring different variations can add new dimensions of flavor and texture to your homemade candy apples, making them even more personalized and exciting for your guests.
Chocolate Drizzle or Nuts
To add another layer of indulgence, consider drizzling melted chocolate over your hardened rainbow candy apples. Dark, milk, or white chocolate can create beautiful patterns and a rich flavor contrast. Simply melt your favorite chocolate, transfer it to a piping bag or a spoon, and drizzle it artfully over the cooled candy shell. For added texture and flavor, you can also press chopped nuts (like peanuts, almonds, or walnuts) onto the apple immediately after dipping, before the candy hardens completely. This creates a delightful crunchy exterior that pairs wonderfully with the crisp apple and sweet candy.
Spicy Twist or Vegan Options
For those who enjoy a little kick, a spicy twist can be an unexpected delight. A tiny amount of cinnamon oil or a pinch of cayenne pepper added to one of your candy syrup colors can create a unique flavor profile that surprisingly complements the sweetness. For vegan options, the main consideration is usually the sugar. While most granulated sugars in many regions are now vegan, some can still be processed with bone char. Look for sugars specifically labeled “vegan” or “organic.” The corn syrup and apples are naturally vegan. These creative modifications ensure that everyone can enjoy a version of this festive food, catering to different tastes and dietary needs.
Serving Your Homemade Rainbow Candy Apples
The moment of truth arrives when your vibrant, crisp rainbow candy apples are ready to be served. Presenting them beautifully and understanding the optimal timing for enjoyment will ensure your efforts are fully appreciated, leaving a lasting impression on anyone who tries this perfect snack.
Best Time to Enjoy Crunch
The absolute best time to enjoy the satisfying crunch of your rainbow candy apples is within the first 24-48 hours after they’ve fully hardened. During this period, the candy shell is at its most brittle and the apple beneath is still perfectly crisp and juicy. As mentioned earlier, humidity and the apple’s natural moisture content will gradually soften the candy coating over time. For the ultimate experience, serve them fresh. Arrange them on a platter or stand, perhaps with a decorative ribbon on each stick, to showcase their colorful beauty. Cutting them into wedges can make them easier to eat, especially for children, and highlight the beautiful cross-section of apple and candy.
Total Time and Servings
Making rainbow candy apples, while a fun and rewarding process, does require a bit of dedicated time. Typically, the preparation (washing, drying, sticking) takes about 20-30 minutes. Cooking the syrup to the hard crack stage can take another 20-25 minutes, followed by 10-15 minutes for dividing, coloring, and dipping. The cooling and hardening process will add another 30-60 minutes. Therefore, you should budget approximately 1.5 to 2 hours of active and inactive time from start to finish. This recipe generally yields 6-8 candy apples, depending on the size of your apples and the amount of syrup produced. These estimates ensure you can plan your kitchen time effectively to create this memorable, colorful snack.