
No Bake Cookies are a delightful treat that satisfies sweet cravings without needing an oven. This simple recipe provides a fast and convenient way to enjoy a homemade dessert. Get ready to mix, drop, and cool your way to deliciousness in no time, using basic ingredients from your pantry.
Key Takeaways
- No bake cookies are incredibly quick to make, requiring no oven time.
- They are perfect for satisfying sudden sweet cravings with minimal effort.
- Using common pantry staples makes this recipe accessible and budget-friendly.
- Proper cooling and storage are key to achieving and maintaining a firm, delicious texture.
- Enjoy creative variations by swapping out nut butters or adding extracts.
Sweet tooth calling? No oven needed. These cookies come together quickly. Just a few simple ingredients transform into treats. Enjoy them anytime you desire.
Why Make No Bake Cookies?
Life moves fast, and sometimes you need a sweet treat that can keep up. No bake cookies offer a fantastic solution for those moments when time is short, but the desire for something homemade and delicious is strong. These simple desserts bypass the need for an oven, making them ideal for hot weather or when your oven is already occupied with other dishes. They are a beloved classic for their speed and ease, providing that satisfying chewiness and rich flavor without the fuss of baking. Whether you’re a novice in the kitchen or a seasoned baker looking for a quick win, no bake cookies are a reliable and rewarding choice.
Perfect for sweet cravings
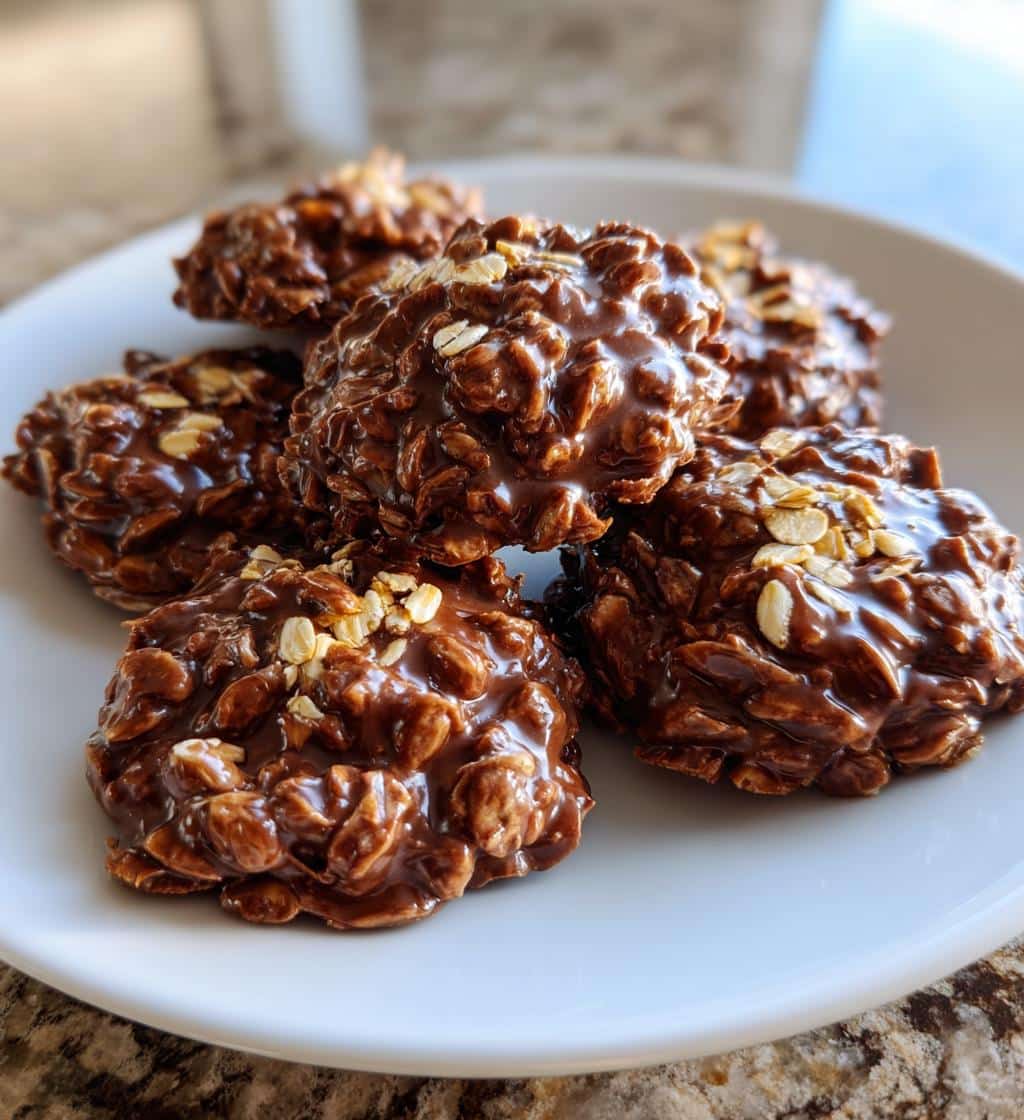
Imagine a sudden urge for something sweet. Instead of reaching for a store-bought option, you can whip up a batch of these quick treats in minutes. The combination of chocolate, peanut butter (or other nut butter), and oats creates a rich, satisfying flavor profile that hits all the right notes for a sweet craving. They’re substantial enough to feel like a proper dessert but light enough not to overwhelm. These cookies truly are an easy dessert for any occasion.
No oven needed, super fast
One of the biggest advantages of these cookies is that they live up to their name: no oven required! This not only saves energy but also makes them a safe and fun activity for families, even with younger helpers. The entire process, from mixing to setting, can often be completed in under an hour, with most of that time being passive cooling. This super fast preparation makes them perfect for last-minute gatherings, after-school snacks, or simply when you want a homemade indulgence without a lengthy commitment. For another quick dessert, check out our Quick Italian Cream Cake.
Gather Your Quick No Bake Ingredients
The beauty of no bake cookies lies in their simplicity, starting with the ingredients. You won’t need any exotic items or special equipment. Most of what you need is likely already in your kitchen, making this a perfect recipe to pull together on a whim. Having all your ingredients measured and ready before you start cooking on the stovetop will make the process even smoother and faster. Think of it as a fun, accessible way to create something wonderful with everyday items. To see more dessert options that use accessible ingredients, browse our entire Desserts category.
Pantry staples you will need
Here’s a breakdown of the essential pantry staples that form the backbone of these delicious cookies:
- Granulated Sugar: Provides the fundamental sweetness and helps create the glossy, fudgy base.
- Unsweetened Cocoa Powder: Delivers the rich chocolate flavor that everyone loves.
- Milk: Adds liquid to the base, helping all the ingredients combine smoothly.
- Butter: Contributes to the cookies’ smooth texture and rich taste.
- Peanut Butter: (Creamy or crunchy) essential for flavor, binding, and that classic no bake cookie chew. This is a key component to achieving a desirable texture.
- Vanilla Extract: Enhances all the flavors, adding a warm, aromatic depth.
- Quick-Cooking Oats: These are crucial for texture and structure. They absorb the liquid from the base, helping the cookies set. For more about this versatile grain, you can read about Oatmeal on Wikipedia.
Make sure your butter and peanut butter are at room temperature to ensure they melt and incorporate evenly into the hot mixture. Using fresh ingredients will always yield the best flavor, so check those expiration dates!
Simple Steps for Easy No Bake Cookies
Creating these delightful no bake cookies is a straightforward process, making them an excellent choice for bakers of all skill levels. The magic happens primarily on the stovetop, followed by a quick assembly and cooling period. There are no complicated techniques or extensive cleanup involved. This section offers a broad overview of the method, setting the stage for the more detailed instructions that follow. Remember, success in no bake cookies often comes down to precise timing during the boiling phase and patience during cooling.
Overview of the process
The entire no bake cookie journey can be broken down into three main phases:
- Boiling the Base: You’ll combine sugar, cocoa, milk, and butter in a saucepan, bringing it to a rolling boil for a precise amount of time. This step is critical for the cookies’ final texture.
- Mixing and Dropping: Once the base is perfectly boiled, it’s removed from the heat, and you’ll stir in the peanut butter, vanilla, and oats. The mixture then needs to be quickly dropped onto wax paper or parchment paper before it sets.
- Cooling and Setting: The final, and arguably hardest, step is waiting for the cookies to cool completely. As they cool, they firm up, transforming into those irresistible chewy treats you crave.
Each phase contributes to the perfect cookie, ensuring a balance of fudgy chewiness and classic flavor. It’s a truly simple recipe that delivers big on taste.
Mixing and Boiling the Cookie Base
The foundation of every perfect no bake cookie is its rich, fudgy base, which comes together quickly on the stovetop. This initial stage requires a little attention, but it’s far from complicated. The goal is to properly dissolve the sugar and integrate the fats, creating a glossy, smooth mixture that will later bind the oats into delicious cookies. A heavy-bottomed saucepan is recommended to prevent scorching, ensuring even heat distribution as you bring the ingredients to a boil. This step is what separates good no bake cookies from great ones, so precision here pays off with a superior texture.
Combining sugar, cocoa, milk
Begin by combining the granulated sugar, unsweetened cocoa powder, milk, and butter in your saucepan. Place the pan over medium heat. Stir constantly as the butter melts and the sugar dissolves. This continuous stirring helps prevent the sugar from crystallizing and ensures a smooth consistency. Watch as the mixture comes together, becoming a uniform chocolatey liquid. The aroma of chocolate will start to fill your kitchen, a pleasant precursor to the treats to come. Once the butter is fully melted and the sugar seems dissolved, bring the mixture to a full, rolling boil.
The 1-minute boil trick
This is arguably the most crucial step for achieving the perfect consistency in your no bake cookies. Once the mixture reaches a full, rolling boil (meaning it continues to bubble vigorously even when stirred), set a timer for exactly one minute. It’s tempting to boil longer for a firmer cookie, but over-boiling can lead to dry, crumbly cookies, while under-boiling might result in cookies that don’t set properly. Boil for precisely 60 seconds, stirring occasionally to prevent sticking. As soon as the minute is up, remove the saucepan immediately from the heat. This precise timing ensures the sugar syrup reaches the right concentration, which is essential for the cookies to set into that classic, chewy texture. This technique is similar to how other confectionery items rely on specific boiling points.
Adding Oats and Forming Cookies
With the perfectly boiled base ready, the next exciting step is to transform this liquid gold into actual cookies. This phase is all about speed and efficiency, as the mixture will start to set quickly once the oats and nut butter are introduced. Having your remaining ingredients pre-measured and your wax paper laid out will make this step seamless. The goal is to incorporate the oats thoroughly, ensuring each bite has that delightful chewy texture, then swiftly drop the mixture into cookie shapes before it becomes too stiff to work with.
Incorporating texture well
Immediately after removing the saucepan from the heat, stir in the peanut butter and vanilla extract. The residual heat from the chocolate mixture will help the peanut butter melt and combine smoothly. Once those are well incorporated, swiftly add the quick-cooking oats. Stir vigorously until the oats are fully coated and evenly distributed throughout the chocolate mixture. The oats are what give these cookies their characteristic texture and body. Don’t use old-fashioned or steel-cut oats, as they won’t absorb the liquid in the same way, leading to a different, often less desirable, texture. The mixture will start to thicken as you stir, so work quickly to ensure everything is combined before it becomes too stiff.
Dropping onto wax paper
As soon as the oats are fully mixed in, begin dropping spoonfuls of the cookie mixture onto sheets of wax paper or parchment paper. Use two spoons, one to scoop the mixture and the other to push it off, creating uniform cookie shapes. You can make them as large or small as you like, but remember that larger cookies will take slightly longer to set. Work quickly here, as the mixture cools down rapidly and becomes harder to scoop. If the mixture becomes too stiff, you can try gently warming it over very low heat for a few seconds to make it more pliable, but avoid re-boiling. Ensure there’s enough space between each cookie to prevent them from sticking together as they spread slightly while cooling. For more delightful treats, check out these Peanut Butter Brownie Swirl Cookies.
Cooling Your Sweet Tooth Cookies
The most challenging part of making no bake cookies, for many, is the waiting game. Once the warm, delicious mounds of chocolate and oats are neatly arranged on wax paper, they need time to cool and set properly. This cooling process is not just about bringing them to an edible temperature; it’s vital for their structural integrity and chewy texture. Rushing this step can lead to disappointing, gooey cookies that don’t hold their shape. Patience truly is a virtue here, as a perfectly set cookie is well worth a little wait.
Letting them set perfectly
Allow your freshly dropped cookies to cool undisturbed at room temperature for at least 30 minutes to an hour. For quicker setting, or if your kitchen is particularly warm, you can place the wax paper sheets on a baking tray and transfer them to the refrigerator. Chilling them in the fridge can cut the setting time down to about 15-20 minutes. As they cool, the sugar syrup hardens, the butter firms up, and the oats become firmly bound, transforming the soft mixture into a chewy, delicious cookie. You’ll know they are ready when they are firm to the touch and easily peel off the wax paper without leaving residue. Once set, these sweet snack cookies are ready to be enjoyed!
Tips for Perfect No Bake Cookies
While no bake cookies are generally straightforward, a few expert tips can elevate your batch from good to absolutely perfect. These insights address common pitfalls and offer strategies to ensure your cookies consistently turn out with that ideal firm yet chewy texture. From ingredient quality to environmental factors, understanding these nuances will empower you to troubleshoot and master this classic easy dessert. Don’t let simple mistakes detract from your enjoyment; a little foresight goes a long way in cookie making.
Achieving firm texture
The key to a firm texture lies primarily in the boiling stage. Ensure you bring the mixture to a full, rolling boil that cannot be stirred down, and time it precisely for one minute. If your cookies are consistently too soft or don’t set, try boiling for an extra 15-30 seconds next time. Humidity can also play a role; on very humid days, the extra moisture in the air might make cookies struggle to set. In such cases, a slightly longer boil (up to 90 seconds total) or ensuring the mixture is dropped onto wax paper promptly can help. Using fresh, high-quality quick-cooking oats is also important, as they absorb liquid better than older or different types of oats.
Storing them right
Proper storage is essential to maintain the quality and firmness of your no bake cookies. Once fully set, transfer them to an airtight container. Storing them at room temperature is acceptable for a few days, especially if they are well set. However, for maximum freshness and firmness, especially if you prefer a chewier, slightly denser cookie, refrigeration is highly recommended. Keep them in a single layer if possible, or separate layers with wax paper to prevent sticking. This not only extends their shelf life but also enhances their delightful texture. For more insights and creative twists on recipes, follow us on Pinterest!
Storing Your Delicious No Bake Cookies
Once your no bake cookies have cooled and set perfectly, the next consideration is how to store them to maintain their deliciousness and texture. Proper storage ensures they stay fresh, firm, and ready to be enjoyed whenever a sweet craving strikes. Incorrect storage can lead to dry, crumbly cookies or, conversely, cookies that become too soft and sticky. Thankfully, keeping these sweet snack treats at their best is quite simple, requiring just a few basic practices.
Airtight container method
The most critical step in storing your no bake cookies is to place them in an airtight container. Exposure to air is the primary culprit behind cookies drying out or losing their optimal texture. A plastic storage container with a tight-fitting lid or a cookie tin works perfectly. If you have multiple layers of cookies, place a sheet of wax paper or parchment paper between each layer to prevent them from sticking together. This method helps lock in moisture and flavor, keeping your cookies fresh for several days at room temperature.
Refrigeration for firmness
For those who prefer a firmer, chewier no bake cookie, or if you’re making them ahead of time, refrigeration is an excellent option. Storing them in the refrigerator, still in an airtight container, will significantly extend their freshness and help them retain a more solid texture. They can last up to a week in the fridge. Before serving, you might want to let them sit at room temperature for 5-10 minutes to soften slightly, but many people enjoy them straight from the fridge for an extra-cool treat. This also helps prevent them from becoming too soft on warm days. For more quick treats like these, be sure to check out our Snickerdoodle Cobbler recipe.
Variations for Your Cookie Recipe
While the classic no bake cookie recipe is a beloved favorite, there’s always room for creativity and customization. Experimenting with different ingredients can open up a world of new flavors and textures, allowing you to tailor this easy dessert to your personal preferences or dietary needs. These variations keep the recipe exciting and ensure that even frequent no bake cookie makers can find something new to savor. Don’t be afraid to think outside the box and make this recipe truly your own.
Nut butter alternatives
The original recipe typically calls for peanut butter, which provides that classic, rich flavor and helps bind the cookies. However, if you have a peanut allergy or simply want to try something different, there are several fantastic nut butter alternatives you can use:
- Almond Butter: Offers a slightly milder, nutty flavor and a similar creamy consistency. It pairs wonderfully with chocolate.
- Cashew Butter: Known for its subtle, sweet flavor and very creamy texture, it makes for a luxurious no bake cookie.
- Sunflower Seed Butter (SunButter): An excellent option for those with nut allergies, providing a unique, earthy flavor that complements the chocolate well.
- Tahini: For a more adventurous and savory twist, tahini (sesame seed paste) can add an interesting depth of flavor, especially if you appreciate a less sweet profile.
When swapping nut butters, ensure they are smooth and creamy, not overly thick or gritty, to maintain the desired texture of the cookie base. You can also experiment with different extracts, such as almond extract for an extra nutty note, or peppermint extract for a festive holiday twist. Your creativity is the only limit to these quick treats!
Nutrition Facts for Each Treat
Understanding the nutritional content of your homemade no bake cookies can be helpful, especially if you’re monitoring your dietary intake. While these are undeniably sweet treats, knowing their approximate breakdown allows you to enjoy them mindfully. The exact nutrition will vary based on the specific brands of ingredients you use and the size of your cookies. However, this section provides a general idea of what each delicious bite contains, giving you a clearer picture of these indulgent pantry staples.
Per cookie breakdown
Typically, a single no bake cookie, depending on its size, contains a balance of carbohydrates, fats, and some protein:
- Calories: Expect around 100-150 calories per cookie. This can vary based on the amount of sugar, butter, and peanut butter used.
- Carbohydrates: Primarily from sugar and oats, these cookies are a source of quick energy.
- Fat: The butter and peanut butter contribute healthy fats, though the saturated fat content can be moderate.
- Protein: Peanut butter and oats provide a small but significant amount of protein, making them more substantial than some other desserts.
- Fiber: Oats are a good source of dietary fiber, which aids digestion.
Remember that these are estimates. If precise nutritional information is crucial for your dietary needs, consider using a recipe calculator with your exact ingredients and portion sizes. Enjoy these delightful bites as part of a balanced diet.
Frequently Asked Cookie Questions
Even though no bake cookies are known for their simplicity, new bakers or those trying the recipe for the first time often have common questions or encounter specific challenges. Addressing these frequently asked questions can help you troubleshoot issues, gain confidence, and ensure your no bake cookies turn out perfectly every single time. From texture problems to ingredient substitutions, understanding the “why” behind the steps can make all the difference in your cookie-making success. This will help you master these quick treats.
Common issues explained
- Why are my cookies too gooey/not setting? This is the most common issue. It usually means the mixture wasn’t boiled long enough. Ensure you reach a full, rolling boil and time it for the full minute. Humidity can also contribute; try boiling for an extra 15-30 seconds on humid days.
- Why are my cookies dry and crumbly? Conversely, this happens when the mixture is boiled for too long. Over-boiling evaporates too much liquid, leading to a sugar concentration that makes the cookies hard and dry. Stick to the one-minute boil precisely.
- Can I use old-fashioned oats instead of quick-cooking oats? It’s not recommended. Quick-cooking oats are pre-cooked and rolled thinner, allowing them to absorb liquid faster and more effectively, which is crucial for the no bake texture. Old-fashioned oats will result in a chewier, sometimes tougher, and less cohesive cookie.
- My cookies are too sticky to handle. What went wrong? This usually indicates they haven’t set completely. Ensure they are fully cooled and firm before handling. Refrigeration can help them firm up quicker. High humidity might also make them stickier.
- How can I prevent them from sticking to the wax paper? Ensure the cookies are fully set and firm before attempting to peel them off. If you’re having trouble, lightly grease the wax paper or use parchment paper, which is less prone to sticking.
By understanding these common issues, you’ll be well-equipped to make perfect no bake cookies every time. Keep experimenting and don’t hesitate to share your delicious creations! Find more recipe inspiration by visiting Carina Recipes on Instagram.
Enjoy Your Easy No Bake Cookies
You’ve successfully navigated the simple yet satisfying process of making no bake cookies, transforming basic pantry staples into a delightful easy dessert. Now comes the best part: savoring the fruits of your labor! These quick treats are a testament to how effortlessly you can create something truly special, bringing joy with every chewy, chocolatey bite. Whether you’re sharing them with loved ones or enjoying a moment of quiet indulgence, these cookies are a perfect reminder that deliciousness doesn’t always require a lot of fuss.
Share or savor alone
No bake cookies are incredibly versatile in how they can be enjoyed. They are perfect for:
- Sharing: Pack them in lunchboxes, bring them to potlucks, or offer them to friends and family. Their universal appeal makes them a hit with almost everyone.
- Gifts: Arrange them beautifully in a decorative tin for a thoughtful, homemade gift.
- Personal Treat: Keep a stash in the fridge for whenever a sweet tooth strikes. They are the ideal pick-me-up during a busy day or a satisfying evening snack.
However you choose to enjoy them, these no bake cookies are sure to become a beloved staple in your recipe collection. Their ease, speed, and undeniable deliciousness make them a go-to for any occasion. For other quick and easy main course ideas to pair with your dessert, try our Ground Turkey and Peppers recipe, or perhaps our Easy Butter Chicken Recipe. Happy eating!