
Pistachio Raspberry Cheesecake Domes are a luxurious and individual sweet treat perfect for any occasion. These creamy dessert domes combine rich pistachio flavors with tart raspberry coulis, all atop a delicate crumb crust. This recipe simplifies the process, allowing you to create beautiful, decadent mini cheesecakes with ease. They are truly irresistible.
Key Takeaways
- Prepare components in stages for best results and vibrant flavors.
- Quality ingredients are crucial for achieving superior texture and taste.
- Proper chilling ensures perfect dome shape and ideal creamy consistency.
- Customization options allow for personalized sweetness and creative garnishes.
These little domes taste amazing. They offer pistachio, raspberry, cheesecake flavors. Each bite is a sweet delight. Perfect for sharing or for yourself. You will truly enjoy making them.
Making Pistachio Raspberry Cheesecake Domes
Pistachio Raspberry Cheesecake Domes are an exceptional way to impress guests or simply treat yourself to a luxurious dessert. These individual portions are not only visually appealing but also offer a delightful combination of textures and flavors. Imagine a smooth, creamy pistachio cheesecake filling, swirled with a vibrant, tangy raspberry coulis, all nestled on a crisp, buttery crumb crust. This dessert is a celebration of contrasting elements that come together harmoniously, creating a truly memorable sweet treat. Unlike traditional cheesecakes, the dome shape adds an elegant touch, making them ideal for special gatherings or a sophisticated end to any meal. This recipe offers a straightforward approach to creating these decadent mini cheesecakes, ensuring a rewarding baking experience for home cooks of all skill levels. For more delightful dessert ideas, check out our collection of dessert recipes.
Why You’ll Love These Domes
You’ll fall in love with these pistachio raspberry cheesecake domes for several compelling reasons. First, their individual presentation makes serving effortless and provides each guest with their own perfect portion. Second, the flavor profile is outstanding: the earthy, slightly nutty pistachio pairs beautifully with the bright, fruity tang of fresh raspberries, cutting through the richness of the cheesecake. They strike a wonderful balance, offering a sophisticated taste without being overly sweet. Lastly, while they look incredibly impressive, the process for making these creamy dessert domes is simpler than you might think, involving clear, manageable steps that yield stunning results every time. These mini cheesecakes are truly a sweet treat worth making.
What You’ll Need to Begin
To begin your journey into crafting these delightful pistachio raspberry cheesecake domes, gather your basic kitchen tools and high-quality ingredients. You’ll need a dome-shaped silicone mold, a food processor for the crust, mixing bowls, a whisk, and a rubber spatula. Ingredient-wise, focus on freshness and quality. This includes premium cream cheese, a good quality pistachio paste, fresh raspberries, butter, sugar, and your chosen crumb base (such as digestive biscuits or graham crackers). Having everything prepped and ready before you start will ensure a smooth and enjoyable cooking process, leading to the best possible outcome for your homemade treat. Organization is key for a seamless experience in the kitchen.
Gather Your Cheesecake Dome Ingredients
Having all your ingredients ready and measured before you start is crucial for a smooth and efficient baking process. This method, known as mise en place, helps prevent last-minute rushes and ensures you don’t miss any critical components for your pistachio raspberry cheesecake domes. Pay attention to the quality of each ingredient, as it directly impacts the final flavor and texture of your creamy dessert. Freshness, especially for the raspberries, will make a significant difference to the overall vibrancy and taste of your individual portions. Let’s break down what you’ll need for each layer.
Crust Essentials List
- Graham Crackers or Digestive Biscuits: Approximately 1 ½ cups (180g) crushed finely. These form the sturdy, buttery base for your mini cheesecakes.
- Unsalted Butter: ½ cup (113g) melted. This binds the crumbs together, ensuring a firm, delicious crust that holds its shape.
- Granulated Sugar: 2 tablespoons. A touch of sugar enhances the sweetness of the crust and complements the cheesecake filling.
- Pinch of Salt: Just a tiny amount to balance the flavors.
Filling Essentials List
- Cream Cheese: 16 oz (450g) full-fat, softened to room temperature. This is the heart of your creamy dessert, so choose a good quality brand for the best texture.
- Granulated Sugar: ½ cup (100g). Adjust to your sweetness preference.
- Pistachio Paste: ¼ cup (60g). Look for pure pistachio paste for an authentic, rich flavor and vibrant green hue.
- Heavy Cream: 1 cup (240ml) cold. Whipped cream provides lightness and airiness to the filling.
- Vanilla Extract: 1 teaspoon. Enhances the overall flavor profile.
- Powdered Sugar: 2 tablespoons (optional, for stabilizing whipped cream).
Coulis Essentials List
- Fresh Raspberries: 1 ½ cups (225g). Fresh berries are key for a bright, tangy coulis.
- Granulated Sugar: 2-3 tablespoons, to taste. Adjust based on the sweetness of your raspberries.
- Lemon Juice: 1 teaspoon. A squeeze of lemon brightens the raspberry flavor.
Crafting the Perfect Crumb Crust
A well-made crust is the foundation of any great cheesecake, and these pistachio raspberry cheesecake domes are no exception. The crumb crust needs to be sturdy enough to hold the creamy filling but delicate enough to complement its richness. The process is quite simple, focusing on achieving the right consistency and ensuring it’s properly chilled. Getting this step right sets the stage for a successful and delicious homemade dessert. This simple recipe ensures a perfect, crumbly base for your individual portions, contributing to the overall decadent experience.
Mixing the Crumb Base
Start by crushing your graham crackers or digestive biscuits until they resemble fine crumbs. A food processor works wonderfully for this, quickly creating an even texture. If you don’t have one, place the crackers in a sturdy zip-top bag and crush them with a rolling pin. Once crushed, transfer the crumbs to a medium-sized bowl. Add the melted unsalted butter, granulated sugar, and a pinch of salt. Mix these ingredients thoroughly until all the crumbs are evenly coated with butter. The mixture should resemble wet sand, clumping together when squeezed. This ensures the crust will hold its shape once pressed and chilled.
Pressing into Molds
Carefully spoon the crumb mixture into the cavities of your dome-shaped silicone mold. Use the back of a spoon or your fingertips to firmly press the crumbs into the bottom of each cavity, creating an even, compact layer. The goal is to form a solid base that will support the cheesecake filling. Pay particular attention to pressing the edges firmly to prevent crumbling when unmolding. The thickness of your crust can be adjusted to personal preference, but aiming for about ¼ inch (0.6 cm) usually provides a good balance.
Chilling the Crust
Once the crusts are pressed into the molds, it’s essential to chill them. Place the silicone mold in the refrigerator for at least 30 minutes. This chilling period allows the butter to solidify, binding the crumbs together and making the crust firm and stable. A properly chilled crust will be much easier to handle and will prevent it from falling apart when you eventually unmold your mini cheesecakes. This step is a critical part of the process, contributing to the structural integrity and delightful texture of your finished pistachio raspberry cheesecake.
Whipping Up Creamy Cheesecake Filling
The heart of your pistachio raspberry cheesecake domes lies in its incredibly creamy and flavorful filling. Achieving the perfect texture—smooth, airy, and rich without being too dense—requires attention to detail, especially when it comes to ingredient temperature and mixing technique. This filling is what truly defines these decadent mini cheesecakes, providing the base for the vibrant raspberry coulis. We have another equally delightful creamy dessert, our Vanilla Bean Creme Brulee Cheesecake Cupcakes, which also highlight the importance of smooth, well-mixed fillings.
Softening Cream Cheese Smoothly
The single most important step for a smooth cheesecake filling is ensuring your full-fat cream cheese is at proper room temperature. Cold cream cheese will result in a lumpy filling, no matter how much you beat it. Take the cream cheese out of the refrigerator at least an hour before you plan to mix, or even longer if your kitchen is cool. It should be soft enough to easily indent with your finger. Beat the softened cream cheese on medium speed with an electric mixer until it’s completely smooth and free of any lumps. This foundational step guarantees a silky texture throughout your creamy dessert.
Adding Pistachio Paste
Once your cream cheese is smooth, it’s time to incorporate the star flavor: pistachio paste. Add the pure pistachio paste and granulated sugar to the cream cheese mixture. Continue beating on medium speed until the pistachio paste is fully integrated, and the mixture is uniformly light green and smooth. The pistachio paste not only imparts its unique, slightly nutty flavor but also gives the cheesecake its beautiful, natural color. Ensure even distribution of the paste to guarantee a consistent flavor in every bite of your individual portions.
Gentle Mixing for Fluffiness
After the pistachio and sugar are well combined, gently fold in the cold heavy cream (and optional powdered sugar, if using to stabilize). For best results, it’s often helpful to whip the heavy cream separately to soft peaks first, then fold it into the cream cheese mixture. This technique incorporates air, giving the cheesecake a light, airy, and fluffy consistency rather than a heavy, dense one. Overmixing at this stage can deflate the whipped cream and lead to a less desirable texture, so mix just until everything is combined and no streaks remain. This careful approach ensures your pistachio raspberry cheesecake will be wonderfully airy and creamy.
Preparing the Fresh Raspberry Coulis
The vibrant, tangy raspberry coulis is a critical component of these pistachio raspberry cheesecake domes, providing a delightful contrast to the rich, creamy pistachio filling. It not only adds a burst of fresh fruit flavor but also introduces a beautiful swirl of color, making each mini cheesecake even more appealing. Coulis is a simple fruit sauce, and making it fresh ensures the brightest taste. It’s an easy yet impactful element for these sweet treat domes, and its preparation is straightforward, guaranteeing a successful outcome for your homemade dessert.
Blending Berries Smooth
Start with fresh, ripe raspberries for the most intense flavor. Place the raspberries, granulated sugar, and lemon juice into a small saucepan. Heat over medium-low heat, stirring occasionally, until the raspberries break down and release their juices, which typically takes about 5-7 minutes. Once softened, remove from heat and transfer the mixture to a blender or food processor. Blend until the mixture is completely smooth. The sugar helps to draw out the juices and sweeten the coulis, while the lemon juice brightens the overall fruit flavor, making it pop against the richness of the cheesecake.
Straining for Purity
For a truly refined raspberry coulis, straining is an essential step. Place a fine-mesh sieve over a clean bowl and pour the blended raspberry mixture through it. Use the back of a spoon or a rubber spatula to press the pulp against the sieve, extracting as much of the smooth liquid as possible while leaving behind the seeds. This step creates a silky-smooth coulis that has a luxurious mouthfeel, free from any gritty raspberry seeds. The resulting pure, vibrant red sauce is perfect for swirling into your cheesecake filling or as a garnish. To learn more about this delicious berry, you can visit the Raspberry Wikipedia page.
Swirling into Filling
Once your raspberry coulis is strained and cooled slightly, it’s ready to be swirled into the creamy pistachio cheesecake filling. Gently spoon dollops of the coulis over the surface of the pistachio filling in the mold cavities. Using a skewer or a thin knife, gently swirl the coulis into the filling. Be careful not to overmix; you want distinct ribbons of raspberry running through the pistachio, creating a beautiful marbled effect, not a uniform pink color. This swirling technique adds visual appeal and ensures each bite offers a delightful combination of both flavors, making your pistachio raspberry cheesecake domes truly special.
Assembling Pistachio Raspberry Cheesecake Domes
With all your components prepared—the chilled crumb crusts, the creamy pistachio filling, and the vibrant raspberry coulis—it’s time for the exciting step of assembling your pistachio raspberry cheesecake domes. This stage brings all the delicious elements together to form the beautiful individual portions. Careful assembly ensures a neat presentation and an enjoyable eating experience. The simple recipe makes this process straightforward, even for those new to making mini cheesecakes.
Spooning Filling Neatly
Once the crumb crusts are firm in their dome molds, it’s time to add the filling. Gently spoon the creamy pistachio cheesecake filling over the chilled crusts, filling each cavity almost to the top. Be mindful not to disturb the crust layer. You might find a small spoon or even a piping bag useful for this, especially if your molds have intricate shapes. The goal is to fill each dome evenly, ensuring a consistent size and portion for all your individual sweet treat domes.
Smoothing Dome Tops
After spooning in the filling, use an offset spatula or the back of a spoon to gently smooth the tops of each cheesecake dome. This creates a flat, even surface, which will become the base of your dome once unmolded. A smooth top also ensures that the cheesecake sets perfectly and looks professional. Any excess filling can be gently scraped off the mold edges. This attention to detail in smoothing the tops contributes significantly to the elegant presentation of your finished pistachio raspberry cheesecake domes, making them look professionally crafted.
Chilling Domes for Best Texture
Chilling is arguably the most crucial step in making no-bake pistachio raspberry cheesecake domes. It’s not just about setting the cheesecake; it’s about developing its texture, firming up the structure, and allowing the flavors to meld beautifully. Rushing this stage can lead to a soft, messy dome that doesn’t hold its shape, diminishing the decadent experience of these mini cheesecakes. Patience truly pays off here, transforming a liquid mixture into a stable, creamy dessert. Proper chilling ensures your individual portions are perfectly set and ready for enjoyment.
Minimum Chill Time
For your pistachio raspberry cheesecake domes to set sufficiently and be ready for unmolding, a minimum chill time of 4 hours in the refrigerator is required. During this period, the cream cheese mixture will firm up, and the raspberry coulis will become more viscous, preventing it from running when the domes are released from their molds. While 4 hours is the minimum, you might notice that the texture is still somewhat delicate. If time is a constraint, ensure they have at least this much time to firm up before attempting to serve. This is a critical step for a successful simple recipe outcome.
Overnight for Perfection
For truly perfect pistachio raspberry cheesecake domes, an overnight chill (ideally 8-12 hours) in the refrigerator is highly recommended. This extended chilling period allows the cheesecake to firm up completely, creating an incredibly smooth, dense, yet creamy texture that melts in your mouth. The flavors also deepen and harmonize more effectively. Unmolding will be significantly easier, and the domes will hold their shape beautifully, resulting in a more polished and professional-looking sweet treat. For more delightful visuals of our creations, follow us on Pinterest and Instagram.
Serving Delicious Cheesecake Domes
Once your pistachio raspberry cheesecake domes are perfectly chilled and firm, the moment arrives to present these beautiful individual portions. Serving them correctly enhances their appeal and ensures everyone enjoys the full decadent experience. These mini cheesecakes are designed to be a showstopper, and a little attention to detail during serving can make all the difference. Get ready to delight your family and friends with this charming homemade sweet treat.
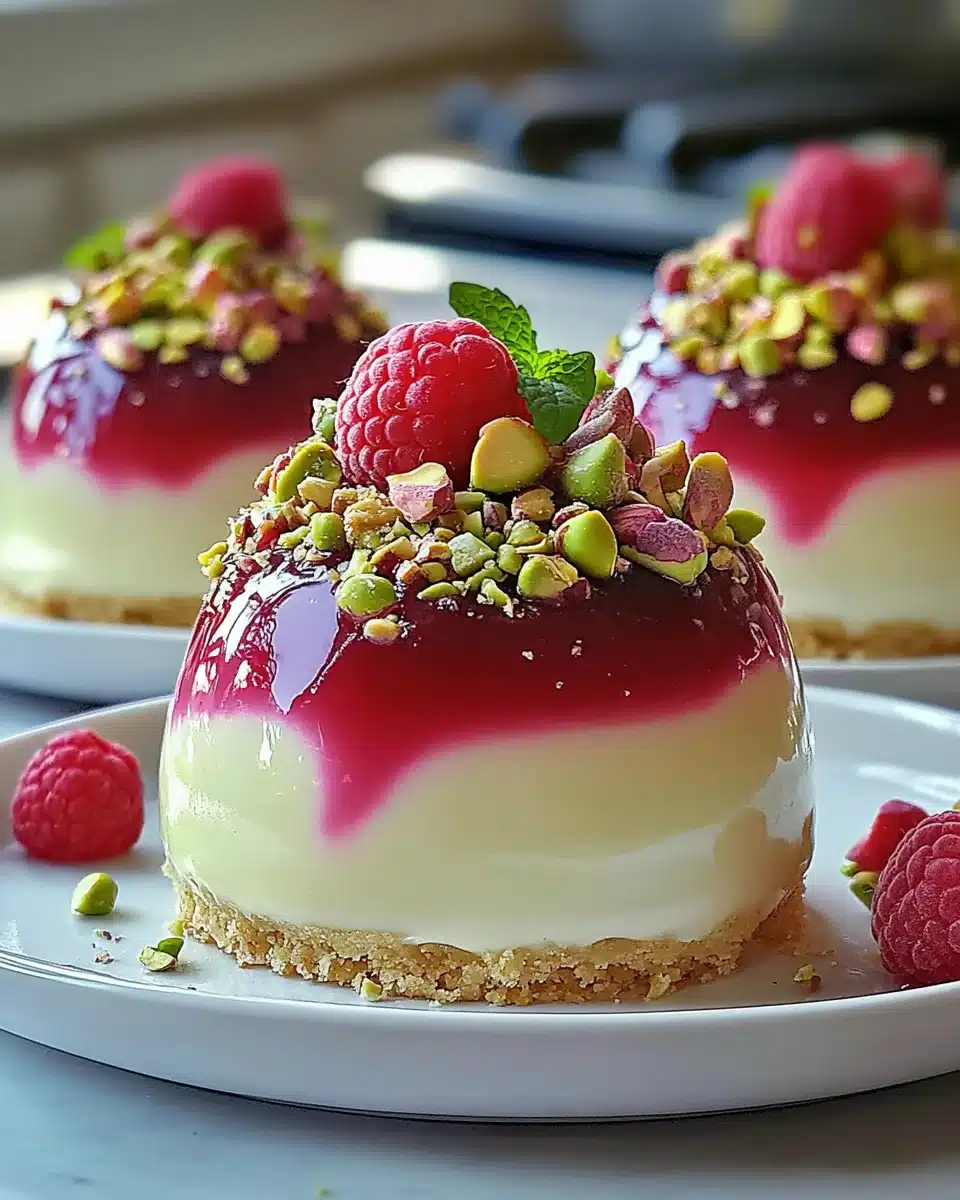
Garnishing Your Domes
Garnishing is the final flourish that elevates your pistachio raspberry cheesecake domes from delicious to truly spectacular. Before unmolding, you can lightly dust them with powdered sugar for a snowy effect. After carefully unmolding, consider adding a fresh raspberry or two on top of each dome. A sprinkle of finely chopped pistachios not only adds a lovely contrasting texture but also highlights the pistachio flavor. For an extra touch of elegance, you could drizzle a tiny bit of extra raspberry coulis, or even some melted white chocolate. Garnish just before serving to maintain freshness and visual appeal, turning each dome into a tiny work of art.
Tips for Pistachio Raspberry Cheesecake Domes
Creating these delightful pistachio raspberry cheesecake domes is a rewarding experience, but a few key tips can ensure your success and make the process even smoother. Paying attention to these small details can significantly impact the final texture and flavor of your creamy dessert, ensuring that each individual portion is as perfect as possible. Following these simple recommendations will help you achieve a truly decadent and well-executed homemade treat, even if it’s your first time making mini cheesecakes.
Room Temperature Matters
As mentioned earlier, ensuring your cream cheese is at true room temperature is paramount. This prevents lumps and ensures a smooth, uniform filling. If you forget to take it out in advance, you can speed up the process by cutting the cream cheese into smaller cubes and letting it sit on the counter for about 20-30 minutes, or gently warming it in the microwave in 10-second bursts, being careful not to melt it. A smooth start with cream cheese sets the stage for a perfect, lump-free cheesecake. For other recipes where ingredient temperature is important, consider our Snickerdoodle Cobbler, where butter temperature affects consistency.
Don’t Rush Chilling
It bears repeating: resist the temptation to rush the chilling process. While it’s hard to wait, proper refrigeration time is absolutely critical for the cheesecake domes to set correctly. Attempting to unmold or serve them before they are fully firm can lead to disappointment, as they may collapse or lose their shape. Plan ahead and give them ample time in the refrigerator—overnight is always best. This patience ensures your mini cheesecakes will hold their elegant dome shape and have that desirable firm yet creamy texture, making your simple recipe truly successful.
Ingredient Quality for Better Domes
The success of your pistachio raspberry cheesecake domes hinges significantly on the quality of your ingredients. While a simple recipe can guide you through the steps, superior ingredients provide a foundation for truly exceptional flavor and texture. Opting for the best available components elevates these mini cheesecakes from merely good to absolutely unforgettable, making each individual portion a decadent sweet treat experience. This attention to detail is what sets homemade desserts apart.
Cream Cheese Importance
The cream cheese is the backbone of any cheesecake, and for these creamy dessert domes, it’s no different. Invest in a good quality, full-fat cream cheese. Avoid low-fat or whipped varieties, as they contain more water and less fat, which can result in a weaker set and a less rich, less creamy texture. High-quality cream cheese provides that characteristic tangy, rich base that pairs so well with the pistachio and raspberry. Its firm texture when chilled is essential for the structure of your domes. To understand more about this dairy product, read about Cream Cheese on Wikipedia.
Fresh Raspberry Flavor
While frozen raspberries can be used for the coulis in a pinch, fresh raspberries will always yield the most vibrant and authentic flavor for your pistachio raspberry cheesecake domes. Fresh berries offer a brighter, tangier note and a more intense color, which are crucial for cutting through the richness of the pistachio cheesecake. They contribute significantly to the refreshing aspect of this sweet treat. Choose ripe, plump raspberries for the best results, as their natural sweetness will also reduce the amount of added sugar needed in the coulis, allowing the pure fruit flavor to shine.
Elevating Pistachio Raspberry Cheesecake Domes
Even with a simple recipe, there’s always room to personalize and enhance your pistachio raspberry cheesecake domes. These mini cheesecakes are a fantastic canvas for culinary creativity, allowing you to fine-tune flavors and textures to perfectly match your preferences or cater to a specific occasion. Thinking beyond the basic instructions can transform your homemade individual portions into an even more remarkable decadent sweet treat. Consider these ideas to truly make the recipe your own.
Optional Add-ons Ideas
To further elevate your creamy dessert, consider incorporating some delightful add-ons. You could mix finely chopped white chocolate into the filling for an extra layer of sweetness and subtle texture. A thin layer of white chocolate ganache over the set domes before garnishing would also be exquisite. For a more intense pistachio experience, a few drops of almond extract or even a touch of rosewater can be added to the filling, complementing the nutty notes. Don’t be afraid to experiment with other berry purees in place of or in addition to raspberry coulis for different flavor profiles. For another rich and indulgent dessert, explore our Quick Italian Cream Cake recipe.
Adjusting Sweetness to Taste
Sweetness is a personal preference, and this simple recipe allows for easy adjustments. If you prefer a less sweet pistachio raspberry cheesecake, reduce the amount of granulated sugar in both the crust and the filling. Similarly, for the raspberry coulis, start with less sugar and taste as you go, adding more until it reaches your desired balance of tartness and sweetness. Remember that the overall flavor profile is a dance between the sweet, creamy cheesecake, the tart raspberry, and the nutty pistachio. Adjusting the sugar allows you to conduct this symphony to your exact liking, ensuring your individual portions are perfectly tailored for your palate.
Frequently Asked Questions About Domes
Making pistachio raspberry cheesecake domes, like any baking endeavor, can sometimes lead to questions about preparation, storage, and troubleshooting. Addressing these common queries can help ensure your experience is smooth and successful, allowing you to confidently create and enjoy these decadent mini cheesecakes. This section aims to provide practical advice for the simple recipe, making your homemade individual portions even more stress-free.
Storing Leftover Domes
If you happen to have any leftover pistachio raspberry cheesecake domes (though they are so delicious, this is unlikely!), proper storage is key to maintaining their freshness and flavor. Store the domes in an airtight container in the refrigerator. This protects them from absorbing odors and prevents them from drying out. They will remain fresh and delightful for up to 3-4 days. For longer storage, you can freeze individual domes. Wrap each dome tightly in plastic wrap, then place them in an airtight freezer-safe container or bag. They can be frozen for up to 1 month. Thaw them in the refrigerator overnight before serving for the best creamy dessert texture. Always allow them to come to near room temperature for about 15 minutes before serving to soften slightly and enhance the flavors.