
Making peach cobbler ice cream at home brings pure joy. This sweet treat combines luscious fresh peaches with a creamy base and delightful cobbler bits. It’s a perfect summer dessert recipe, promising a delightful flavor that truly satisfies any craving. Get ready to enjoy this family favorite.
Key Takeaways
- Utilize fresh, ripe peaches for the most vibrant and sweet flavor.
- Incorporate actual cobbler crust pieces for an authentic texture and taste.
- Learn how to prepare a rich, creamy base that churns perfectly.
- Discover options for making this frozen dessert with or without an ice cream maker.
- Master the simple steps to create a delightful homemade peach cobbler ice cream.
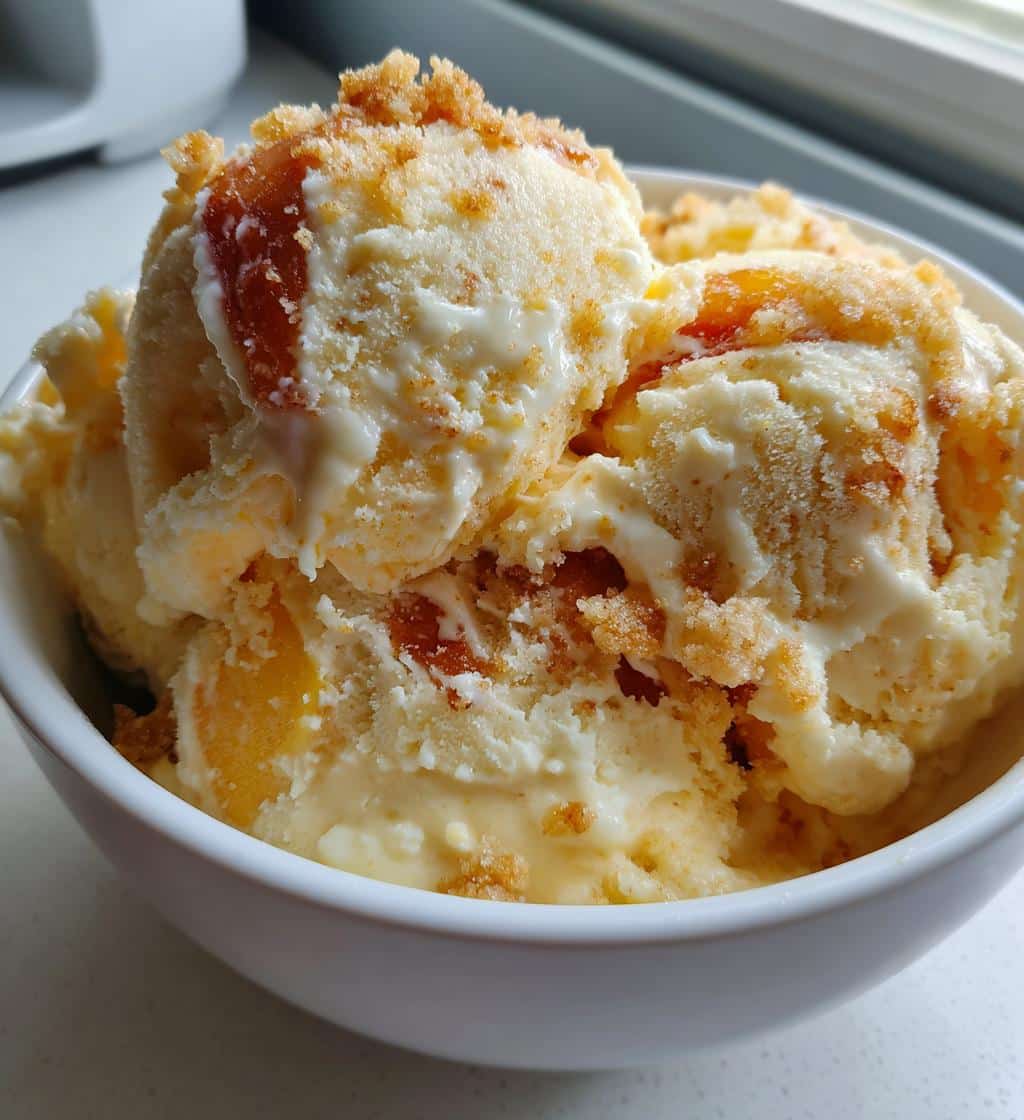
Summer peaches shine in this dessert. The creamy texture melts delightfully. Sweet fruit marries spiced crumble. This homemade treat impresses all. It is a true culinary delight.
Making Peach Cobbler Ice Cream
There’s nothing quite like the taste of homemade peach cobbler ice cream. This beloved frozen dessert perfectly captures the essence of a classic summer treat, blending the sweetness of ripe peaches with the comforting crunch of spiced cobbler. Our recipe is designed to help you create a rich, creamy ice cream that’s bursting with natural fruit flavor and delightful texture. Forget store-bought versions; once you try this delightful flavor, you’ll be hooked on the authentic taste and satisfaction of crafting it yourself. It’s an ideal way to celebrate peach season and impress your family and friends with a truly special dessert.
The Pure Bliss Promise
Imagine a scoop of velvety smooth ice cream, studded with tender pieces of sweetened peach and crunchy, buttery cobbler crust. That’s the pure bliss promise of this recipe. Each spoonful offers a harmonious blend of creamy sweetness, subtle spice, and fruity goodness. We’ll guide you through every step, ensuring your homemade peach cobbler ice cream is not just good, but absolutely unforgettable. This recipe is more than just instructions; it’s your pathway to creating a memorable culinary experience right in your own kitchen, turning simple ingredients into a truly indulgent treat.
Total Time and Servings
Crafting this delightful peach cobbler ice cream requires a bit of patience, but the hands-on time is quite manageable. Expect about 30-45 minutes of active preparation, primarily for peeling and dicing peaches, and mixing the base. The churning process typically takes 20-30 minutes, depending on your ice cream maker. The longest part is the freezing time, which requires a minimum of 4-6 hours for the ice cream to set properly to a scoopable consistency. This recipe yields approximately 8-10 servings, making it perfect for family gatherings, summer barbecues, or simply enjoying throughout the week. Plan ahead to ensure you have ample time for each stage, resulting in a perfect frozen dessert.
Simple Ingredients for Amazing Flavor
Creating an outstanding homemade peach cobbler ice cream starts with selecting the right simple ingredients. Each component plays a crucial role in building the delightful flavor and perfect texture that makes this dessert so special. We focus on fresh, high-quality items to ensure every scoop is a testament to natural goodness. From the star fruit to the creamy base and the signature cobbler bits, paying attention to these selections will elevate your ice cream from good to truly exceptional. For even more dessert ideas, consider exploring other sweet treats like Quick Italian Cream Cake.
Fresh Peaches Are Key
The heart of any great peach ice cream is, undeniably, the fresh peaches. Opt for ripe, fragrant peaches that are slightly soft to the touch but not mushy. Varieties like freestone peaches (e.g., Georgia Belle, Redhaven, Elberta) are excellent choices because their flesh easily separates from the pit, simplifying preparation. Using fresh, in-season peaches ensures the most vibrant and sweet peach flavor, which is paramount for this recipe. Avoid canned or frozen peaches if possible, as they often lack the same natural sweetness and texture. If you’re interested in learning more about the fruit itself, you can read about the peach on Wikipedia.
Creamy Base Essentials
For that rich, smooth, and creamy ice cream texture, the base ingredients are crucial. You’ll need a combination of heavy cream and whole milk. The high-fat content of heavy cream provides the luxurious mouthfeel we all crave in ice cream, while whole milk helps to thin it slightly for optimal churning. Granulated sugar sweetens the base, balancing the tartness of the peaches. A touch of vanilla extract (pure vanilla is best) enhances all the flavors, adding warmth and depth. Some recipes might also include a pinch of salt to further round out the sweetness. These staples ensure a decadent foundation for your fruit-filled creation.
The Crumbled Cobbler Touch
What makes this truly “peach cobbler” ice cream is the addition of actual cobbler crust. This isn’t just about flavor; it’s about texture. You can use homemade cobbler crust (perhaps from a leftover snickerdoodle cobbler recipe) or store-bought pie crust that you bake and crumble. The key is to bake it until it’s crisp and golden brown, then let it cool completely before crumbling it into small, bite-sized pieces. These bits provide a delightful contrast to the creamy ice cream, offering a satisfying chew and a hint of buttery, spiced flavor. A little cinnamon or nutmeg in the cobbler crust can further enhance the “cobbler” experience.
Prepare Peaches for Ice Cream Bliss
Properly preparing your fresh peaches is a critical step in making exquisite peach cobbler ice cream. The way you handle them will directly impact both the texture and the intensity of the peach flavor in your final dessert. Taking a little extra time here ensures that your homemade treat truly shines with sweet peaches, contributing significantly to that delightful flavor you are aiming for. This meticulous preparation sets the foundation for a truly exceptional frozen dessert experience, ensuring every bite is infused with natural fruit goodness.
Peeling and Dicing Peaches
To achieve the smoothest ice cream texture without any chewy peel bits, peeling your peaches is highly recommended. The easiest method is blanching:
- Bring a pot of water to a rolling boil.
- Prepare an ice bath in a large bowl.
- Carefully drop peaches into the boiling water for 30-60 seconds (just until the skin begins to loosen).
- Immediately transfer them to the ice bath to stop the cooking process.
- Once cool enough to handle, the skins should slip off easily.
After peeling, cut the peaches in half, remove the pit, and then dice them into small, uniform pieces. Aim for about 1/4 to 1/2-inch cubes. Smaller pieces will distribute more evenly throughout the ice cream, ensuring peach flavor in every spoonful.
Sugaring Peaches for Sweetness
Once your peaches are peeled and diced, the next step is to sugar them. This process, often called macerating, draws out the natural juices and intensifies their sweetness.
- Place the diced peaches in a bowl.
- Sprinkle them with a small amount of granulated sugar (usually 1/4 to 1/2 cup per 4-5 medium peaches, adjusting to peach sweetness).
- Gently toss to coat the peaches.
- Let them sit at room temperature for at least 30 minutes, or even longer in the refrigerator, stirring occasionally.
As the peaches sit, they’ll release a beautiful, sugary syrup. This syrup, along with the softened peaches, will be a fantastic addition to your ice cream base, ensuring that the peach flavor is pronounced and perfectly sweet.
Mixing Your Ice Cream Base
The foundation of any great ice cream lies in its base. For our homemade peach cobbler ice cream, we aim for a rich cream base that provides the perfect canvas for the sweet peaches and crunchy cobbler bits. This stage is relatively straightforward but crucial for achieving that desirable creamy ice cream consistency and delightful flavor. Paying attention to the mixing process ensures all the simple ingredients are well combined, leading to a homogenous and smooth mixture ready for churning.
Whisking Cream and Milk
Begin by combining your dairy components. In a large mixing bowl, whisk together the heavy cream and whole milk until they are thoroughly blended. This initial step helps to create a uniform liquid base, ensuring that the fats and liquids are evenly distributed before other ingredients are introduced. A good whisking now will prevent any separation later and contribute to the overall smooth texture of your frozen dessert. You’re building the perfect foundation for your fruit-filled delight.
Adding Vanilla and Sugar
Next, incorporate the flavor enhancers. Add the granulated sugar to the cream and milk mixture. Whisk vigorously until the sugar is completely dissolved. It’s important to ensure no gritty sugar crystals remain, as they can lead to an icy texture in the final product. Then, stir in a generous amount of pure vanilla extract. The vanilla notes complement the peaches beautifully, adding a layer of warmth and complexity to the overall delightful flavor. Taste a small amount of the base to adjust sweetness if necessary, keeping in mind the peaches will add more.
Combining Peaches and Cream
Now, it’s time to bring the star ingredient into the base. Gently fold the sugared (macerated) peaches, along with any released juices, into your cream and milk mixture. Stir just until combined. Be careful not to overmix, as you want to maintain the integrity of the peach pieces. Some recipes suggest blending a portion of the peaches into a puree for a more intense peach flavor throughout the base, while reserving diced pieces for texture. For this recipe, we’ll keep the peaches diced to ensure distinct fruit chunks. This creates a perfect balance of creamy and fruit-filled elements.
Churning Your Perfect Peach Cobbler
Churning is where the magic truly happens, transforming your liquid base into the soft, luscious frozen dessert we all love. This process incorporates air and prevents large ice crystals from forming, ensuring a creamy ice cream texture. Getting this step right is key to achieving that delightful, scoopable consistency that makes homemade peach cobbler ice cream so satisfying. Whether you use a machine or a no-churn option, understanding the principles of chilling is vital for success.
Using an Ice Cream Maker
For the creamiest results, an ice cream maker is highly recommended. Ensure your ice cream maker bowl has been frozen for at least 12-24 hours prior to churning, as per the manufacturer’s instructions.
- Pour the chilled peach ice cream base into the frozen bowl of your ice cream maker.
- Turn on the machine and churn according to the manufacturer’s instructions, typically for 20-30 minutes.
- The ice cream is ready when it has reached the consistency of soft-serve.
The churning process is crucial for preventing the formation of large ice crystals, which can make your ice cream icy rather than smooth. Churning also incorporates air, giving the ice cream its characteristic light and airy texture. For more information about the process, you can consult the Ice cream Wikipedia page.
Chilling for Creamier Texture
Before churning, it is absolutely essential to thoroughly chill your ice cream base. After mixing all the ingredients, cover the bowl and refrigerate the base for at least 2-4 hours, or ideally, overnight. A well-chilled base (around 40°F/4°C or colder) helps the ice cream maker work more efficiently and reduces the churning time, leading to a much smoother and creamier final product. If the base isn’t cold enough, the ice cream may not set properly, resulting in a less desirable, icier texture. This chilling phase is a non-negotiable step for achieving perfect texture.
Adding the Cobbler Crust Magic
The “cobbler” in peach cobbler ice cream isn’t just a name; it’s a vital component that adds incredible texture and a hint of spiced, buttery goodness. This step elevates your creamy ice cream from a simple peach flavor to a truly authentic, multi-layered dessert. The crunchy, spiced crumble provides a delightful contrast to the smooth fruit-filled base, creating a truly unique and memorable homemade peach cobbler ice cream that stands out among frozen desserts.
When to Add Cobbler Bits
Timing is everything when incorporating the cobbler crust bits. You want them to retain some of their crunch without becoming soggy. The best time to add the crumbled cobbler is during the last 5 minutes of churning in your ice cream maker.
- Once your ice cream has reached a soft-serve consistency, slowly add the cooled, crumbled cobbler pieces through the opening of the ice cream maker.
- Allow the machine to churn for another 2-5 minutes, just enough to evenly distribute the cobbler bits throughout the ice cream.
Adding them too early might make them too soft, and adding them too late could result in uneven distribution. This method ensures that the cobbler crust maintains its integrity and provides that satisfying textural contrast in every scoopable bite.
Freezing for Pure Bliss Texture
Once churned, your homemade peach cobbler ice cream will have a soft, almost milkshake-like consistency. To achieve that firm, scoopable texture we all love, a crucial freezing period is necessary. This final stage allows the ice cream to harden and mature, locking in its delightful flavor and ensuring a perfect texture. Proper freezing is essential for transforming the churned mixture into a truly satisfying frozen dessert that holds its shape beautifully.
Minimum Freeze Time
After churning, immediately transfer the soft ice cream to an airtight container. Press a piece of plastic wrap directly onto the surface of the ice cream to prevent ice crystals from forming, then secure the lid. Place the container in the coldest part of your freezer. The ice cream needs to freeze for a minimum of 4-6 hours to reach a firm, scoopable consistency. For best results and the firmest texture, allowing it to freeze overnight is ideal. Resist the urge to open the freezer frequently, as this can affect the freezing process. This waiting period is critical for the pure bliss texture you desire.
Tips for Best Peach Ice Cream
Achieving truly exceptional peach cobbler ice cream goes beyond just following the recipe steps; a few expert tips can elevate your homemade creation from good to absolutely glorious. These small adjustments can significantly impact the delightful flavor and overall enjoyment of your frozen dessert. Paying attention to these details ensures that every scoop is bursting with sweet peaches and features that perfect texture you crave. Making this summer treat even better is easy with these considerations.
Ripe Peaches for Flavor
The single most important factor for an outstanding peach ice cream is using perfectly ripe peaches. Ripe peaches are naturally sweeter and more aromatic, requiring less added sugar and yielding a more intense, authentic peach flavor. Look for peaches that have a vibrant color, feel heavy for their size, and give slightly when gently squeezed. Their aroma should be distinctly sweet and peachy. Under-ripe peaches will result in a bland ice cream, while overripe ones might be mushy. Freshness and ripeness truly make all the difference for a truly delightful flavor.
Room Temperature Scooping
For the easiest and most enjoyable scooping experience, allow your homemade peach cobbler ice cream to sit at room temperature for about 5-10 minutes before serving. This brief period slightly softens the ice cream, making it easier to scoop and enhancing its creamy texture. If you try to scoop it directly from the freezer, it might be too hard and challenging to serve. Using a warm ice cream scoop (dipped in hot water and wiped dry) also helps create perfect, smooth scoops. This simple trick ensures a delightful and effortless serving experience, revealing that perfect texture.
Alternative Without a Maker
Don’t have an ice cream maker? You can still make a delicious no-churn peach cobbler ice cream!
- Whip heavy cream until stiff peaks form.
- In a separate bowl, combine sweetened condensed milk with your prepared sugared peaches and vanilla.
- Gently fold the whipped cream into the peach mixture until just combined.
- Stir in the crumbled cobbler bits.
- Transfer to an airtight container and freeze for at least 6 hours, or until firm.
While the texture might be slightly different from a churned version, this no-churn option still delivers fantastic flavor and a wonderfully creamy, fruit-filled treat. It’s an easy preparation method for a delicious summer dessert.
Enjoying Your Homemade Peach Dessert
After all your efforts in creating this marvelous homemade peach cobbler ice cream, the best part is undoubtedly enjoying your frozen dessert. This sweet treat is versatile and can be savored in many ways, making it a truly delightful flavor experience. Whether you prefer it plain or with extra flair, it’s designed to be a family favorite. Don’t forget to check out our Pinterest for more inspiration and dessert ideas!
Serving Suggestions
This peach cobbler ice cream is fantastic on its own, but here are some serving suggestions to make it even more special:
- Classic Scoop: Simply serve a generous scoop in a bowl or cone.
- Warm Cobbler Topping: Drizzle with a spoonful of warm peach cobbler filling or a sprinkle of extra cinnamon.
- Whipped Cream: A dollop of fresh whipped cream never hurts!
- Caramel Drizzle: A light swirl of caramel sauce adds another layer of sweetness.
- Fresh Mint: A sprig of fresh mint provides a beautiful garnish and a hint of freshness.
- Nutty Crunch: Sprinkle with toasted pecans or walnuts for an extra textural element.
However you choose to serve it, this fruit-filled ice cream is sure to be a crowd-pleaser and a perfect summer treat.
Storing Leftover Peach Cobbler Ice Cream
Having leftover homemade peach cobbler ice cream is a rare but wonderful occurrence! Proper storage is key to maintaining its delightful flavor and perfect texture for future enjoyment. You’ve put in the effort to create this creamy ice cream, so ensuring it stays fresh and delicious is important. Following these simple storage tips will help you preserve your frozen dessert effectively.
Airtight Container Tips
To keep your peach cobbler ice cream fresh and free from freezer burn, always store it in an airtight container.
- Use a shallow, rectangular container: This helps the ice cream freeze more evenly.
- Press plastic wrap directly onto the surface: This creates a barrier against air, preventing ice crystals from forming on top.
- Seal tightly: Ensure the lid is securely fastened.
- Store in the coldest part of the freezer: This helps maintain a consistent temperature.
Stored correctly, your homemade peach cobbler ice cream can last for up to 2-3 weeks in the freezer, although its best quality is usually within the first week. Don’t forget to follow Carina Recipes on Instagram for more cooking inspiration and tips, including for delicious desserts.
Quick Look: Peach Cobbler Nutrition
While homemade peach cobbler ice cream is undoubtedly a sweet treat to be savored, it’s helpful to have a general idea of its nutritional content. Keep in mind that exact figures can vary significantly based on the specific ingredients used, portion sizes, and any added toppings. This section provides a basic per serving breakdown to offer some insight, helping you enjoy this delightful flavor mindfully.
Per Serving Breakdown
A typical single serving of homemade peach cobbler ice cream (approximately 1/2 cup) will generally contain:
- Calories: 250-350 kcal (depending on cream, sugar, and cobbler content)
- Total Fat: 15-25g (primarily from heavy cream)
- Saturated Fat: 9-15g
- Cholesterol: 50-80mg
- Sodium: 50-100mg
- Total Carbohydrates: 25-35g (from sugar and peaches)
- Dietary Fiber: 1-2g (from peaches)
- Sugars: 20-30g
- Protein: 3-5g
This information is an estimate. Homemade versions often contain less artificial additives compared to commercial ice creams, offering a more natural fruit-filled treat. Enjoy in moderation as part of a balanced diet.
Recipe Summary: 5 Steps to Bliss
To recap, creating this amazing homemade peach cobbler ice cream is an achievable and rewarding culinary adventure. We’ve broken down the process into key stages, ensuring easy preparation for this delightful flavor. By following these summarized steps, you’ll be well on your way to enjoying a perfect texture, fruit-filled, and incredibly satisfying frozen dessert. This quick overview serves as a handy checklist for your journey to pure bliss.
Overview of Key Steps
- Prepare Peaches: Peel, dice, and sugar your fresh peaches to draw out their juices and enhance sweetness.
- Mix the Base: Whisk together heavy cream, whole milk, sugar, and vanilla until thoroughly combined and sugar is dissolved. Fold in the prepared peaches.
- Chill Thoroughly: Refrigerate the entire ice cream base for at least 2-4 hours, or preferably overnight, for optimal churning and creamy texture.
- Churn and Add Cobbler: Churn the chilled base in an ice cream maker until it reaches a soft-serve consistency. During the last 5 minutes, add your crumbled, baked cobbler crust bits.
- Freeze for Firmness: Transfer the ice cream to an airtight container, press plastic wrap directly on the surface, and freeze for a minimum of 4-6 hours (or overnight) until firm and scoopable.
Follow these steps, and you’ll successfully create a homemade peach cobbler ice cream that promises delightful flavor and perfect texture, a true summer treat everyone will adore.
