
Quick Italian Cream Cake for another rewarding experience.
Gathering Simple Pie Ingredients
One of the most appealing aspects of the Old Fashioned Amish Peanut Butter Dream Pie is its reliance on readily available, simple ingredients. You likely have most of these staples in your pantry already, making this an accessible dessert for any spontaneous craving or last-minute gathering. For the crust, you’ll need graham cracker crumbs (or a similar cookie crumb) and melted butter. These two components create a delightfully buttery and slightly crisp base that perfectly complements the rich filling. For the star of the show – the filling – you’ll be working with creamy peanut butter, powdered sugar, heavy whipping cream, and a touch of vanilla extract. Choosing a good quality peanut butter will significantly impact the depth of flavor in your pie, so opt for your favorite brand. The combination of these items results in a luscious, airy, and utterly irresistible filling that embodies the “dream” in its name. No fancy or exotic items are needed; just pure, wholesome ingredients coming together to create a memorable sweet treat.
Easy Step 1: Make the Crust
Starting with a solid crust is foundational to any great pie, and this Amish peanut butter pie is no exception. A well-prepared crust provides the perfect counterpoint to the soft, creamy filling, adding a delightful textural contrast. This particular crust is quick to assemble and requires minimal fuss, setting you up for success right from the beginning of your pie-making adventure.
Mix Crumbs and Melted Butter
Begin by combining the graham cracker crumbs with melted unsalted butter. Ensure the butter is thoroughly incorporated into the crumbs, creating a mixture that resembles wet sand. This even distribution is crucial for a cohesive crust that holds together well. If you prefer, you can use other types of cookie crumbs, such as vanilla wafers or chocolate cookies, for a different flavor profile.
Press and Bake for 10 Minutes
Once mixed, press the crumb mixture firmly into the bottom and up the sides of a 9-inch pie plate. Use the bottom of a glass or your knuckles to compact the crumbs, creating a dense and even layer. This firm pressing is vital to prevent the crust from falling apart when sliced. Bake the crust in a preheated oven at 350°F (175°C) for just 10 minutes. This brief baking time helps to set the butter and firm up the crust, giving it a slightly toasted flavor and ensuring it won’t become soggy when the filling is added. Allow the crust to cool completely before proceeding to the next step.
Easy Step 2: Craft the Filling
The heart of this Old Fashioned Amish Peanut Butter Dream Pie lies in its incredibly smooth and fluffy filling. This part of the recipe transforms simple pantry staples into a rich, airy concoction that is truly a creamy peanut butter lover’s delight. The technique involves a bit of blending and careful folding, ensuring the final texture is light as a cloud.
Blend Peanut Butter, Powdered Sugar
In a medium bowl, combine the creamy peanut butter and powdered sugar. Using an electric mixer, beat these two ingredients together until they are smooth and well-combined. The powdered sugar not only sweetens the peanut butter but also helps to create a fine, non-gritty texture. This forms the dense, flavorful base of your filling, so make sure there are no lumps of powdered sugar remaining.
Whip Cream with Vanilla Extract
In a separate, chilled large bowl, pour in the heavy whipping cream and vanilla extract. Using clean beaters, whip the cream on high speed until stiff peaks form. Stiff peaks mean that when you lift the beaters, the cream stands up straight. Be careful not to over-whip, as this can turn the cream grainy. The vanilla extract adds a lovely aromatic depth that complements the peanut butter beautifully. This whipped cream is what gives the pie its signature lightness and dream-like consistency. For another delightful dessert featuring peanut butter, check out our Peanut Butter Brownie Swirl Cookies.
Gently Fold to Combine
Once your peanut butter mixture is smooth and your cream is whipped to stiff peaks, it’s time to bring them together. Add about one-third of the whipped cream to the peanut butter mixture and gently fold it in using a rubber spatula. This initial addition lightens the peanut butter mixture, making it easier to incorporate the rest of the whipped cream without deflating it. Then, carefully fold in the remaining whipped cream, working in gentle, upward motions until no streaks of cream or peanut butter remain. The goal is to maintain as much air as possible in the mixture, resulting in a light, airy, and utterly divine filling for your Amish peanut butter pie. Avoid aggressive stirring, which can deflate the whipped cream and make the filling dense.
Easy Step 3: Assemble the Pie
With your perfectly baked and cooled crust ready and your luscious, creamy peanut butter filling whipped to perfection, it’s time for the straightforward assembly. This step is where all your hard work comes together, creating a visually appealing and soon-to-be delicious homemade pie. The ease of assembly is another reason this easy pie recipe is a favorite among dessert enthusiasts.
Pour Filling into Cooled Crust
Carefully spoon or pour the entire peanut butter filling mixture into your completely cooled graham cracker crust. Ensure the crust is truly cool, as any residual warmth could cause the filling to melt and lose its airy texture. Distribute the filling evenly across the bottom of the pie crust. Take your time to get an even spread, as this will impact the final presentation of your no-bake dessert.
Smooth Top Evenly
Once the filling is in the crust, use the back of your spoon or an offset spatula to gently smooth the top surface. Create an even layer across the entire pie. This not only makes the pie look professional and appetizing but also ensures a consistent texture in every slice. Some people like to create gentle swirls or patterns on top for an added decorative touch, which can be a fun way to personalize your sweet treat before chilling. The smoother the top, the more elegant your final presentation will be once garnished.
Easy Step 4: Chill Your Creation
This stage is arguably the most critical for achieving the perfect texture for your Old Fashioned Amish Peanut Butter Dream Pie. While the preparation and mixing steps are simple, the extended chilling time is what transforms the creamy filling into a firm, sliceable dessert. Do not rush this process; patience will be rewarded with an ideal consistency that holds its shape beautifully.
Refrigerate At Least 4 Hours
Once your pie is assembled, cover it loosely with plastic wrap or aluminum foil to prevent it from absorbing odors from the refrigerator. Place the pie in the refrigerator and allow it to chill for a minimum of 4 hours. For the best results and a truly firm set, consider refrigerating it overnight. This extended chilling period allows the fats in the whipped cream and peanut butter to solidify, creating a stable structure for your pie. It’s during these hours that the “dream” in “Dream Pie” truly comes to life, as the flavors deepen and the texture becomes perfectly smooth and ready to serve. Exploring other desserts often reveals similar chilling requirements for optimal enjoyment.
Ensures Firm Setting
The primary purpose of thorough chilling is to ensure a firm setting. Without adequate time in the cold, the pie filling may be too soft, resulting in messy slices that don’t hold their form. A properly chilled pie will slice cleanly, revealing distinct layers of crust and creamy filling, making it not only delicious but also visually appealing. This firm setting is especially important for serving, as it allows for easy portioning and ensures each guest receives a perfect piece of this delightful Amish peanut butter pie.
Easy Step 5: Garnish and Serve
The final touches truly elevate your Old Fashioned Amish Peanut Butter Dream Pie from a simple, creamy peanut butter dessert to a show-stopping sweet treat. Garnishing adds both visual appeal and an extra layer of flavor, making each slice an even more delightful experience. Presentation is key, especially after the anticipation of the chilling process.
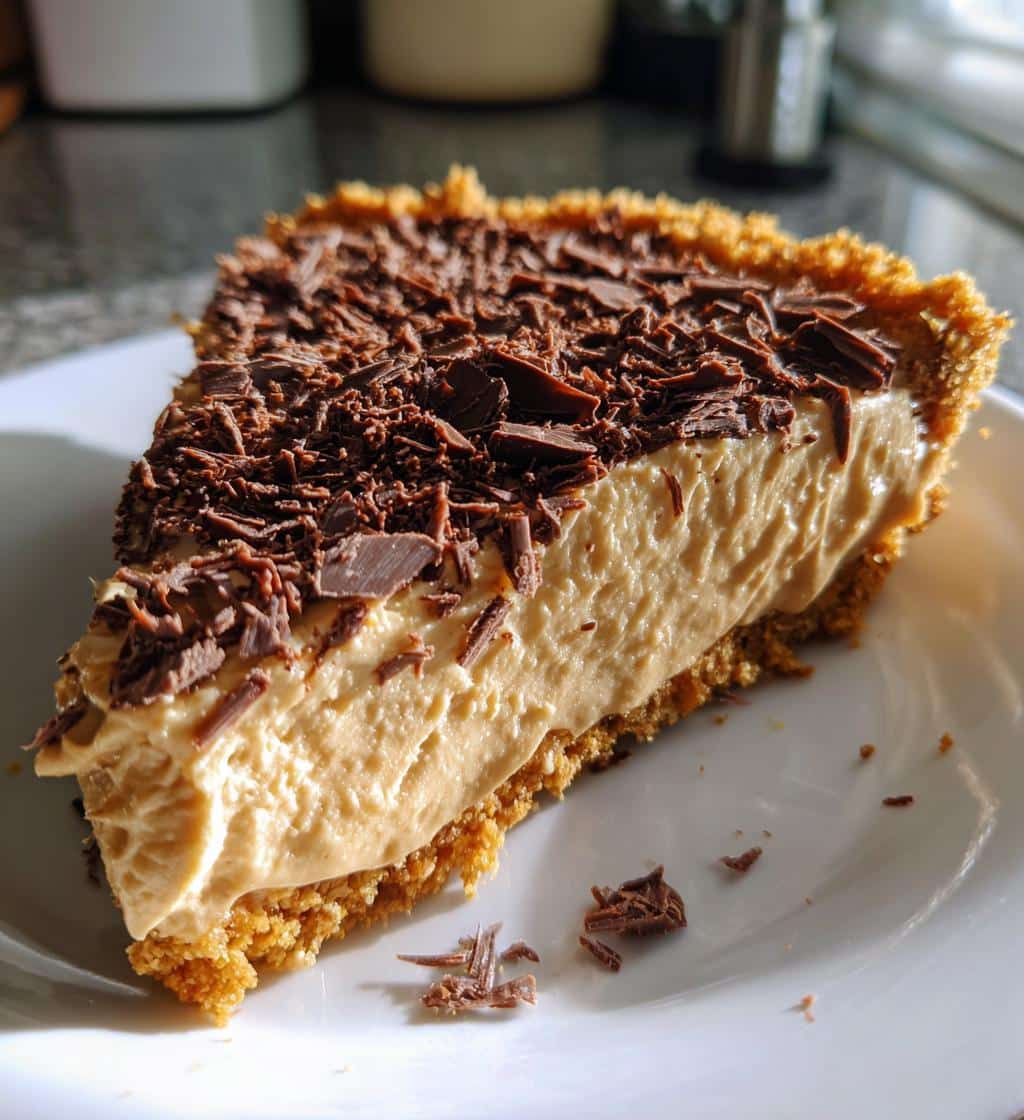
Add Chocolate Shavings
Once your pie is perfectly chilled and ready to serve, consider adding some chocolate shavings to the top. Dark, milk, or even white chocolate can be used, depending on your preference. Use a vegetable peeler or a sharp knife to create delicate curls or fine shavings. These not only add a beautiful contrast in color against the light peanut butter filling but also introduce a complementary flavor and a touch of elegance. The slight bitterness of dark chocolate can balance the sweetness of the pie, making for a sophisticated pairing.
Best Enjoyed Chilled
It’s important to remember that this no-bake dessert is truly at its best when served cold. The chilling process ensures its firm texture and highlights the refreshing creaminess of the filling. Remove the pie from the refrigerator just before slicing and serving. If left out at room temperature for too long, the filling will begin to soften, impacting its texture and overall enjoyment. Slice with a sharp, clean knife, wiping it between cuts for the neatest slices. This easy pie recipe promises a delectable experience, best savored in its perfectly chilled state.
Tips for Perfect Amish Peanut Butter Dream Pie
Achieving a truly perfect Old Fashioned Amish Peanut Butter Dream Pie is well within reach, especially with a few insider tips. This homemade pie is already straightforward, but these additional pointers will help ensure your sweet treat turns out impeccably every single time. From ingredient selection to the crucial chilling process, paying attention to these details will make all the difference in your delicious Amish peanut butter pie.
Use Quality Ingredients
The quality of your ingredients directly impacts the flavor and texture of your finished pie. Opt for a good quality creamy peanut butter, as it is the star ingredient. Natural peanut butter can work, but sometimes its oil separation might require extra mixing for a smoother filling. Ensure your heavy whipping cream is fresh and well-chilled before whipping, which helps it achieve stiff peaks more easily. High-quality vanilla extract will also impart a much richer flavor than artificial alternatives. These simple ingredients, when chosen carefully, contribute significantly to the overall deliciousness of your dream pie. For more culinary inspiration, consider checking out Carina Recipes on Pinterest.
Thorough Chilling is Key
We’ve emphasized it before, and we’ll say it again: thorough chilling is non-negotiable for this no-bake dessert. While 4 hours is the minimum, an overnight chill is truly ideal. This extended period allows the filling to set completely, ensuring clean, firm slices and preventing a runny mess. A well-chilled pie is easier to cut, holds its shape beautifully, and offers the best possible texture and taste. If you’re short on time, consider preparing the pie the day before you plan to serve it. This not only guarantees perfect setting but also takes the pressure off on the day of your event, allowing you to relax and enjoy your magnificent creamy peanut butter creation.
Storing Leftover Pie Safely
Should you be fortunate enough to have any leftover Old Fashioned Amish Peanut Butter Dream Pie, proper storage is essential to maintain its freshness and delightful texture. This homemade pie is just as enjoyable the next day, provided it’s kept correctly. Following these simple storage guidelines will ensure your sweet treat remains delicious for several days, letting you savor every last bite of this creamy peanut butter dessert.
Keep Covered in Fridge
To keep your pie fresh and prevent it from drying out or absorbing unwanted odors from your refrigerator, it’s crucial to cover it properly. Use plastic wrap to tightly cover the pie plate, or transfer individual slices to an airtight container. The goal is to create a barrier against air and moisture. Ensure the covering doesn’t directly press down on the delicate filling, especially if you have added garnishes. A pie dome or a piece of foil tented over the pie can also work wonders.
Good for Up to 5 Days
When stored correctly in the refrigerator, your Old Fashioned Amish Peanut Butter Dream Pie will remain fresh and delicious for up to 5 days. Beyond this timeframe, while it might still be safe to eat, the quality of the texture and flavor may start to diminish. Always use your best judgment. For optimal taste and texture, it’s often best to enjoy the pie within the first 2-3 days. This duration allows ample time to enjoy your delightful no-bake dessert without any rush.
Fun Variations for Your Pie
While the classic Old Fashioned Amish Peanut Butter Dream Pie is utterly perfect as is, part of the joy of baking is the ability to customize and experiment. This easy pie recipe serves as an excellent canvas for creative additions, allowing you to tailor the sweet treat to your personal preferences or seasonal delights. Don’t be afraid to put your unique spin on this delicious homemade pie, transforming it into new and exciting dessert ideas.
Add Chocolate or Banana
The combination of peanut butter and chocolate is a timeless classic, and it works wonderfully in this dream pie. You can swirl melted chocolate into a portion of the filling before adding it to the crust, or layer a thin ganache on top of the chilled pie. For a more direct approach, incorporate mini chocolate chips directly into the filling. Another fantastic pairing is banana. Consider adding a layer of thinly sliced fresh bananas over the crust before pouring in the filling. The natural sweetness and soft texture of the banana complement the rich classic American pies beautifully. For more inventive recipe ideas, follow Carina Recipes on Instagram.
Try Crunchy Peanut Butter
If you love a bit of texture in your desserts, swapping creamy peanut butter for crunchy peanut butter is an excellent variation. The small pieces of peanuts throughout the filling will add a delightful crunch that contrasts with the smooth, airy cream. This simple change can significantly alter the eating experience, providing an interesting dynamic to each bite. If using crunchy peanut butter, ensure it’s still smooth enough to blend well with the powdered sugar, or you might need to beat it a little longer to break down larger chunks. This small modification keeps the core essence of the Amish peanut butter pie while adding an exciting textural dimension.
Nutrition Facts for Your Treat
While the Old Fashioned Amish Peanut Butter Dream Pie is undoubtedly a delicious sweet treat, it’s always helpful to have a general understanding of its nutritional profile. As with most indulgent desserts, this creamy peanut butter creation is best enjoyed in moderation. Knowing the typical nutritional breakdown can assist in fitting this delightful homemade pie into a balanced diet. Specific values will vary based on brands and exact measurements used, but we can provide a general overview.
Calories Per Serving
Given its rich ingredients—peanut butter, sugar, butter, and heavy cream—this pie is calorie-dense. A typical serving can range from 350 to 500 calories, depending on the slice size and specific recipe variations. It’s a treat meant to be savored and enjoyed, rather than an everyday staple. Recognizing its caloric contribution helps in mindful consumption and ensures it remains a delightful occasional indulgence.
Breakdown of Nutrients
In terms of nutrients, this Amish peanut butter pie is rich in fats, primarily from the peanut butter and dairy, which contribute to its creamy texture and satiety. It also contains a significant amount of carbohydrates, mostly from the sugars and graham cracker crust. Peanut butter does provide some protein and dietary fiber, along with vitamins and minerals like Vitamin E, B vitamins, magnesium, and potassium. However, the pie’s overall profile means it should be considered a dessert or treat. Balancing it with nutrient-dense meals throughout the day is a good approach. For another comforting dessert, try our Snickerdoodle Cobbler or delightful Butterfinger Balls.
Enjoying Old Fashioned Amish Peanut Butter Dream Pie
After all your efforts in preparing and patiently chilling this delightful creation, the moment has arrived to truly enjoy your Old Fashioned Amish Peanut Butter Dream Pie. This easy pie recipe culminates in a truly special sweet treat that brings joy to any occasion. Whether it’s a family dinner, a celebratory gathering, or simply a quiet evening indulgence, this creamy peanut butter pie is sure to be a hit. Its rich flavor and silky texture make it an unforgettable no-bake dessert, proving that sometimes, the simplest recipes yield the most profound culinary experiences.
Serve slices with a smile, perhaps with a tall glass of cold milk or a hot cup of coffee to complement its sweetness. Watch as faces light up with each bite of this incredible homemade pie. The delightful contrast of the firm crust and the airy, melt-in-your-mouth filling creates a symphony of textures and flavors that embodies comfort and joy. This Amish peanut butter pie isn’t just a dessert; it’s an experience, a memory in the making, and a testament to the timeless appeal of simple, delicious food. Embrace the pure pleasure of this dream pie, and remember that sometimes the best things in life are indeed the easiest to create.