
Mini chocolate tarts offer a delightful, bite-sized indulgence for any occasion. This recipe makes easy baking accessible, creating sweet treats with a perfect crust and rich chocolate ganache filling. Whether for a party or a quiet evening, these homemade tarts are simple to prepare and truly satisfying. Enjoy pure chocolate bliss!
Key Takeaways
- Master simple steps for homemade mini chocolate tarts.
- Achieve a perfect, tender crust and a rich, smooth ganache filling.
- Learn essential baking, chilling, and serving tips for optimal results.
- Create delightful sweet treats ideal for any gathering or personal indulgence.
These chocolate tarts are pure joy. They bring sweetness to any moment. Simple ingredients yield rich flavor. Perfect for sharing or just you. Make them today!
Pure Chocolate Bliss: Making Mini Tarts
Quick overview of these chocolate treats
Creating these mini chocolate tarts is a rewarding culinary adventure, offering pure chocolate bliss in every bite. These miniature desserts are more than just a sweet treat; they’re an elegant statement, perfect for entertaining or a quiet moment of indulgence. The beauty of these homemade tarts lies in their simplicity combined with an impressive presentation. You’ll craft a tender, buttery crust that provides the ideal foundation for a lusciously rich chocolate ganache filling. This recipe makes easy baking accessible to everyone, ensuring even novice bakers can achieve spectacular results. From gathering the simple ingredients to the final delightful chill, each step is designed for success, resulting in truly irresistible sweet treats.
This guide will walk you through the entire process, making sure you understand how to achieve a perfect crust and a smooth, decadent filling. These individual tarts are fantastic for parties, potlucks, or as a sophisticated ending to any meal. We’ll cover everything from selecting the right chocolate to the best methods for chilling and serving. Get ready to add a new favorite to your collection of dessert recipes that will surely impress your family and friends with minimal fuss.
Gather Ingredients for Mini Chocolate Tarts
Success in making delicious mini chocolate tarts begins with selecting quality ingredients. The beauty of this recipe is that it relies on a few core components, each playing a crucial role in the final texture and flavor. Opt for fresh, good-quality butter and chocolate, as these are the stars of the show and will significantly impact the rich taste of your homemade tarts. Preparing your ingredients beforehand, often called mise en place, streamlines the baking process and ensures a smooth, enjoyable experience from start to finish. This detailed list will guide you in assembling everything you need to create both the perfect crust and the decadent filling.
List for the delicious crust
The foundation of these mini chocolate tarts is a wonderfully tender and flavorful crust. This component provides the necessary structure and a delightful contrast to the creamy filling. To achieve this perfect crust, you will need:
- All-purpose flour: The main structural component.
- Granulated sugar: Adds a touch of sweetness to the crust.
- Unsalted butter: Chilled and cut into small cubes. Butter is crucial for flakiness and flavor.
- Salt: Balances the sweetness and enhances all other flavors.
- Large egg yolk: Acts as a binder and adds richness to the dough, helping to create a tender texture.
List for the rich chocolate filling
The star of these miniature desserts is, of course, the rich chocolate filling—a smooth, velvety ganache that simply melts in your mouth. For this decadent part of the recipe, gather the following:
- Semi-sweet or dark chocolate chips: Choose a high-quality brand for the best flavor. Dark chocolate will yield a more intense, less sweet ganache.
- Heavy cream: The base of the ganache, providing its creamy texture. Ensure it’s at least 36% milk fat.
- Vanilla extract: A splash of pure vanilla extract enhances the chocolate notes and adds aromatic depth to the rich chocolate filling.
Prepare the Perfect Mini Tart Crusts
Crafting the tart crusts is a pivotal step for your mini chocolate tarts, setting the stage for their overall excellence. A well-made crust is buttery, tender, and provides a delightful textural contrast to the smooth chocolate filling. Precision in mixing and technique in pressing are key to achieving this perfect crust, ensuring your homemade tarts look as good as they taste. This section will walk you through creating a dough that is both easy to handle and bakes beautifully, making your easy baking journey a successful one.
Mixing dry and wet ingredients
Begin by combining your dry ingredients. In a medium bowl, whisk together the all-purpose flour, granulated sugar, and salt until well incorporated. In a separate bowl, or using a stand mixer with the paddle attachment, cream the chilled, cubed unsalted butter until it is soft and pliable. Gradually add the dry ingredients to the creamed butter, mixing on low speed until just combined and a crumbly mixture forms. Be careful not to overmix at this stage. Then, add the egg yolk and continue mixing until the dough just comes together. The mixture should form a soft, cohesive dough that is easy to handle but not sticky. Avoid adding extra liquid unless absolutely necessary, as this can make the crust tough.
Pressing mixture into tart pans
Once your dough is ready, it’s time for the gentle crust pressing technique that ensures a uniform and flawless tart shell. Take small portions of the dough, about 1-2 tablespoons per mini tart pan, depending on the size of your pans. Place the dough into the center of each fluted mini tart pan (with removable bottoms, if possible). Using your fingertips or the back of a small spoon, gently press the dough evenly across the bottom and up the sides of the pan. Ensure the thickness is consistent to prevent uneven baking. Pay close attention to the edges, pressing firmly but gently to create a clean, defined rim. This method helps achieve a sturdy yet tender crust, perfect for holding your rich chocolate filling.
Bake Your Mini Chocolate Tart Shells
Baking the mini tart shells correctly is paramount for achieving that perfect crust that holds up to the rich chocolate filling without becoming soggy. It’s one of those baking tips that can make or break the final product. Paying close attention to oven temperature and baking time, followed by proper cooling, will ensure your tart shells are golden, crisp, and ready for their decadent filling. This step is where the magic of easy baking truly comes alive, transforming simple dough into beautiful golden casings.
Oven temperature and baking time
Preheat your oven to 350°F (175°C). This moderate temperature allows the crust to bake through evenly without browning too quickly. Arrange the pressed tart pans on a baking sheet. Bake for approximately 12-15 minutes, or until the edges are lightly golden brown and the crust appears firm. If you notice any puffing in the center during baking, gently prick it with a fork. Some recipes call for blind baking (baking the crust without filling, often with pie weights), but for these mini tarts, a single bake usually suffices given their thinness. Keep a close eye on them, as mini tarts can bake quickly. Avoiding overbaked crusts is crucial; a slightly underbaked crust is better than a burnt one that compromises the taste and texture.
Cooling tart shells completely
Once baked, carefully remove the baking sheet from the oven. Let the mini tart shells cool in their pans on a wire rack for about 10 minutes. This allows them to set and firm up before handling. After this initial cooling, gently remove the tart shells from their pans and place them directly on the wire rack to cool completely. It is absolutely essential that the tart shells are entirely cool before you add the rich chocolate filling. Pouring warm ganache into a warm crust can make the crust soggy, ruining its crisp texture. Patience here will be rewarded with perfectly crisp and delicious homemade tarts.
Crafting the Rich Chocolate Filling
The heart of these mini chocolate tarts is their luxurious, rich chocolate filling—a velvety smooth ganache that provides an intense burst of flavor. Crafting this ganache requires attention to detail, ensuring the cream is heated correctly and the chocolate melts smoothly to achieve that signature glossy finish. This process, while simple, is key to the overall success and elegance of your miniature desserts. It’s a wonderful example of how careful preparation leads to truly delightful sweet treats.
Heating heavy cream correctly
Begin by pouring the heavy cream into a small saucepan. Heat the cream over medium heat, stirring occasionally, until it just begins to simmer around the edges and tiny bubbles appear. It’s crucial not to let it boil vigorously, as this can scorch the cream or alter its texture. The goal is to get the cream hot enough to melt the chocolate chips effectively. Once the cream reaches this point, immediately remove it from the heat.
Melting chocolate chips smoothly
Place your chosen semi-sweet or dark chocolate chips in a heatproof bowl. Pour the hot heavy cream directly over the chocolate chips. Let it sit undisturbed for 5-7 minutes. This allows the residual heat from the cream to gently melt the chocolate, ensuring a smooth and lump-free ganache. After waiting, gently stir the mixture with a whisk or spatula, starting from the center and working your way outwards. Continue stirring until the chocolate is fully melted and the mixture is completely smooth, glossy, and uniform in color. This method creates a beautifully emulsified ganache, forming the perfect base for your individual dessert ideas.
Adding vanilla extract for flavor
Once your ganache is smooth and shiny, stir in the vanilla extract. A good quality pure vanilla extract enhances the chocolate’s natural flavors and adds a warm, aromatic depth that elevates the entire rich chocolate filling. Mix gently until the vanilla is fully incorporated. Do not overmix, as this can introduce air bubbles. Taste a small amount of the ganache; if you desire a stronger chocolate flavor, you can always add a pinch of espresso powder at the beginning of the process with the chocolate chips. This completes the most crucial part of creating these decadent miniature desserts.
Assemble Your Mini Chocolate Tarts Simply
With your perfectly baked and cooled tart shells and your velvety smooth rich chocolate filling ready, assembling your mini chocolate tarts is the final straightforward step before chilling. This part of the process is quick and satisfying, bringing all your hard work together to create beautiful miniature desserts. The simplicity of assembly makes these sweet treats even more appealing for any easy baking enthusiast.
Pouring filling into cooled shells
Ensure your tart shells are completely cool to the touch. If they are even slightly warm, the ganache may not set correctly or could cause the crust to become soggy. Carefully place the cooled tart shells on a flat surface or a baking sheet for stability. Gently spoon or, for more precision, carefully pour the rich chocolate filling into each tart shell. Fill them almost to the brim, but leave a tiny bit of space at the top to account for any expansion or to allow for future toppings. Work slowly and steadily to avoid drips and ensure an even, smooth surface on each tart. Once all the shells are filled, you’re ready for the essential chilling step, which will transform the liquid ganache into a firm, delectable treat.
Chill Tarts for Pure Chocolate Bliss
Chilling is a non-negotiable step in the creation of these mini chocolate tarts. It’s where the rich chocolate filling transforms from a pourable liquid into a firm, sliceable ganache, delivering that pure chocolate bliss we’re aiming for. This period of refrigeration is vital for the texture, stability, and overall enjoyment of these miniature desserts. Skipping or shortening this step can lead to a runny filling and a less satisfying experience with your homemade tarts.
Importance of refrigeration time
The primary reason for chilling your mini chocolate tarts is to allow the ganache filling to properly set. As the ganache cools, the fat in the chocolate solidifies, giving the filling its characteristic smooth, firm, and yet still creamy texture. Without adequate refrigeration, the filling would remain too soft, making the tarts difficult to handle, serve, and eat. Proper chilling also helps to meld the flavors, ensuring a cohesive and delightful taste experience. It’s a critical component of successful easy baking when working with ganache-based sweet treats.
How long to chill tarts
Place the filled mini chocolate tarts on a baking sheet and transfer them to the refrigerator. For the ganache to set completely, they will need to chill for a minimum of 2 hours. However, for best results and optimal firmness, chilling them for 4 hours or even overnight is highly recommended. This longer chill time ensures the ganache is perfectly firm, allowing for clean cuts and easy removal from the tart pans (if applicable). Once chilled, the tarts are ready to be served or stored until your next gathering, making them perfect party treats that can be prepared in advance.
Serving Your Delightful Mini Chocolate Tarts
After all the careful preparation and crucial chilling time, serving your delightful mini chocolate tarts is the moment to enjoy the fruits of your labor. These elegant miniature desserts are perfect for any occasion, offering a sophisticated yet approachable sweet treat. Their individual size makes them incredibly convenient for gatherings and ensures easy portion control. Consider setting up a dessert display for an array of sweet treats, perhaps alongside peanut butter brownie swirl cookies, to truly impress your guests.
Optional toppings for presentation
While these mini chocolate tarts are stunning on their own, a few simple garnishes can elevate their presentation and add extra layers of flavor, turning them into truly memorable dessert ideas. Consider these optional toppings:
- Fresh Berries: Raspberries, strawberries, or blueberries add a vibrant pop of color and a refreshing tartness that beautifully complements the rich chocolate.
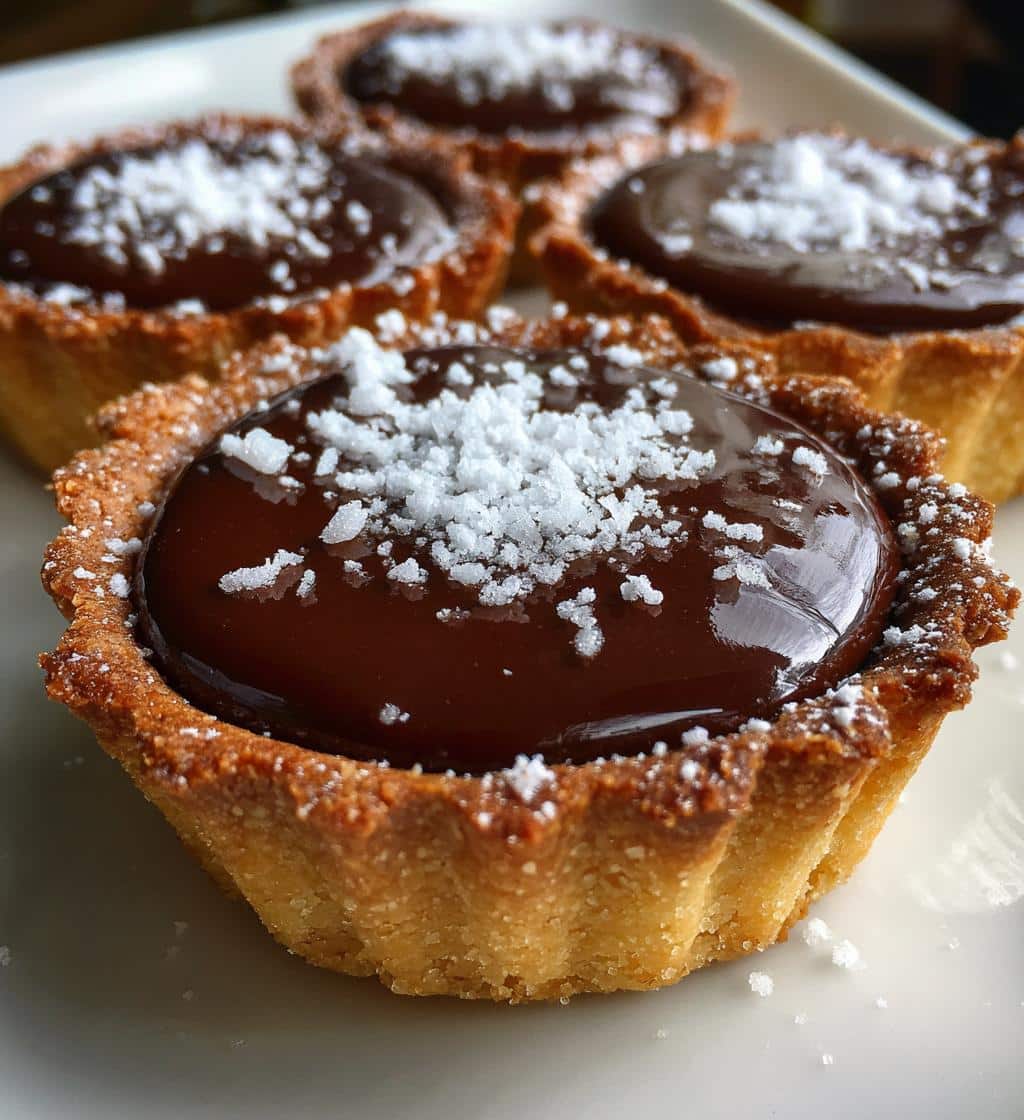
- Dusting of Cocoa Powder: A light dusting of unsweetened cocoa powder or powdered sugar provides a refined finish.
- Whipped Cream or Crème Fraîche: A small dollop of homemade whipped cream or a spoonful of tangy crème fraîche offers a creamy contrast.
- Chocolate Shavings or Curls: For extra indulgence and a professional look, scatter some delicate chocolate shavings over the top.
- Mint Leaves: A fresh mint leaf provides a beautiful green accent and a hint of coolness.
Feel free to get creative with your toppings to match the occasion or your personal preference. For more inspiration on presentation and dessert ideas, check out our Instagram!
Tips for Flawless Mini Chocolate Tarts
Achieving truly flawless mini chocolate tarts involves more than just following the steps; it’s about understanding the nuances that elevate a good dessert to a great one. These baking tips are designed to help you avoid common pitfalls and ensure your homemade tarts are consistently perfect, from the tender crust to the rich, smooth ganache filling. Mastering these techniques will make your easy baking endeavors even more rewarding.
Choosing your chocolate type
The type of chocolate you select significantly impacts the flavor profile of your rich chocolate filling. For a classic, balanced taste, semi-sweet chocolate chips are an excellent choice. If you prefer a more intense, less sugary flavor, opt for dark chocolate (60-70% cacao). Milk chocolate can also be used, but it will result in a much sweeter and softer ganache, so adjust the heavy cream quantity slightly if needed. Always choose high-quality chocolate; it makes a noticeable difference in the final taste and texture of your miniature desserts. For another delightful treat that lets chocolate shine, consider our snickerdoodle cobbler, which pairs warm spice with a sweet topping.
Avoiding overbaked crusts
An overbaked crust can be dry, tough, and even bitter, detracting from the overall enjoyment of your mini chocolate tarts. To prevent this, keep a close eye on your tart shells as they bake. They should be just lightly golden brown around the edges, not dark or deeply browned. If your oven tends to bake unevenly, rotate the baking sheet halfway through the baking time. Remember that every oven is different, so the first time you make these, start checking for doneness a couple of minutes before the suggested baking time. A perfectly baked crust is tender and crumbly, offering a delightful contrast to the creamy filling. For more visual inspiration and baking tips, follow us on Pinterest.
Gentle crust pressing technique
The way you press the dough into the tart pans is crucial for a tender, perfectly formed crust. Use a gentle but firm touch to ensure the dough is evenly distributed and no thin spots remain, which could lead to burning or breakage. Avoid pressing too hard, as this can compress the dough and result in a tough crust. The goal is to create a consistent thickness throughout the bottom and sides. If the dough starts to stick to your fingers, dust them lightly with flour or chill the dough for a few minutes. This gentle approach ensures your sweet treats have a delicate, melt-in-your-mouth crust every time.
Store Leftover Mini Chocolate Tarts Easily
One of the many benefits of making mini chocolate tarts is their excellent keeping quality, especially if you follow proper storage guidelines. This makes them ideal as party treats that can be prepared well in advance, or for simply enjoying a quick dessert throughout the week. Proper storage ensures that your homemade tarts maintain their fresh taste and perfect texture, allowing you to savor pure chocolate bliss long after baking.
Best way to keep them fresh
To keep your mini chocolate tarts fresh, it is essential to store them in an airtight container. Once the tarts are fully chilled and the ganache is firm, arrange them in a single layer within the container. If you need to stack them, place a piece of parchment paper between the layers to prevent them from sticking or damaging the tops. Store the container in the refrigerator. When stored correctly, these tarts will remain fresh and delicious for up to 3-4 days. For optimal enjoyment, remove them from the refrigerator about 15-20 minutes before serving to allow the ganache to soften slightly and enhance its creamy texture.
Nutrition Facts for Your Chocolate Tarts
Understanding the nutrition facts for your mini chocolate tarts helps you appreciate them as a delightful treat and manage your intake mindfully. As with many indulgent dessert ideas, these tarts are rich in flavor and calories, making them perfect for occasional enjoyment rather than an everyday staple. While exact figures depend on specific ingredient brands and portion sizes, we can provide a general overview of what to expect.
Understanding calories and sugar
Mini chocolate tarts, given their components of butter, sugar, flour, and chocolate, are naturally high in calories, fats, and sugars. A single tart can contain anywhere from 200-350 calories, largely due to the rich ganache and buttery crust. The sugar content will also be significant, primarily from the chocolate and the added sugar in the crust. While these sweet treats offer a wonderful moment of pure chocolate bliss, they are best enjoyed in moderation. Focusing on portion control allows you to savor the rich flavor without overindulging. Remember, dessert is about enjoyment and satisfaction, and a small, perfectly crafted mini tart can deliver immense pleasure.
Why Make These Mini Chocolate Tarts?
Beyond their undeniable deliciousness, there are numerous compelling reasons to add these mini chocolate tarts to your baking repertoire. They represent the epitome of a delightful treat, combining ease of preparation with sophisticated results. These miniature desserts are not just food; they’re an experience, perfect for creating memorable moments and satisfying the deepest chocolate cravings. Whether you’re a seasoned baker or just starting your easy baking journey, these homemade tarts offer immense satisfaction and versatility, cementing their place as a go-to for any occasion.
A delightful treat for any occasion
These mini chocolate tarts truly shine as a delightful treat for any occasion. Their individual size makes them perfect for party treats, allowing guests to enjoy a bite-sized indulgence without the mess of slicing a larger dessert. From elegant dinner parties to casual potlucks, birthday celebrations, holiday gatherings, or even a simple weekend indulgence, these tarts fit seamlessly into any event. They are also fantastic for gifting to friends and family. The rich chocolate filling and tender, perfect crust ensure everyone will adore these sweet treats. They’re a testament to how simple ingredients, when combined with care, can create something truly extraordinary and universally loved. If you are looking for another quick dessert, our quick Italian cream cake is an excellent choice for any event.