
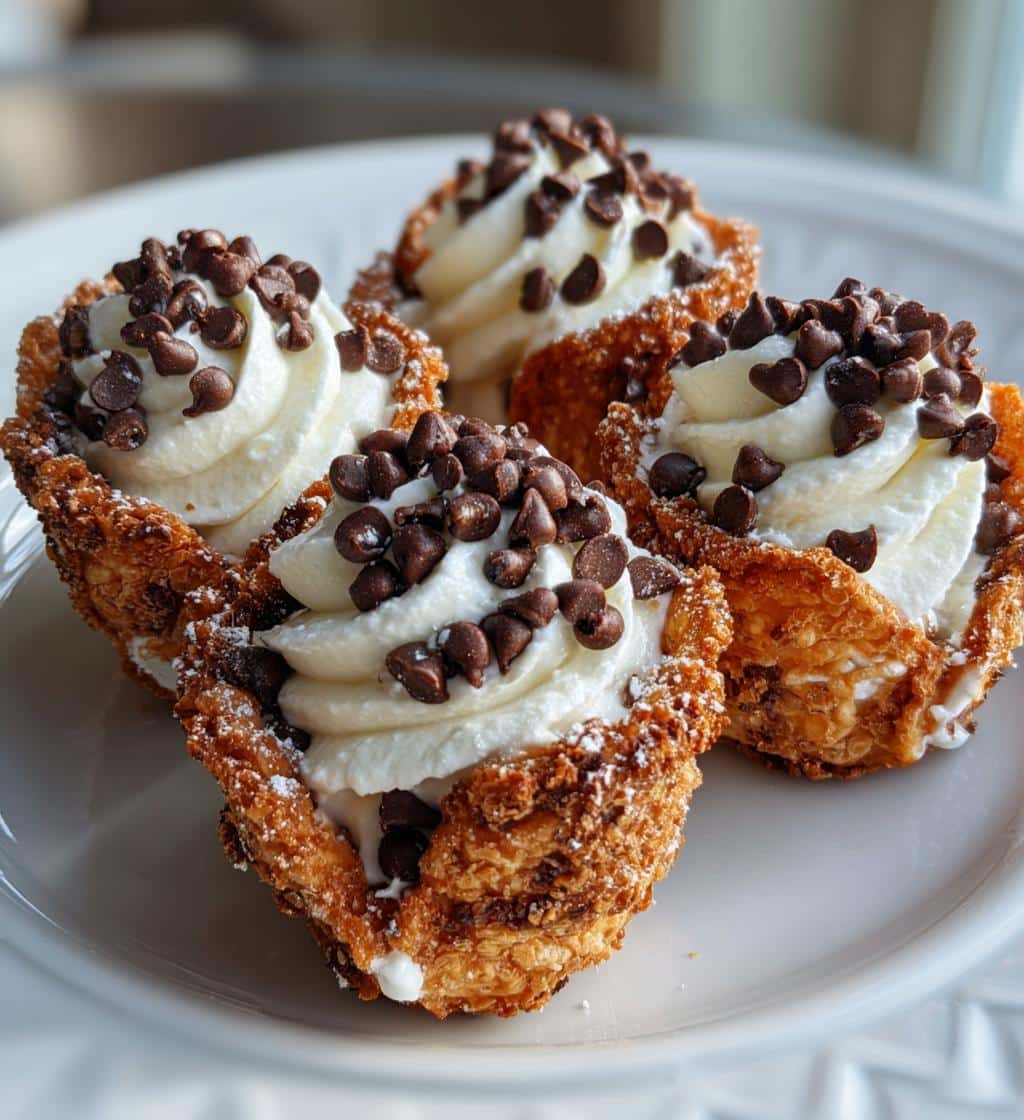
Mini Cannoli Cups offer a delightful twist on a classic Italian dessert. These bite-sized sweet treats feature perfectly crispy shells filled with a rich, creamy ricotta mixture and mini chocolate chips. Ideal for parties or a personal indulgence, this easy recipe brings authentic flavors right to your kitchen, promising sweet bliss in every bite.
Key Takeaways
- Prepare delicious homemade mini cannoli cups with ease.
- Enjoy crispy, golden shells filled with a sweet, creamy ricotta and chocolate chip mixture.
- The recipe is quick to prepare and bakes in just 12 minutes.
- Perfect for entertaining or as a delightful personal dessert.
- Customizable with various chocolate and topping ideas.
These tiny treats are simple to make. They bring joy to any table. Crispy shells meet sweet, smooth cream. A perfect bite-sized dessert always. Enjoy this delightful Italian classic.
Mini Cannoli Cups: Sweet Bliss Defined.
A delightful dessert overview.
Mini Cannoli Cups represent a charming and approachable rendition of the beloved Italian cannoli. Originating from Sicily, traditional cannoli are fried pastry dough tubes filled with a sweet, creamy ricotta cheese mixture. Our mini cannoli cups adapt this concept into an easier-to-manage, baked cup form, making them perfect for home bakers of all skill levels. These delightful sweet bites are ideal for dessert tables, casual gatherings, or simply when you crave a touch of Italian elegance without the fuss of deep-frying. Their smaller size makes them incredibly appealing, allowing guests to enjoy a perfect portion without feeling overwhelmed. This recipe focuses on creating a dessert that is both visually appealing and incredibly satisfying, offering a wonderful balance of textures and flavors in every mouthful. The simplicity of the cup shape also makes for a cleaner eating experience, cementing their status as a favorite dessert option for any occasion. For those interested in the history of this delightful pastry, you can learn more about its origins on Wikipedia’s Cannoli page.
Crispy shells, creamy filling.
The magic of mini cannoli cups lies in the harmonious contrast between their elements. Each cup boasts a wonderfully crispy, golden-brown shell that provides a satisfying crunch with every bite. This crispiness perfectly complements the lush, creamy filling nestled within. The filling itself is a velvety blend of fresh ricotta cheese, subtly sweetened and often enhanced with a touch of vanilla or citrus zest. The inclusion of mini chocolate chips adds tiny pockets of rich cocoa flavor and an additional textural dimension, making each cup an irresistible treat. Achieving this balance requires careful attention to both the dough preparation and the filling mixture, ensuring that neither overpowers the other. The resulting sweet treat is a testament to simple ingredients coming together to create something truly extraordinary. Just like a perfectly crafted Quick Italian Cream Cake, these mini cannoli cups offer a sophisticated yet comforting flavor profile that is hard to resist.
Gathering Ingredients for Heavenly Bites.
All-purpose flour and sugar.
To begin crafting your heavenly mini cannoli cups, the foundation is, of course, the pastry dough. For this, you will primarily need all-purpose flour, which forms the structure of our crispy shells. Opt for a good quality brand, as the flour’s consistency can affect the dough’s texture and how it bakes. Alongside flour, a modest amount of granulated sugar is incorporated into the dough. While the filling is the primary source of sweetness, a little sugar in the shell enhances its flavor and contributes to that beautiful golden-brown color during baking. You’ll also need a touch of salt to balance the flavors, a large egg to bind the dough, and unsalted butter, which lends richness and flakiness to the finished shells. Ensure all your ingredients are at room temperature, especially the butter, to allow for smoother mixing and a more consistent dough.
Ricotta, vanilla, chocolate chips.
The heart of these mini cannoli cups is undoubtedly their rich and creamy filling. The star ingredient here is ricotta cheese. For the best results, use whole milk ricotta, as it provides a richer flavor and a smoother, creamier texture compared to part-skim varieties. It’s also crucial to drain your ricotta thoroughly. Excess moisture can lead to a watery filling, so pressing it through a fine-mesh sieve or placing it in cheesecloth to drain for several hours (or even overnight) is a vital step. Alongside the ricotta, powdered sugar is used to sweeten the filling; its fine texture dissolves easily, creating a silky-smooth consistency. Vanilla extract is a classic addition, enhancing the overall sweetness and providing a warm, aromatic note. Finally, no cannoli would be complete without mini chocolate chips. These tiny morsels melt slightly in the creamy filling, offering bursts of delicious chocolate flavor. You can learn more about the versatility and origin of this fantastic cheese on Wikipedia’s Ricotta page.
Crafting the Sweet Dough for Shells.
Mixing flour, egg, and butter.
Creating the perfect dough for your mini cannoli cups is a straightforward process that begins with combining your dry ingredients. In a large mixing bowl, whisk together the all-purpose flour, granulated sugar, and a pinch of salt. This ensures that the sweetness and seasoning are evenly distributed throughout the dough. Next, you’ll incorporate the wet ingredients. Crack a large egg into the mixture, then add softened unsalted butter. The butter should be soft enough to easily cream, but not melted, as this will affect the dough’s texture. Using your hands or a stand mixer with a dough hook attachment, gently mix these ingredients. The dough will initially appear crumbly, but as you continue to work it, the warmth from your hands or the friction from the mixer will bring it together into a cohesive ball. Avoid overworking the dough, which can lead to tough shells. Once it forms a smooth ball, wrap it tightly in plastic wrap and let it rest in the refrigerator for at least 30 minutes. This resting period allows the gluten to relax, making the dough easier to roll and preventing it from shrinking during baking.
Rolling and cutting dough circles.
After the dough has sufficiently rested and chilled, it’s time to prepare it for shaping. Lightly flour a clean work surface and your rolling pin. Take the dough out of the refrigerator and unwrap it. Using your rolling pin, roll the dough out evenly until it is quite thin, about 1/16th of an inch thick. The thinner the dough, the crisper your cannoli cups will be. Be careful not to roll it too thin, however, as it might tear when you press it into the muffin tin. Once you have your desired thickness, it’s time to cut out the circles. You can use a round cookie cutter, a biscuit cutter, or even the rim of a small glass, aiming for circles approximately 2.5 to 3 inches in diameter. This size is ideal for fitting snugly into standard mini muffin tins. Carefully lift the cut circles and place any scraps together, gently re-kneading them into a ball. You can re-roll these scraps once or twice to get a few more circles, minimizing waste and ensuring you get the most out of your dough for your mini cannoli cups.
Baking Golden Mini Cannoli Cups Shells.
Pressing circles into muffin tin.
Once you have your perfectly cut dough circles, the next step is to shape them into cups for baking. This is where your mini muffin tin comes into play. Lightly grease the cups of your mini muffin tin, even if it’s non-stick, to ensure the shells release easily after baking. Gently take each dough circle and carefully press it into the cavity of a mini muffin cup. The goal is to create a small cup shape, so ensure the dough extends up the sides of the tin. You might need to gently stretch or press the dough with your fingertips to make it conform to the cup’s shape and to ensure an even thickness. Take your time with this step, as a well-formed dough cup will result in a perfectly shaped cannoli shell. Avoid leaving any large air pockets underneath the dough. The edges of the dough circle should ideally sit just below the rim of the muffin tin, creating a neat, shallow cup that will hold the creamy filling beautifully. This method offers a much simpler alternative to the traditional cannoli molds and deep-frying.
Oven bake until golden brown.
With your dough circles nestled securely in the muffin tin, it’s time to bake them to golden perfection. Preheat your oven to a moderate temperature, typically around 375°F (190°C), to ensure even cooking and a crispy texture. Place the muffin tin into the preheated oven and bake for approximately 10 to 12 minutes. Baking times can vary slightly depending on your oven, so keep a close eye on them. You are looking for the edges of the dough cups to turn a beautiful golden-brown color, indicating they are cooked through and have achieved that desirable crispness. The center might be slightly lighter, which is perfectly fine. Once baked, carefully remove the muffin tin from the oven. Allow the mini cannoli cups shells to cool in the tin for a few minutes before gently removing them. They should pop out easily if the tin was adequately greased. Transfer the cooled shells to a wire rack to cool completely. It’s crucial that these shells are entirely cool before filling, as any residual warmth could cause the ricotta filling to soften or separate. This crispy base is what makes these mini cannoli cups truly special.
Preparing the Rich Ricotta Filling.
Blending ricotta, sugar, vanilla.
The heart of your mini cannoli cups, the rich ricotta filling, comes together with just a few simple ingredients and steps. First, ensure your ricotta cheese is well-drained as previously mentioned. Transfer the drained ricotta to a medium-sized mixing bowl. To this, add your powdered sugar (also known as confectioners’ sugar). Powdered sugar is preferred over granulated sugar for the filling because its fine texture ensures a smooth, lump-free cream. Granulated sugar might leave a grainy consistency. Next, add a generous splash of pure vanilla extract. Vanilla is a classic pairing with ricotta and chocolate, enhancing the sweetness and providing a warm, inviting aroma. You can also consider adding a tiny pinch of cinnamon or a hint of orange zest for an extra layer of authentic Italian flavor, though vanilla alone is perfectly wonderful. Using a hand mixer or a sturdy whisk, blend these ingredients together until the mixture is completely smooth and creamy. Scrape down the sides of the bowl to ensure everything is incorporated evenly, resulting in a perfectly luscious filling that’s ready for the next step.
Folding in mini chocolate chips.
Once your ricotta, sugar, and vanilla mixture is silky smooth, it’s time to incorporate the delightful mini chocolate chips. Gently fold these into the creamy ricotta filling using a spatula. Mini chocolate chips are ideal for these smaller cups as they distribute more evenly and provide a chocolatey burst in every bite without being overwhelming. You can use semi-sweet chocolate chips for a classic flavor, or for a slightly less sweet option, dark chocolate chips would also be fantastic. If you’re feeling adventurous, white chocolate chips could offer a different aesthetic and taste profile, creating a visually appealing contrast with the creamy white filling. Avoid overmixing once the chocolate chips are added; you just want to fold them in until they are evenly distributed throughout the filling. Once combined, cover the bowl and refrigerate the filling for at least 30 minutes. This chilling period allows the flavors to meld and the filling to firm up slightly, making it easier to spoon into your cooled cannoli cups and ensuring a stable, delicious final product. Consider making these alongside other quick desserts like Funnel Cake Bites for a diverse dessert spread.
Assembling Your Mini Cannoli Cups.
Spoon filling into cooled cups.
With both your crispy shells baked and cooled, and your rich ricotta filling chilled, the moment has arrived to bring your mini cannoli cups to life. This assembly step is quick and satisfying. Using a small spoon, carefully scoop the creamy ricotta filling into each cooled mini cannoli shell. Fill them generously, mounding the filling slightly at the top to create that classic cannoli look. For a neater presentation, you can also transfer the filling into a piping bag fitted with a star tip and pipe it into the shells. This method creates a beautiful decorative swirl on top, adding an extra touch of elegance. Whichever method you choose, ensure the shells are completely cool to prevent the filling from softening prematurely. The contrast of the firm, crisp shell with the soft, sweet filling is what truly defines this dessert. As you fill each cup, you’ll see your efforts come together into these perfect little bites of sweet bliss. Once all the mini cannoli cups are filled, they are ready for their finishing touches and to be enjoyed.
Total Time for Mini Cannoli Cups.
20 minutes for preparation.
One of the most appealing aspects of making mini cannoli cups is their relatively quick turnaround time, especially the active preparation phase. From gathering your ingredients to mixing the dough, rolling it out, and cutting the circles, the hands-on preparation typically takes around 20 minutes. This includes whipping up the creamy ricotta filling. While there is some waiting involved for the dough to chill and the shells to cool, the actual work is minimal, making this an ideal recipe for when you want a homemade treat without spending hours in the kitchen. This efficient prep time means you can easily fit making these delicious desserts into a busy schedule, perhaps even preparing the dough ahead of time for a quicker assembly later on. The speed and ease are certainly part of their charm, allowing you to focus more on the enjoyment and less on the labor.
Only 12 minutes to bake.
The baking process for your mini cannoli cups shells is remarkably swift. Once the dough circles are pressed into the muffin tin, they only require approximately 10 to 12 minutes in a preheated oven to turn golden brown and achieve that perfect crisp texture. This short baking time is a huge advantage, as it means you can have freshly baked shells ready in very little time, allowing for quick dessert assembly. Because the baking time is so short, it’s a good idea to stay near the oven and keep an eye on them to prevent over-baking, which could lead to excessively hard or burnt shells. The quick bake also means less energy consumption, adding another practical benefit to this delightful recipe. In total, from start to finish (including chilling and cooling times), you can have a batch of these exquisite mini cannoli cups ready in about an hour, a true testament to their efficiency.
Serving and Yield for Sweet Bites.
Makes 12 mini cannoli cups.
This recipe for mini cannoli cups is designed to yield a convenient dozen, making it a perfect quantity for various occasions. Twelve individual sweet bites are ideal for a small family dessert, a contribution to a potluck, or for entertaining a few guests without having an overwhelming amount of leftovers. The yield can, of course, be scaled up if you’re hosting a larger party; simply double or triple the ingredients and use multiple mini muffin tins. Each cup offers a satisfying portion, packed with flavor but not overly rich, ensuring that everyone can enjoy a delightful taste without feeling too full. Knowing the exact yield helps in planning your dessert spread and ensures you have enough for everyone to enjoy these Italian-inspired treats. For more sweet ideas for gatherings, check out our desserts category.
Serving suggestions for guests.
Presenting your mini cannoli cups beautifully can elevate the entire dessert experience. After filling, you might choose to dust them lightly with powdered sugar or cocoa powder for an elegant finish. A popular option is to dip the edges of the filled cups into miniature chocolate chips, finely chopped pistachios, or candied orange peel for added texture and visual appeal. Arrange the mini cannoli cups artfully on a serving platter, perhaps garnished with a few fresh mint leaves or a sprinkle of colorful sprinkles if it’s a celebratory occasion. They are best served fresh, shortly after filling, to maintain the crispness of the shells. If you’re preparing them for a party, you can bake the shells and make the filling a day in advance, storing them separately, and then assemble them just before your guests arrive. This ensures maximum freshness and crispness, guaranteeing your guests a memorable sweet treat. Sharing your creations on social media? Tag us on Pinterest and Instagram!
Mini Cannoli Cups: Know Your Nutrition.
Calories, sugar, and fat facts.
While mini cannoli cups are undoubtedly a delicious indulgence, it’s helpful to have a general understanding of their nutritional profile. As with most sweet desserts, they contain calories primarily from carbohydrates (sugar and flour) and fats (butter, ricotta, and chocolate chips). The amount of sugar can be adjusted slightly in the filling to suit your preferences, but it’s an integral component of the classic sweet taste. Ricotta cheese contributes protein and some calcium, along with fat. The chocolate chips add additional calories and a small amount of fat. Portion control is key when enjoying any dessert, and the mini size of these cannoli cups naturally assists with this, allowing you to enjoy a treat without overindulging. For those monitoring dietary intake, ingredients like whole milk ricotta can be swapped for part-skim ricotta to reduce fat content, and dark chocolate chips can sometimes offer slightly less sugar than milk chocolate. However, these are sweet treats meant for enjoyment, so savoring them in moderation is always the best approach. Each mini cup provides a satisfying bite that can curb a sweet craving effectively.
Storing Leftover Mini Cannoli Cups.
Keep fresh in the refrigerator.
Proper storage is crucial for maintaining the quality and freshness of your mini cannoli cups. Once assembled, they are best enjoyed within a day or two. To store leftovers, place them in an airtight container in a single layer to prevent them from getting crushed. Refrigerate immediately. The cool environment of the refrigerator will help to keep the ricotta filling fresh and prevent spoilage. However, it’s important to note that over time, the moisture from the ricotta filling will inevitably start to soften the crispy shells. While they will still be delicious, they won’t retain their initial crispness after more than a day in the fridge. For optimal crispiness, if you anticipate having leftovers, it’s best to store the unfilled shells and the ricotta filling separately. Keep the cooled shells in an airtight container at room temperature or in the freezer for longer storage, and store the filling in an airtight container in the refrigerator. Then, simply fill the shells just before serving. This method ensures that every bite is as fresh and delightful as the first.
Fun Variations for Your Sweet Treats.
Experiment with different chocolates.
One of the joys of baking is the opportunity to experiment and personalize recipes, and mini cannoli cups are no exception. While mini semi-sweet chocolate chips are a classic choice for the filling, don’t hesitate to venture into other chocolate territories. Consider using mini dark chocolate chips for a richer, more intense flavor that balances the sweetness of the ricotta. White chocolate chips can add a different kind of sweetness and a lovely visual contrast. You could even finely chop a flavored chocolate bar, such as orange-infused chocolate or espresso-flavored chocolate, to introduce unique aromatic notes. For a truly decadent twist, try folding in some chocolate shavings or curls for an extra luxurious texture. The possibilities are vast, allowing you to tailor the chocolate element to your personal preference or to match a specific occasion. This flexibility makes mini cannoli cups a fantastic dessert that can be subtly adapted time and time again. You can also explore different flavor profiles like those found in Peanut Butter Brownie Swirl Cookies.
Topping ideas for extra sweetness.
Beyond experimenting with the chocolate within the filling, the toppings offer another canvas for creativity. A simple dusting of powdered sugar or cocoa powder is always elegant, but you can go further. Finely chopped pistachios are a traditional and incredibly popular topping for cannoli, adding a vibrant green color and a delightful nutty crunch that complements the creamy filling beautifully. Candied orange peel or finely grated orange zest can introduce a bright, citrusy counterpoint to the sweetness. For a more decadent touch, drizzle a little melted chocolate (milk, dark, or white) over the tops of the filled cups. Small sprinkles, especially for a festive occasion, can add a playful burst of color. If you’re serving these at a summer gathering, a tiny fresh berry, like a raspberry or a blueberry, could add a touch of freshness and color. Feel free to mix and match these ideas; a combination of pistachios and a chocolate drizzle, for instance, can create a truly stunning and delicious presentation, making your mini cannoli cups irresistible.
Enjoy Your Mini Cannoli Cups Today!
Armed with this recipe, you are now ready to create your own batches of mini cannoli cups, bringing a taste of Italian tradition right into your home. These delightful sweet bites are not just desserts; they are miniature celebrations of flavor and texture, offering crispy shells and creamy, sweet ricotta filling in every bite. Whether you’re baking them for a special occasion, a quiet indulgence, or to share with loved ones, the process is rewarding and the results are truly heavenly. So gather your ingredients, follow these simple steps, and prepare to impress yourself and your guests with these charming and utterly delicious treats. Enjoy the sweet bliss of homemade mini cannoli cups, a perfect ending to any meal or a wonderful sweet escape throughout your day. They are as satisfying to make as they are to eat, similar to the joy of making Crispy Parmesan Chicken for dinner.