
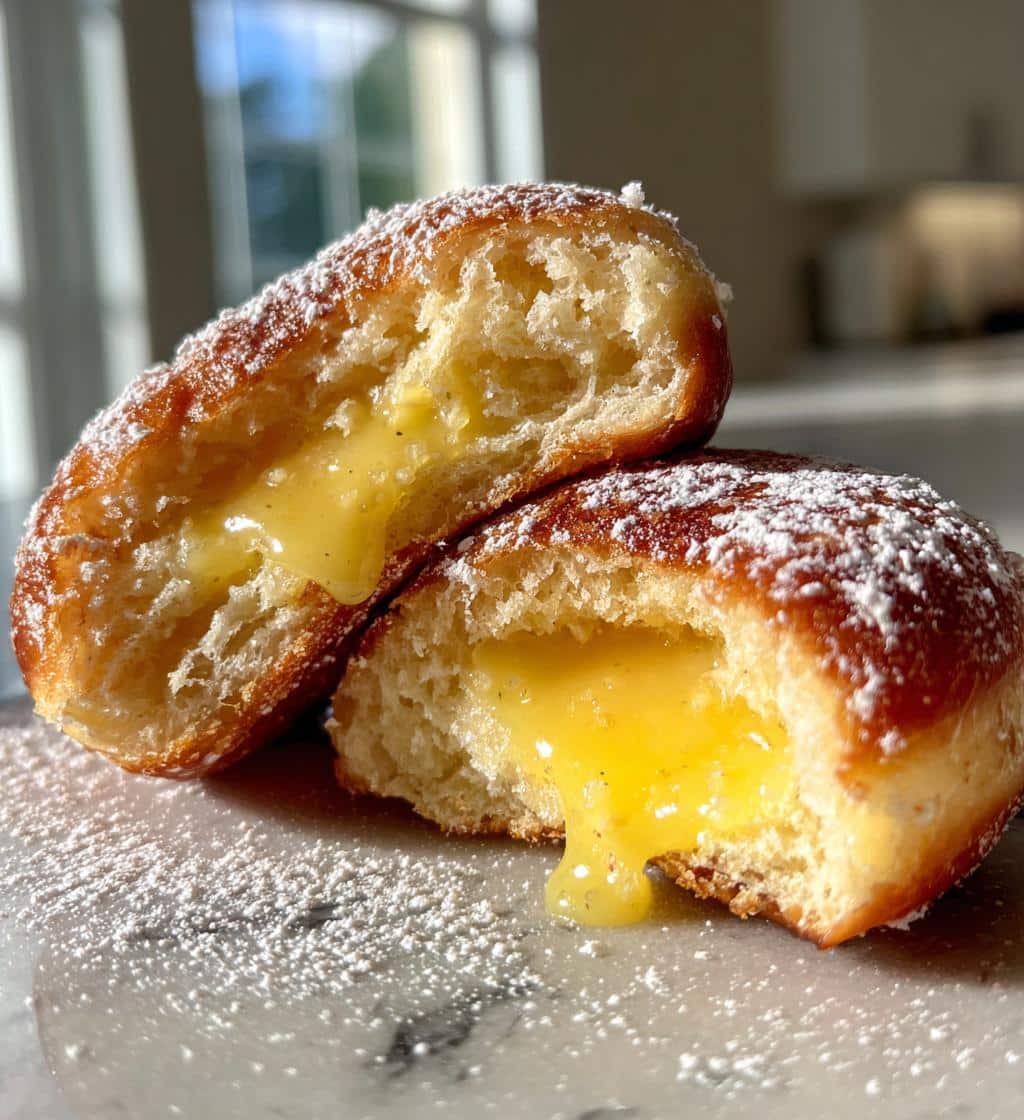
Lemon Curd Filled Donuts offer a burst of sunshine in every bite. This delightful dessert combines soft, fluffy fried dough with a tangy, sweet lemon curd center. Perfect for a special breakfast or an afternoon treat, making these donuts is a rewarding experience that brings pure joy to any occasion.
Key Takeaways
- Bake light, fluffy donuts with a vibrant lemon curd filling for a delightful dessert.
- Understand essential ingredients, proper dough preparation, and frying techniques.
- Learn how to perfectly shape, fry, and fill your homemade donuts.
- Gain insights into serving suggestions, storage tips, and nutritional information.
Homemade donuts are truly special. They bring comfort and happiness. The lemon curd adds bright flavor. Frying them fresh creates magic. Share this joy with loved ones.
About Lemon Curd Filled Donuts
Lemon Curd Filled Donuts are a celebration of flavor and texture, combining the comforting familiarity of a classic donut with the bright, zesty surprise of a creamy lemon curd center. These sweet moments of joy are more than just a dessert; they are an experience. Imagine sinking your teeth into a perfectly golden-brown, soft, and airy donut, followed by a burst of tangy-sweet doughnut filling that awakens your senses. This recipe promises not only a delicious treat but also the rewarding process of creating something truly special in your own kitchen. Whether you’re an experienced baker or a curious beginner, the steps outlined will guide you to donut perfection, making every bite a moment to savor.
Enjoying Sweet Moments of Joy
Creating these desserts allows for a unique indulgence, transforming ordinary afternoons into extraordinary sweet moments. The process, from kneading the dough to filling each pastry, is therapeutic and immensely satisfying. It’s a fantastic activity for weekend baking, suitable for sharing with family and friends. The vibrant citrus flavor of the lemon curd cuts through the richness of the fried dough, creating a harmonious balance that makes these filled pastries irresistible. They are a delightful deviation from plain donuts, offering an elevated taste that feels both decadent and refreshing. Embrace the culinary adventure and prepare to enjoy pure baking joy with these homemade donuts, creating cherished memories with every sweet bite.
Ingredients for Lemon Curd Donuts
Crafting the perfect lemon curd donuts starts with selecting quality ingredients. Each component plays a vital role in achieving that sought-after fluffy texture and bright, balanced flavor. From the foundational flours to the zesty lemon curd, understanding the purpose of each item ensures a successful and delicious outcome. This section breaks down the key ingredients you’ll need, separating them into dry and wet components for the donut dough, and highlighting the star of the show: the bright lemon curd itself.
Dry Ingredients You’ll Need
For the donut dough, you will primarily need all-purpose flour, granulated sugar, active dry yeast, and a pinch of salt. The flour provides the structure, while the sugar not only sweetens the dough but also aids in yeast activation and browning. Active dry yeast is crucial for leavening, giving the donuts their characteristic airy texture. Salt balances the flavors and helps control the yeast activity. Ensure your yeast is fresh for optimal rising. Combining these dry elements precisely sets the stage for a light and tender donut. For another sweet treat, consider trying our Snickerdoodle Cobbler.
Wet Ingredients for Softness
The wet ingredients contribute significantly to the dough’s softness and richness. You’ll need warm whole milk, unsalted butter, and large eggs. Warm milk activates the yeast, while melted butter adds moisture and a rich flavor profile. Eggs provide structure, richness, and help with the golden-brown color during frying. It’s important that the milk and butter are at the right temperature—warm but not hot enough to kill the yeast, typically between 105-115°F (40-46°C). These components work together to create a pliable and delicious donut dough base.
The Bright Lemon Curd
The heart of these delightful treats is the bright lemon curd. This tangy-sweet filling is made from fresh lemon juice, lemon zest, sugar, eggs, and butter. The zest intensifies the citrus flavor, while the juice provides the essential tang. Eggs and butter create a rich, creamy consistency. You can choose to make your own homemade lemon curd for the freshest, most vibrant taste, or opt for a high-quality store-bought version for convenience. Making it from scratch offers a truly superior flavor profile and allows you to control the sweetness and tanginess. Learn more about its history on Wikipedia.
Gathering Your Donut Making Tools
Before you begin the exciting journey of making lemon curd donuts, it’s crucial to gather all the necessary tools and equipment. Having everything at hand streamlines the process and ensures a smoother, more enjoyable baking experience. From basic kitchen essentials to specialized frying apparatus, each tool plays a role in transforming simple ingredients into delicious, golden-brown treats. Proper preparation of your workspace and equipment also contributes to safety, especially when dealing with hot oil. Let’s ensure you have everything ready for a successful donut-making adventure.
Standard Kitchen Equipment
For the initial stages of dough preparation, you’ll need a large mixing bowl (or a stand mixer with a dough hook attachment), measuring cups and spoons for precise ingredient portions, and a rubber spatula or wooden spoon for mixing. A clean kitchen towel is essential for covering the dough during its rising period. For shaping, a rolling pin and a round cookie cutter (about 2-3 inches in diameter) are indispensable. A wire rack for cooling the fried donuts and a piping bag with a long, thin nozzle or a donut filling tool will be needed for the lemon curd. These standard items are usually found in most home kitchens, making the process accessible.
Deep Pan for Frying
The most critical piece of equipment for making fried donuts is a heavy-bottomed deep pot or Dutch oven. This ensures even heat distribution and helps maintain a stable oil temperature, which is vital for perfectly cooked donuts. A candy thermometer or deep-fry thermometer is an absolute must-have; it allows you to accurately monitor the oil temperature, preventing scorched exteriors or undercooked interiors. Tongs or a slotted spoon are necessary for safely turning and removing donuts from the hot oil. Ensure your frying area is clear and well-ventilated, and have a baking sheet lined with paper towels ready to drain excess oil from the freshly fried donuts. Safety first!
Making the Soft Donut Dough
The foundation of truly exceptional lemon curd donuts lies in a perfectly soft and pliable dough. This step is where the magic begins, combining simple ingredients to form a living mixture that will eventually transform into light, airy pastries. Patience and attention to detail during the dough-making process are key to achieving the desired texture and rise. Follow these steps carefully to create a dough that is a joy to work with and promises a delicious result. The quality of your dough directly impacts the final taste and mouthfeel of your homemade donuts, making this stage incredibly important.
Mixing Dry Ingredients First
Begin by combining your dry ingredients in a large mixing bowl. Whisk together the all-purpose flour, granulated sugar, active dry yeast, and salt. This ensures that all components are evenly distributed before any wet ingredients are introduced. Even distribution of yeast is particularly important for consistent rising. Using a whisk helps to aerate the flour slightly, which can contribute to a lighter dough. Set this mixture aside briefly while you prepare the wet components, creating an organized workflow for your donut recipe.
Combining Warm Milk and Butter
In a separate small saucepan or microwave-safe bowl, gently warm the whole milk until it reaches a temperature between 105-115°F (40-46°C). This temperature is ideal for activating the yeast without killing it. Once warm, add the unsalted butter to the milk and stir until it’s completely melted and incorporated. If the mixture cools down too much, gently reheat it, ensuring it stays within the optimal temperature range. This warm, buttery liquid provides the necessary moisture and richness for the dough, contributing to its eventual softness.
Adding Eggs for Dough
Once the warm milk and butter mixture is ready, pour it into the bowl with your dry ingredients. Add the lightly beaten large eggs. The eggs bind the dough together, add richness, and contribute to its elasticity and structure. Mix all the ingredients, either with a sturdy spoon or in a stand mixer fitted with a dough hook, until a shaggy dough forms. Continue to mix until the dough comes together and starts to pull away from the sides of the bowl. At this stage, the dough will be somewhat sticky, but it will become smoother with further kneading, as described in the next step.
Letting the Dough Rise Perfectly
The rising process is arguably the most crucial step in donut making, as it directly impacts the texture and lightness of your finished treats. A perfectly risen dough yields airy, tender donuts, while an improperly risen dough can result in dense or crumbly pastries. This stage requires patience and a good understanding of yeast activity. By providing the ideal environment for your dough to proof, you ensure that the yeast can work its magic, creating the beautiful structure essential for a delightful lemon curd donut. Mastering this step is fundamental for baking joy.
Kneading Dough Until Smooth
Once your donut dough has come together, turn it out onto a lightly floured surface. Begin to knead the dough by hand for about 8-10 minutes, or continue with a stand mixer for 5-7 minutes. The goal is to develop the gluten, which will make the dough smooth, elastic, and no longer sticky. You’ll know it’s sufficiently kneaded when it passes the “windowpane test”: you should be able to stretch a small piece of dough thinly enough that light passes through without it tearing. Proper kneading ensures a strong gluten structure, allowing the dough to trap gas during rising and maintain its shape during frying.
Allowing Dough to Double
After kneading, lightly grease a clean large bowl with a little oil. Place the dough in the bowl, turning it once to coat all sides with oil. Cover the bowl tightly with plastic wrap or a clean kitchen towel. Find a warm, draft-free place in your kitchen for the dough to rise. This could be a slightly warmed oven (turned off), near a sunny window, or just a cozy spot. Allow the dough to rise for 1 to 1.5 hours, or until it has visibly doubled in size. The exact time will depend on the ambient temperature. This slow, steady rise builds flavor and contributes significantly to the final light and airy texture of your delicious treats.
Shaping Your Delicious Donuts
Once your donut dough has gloriously risen, the next exciting phase is shaping it into individual donuts. This step is where your creative vision starts to take form, transforming a large mass of dough into perfectly round potential pastries. Precision here ensures uniform cooking and a visually appealing final product. While simple in concept, understanding the best techniques for rolling and cutting will minimize waste and maximize the yield of your delightful lemon curd donuts. Prepare your workspace and get ready to create those classic donut shapes that everyone loves.
Rolling Out the Dough
After the first rise, gently punch down the dough to release the air. Turn the dough out onto a lightly floured surface. Using a rolling pin, carefully roll the dough out to an even thickness, typically about ½ to ¾ inch (1.2 to 1.8 cm) thick. It’s important to maintain a consistent thickness across the entire sheet of dough to ensure that all your donuts cook evenly during frying. Avoid rolling it too thin, as this can result in dense donuts, or too thick, which might lead to undercooked centers. Take your time to achieve a uniform surface for optimal shaping.
Cutting Dough into Circles
Now comes the fun part: cutting the dough into donut shapes. Use a 2.5 to 3-inch (6-7.5 cm) round cookie cutter. Dip the cutter in flour between each cut to prevent sticking. Press the cutter straight down firmly, then lift it without twisting. Twisting can seal the edges of the donut, preventing a proper rise during frying. Arrange the cut circles on a lightly floured baking sheet or pieces of parchment paper. Gather the dough scraps, gently knead them together, and let them rest for about 10-15 minutes before re-rolling and cutting more donuts. This allows the gluten to relax, making the dough easier to work with and preventing tough donuts. Cover the shaped donuts loosely with plastic wrap or a clean towel and let them rise again for another 30-45 minutes, or until they look puffy and slightly larger. This second rise is crucial for light, airy results.
How to Fry Golden Brown Donuts
Frying is the culinary art that transforms raw dough into golden, puffy, and irresistibly delicious donuts. While it might seem daunting, achieving perfectly fried donuts is all about controlling the oil temperature and paying close attention during the process. Proper frying ensures a beautiful golden-brown exterior and a thoroughly cooked, fluffy interior. This section will guide you through the essential steps, from heating the oil to knowing when your donuts have reached their optimal crispness and color, making sure your sweet indulgence is perfectly executed. For more insights on this cooking method, explore our frying method guides.
Heating Oil to Correct Temperature
Pour about 3-4 inches of neutral-flavored oil, such as vegetable, canola, or sunflower oil, into your deep pan or Dutch oven. Place the pan over medium heat and insert a deep-fry thermometer. Heat the oil slowly and steadily until it reaches a consistent temperature of 350-360°F (175-180°C). Maintaining this temperature is critical. If the oil is too cool, the donuts will absorb too much oil and become greasy. If it’s too hot, the outsides will brown too quickly, leaving the insides raw. Always keep an eye on your thermometer and adjust the heat as needed throughout the frying process to ensure an even cook and delicious results.
Frying Until Golden Brown
Once the oil is at the correct temperature, carefully lower 2-3 donuts into the hot oil using a slotted spoon or tongs, being careful not to overcrowd the pan. Overcrowding will drop the oil temperature and lead to uneven cooking. Fry the donuts for about 1-2 minutes per side, or until they are puffed up and beautifully golden brown. Use tongs or a slotted spoon to gently flip them to ensure even coloring on both sides. As they cook, their characteristic pale “belly band” (a light ring around the center) will appear, indicating a successful rise and fry. Remove the fried donuts from the oil and immediately transfer them to a wire rack set over a baking sheet lined with paper towels to drain any excess oil. This quick drain helps prevent them from becoming greasy. Repeat with the remaining donuts, allowing the oil to come back up to temperature between batches.
Cooling Down Your Fresh Donuts
The journey from hot oil to a delicious, filled donut isn’t complete without proper cooling. This often-overlooked step is crucial for both the texture of the donut and the integrity of the lemon curd filling. Rushing the cooling process can lead to a messy, less enjoyable experience, as hot donuts can melt the filling or become soggy. By allowing your freshly fried donuts to cool adequately, you ensure they retain their airy structure and are perfectly ready to embrace their vibrant citrus heart. Patience here truly pays off for the best results.
Slight Cooling Before Filling
After frying, transfer your golden-brown donuts to a wire rack placed over a baking sheet lined with paper towels. The paper towels will absorb any excess oil, preventing the donuts from becoming greasy. Allow the donuts to cool for at least 15-20 minutes on the rack. During this initial cooling phase, their internal temperature will drop significantly, and any residual steam will dissipate, preventing sogginess. While they don’t need to be completely cold, they should be cool enough to handle comfortably without burning your fingers. This slight cooling also helps the outer crust firm up a bit, creating a better canvas for the filling.
Important Cooling for Best Results
For the absolute best results, especially when working with a creamy filling like lemon curd, it’s important to allow the donuts to cool almost completely before filling. Ideally, they should be at room temperature, which might take up to 30-45 minutes. Filling warm donuts will cause the lemon curd to soften and potentially melt, leading to a runny, less appealing texture that can also soak into the donut. A fully cooled donut will maintain its structure, and the chilled lemon curd will hold its creamy consistency perfectly within the pastry. This patience ensures that each bite of your lemon curd filled donuts is a delightful experience, showcasing both the fluffy dough and the vibrant, tangy filling.
Filling Your Lemon Curd Donuts
The moment has arrived to infuse your perfectly cooled donuts with their sweet and tangy soul: the lemon curd. This step transforms a simple fried donut into a gourmet treat, creating a burst of citrus flavor in every bite. Whether you’ve lovingly made your own curd or chosen a convenient store-bought option, the technique for filling is key to an evenly distributed and aesthetically pleasing result. Get ready to elevate your delicious treats, as this is where the “lemon curd filled” part of the name truly comes to life, making these desserts truly unforgettable.
Filling Donuts with Lemon Curd
Once your donuts are completely cool, it’s time for the filling. The easiest and cleanest way to fill them is by using a piping bag fitted with a long, thin Bismark or round nozzle, or a specialized donut filling tool. Carefully insert the nozzle into the side of each donut, pushing it gently towards the center. Squeeze the piping bag to inject about 1-2 tablespoons of lemon curd into the donut, feeling it plump up slightly. Be careful not to overfill, as the curd might burst out. If you don’t have a specialized nozzle, you can also use a small paring knife to create a small hole in the side of the donut, then spoon or pipe the curd in using a regular piping bag with the tip snipped off. This method ensures that each donut receives a generous and consistent amount of the bright, citrusy filling.
Using Homemade or Store-Bought Curd
The choice between homemade and store-bought lemon curd is yours, each offering distinct advantages. Homemade lemon curd typically boasts a fresher, more vibrant flavor profile, allowing you to control the sweetness and tanginess to your exact preference. It offers that extra touch of homemade goodness that truly elevates your lemon curd donuts. However, making curd from scratch does add an extra step to the preparation time. High-quality store-bought lemon curd, on the other hand, provides incredible convenience without sacrificing too much on taste. It’s a fantastic option when you’re short on time but still want to enjoy these special occasion desserts. Whichever you choose, ensure the curd is well-chilled before use, as this helps it maintain its consistency when piped into the donuts.
Serving and Storing Your Donuts
The final steps involve presenting your beautiful lemon curd donuts and understanding how to keep them fresh for as long as possible. While these delightful pastries are undoubtedly best enjoyed fresh, knowing the proper serving and storage techniques ensures you can savor every last bite. From a dusting of powdered sugar to airtight refrigeration, these tips will help maintain the quality and deliciousness of your homemade donuts, allowing you to extend those sweet moments of joy just a little bit longer. Remember that proper handling impacts both flavor and safety.
Best Served Fresh
Lemon Curd Filled Donuts are truly at their peak when served fresh, ideally within a few hours of being filled. The donut dough is at its softest and most tender, and the lemon curd is perfectly creamy and vibrant. A light dusting of powdered sugar just before serving adds a touch of elegance and extra sweetness, making them even more appealing. Arrange them on a platter for a stunning presentation at any gathering, whether it’s a special breakfast, brunch, or an afternoon tea. The contrast between the warm, fluffy dough (if slightly reheated) and the cool, tangy filling is a culinary delight, guaranteeing praise from anyone who tries them. For more delicious dessert ideas, check out our recipe for Peanut Butter Brownie Swirl Cookies.
Refrigerating Filled Donuts
Due to the perishable nature of the lemon curd filling (especially if homemade with eggs and butter), filled donuts must be stored in the refrigerator. Place the lemon curd donuts in an airtight container to prevent them from drying out and absorbing other refrigerator odors. They will keep well in the refrigerator for up to 2-3 days. While refrigeration helps preserve the curd, it can sometimes alter the texture of the donut dough, making it a bit firmer. To restore some of their softness, you can gently warm them in the microwave for 10-15 seconds before serving, being careful not to overheat the curd. For sharing your culinary creations and finding inspiration, consider visiting our Pinterest or Instagram pages for more sweet treats and recipes.
Nutrition Information for These Donuts
Understanding the nutritional aspects of your homemade lemon curd donuts can help you enjoy them as part of a balanced diet. While these are undoubtedly delicious treats, they are also an indulgence. This section provides a general overview of the estimated nutritional content, breaking down key components like calories, macronutrients, and sugar content. It’s important to remember that these figures are approximate and can vary based on specific ingredients, portion sizes, and preparation methods. This information is intended to offer a basic understanding rather than precise dietary advice for these sweet indulgence items.
Calories and Macronutrients
A single lemon curd donut typically contains a significant amount of calories, primarily from carbohydrates and fats. On average, one filled donut might range from 300 to 450 calories, depending on its size and the richness of the ingredients. Carbohydrates form the bulk, contributing to energy, while fats provide richness and flavor. Protein content is usually moderate, coming from the flour, milk, and eggs in the dough, as well as the eggs and butter in the lemon curd. These values are estimates for a typical homemade donut, showcasing them as a comfort food rather than a low-calorie option.
Sugars and Sodium Content
As a sweet dessert, lemon curd donuts are naturally high in sugar. Both the donut dough and the lemon curd contribute to the overall sugar content. This provides the characteristic sweetness and energy boost. Sodium content is generally moderate, coming from the salt in the dough and any leavening agents used. While sugar provides immediate energy, it’s a factor to consider for those monitoring their intake. The bright citrus flavor helps to balance the sweetness, preventing the donut from being overly cloying, making it a delicious balance of tastes for a delightful dessert.
Fats and Protein Breakdown
The fat content in lemon curd donuts comes from several sources: the oil used for frying, butter in both the dough and the curd, and fats naturally present in the eggs and milk. This combination of fats contributes to the donut’s moist interior and rich flavor. Protein, while not the primary macronutrient, is present in the flour (gluten), milk, and eggs, aiding in the dough’s structure and overall satiety. Understanding this breakdown can help you appreciate the complex interplay of ingredients that create these satisfying and delicious treats. Enjoying them in moderation allows for a wonderful sweet indulgence.
All About Recipe Times and Servings
Planning your baking session efficiently is key to a smooth and enjoyable experience, especially when making something as intricate as lemon curd donuts. This section provides a clear breakdown of the time commitments involved, from initial preparation to the final frying, alongside an estimate of the total yield. Knowing what to expect regarding timing allows you to schedule your day effectively, ensuring you have ample time for each stage of the donut recipe. This information helps in managing expectations for your weekend baking projects and party planning.
Preparation and Cooking Times
The preparation for lemon curd donuts involves several stages. Expect about 30-40 minutes for mixing and kneading the dough. The first rise will take approximately 1 to 1.5 hours, depending on your kitchen’s temperature. Shaping the donuts and allowing for the second rise will add another 45 minutes to 1 hour. The actual frying time is relatively quick, typically 1-2 minutes per side per donut, totaling around 15-20 minutes for a full batch. If you’re making homemade lemon curd, add an additional 20-30 minutes for its preparation and cooling. This detailed breakdown ensures you can plan your day effectively around this pastry making project.
Total Time and Donut Yield
Considering all the steps, the total estimated time for making Lemon Curd Filled Donuts from scratch, including both dough preparation, rising times, frying, and filling, is approximately 3 to 4 hours. This makes it a perfect project for a leisurely weekend baking session. From this recipe, you can typically expect a yield of about 10-12 medium-sized lemon curd donuts, which is perfect for a family treat or sharing with a small group of friends. The exact number can vary slightly based on the thickness of your rolled dough and the size of your donut cutter. Enjoy the rewarding process and the delightful outcome of these homemade donuts!
