
Homemade vanilla ice cream offers a delightful sweet treat that surpasses store-bought versions. This detailed recipe provides all the steps to achieve a rich, creamy texture right in your kitchen. We cover everything from gathering fresh ingredients and preparing the luscious custard base to churning and serving this truly special dessert recipe. Get ready to enjoy a fantastic, simple pleasure.
Key Takeaways
- Master the art of creating a rich, smooth ice cream custard base.
- Learn techniques for tempering eggs and ensuring a silky texture.
- Discover methods for making homemade ice cream with or without an ice cream maker.
- Find tips for boosting vanilla flavor and achieving an ultra-creamy result.
- Explore delicious flavor variations to personalize your sweet treat.
Crafting this dessert is a rewarding process. Simple steps yield delicious results. A creamy texture awaits your palate. Patience in chilling is key. Enjoy this homemade delight!
Gather Ingredients for Delicious Ice Cream
Creating exceptional homemade vanilla ice cream starts with selecting the right components. The simplicity of this dessert recipe means that the quality of each ingredient truly shines through, contributing to the rich flavor and incredibly creamy texture. Taking a moment to gather everything before you begin ensures a smooth and enjoyable cooking process, setting the stage for a truly delightful sweet treat.
Cream, Milk, Sugar, and Eggs
The foundation of our homemade vanilla ice cream is a luxurious custard base, built from high-quality dairy and eggs. You’ll need heavy cream for its richness, whole milk to balance the fat content, and granulated sugar for sweetness. Opt for fresh, large eggs, specifically yolks, as these are crucial for both thickening the custard and imparting that desirable velvety texture. The fat in the cream and egg yolks works together to prevent large ice crystals from forming, which is key to achieving that signature smooth mouthfeel. Using good quality dairy products makes a significant difference in the final taste, making your homemade ice cream truly special. This precise combination of ingredients ensures a perfect balance of sweetness and creaminess that is hard to beat, making it a beloved dessert recipe for many.
Vanilla Extract and Pinch of Salt
Vanilla is the star of this homemade ice cream, and the extract provides its signature aroma and taste. For the best flavor, choose a high-quality pure vanilla extract or, even better, vanilla bean paste for a more intense and visually appealing result. A tiny pinch of salt might seem counterintuitive in a dessert, but it’s a secret weapon. Salt doesn’t make your ice cream salty; instead, it remarkably enhances all the other flavors, particularly the sweetness of the sugar and the fragrant notes of the vanilla. It brightens the overall profile, ensuring that each spoonful is perfectly balanced and deeply satisfying. Don’t skip this small but impactful addition. If you’re a fan of rich vanilla desserts, you might also enjoy making vanilla bean creme brulee cheesecake cupcakes, which similarly celebrate this wonderful flavor.
Making Homemade Vanilla Ice Cream Base
Crafting the perfect base is arguably the most critical step in achieving creamy, delicious homemade vanilla ice cream. This stage involves careful heating and mixing to create a rich, smooth custard that will later freeze into that irresistible sweet treat. Don’t rush these steps; they lay the groundwork for preventing a gritty texture and ensuring a velvety consistency that makes all the difference.
Warm Cream and Milk Mixture
Begin by gently heating the heavy cream and whole milk in a saucepan over medium-low heat. The goal here isn’t to boil the mixture, but rather to bring it to a gentle simmer, just until small bubbles start to form around the edges. This process helps to dissolve some of the sugar that will be added later and warms the dairy to the ideal temperature for the next step – tempering the eggs. Stir occasionally to prevent scorching the bottom of the pan and ensure even heating. A proper warm milk and cream mixture is essential for a smooth custard base, guaranteeing your homemade vanilla ice cream will have a truly luxurious feel.
Whisking Eggs and Remaining Sugar
While the dairy is warming, in a separate medium-sized bowl, whisk together your egg yolks with the remaining granulated sugar. You’ll want to whisk vigorously until the mixture becomes pale yellow and slightly thick, almost ribbon-like. This aeration and thorough mixing of the sugar into the yolks helps to prevent the eggs from scrambling when they meet the warm dairy. It’s a foundational step for a truly smooth and homogenous custard, contributing significantly to the desired creamy texture of your finished ice cream. Ensure no sugar granules remain visible, as this indicates complete dissolution, crucial for the subsequent tempering process.
Tempering Eggs for the Custard
Tempering is a crucial technique that slowly introduces the warm dairy mixture into the egg and sugar mixture, preventing the eggs from cooking too quickly and scrambling. To do this, gradually pour about a cup of the warm cream and milk into the egg yolk mixture while continuously whisking. This gentle warming of the eggs brings their temperature up without cooking them. Once combined, pour the tempered egg mixture back into the saucepan with the rest of the warm dairy. Continue to whisk constantly as you do this to ensure everything is thoroughly incorporated, leading to a perfectly blended custard. This process is essential for creating a stable and smooth custard base, making your homemade ice cream velvety and delicious.
Cook Your Creamy Ice Cream Custard
With the ingredients carefully combined and tempered, the next step is to cook your homemade vanilla ice cream custard to perfection. This stage requires patience and attention to detail, as it’s where the mixture transforms from a thin liquid into a rich, spoon-coating custard, which is vital for achieving that desired creamy texture. Proper cooking ensures both food safety and the ultimate smoothness of your sweet treat.
Thickening the Egg Mixture Slowly
Return the saucepan with the combined mixture to medium-low heat. Stir constantly with a wooden spoon or spatula, making sure to scrape the bottom and sides of the pan. This slow and steady stirring is key to preventing the eggs from curdling and sticking. You’re looking for the custard to thicken gradually, coating the back of your spoon. A good indicator that it’s ready is when you can draw a clean line across the spoon with your finger and the line holds without the custard running back together. The ideal temperature is usually between 175°F and 180°F (79°C-82°C) on an instant-read thermometer. Do not let it boil, as this can cause the custard to curdle or break. This careful thickening process is paramount for a luscious, uniform custard base for your homemade ice cream.
Straining for a Smooth Texture
Once your custard has reached the desired thickness, immediately remove it from the heat. Pour the hot custard through a fine-mesh sieve into a clean bowl. This crucial step catches any small bits of cooked egg, chalazae, or any other impurities, ensuring your homemade vanilla ice cream has an impeccably smooth and silky texture. Don’t skip this step, as it makes a noticeable difference in the final mouthfeel of your sweet treat. Press any remaining solids in the sieve to extract all the flavorful custard. The result is a beautifully uniform and flawless base, ready for the next stages of chilling and churning.
Chill Your Ice Cream Mixture Thoroughly
After the custard is cooked to perfection, chilling is a non-negotiable step for truly outstanding homemade vanilla ice cream. This phase is crucial not just for food safety, but also for allowing the flavors to meld and mature, and for the mixture to reach the optimal temperature for churning. Proper chilling ensures a smooth, creamy texture and prevents the ice cream from becoming icy.
Covering to Prevent a Skin
Once you’ve strained your warm custard, it’s important to prevent a “skin” from forming on the surface as it cools. To do this, place a piece of plastic wrap directly onto the surface of the custard, ensuring it makes full contact. This seals the mixture, trapping moisture and preventing the top layer from drying out and forming an unappealing film. This simple trick contributes to the overall smooth texture of your homemade vanilla ice cream, ensuring every spoonful is equally delightful. Many dessert recipes benefit from careful cooling, and this is no exception.
Refrigerate at Least Four Hours
With the custard covered, transfer the bowl to the refrigerator. The mixture needs to chill thoroughly, ideally for at least four hours, but preferably overnight. This extended chilling period allows the custard to become very cold, which is essential for efficient churning and achieving the best creamy texture. A well-chilled base will churn more quickly and result in smaller ice crystals, leading to a much smoother, more luxurious sweet treat. Rushing this step will result in an inferior product with a potentially icy consistency. So, plan ahead to give your ice cream base ample time to cool down completely before moving on to the churning stage.
Churning Homemade Vanilla Ice Cream
Churning is where the magic happens, transforming your chilled custard into a delightful homemade vanilla ice cream. This process introduces air into the mixture while simultaneously freezing it, preventing the formation of large ice crystals and creating that signature creamy texture we all crave. It’s a satisfying step that brings you closer to enjoying your sweet treat.
Using an Ice Cream Maker
Most home ice cream makers rely on a frozen bowl or a compressor to chill the mixture while a paddle churns it. Ensure your ice cream maker bowl has been frozen for at least 24 hours (or according to manufacturer instructions) before you begin. Pour the thoroughly chilled custard into the frozen bowl and turn on the machine. The churning process typically takes 20-30 minutes, during which the mixture will thicken and expand. The ice cream will resemble soft-serve when it’s done churning. It’s important to monitor it, as over-churning can lead to a less desirable texture. An efficient ice cream maker simplifies this part of the process, ensuring consistent results for your homemade dessert.
Freezing Before Serving
After churning, your homemade vanilla ice cream will have a soft, semi-frozen consistency. While delicious, it’s not quite firm enough for scooping. Transfer the soft ice cream to an airtight container, pressing a piece of plastic wrap directly onto the surface to prevent freezer burn and ice crystal formation. Place the container in the coldest part of your freezer for at least 4-6 hours, or overnight, to allow it to harden to a scoopable consistency. This final freezing period is essential for developing the full creamy texture and firm structure of your sweet treat. When ready to serve, let it sit at room temperature for a few minutes to soften slightly for easier scooping.
Best Tips for This Ice Cream Recipe
Even with a solid recipe, a few expert tips can elevate your homemade vanilla ice cream from great to truly extraordinary. These small adjustments can significantly impact the richness of the flavor and the luxuriousness of the creamy texture, making your sweet treat an unforgettable kitchen delight.
Boost Your Vanilla Flavor
For an intensely aromatic vanilla flavor, consider using a vanilla bean. Split a vanilla bean lengthwise, scrape out the seeds, and add both the seeds and the pod to the cream and milk mixture while it’s heating. Let it steep for about 30 minutes after removing from heat, then remove the pod before proceeding. Alternatively, opt for high-quality vanilla bean paste, which offers both concentrated flavor and those beautiful speckled vanilla flecks. Adding a small amount of vanilla extract *after* the custard has cooled can also help preserve its delicate notes, as some flavor can dissipate during cooking. This extra effort ensures your homemade vanilla ice cream truly celebrates its namesake ingredient.
Chill Your Maker Bowl Well
This tip cannot be stressed enough: a truly frozen ice cream maker bowl is paramount for achieving the best results. Many common issues, such as an icy texture or a mixture that simply won’t thicken, stem from an insufficiently chilled bowl. For most models, this means keeping the bowl in the very back of your freezer for a minimum of 24 hours, or even longer if your freezer isn’t exceptionally cold. The colder the bowl, the quicker the ice cream will churn and the smaller the ice crystals will be, resulting in that coveted ultra-creamy texture. Think of it as investing time upfront for a superior sweet treat later.
No Ice Cream Maker? No Problem!
Don’t have an ice cream maker? You can still enjoy the pure delight of homemade vanilla ice cream with a little extra effort. While it requires more hands-on time, the “freeze and whisk” method is a fantastic way to achieve a surprisingly creamy texture without any specialized equipment. It’s an accessible way to make this sweet treat in any kitchen.
Freeze and Whisk Method
After your custard base is thoroughly chilled, pour it into a shallow, freezer-safe metal or glass dish. Place it in the freezer. Every 30-45 minutes, remove the dish and vigorously whisk the mixture, breaking up any ice crystals that have formed and incorporating air. Use a fork or a handheld electric mixer for best results. This process of freezing and whisking should be repeated every half hour for about 3-4 hours, or until the ice cream is thick and creamy. It’s a bit of a workout, but it’s incredibly satisfying to watch your efforts transform into delicious homemade ice cream. This method requires dedication but proves that an ice cream maker isn’t always essential for a fantastic dessert.
Achieving Creamy Texture
The key to achieving a great creamy texture with the freeze and whisk method lies in the frequency and intensity of your whisking. By constantly disrupting the freezing process, you prevent large ice crystals from forming, which are the main culprits behind an icy, gritty texture. The more often you whisk, the smaller the crystals will be, resulting in a smoother, more palatable sweet treat. While it might not be as perfectly smooth as machine-churned ice cream, with diligent whisking, you can still produce a remarkably delightful homemade vanilla ice cream that’s rich and satisfying. Remember, a good base, like our peanut butter brownie swirl cookies, always starts with quality ingredients and patience.
Get Ultra-Creamy Homemade Vanilla Ice Cream
While our base recipe already aims for a luxurious creamy texture, there are a few clever tricks you can employ to make your homemade vanilla ice cream even silkier and more indulgent. These subtle additions and adjustments can push your sweet treat into truly gourmet territory, making every spoonful an absolute delight.
Adding Apple Juice Secret
One surprising secret for achieving an ultra-creamy texture and preventing ice crystals is to add a small amount of apple juice concentrate (or even a splash of fruit liqueur like Triple Sec or Cointreau) to your chilled base before churning. The alcohol or fruit sugars in these additions act as an antifreeze, lowering the freezing point of the mixture. This results in a softer, more scoopable ice cream straight from the freezer and helps to maintain that luxurious creamy texture over time. You only need a tablespoon or two for a batch; too much can prevent the ice cream from fully freezing. It’s a subtle but effective hack for an even more exquisite homemade vanilla ice cream.
Taste and Adjust Sweetness
Before you churn, it’s always a good idea to taste your thoroughly chilled custard base and adjust the sweetness if necessary. While the recipe provides a balanced sweetness, personal preferences vary. Keep in mind that flavors become less pronounced when frozen, so the base should taste slightly sweeter than you desire the finished ice cream to be. Add a little extra sugar (dissolved in a small amount of warm water or milk first) or a pinch more salt to enhance the overall flavor profile. This final adjustment ensures your homemade vanilla ice cream hits just the right note for your palate, making it the perfect sweet treat. For other delightful sweet creations, consider making a quick Italian cream cake.
Flavor Variations for Your Ice Cream
While classic homemade vanilla ice cream is perfect on its own, it also serves as an excellent canvas for creative flavor variations. Don’t be afraid to experiment beyond traditional vanilla to personalize your sweet treat and make it truly unique. These simple additions can transform your kitchen delight into an entirely new experience.
Infusing Herbs into Cream
Elevate your vanilla ice cream by infusing aromatic herbs into the cream and milk mixture. Delicate herbs like fresh mint, lavender, or even a sprig of rosemary can add sophisticated and unexpected notes. Simply add the herbs to the dairy mixture while it’s gently heating, then let them steep for 15-20 minutes after removing from heat. Strain the mixture before continuing with the recipe to remove the herb solids. This technique imparts a subtle, fragrant essence that complements the sweetness of the vanilla beautifully, creating a more complex and memorable sweet treat. Imagine a subtle lavender-vanilla or a refreshing mint-vanilla; the possibilities for your homemade ice cream are vast.
Try Vanilla Bean Paste
For an intensified vanilla flavor and those characteristic black specks that signify true quality, swap out some or all of your vanilla extract for vanilla bean paste. This paste is typically a concentrated mixture of vanilla extract, vanilla bean seeds, and a sweetener. It delivers a richer, more robust vanilla profile and a lovely visual appeal that makes your homemade vanilla ice cream look as artisanal as it tastes. Adding a good quality vanilla bean paste can seriously deepen the aroma and taste, making your sweet treat truly stand out. It’s a small change that yields a significant upgrade in flavor and presentation.
Serving This Homemade Vanilla Ice Cream
After all your efforts in crafting the perfect homemade vanilla ice cream, the final step is to serve it in a way that truly celebrates its rich flavor and creamy texture. Presentation and accompaniments can enhance the enjoyment of this classic sweet treat, turning a simple scoop into a memorable dessert experience.
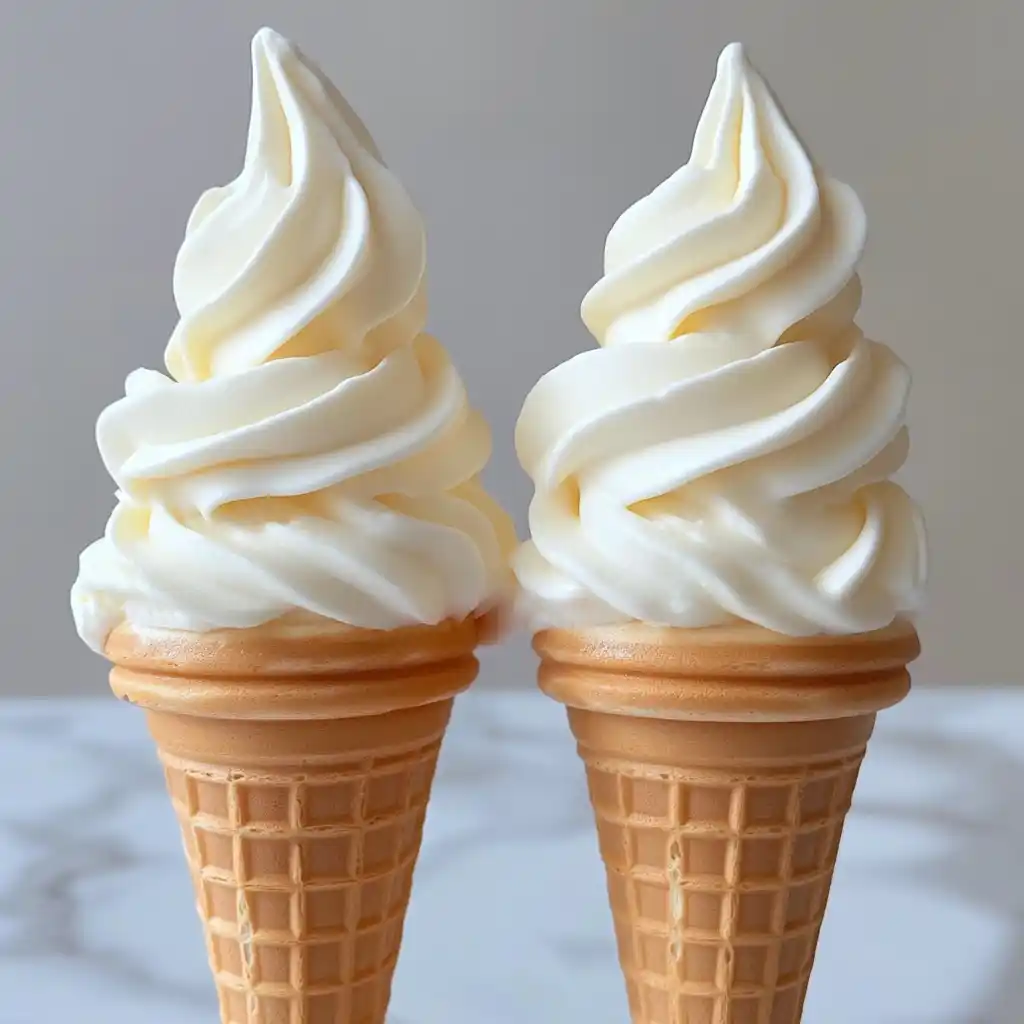
Delightful Waffle Cone Crunch
While a bowl allows you to savor every spoonful, serving your homemade vanilla ice cream in a crisp waffle cone adds a delightful textural contrast. The crunchy, slightly sweet cone perfectly complements the smooth, rich ice cream. For an extra touch, dip the rim of the waffle cone in melted chocolate and then in sprinkles or chopped nuts. This not only looks appealing but also adds another layer of flavor and crunch. Waffle cones are a timeless pairing for ice cream, offering a satisfying bite with every lick. For more kitchen inspiration and sweet treats, be sure to follow us on Pinterest and Instagram for regular updates and new recipes.
Prep and Cook Times Overview
Understanding the time commitment involved is helpful before you start making homemade vanilla ice cream. While the active preparation isn’t overly long, the chilling and freezing periods require patience. This overview will help you plan your sweet treat adventure efficiently, ensuring you know exactly what to expect from this rewarding dessert recipe.
Quick Preparation Steps
The active preparation for your homemade vanilla ice cream, including gathering ingredients, making the custard base, and tempering eggs, typically takes around 30-45 minutes. This involves heating the dairy, whisking eggs, and cooking the custard until it thickens. While these steps require attention, they are straightforward. Most of the “work” involves waiting for chilling and freezing. Having all your ingredients measured and ready to go (mise en place) will significantly streamline this part of the process, making it feel even quicker and more enjoyable. This focused active time is well worth it for the creamy texture you’ll achieve.
Total Time for Enjoyment
From start to finish, including all chilling and freezing, the total time for enjoying your homemade vanilla ice cream can range from 8 hours to overnight. The custard needs at least 4 hours to chill thoroughly in the refrigerator, and then another 4-6 hours (or more) in the freezer after churning to reach a firm, scoopable consistency. This means it’s an excellent make-ahead dessert recipe. While the immediate prep is quick, the waiting periods are essential for achieving that ultimate rich flavor and creamy texture. Plan accordingly to ensure your sweet treat is perfectly set when you’re ready to serve it.
Why Everyone Loves This Ice Cream
There’s an undeniable charm to homemade vanilla ice cream that makes it a beloved classic. It’s more than just a sweet treat; it’s a nostalgic taste of home, a comforting indulgence that appeals across generations. Its enduring popularity stems from a perfect blend of simplicity and profound satisfaction.
Simple Ingredients, Rich Flavor
The true beauty of this homemade vanilla ice cream lies in its humble origins. With just a handful of straightforward ingredients—cream, milk, sugar, eggs, and vanilla—it transforms into an incredibly rich, complex, and deeply satisfying dessert. There are no artificial flavors or preservatives, just pure, unadulterated goodness. The creamy texture, combined with the fragrant, warm notes of real vanilla, creates a flavor profile that is both comforting and sophisticated. It’s a testament to how quality ingredients, prepared with care, can yield a truly extraordinary sweet treat. This recipe delivers a kitchen delight that truly resonates with everyone, proving that sometimes, the simplest things are indeed the best.