
Homemade Moist Chocolate Cupcakes are a delight to bake and even better to eat. This easy recipe shares the secrets to achieve perfectly soft, rich, and incredibly moist cupcakes every time. Follow our simple steps for a dessert that will impress everyone.
Key Takeaways
- Master key techniques for incredibly moist chocolate cupcakes.
- Understand the critical role of proper ingredient mixing.
- Learn optimal baking and cooling steps for perfect texture.
- Discover how sour cream significantly enhances moisture.
- Implement effective storage methods to keep cupcakes fresh for days.
Baking perfect chocolate cupcakes is a joy. Each step truly matters for texture. Simple techniques yield fantastic results. Patience in cooling is a virtue. Enjoy your homemade, delightful treats.
Homemade Moist Chocolate Cupcakes: Bliss
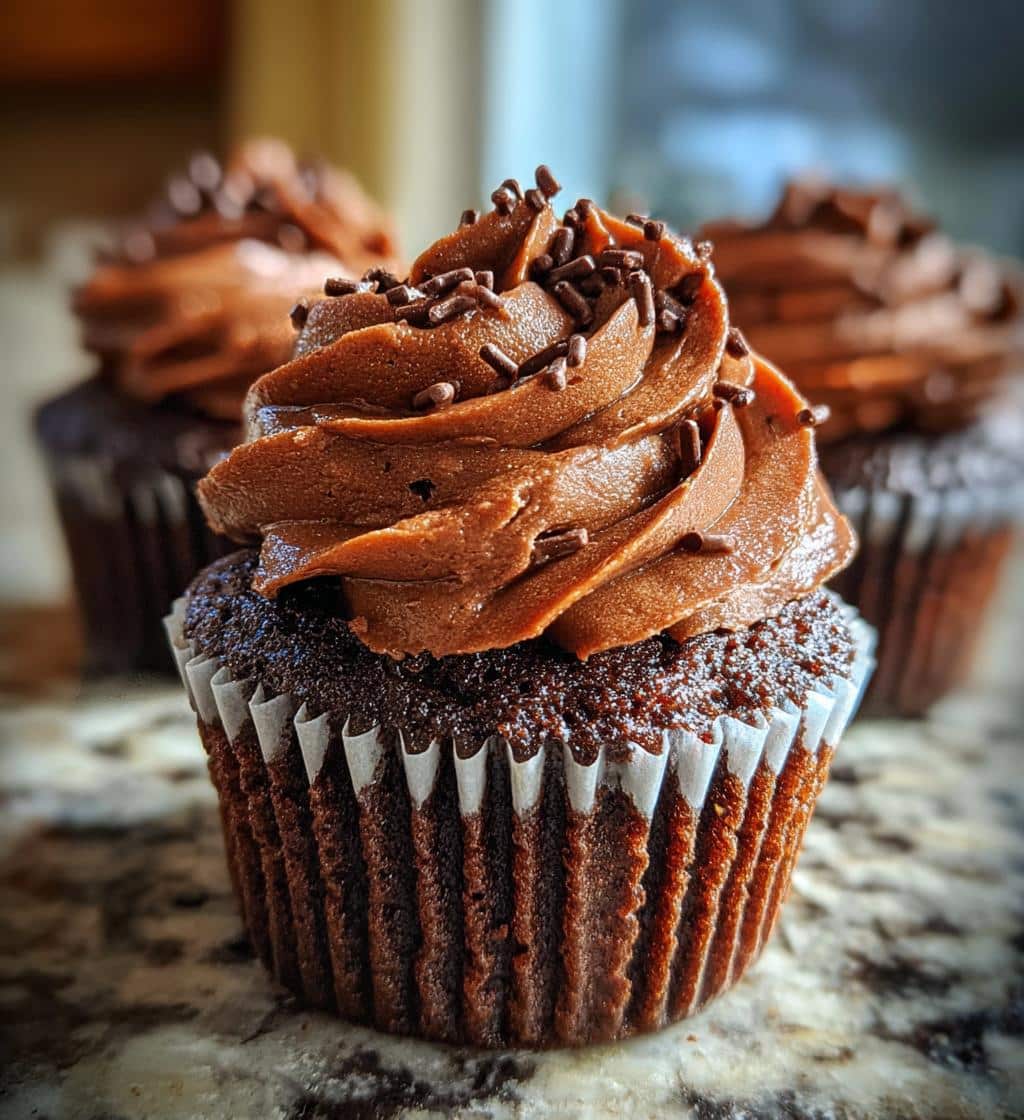
There’s nothing quite like the comforting aroma and rich taste of homemade chocolate cupcakes. These aren’t just any cupcakes; they are designed for pure bliss, offering a perfect balance of deep chocolate flavor and an incredibly tender, moist crumb. Forget dry, crumbly baked goods; our recipe ensures a luscious experience with every single bite. Crafting these delightful sweets at home lets you control the quality of ingredients, resulting in a superior taste that store-bought versions simply cannot match. Whether for a special occasion or a simple weekend treat, these homemade desserts are sure to bring smiles and satisfaction to anyone lucky enough to try them.
Why these cupcakes are special
These cupcakes stand out due to a carefully curated balance of ingredients and techniques that prioritize moisture and flavor. They are special because they consistently deliver a rich, decadent chocolate experience without being overly heavy or greasy. Each cupcake boasts a light, fluffy texture that practically melts in your mouth, making them irresistible. The convenience of an easy-to-follow recipe, combined with remarkable results, elevates these above your average baked goods. They become a go-to for many home bakers, a testament to their exceptional quality and deliciousness.
What makes them truly moist
The secret to their exceptional moisture lies in several key factors, which we’ll unveil throughout this recipe. Primarily, the use of oil instead of butter contributes to a lighter, more consistently moist crumb, as oil stays liquid at room temperature. Additionally, the specific ratio of wet to dry ingredients, along with a particular leavening agent combination, plays a crucial role. We also incorporate a special ingredient—sour cream—which adds both richness and an incredible depth of moisture, ensuring your chocolate cupcakes remain tender and fresh for longer. Adhering to precise mixing and baking times prevents dryness, creating a dessert that truly lives up to its “moist” promise.
Gather Ingredients for Your Cupcakes
Successful baking begins with having all your ingredients measured and ready before you start mixing. This methodical approach, often called ‘mise en place,’ is a baker’s best friend, ensuring a smooth process and preventing last-minute rushes. For these incredibly delicious cupcakes, quality ingredients make a noticeable difference in the final taste and texture. Ensure your leavening agents are fresh, as expired baking soda or powder can lead to flat, dense cupcakes. Room temperature wet ingredients are also crucial for proper emulsion and a smooth batter, so take eggs and milk out of the fridge at least 30 minutes before you plan to start baking.
All-purpose flour and cocoa
For our dry ingredients, you’ll need all-purpose flour and unsweetened cocoa powder. The all-purpose flour provides the necessary structure for the cupcakes, so measuring it accurately is vital—spoon it into your measuring cup and level it off; never scoop directly, as this can compact the flour and lead to a dry batter. As for the cocoa, we recommend using a good quality natural unsweetened cocoa powder. This provides a rich, deep chocolate flavor that is truly the star of these cupcakes. For those interested in the origins of this key ingredient, you can read more about chocolate on Wikipedia. Dutch-processed cocoa can be used, but it reacts differently with baking soda, so stick to natural for this specific recipe to ensure proper leavening.
Wet ingredients you will need
The wet components are essential for bringing richness and, of course, that sought-after moisture. You’ll need granulated sugar, a neutral oil (like vegetable or canola oil), large eggs, milk, vanilla extract, and importantly, sour cream. The oil contributes to the incredible moisture we’re aiming for, keeping the cupcakes tender long after they’ve cooled. Eggs add structure and richness, while milk thins the batter to the right consistency. Pure vanilla extract enhances the chocolate flavor beautifully. The sour cream is one of our “secrets” for supreme moisture and a slight tang that complements the sweet chocolate. Ensure all these liquid ingredients are at room temperature for the best results when mixing.
Mixing Dry Ingredients: Secret One
The initial step of combining your dry ingredients might seem straightforward, but it holds one of our crucial secrets to achieving light, airy, and evenly textured sweet treats. Proper dry ingredient mixing prevents pockets of unmixed leavening or flour, which can lead to dense spots or uneven rising in your cupcakes. Taking the time to do this correctly sets the foundation for a flawless batch. It’s a simple step, yet its impact on the final product is significant. This foundational technique ensures that every bite of your homemade chocolate cupcake will have the consistent quality you desire.
Combine flour, sugar, leaveners
In a large bowl, whisk together your all-purpose flour, granulated sugar, unsweetened cocoa powder, baking soda, and a pinch of salt. This thorough whisking serves multiple purposes. Firstly, it sifts the ingredients, breaking up any lumps in the flour or cocoa, which leads to a smoother batter. Secondly, and most importantly, it evenly distributes the leavening agents (baking soda and salt) throughout the dry mix. This even distribution is Secret One: it ensures that the leaveners are activated consistently when they come into contact with the wet ingredients, promoting a uniform rise and preventing dense spots. A well-whisked dry mix guarantees that your cupcakes will be light and fluffy, rising beautifully in the oven.
Whisking Wet Ingredients Together
Just as careful attention is paid to the dry components, the preparation of your wet ingredients is equally vital for creating a harmonious and moist batter. This stage is where much of the richness and tenderness of our dessert recipes truly begin to develop. Properly whisking the wet ingredients ensures that all the liquid components are fully integrated and emulsified, leading to a smooth, uniform base for your chocolate cupcakes. The goal is to achieve a consistent mixture where flavors are well blended and each ingredient can perform its function effectively during the baking process. This attention to detail contributes significantly to the overall success of the recipe and the delectable outcome.
Oil, eggs, milk, and vanilla
In a separate medium bowl, combine your neutral oil, room temperature eggs, milk, and pure vanilla extract. Whisk these ingredients together until they are thoroughly combined and homogenous. The oil, as previously mentioned, is key to the cupcakes’ moist crumb, providing a richer mouthfeel than butter often does in certain cake recipes. The eggs contribute to the structure and richness, while the milk adds necessary liquid and helps to create a tender texture. Vanilla extract is not just for flavor; it also enhances the natural sweetness and depth of the chocolate. Make sure your eggs and milk are at room temperature, as this helps them incorporate more easily into the other liquids, creating a smooth emulsion that will blend seamlessly with your dry ingredients later.
Combining Wet and Dry: Secret Two
The moment where wet meets dry is critical in baking, especially for delicate items like chocolate cupcakes. This step often determines the final texture—whether it’s wonderfully tender or regrettably tough. It’s where Secret Two comes into play, a fundamental technique that prevents gluten overdevelopment, which is the primary cause of dry, crumbly, or rubbery cupcakes. Approaching this stage with caution and understanding is essential for achieving the perfect, melt-in-your-mouth consistency these delicious treats are known for. By mastering this simple yet powerful secret, you’ll consistently produce professional-quality results right in your home kitchen.
Mix until just blended
Gradually add the wet ingredients to the dry ingredients. Using a spatula or a whisk on low speed, mix only until the ingredients are *just* combined. This is Secret Two: do not overmix the batter. Overmixing develops the gluten in the flour too much, leading to a tough, chewy, and dry cupcake. As soon as you no longer see streaks of dry flour, stop mixing. A few small lumps are perfectly fine and even preferable to an overmixed batter. This gentle approach ensures the gluten remains relaxed, allowing for a tender, moist crumb. This specific instruction is vital for the desired light and airy texture of your homemade moist chocolate cupcakes, separating good cupcakes from truly exceptional ones.
Fill Cupcake Tins Properly: Secret Three
Filling your cupcake tins might seem like a minor detail, but it’s another crucial step, our Secret Three, that impacts the final appearance and texture of your homemade chocolate cupcakes. Consistent filling ensures that all your cupcakes bake evenly and rise uniformly, preventing some from overflowing while others remain too small. It also contributes to the pleasing domed tops that are perfect for frosting. Precision here saves you from unevenly baked goods and makes for a visually appealing batch, demonstrating that even small details contribute significantly to the overall success of your main course or dessert presentation. Take your time with this step for picture-perfect results.
How full should cups be?
Line your cupcake tin with paper liners. Using an ice cream scoop or a measuring spoon, fill each cupcake liner approximately two-thirds full with batter. This is Secret Three for perfectly shaped cupcakes. Filling them two-thirds full allows enough room for the cupcakes to rise without overflowing, creating a beautiful domed top. If you fill them too little, they will be small and flat; if you fill them too much, they will spill over the edges and create messy, potentially dense results. Consistent filling across all liners also ensures even baking, as cupcakes of similar size will cook at the same rate. This attention to detail guarantees that each of your chocolate cupcakes bakes up beautifully and uniformly.
Baking Homemade Chocolate Cupcakes
The baking phase is where the magic truly happens, transforming your carefully prepared batter into irresistible homemade chocolate cupcakes. However, it’s also a stage where common mistakes can compromise all your previous efforts. Proper oven management and knowing exactly when your cupcakes are done are key to preventing dry, overbaked results. Understanding your oven’s nuances, such as hot spots, can also improve consistency. Remember, every oven behaves slightly differently, so monitoring closely is more important than rigidly following a timer. This careful approach to baking ensures a perfect texture and flavor every single time, making these easy recipe cupcakes a consistent triumph.
Oven temperature and time
Preheat your oven to 350°F (175°C). A properly preheated oven is critical for cupcakes to rise correctly from the start. Place the filled cupcake tin in the center rack of your preheated oven. Bake for 18-22 minutes. Baking time can vary slightly depending on your oven, so it’s essential to keep an eye on them. Avoid opening the oven door unnecessarily during the first 15 minutes of baking, as sudden temperature drops can cause the cupcakes to deflate. These baking tips are designed to give your cupcakes the best chance at achieving their optimal texture and rise, resulting in a batch that is perfectly cooked throughout and wonderfully soft.
Check for doneness: Secret Four
To ensure your cupcakes are perfectly baked and not overdone, you need to know how to check for doneness effectively. This is Secret Four. Insert a wooden skewer or toothpick into the center of a cupcake. If it comes out clean or with a few moist crumbs attached, your cupcakes are done. If it comes out with wet batter, they need a few more minutes. Another visual cue is that the tops will spring back lightly when gently touched. Overbaking is a common culprit for dry cupcakes, so pulling them out at just the right moment is crucial for preserving their moisture and tenderness. Trust the toothpick test for reliably delicious, perfectly baked chocolate cupcakes every time.
Cooling Your Cupcakes: Secret Five
After the delightful aroma fills your kitchen and you’ve pulled your perfectly baked chocolate cupcakes from the oven, it might be tempting to dive right in. However, proper cooling is a non-negotiable step—our Secret Five—that is just as important as the baking process itself. Skipping or rushing this stage can negatively impact the texture you’ve worked so hard to achieve. Cooling allows the internal structure of the cupcake to set, prevents sogginess, and ensures that the moisture is evenly distributed throughout. Patience during cooling is a virtue that pays off with every moist, tender bite. These cupcake recipe cooling insights will perfect your baking skills.
Why cooling matters
Immediately after removing the cupcake tin from the oven, let the cupcakes rest in the tin for about 5 minutes. This brief period allows them to firm up slightly. After 5 minutes, carefully transfer the cupcakes from the tin to a wire cooling rack to cool completely. This is Secret Five. Cooling on a wire rack allows air to circulate around all sides of the cupcake, preventing condensation from building up on the bottom, which can lead to soggy liners and a gummy texture. It also stops the baking process gently, ensuring the internal moisture is retained. Attempting to frost warm cupcakes will result in melted frosting and a messy situation, so allow them to cool fully before proceeding to the next step.
Achieving Ultimate Moisture: Secret Six
We’ve discussed several factors contributing to the incredible moisture of these homemade chocolate cupcakes, but there’s one more ingredient that truly takes them to the next level: sour cream. This is our Secret Six, a game-changer that adds an unparalleled richness and tenderness to the crumb. It’s not just about adding liquid; it’s about the unique properties of sour cream that interact with the other ingredients, creating a luxurious texture that stands out. Embracing this simple addition will undoubtedly elevate your chocolate dessert game, making these cupcakes a consistently impressive sweet treat.
The sour cream tip
The inclusion of sour cream in the batter is Secret Six and a powerful contributor to the cupcakes’ moistness. Sour cream adds fat and acidity, both of which are beneficial in baking. The fat content enriches the batter, leading to a more tender and decadent crumb. The acidity of the sour cream reacts with the baking soda, enhancing the leavening process and contributing to a light, airy texture. This acidity also helps to break down gluten, further preventing a tough cupcake. For those curious about the science, you can explore more about sour cream on Wikipedia. If you don’t have sour cream, full-fat plain Greek yogurt can be a suitable substitute, offering similar benefits in terms of moisture and tang. This simple addition ensures your cupcakes are moist, flavorful, and incredibly tender.
Serving Your Delicious Chocolate Cupcakes
Once your homemade moist chocolate cupcakes are perfectly baked and cooled, the fun truly begins with serving them. While they are incredibly delicious on their own, a touch of frosting or a creative topping can elevate them into a show-stopping dessert. Presentation plays a significant role in enhancing the eating experience, making these sweet creations even more appealing. Whether you prefer a classic look or something more elaborate, there are endless ways to personalize your cupcakes and make them truly your own. Get ready to impress your guests and satisfy your sweet tooth with these beautifully finished treats.
Frosting ideas to add
The possibilities for frosting your delicious chocolate cupcakes are vast. A classic chocolate buttercream is always a winner, reinforcing the rich cocoa flavor. For a lighter touch, a vanilla bean buttercream or cream cheese frosting provides a lovely contrast. Mint chocolate chip frosting adds a refreshing twist, while a peanut butter frosting can create a delightful flavor combination reminiscent of your favorite candy bar, much like a peanut butter brownie swirl cookie. Don’t be afraid to experiment with different flavors and textures. You can also add sprinkles, chocolate shavings, or even a fresh raspberry on top for an extra touch of elegance. The right frosting not only adds flavor but also contributes to the overall moist sensation, enhancing the experience of these decadent cupcakes.
Nutrition Facts for Each Cupcake
When indulging in such a delightful treat like these homemade moist chocolate cupcakes, it’s often helpful to have an understanding of their nutritional content. While exact figures can vary based on specific brands of ingredients used and any frosting additions, providing an estimate helps in making informed dietary choices. These delicious cupcakes are certainly a sweet treat, and knowing their general caloric and macronutrient breakdown can aid in portion control or simply satisfying curiosity. Remember, homemade treats offer the advantage of knowing exactly what goes into them, allowing for potential modifications if desired. This makes them a more transparent option than many store-bought alternatives.
Calories and key macros
Each homemade chocolate cupcake (unfrosted) typically contains approximately 200-250 calories. This can fluctuate based on the exact quantity of sugar and oil used. In terms of macronutrients, you can expect around 25-35 grams of carbohydrates, mainly from sugar and flour. The fat content usually ranges from 10-15 grams, primarily from the oil and sour cream, with saturated fat being relatively low compared to butter-based recipes. Protein content is generally modest, about 3-5 grams per cupcake, coming from the flour, eggs, and milk. Fiber content is minimal. These figures are estimates for the cupcake base only; adding frosting, especially a rich buttercream, will significantly increase the calorie, fat, and sugar content. Always consider additional toppings when calculating total nutritional values for these sweet, delicious cupcakes.
Storing Homemade Chocolate Cupcakes: Secret Seven
After all your effort in baking these incredibly moist chocolate cupcakes, ensuring they stay fresh is paramount. Proper storage is our Secret Seven, and it makes all the difference in preserving their tender texture and rich flavor for several days. Nothing is more disappointing than a beautiful cupcake turning stale prematurely. With the right techniques, you can enjoy your delicious homemade treats for longer, making them perfect for meal prepping desserts or simply having a sweet indulgence readily available. Following these simple storage tips will help maintain their just-baked quality, allowing you to savor every single bite as if it were fresh from the oven.
Keep them fresh for days
To keep your homemade chocolate cupcakes fresh and moist, especially if unfrosted, store them in an airtight container at room temperature for up to 2-3 days. The airtight container is Secret Seven, preventing air exposure that leads to staleness. If your cupcakes are frosted with a cream cheese or dairy-based frosting, they should be stored in the refrigerator in an airtight container. Allow them to come to room temperature for about 15-20 minutes before serving for the best flavor and texture. For longer storage, cupcakes (frosted or unfrosted) can be frozen for up to 2-3 months. Wrap individual cupcakes tightly in plastic wrap, then place them in a freezer-safe airtight container or bag. Thaw them at room temperature for a few hours before enjoying. This ensures your easy recipe cupcakes remain a delicious treat anytime.