
Buster Bar Ice Cream Cake is a beloved frozen dessert, bringing joy to any occasion. Crafting this homemade treat allows you to combine creamy vanilla ice cream, crunchy peanuts, and rich chocolate fudge. It’s an easy recipe for dessert lovers, promising a delightful sweet experience for everyone.
Key Takeaways
- Learn to make a delicious homemade Buster Bar Ice Cream Cake.
- Discover simple steps for creating the cookie crust, ice cream, and fudge layers.
- Get tips for freezing, serving, and customizing your frozen dessert.
- Perfect for dessert lovers seeking an easy, yet impressive, treat.
This cake brings classic flavors together. It’s simple to make at home. Each bite offers sweet satisfaction. Perfect for parties or quiet indulgence. A truly memorable frozen delight.
Easy Homemade Buster Bars Recipe
What Makes This Cake Special?
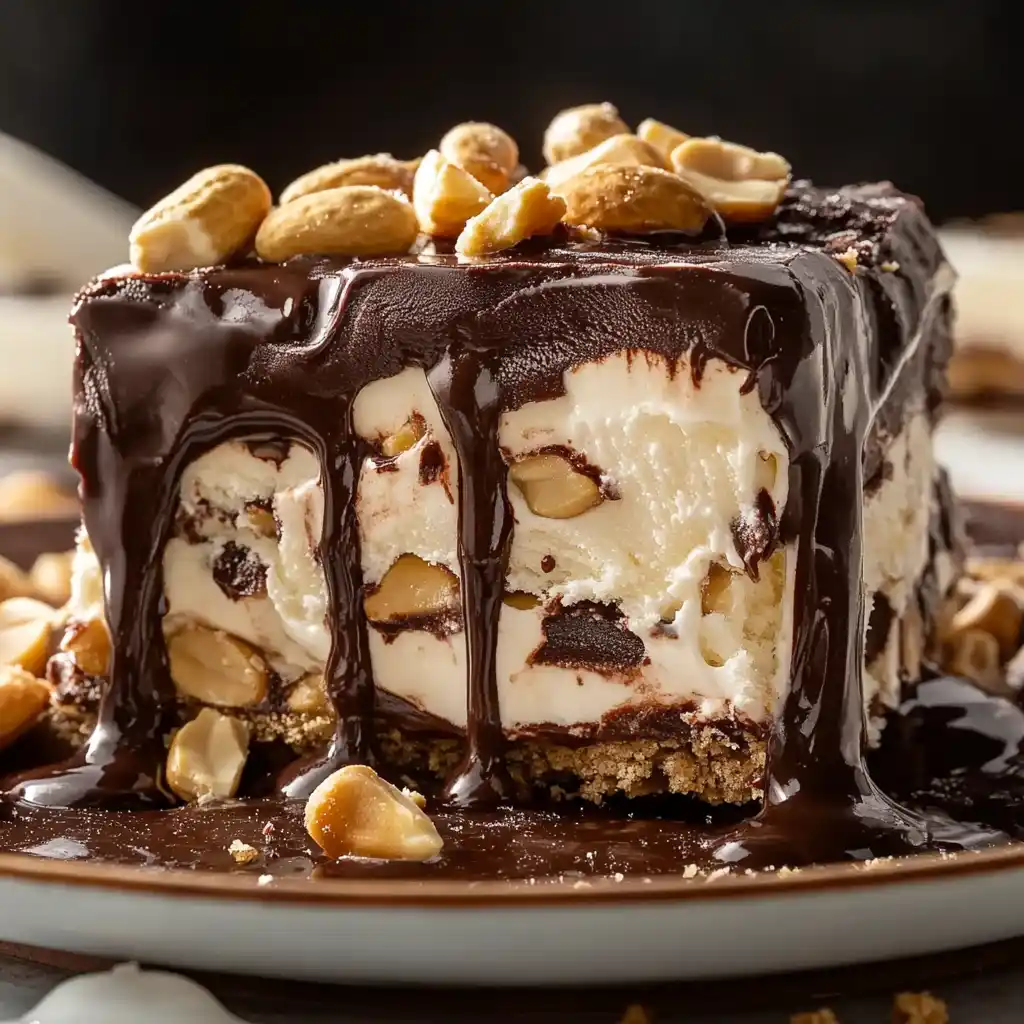
The Buster Bar Ice Cream Cake stands out as a nostalgic and utterly satisfying dessert. Its unique appeal lies in the harmonious combination of textures and flavors that mimic the classic DQ treat, yet it’s made with the love and care of a homemade creation. Imagine a crunchy chocolate cookie crust, followed by a thick layer of creamy vanilla ice cream, generously topped with roasted peanuts and drizzled with a rich chocolate fudge. This isn’t just an ice cream dessert; it’s a celebration of simple pleasures and familiar tastes, making it a favorite for all ages. What truly makes this cake a special `homemade treat` is the ability to tailor each layer to your preference, ensuring every slice is a perfect `frozen delight`. It’s a fantastic way to impress guests or simply treat your family to something extraordinary without needing advanced baking skills. It’s a testament to how an `easy recipe` can yield spectacular results, providing a truly memorable experience for any `dessert lovers` gathering.
Gather Your Dessert Ingredients
Essential Items for Success
To create your sensational Buster Bar Ice Cream Cake, having the right ingredients on hand is crucial. You’ll need a few key components to achieve that signature taste and texture. Start with about 24 chocolate sandwich cookies (like Oreos) and some unsalted butter for the base, forming the delightful `chocolate crust`. For the main body, acquire a good quality half-gallon of `creamy vanilla` ice cream. This will provide the smooth, refreshing core of your `Buster Bar Cake`. Don’t forget the star crunch element: about a cup of dry roasted, unsalted peanuts. These nuts bring that essential savory contrast and satisfying bite. Finally, for the decadent topping, you’ll need ingredients for your `peanut fudge` sauce. This typically includes unsweetened cocoa powder, sugar, milk, butter, and vanilla extract. Having these `essential items for success` ready will streamline your preparation process, making your journey to a delicious `ice cream dessert` seamless and enjoyable. Ensuring fresh, high-quality ingredients will always yield the best results for your homemade treat. For more general information about the main ingredient, you can read about ice cream on Wikipedia.
Creating the Cookie Crust
Chocolate Sandwich Crunch Base
The foundation of any great ice cream cake is a sturdy and flavorful crust, and for the Buster Bar Cake, a `chocolate crust` is paramount. To begin, gather your chocolate sandwich cookies. You’ll want to crush these finely; a food processor works best for an even consistency, but a Ziploc bag and a rolling pin can also do the trick. Aim for fine crumbs with no large chunks remaining. Once crushed, melt about half a stick of unsalted butter. Combine the melted butter thoroughly with the cookie crumbs until they resemble wet sand. This butter acts as the binder, holding your `chocolate sandwich crunch base` together. Press this mixture firmly into the bottom of a 9-inch springform pan. Ensure the crust is evenly distributed and tightly packed, especially around the edges, to prevent crumbling when sliced. Placing parchment paper at the bottom of the springform pan beforehand can make for easier removal later. Pop the crust into the freezer for at least 15-20 minutes while you prepare the next layers. This chilling period is crucial for setting the base, providing a firm foundation for the subsequent ice cream and fudge layers. A well-made crust is the first step towards a perfect `homemade treat`.
Spreading Vanilla Ice Cream
Layering the Softened Treat
After your chocolate cookie crust has firmed up in the freezer, it’s time to add the luscious `creamy vanilla` ice cream layer. The key to a smooth, even application is starting with slightly softened ice cream. Take your half-gallon of vanilla ice cream out of the freezer about 10-15 minutes before you plan to use it. It should be soft enough to scoop and spread easily, but not completely melted or soupy. Once it reaches the desired consistency, carefully spoon the ice cream over the chilled cookie crust. Use an offset spatula or the back of a spoon to gently spread the ice cream evenly across the entire surface of the crust, ensuring it reaches the edges. This `layering the softened treat` step is important for an appealing presentation and a balanced flavor profile in every bite of your `Buster Bar Cake`. Smooth out the top as much as possible before returning the pan to the freezer. Allow it to freeze for at least 1-2 hours, or until the ice cream is firm again. This prevents the next layer from sinking into the ice cream and helps maintain distinct layers, which is crucial for this `ice cream dessert`.
Adding the Peanut Crunch
Roasted Nuts for Texture
The distinctive crunch of peanuts is what truly elevates the Buster Bar Ice Cream Cake, providing a delightful textural contrast to the smooth ice cream and fudge. Once your vanilla ice cream layer is firm, retrieve the pan from the freezer. Evenly sprinkle your dry roasted peanuts over the top of the frozen vanilla ice cream. The peanuts not only add a savory note but also a satisfying bite that is characteristic of a classic Buster Bar. While you can use salted peanuts, unsalted or lightly salted varieties are often preferred to control the overall saltiness of the `Buster Bar Cake`. Press the peanuts down gently into the ice cream using your hand or the back of a spoon. This helps them adhere better and ensures they don’t fall off when you add the next layer or slice the cake. These `roasted nuts for texture` are an essential part of the experience, contributing significantly to the `homemade treat`’s charm. You can even chop some of the peanuts if you prefer a finer crunch. This step enhances the complexity of the `frozen delight` and prepares it for the rich fudge that will soon follow. For another delicious dessert featuring nuts, try these Peanut Butter Brownie Swirl Cookies.
Making Rich Chocolate Fudge
Combining Creamy Sauce Ingredients
The crowning glory of your Buster Bar Ice Cream Cake is the `rich chocolate fudge` layer. This is where a simple `ice cream dessert` transforms into a truly indulgent experience. While store-bought hot fudge can work in a pinch, making your own `creamy sauce ingredients` elevates the flavor significantly. To make homemade fudge, you’ll typically combine unsweetened cocoa powder, sugar, milk, and butter in a saucepan over medium heat. Whisk continuously until the sugar dissolves and the mixture comes to a gentle boil. Reduce the heat and let it simmer for a few minutes, stirring occasionally, until it thickens to a pourable but substantial consistency. Remove from heat and stir in a splash of vanilla extract for added depth of flavor. Allow the fudge to cool slightly before pouring; it should still be warm enough to spread, but not scalding hot, which could melt your ice cream layer. This `peanut fudge` layer will add a smooth, rich counterpoint to the crunchy peanuts and creamy ice cream, making every bite a delight. The quality of your chocolate fudge is key to the authentic Buster Bar taste, so take your time with this step.
Assembling Your Delicious Cake
How to Layer Each Component
Assembling the Buster Bar Ice Cream Cake is where all your carefully prepared components come together to form one irresistible `Buster Bar Cake`. Once the peanut layer is set on top of the vanilla ice cream, and your `rich chocolate fudge` has cooled to a warm, pourable temperature, you’re ready for the final layering. Carefully pour the chocolate fudge sauce over the peanuts, spreading it gently with an offset spatula or the back of a spoon to cover the entire surface evenly. Work quickly but precisely, ensuring the fudge creates a uniform top layer. Once the fudge is spread, you can optionally sprinkle a few more chopped peanuts on top for garnish, though the main crunch is already embedded. This `how to layer each component` step requires a steady hand and an eye for detail to create neat, distinct layers. Immediately return the springform pan to the freezer. This rapid freezing helps the fudge set quickly and prevents it from seeping into the ice cream, maintaining the beautiful separation of layers. A well-assembled cake not only tastes better but also looks stunning, making it a perfect `homemade treat` for any occasion. Consider adding another delightful dessert like Quick Italian Cream Cake to your repertoire!
Freezing for Best Results
Ensuring a Firm Ice Cream Cake
Proper freezing is perhaps the most critical step in creating a successful Buster Bar Ice Cream Cake. After assembling all the layers, the cake needs ample time to set completely. Place the springform pan, uncovered or lightly covered with plastic wrap (taking care not to touch the top layer), back into the freezer. For `best results`, allow the cake to freeze for at least 4-6 hours, or preferably overnight. This extended freezing time is essential for `ensuring a firm ice cream cake` that holds its shape beautifully when sliced. Rushing this step can lead to a messy, unappetizing dessert where layers don’t stay distinct. The firm structure is what allows for clean cuts and easy serving, truly making it a `frozen delight`. The colder your freezer, the quicker and more effectively the cake will set. Before serving, you might even consider moving it to the deepest part of your freezer for a final chill. A perfectly frozen cake is a testament to patience and attention to detail, promising a delightful experience with every bite. The waiting might be hard, but the outcome of a perfectly firm `ice cream dessert` is well worth it.
Serving Your Frozen Delight
Tips for Easy Slicing
After patiently waiting for your Buster Bar Ice Cream Cake to fully freeze, the moment arrives to serve your `frozen delight`. For `easy slicing`, it’s helpful to take the cake out of the freezer about 10-15 minutes before you plan to cut it. This allows the ice cream and fudge to soften just enough to yield to a knife without becoming too melty. Run a sharp, thin knife under hot water, wipe it dry, and then make your first cut. Repeat this process for each slice: hot water, wipe, slice. This technique ensures clean, precise cuts, showcasing the beautiful layers of your `Buster Bar Cake`. Carefully release the springform pan sides and transfer the cake to a serving platter. You can garnish individual slices with a dollop of whipped cream, an extra drizzle of chocolate fudge, or a few more peanuts for a professional touch. Enjoying this `homemade treat` straight from the freezer ensures the best texture and flavor experience. It’s a perfect dessert to serve at parties, gatherings, or as a special family treat. For more visual inspiration and delicious recipes, check out Carina Recipes on Pinterest.
Homemade Buster Bars Variations
Fun Ways to Customize Flavors
While the classic Buster Bar Ice Cream Cake is undeniably delicious, one of the joys of making a `homemade treat` is the opportunity to explore `fun ways to customize flavors`. This `easy recipe` provides a fantastic base for creative variations. Instead of vanilla, consider using chocolate, coffee, or even a peanut butter ice cream for a different base flavor. For the cookie crust, you could experiment with graham crackers, shortbread, or even a different type of chocolate cookie. Change up the nuts: swap peanuts for pecans, walnuts, or even a mix of different nuts for a varied texture profile. The fudge layer can also be customized; try adding a hint of caramel, a dash of espresso powder, or a touch of chili for an unexpected kick. Some `dessert lovers` might enjoy a layer of sliced bananas or a swirl of caramel sauce between the ice cream and fudge for extra decadence. You can also incorporate different candies or crushed chocolate bars into the layers. These `customizable flavors` ensure that your `Buster Bar Cake` can be adapted to suit any palate or occasion, making it a versatile `frozen delight` that never gets old. Explore other dessert possibilities, like these Vanilla Bean Creme Brulee Cheesecake Cupcakes.
Quick Prep and Chill Times
Understanding Your Recipe Schedule
When planning to make your Buster Bar Ice Cream Cake, it’s helpful to have a clear understanding of the `quick prep and chill times` involved. While the actual hands-on preparation for this `easy recipe` is relatively short, the chilling time for each layer is crucial and contributes significantly to the overall schedule. The cookie crust takes about 10-15 minutes to prepare and then needs at least 15-20 minutes to firm up in the freezer. Spreading the softened vanilla ice cream takes another 5-10 minutes, followed by a necessary 1-2 hours of freezing to firm up. Adding the peanuts and preparing the fudge might take 15-20 minutes, and the final pouring and spreading of the fudge is quick, around 5 minutes. However, the most substantial chunk of time is the final freeze, which ideally requires 4-6 hours or, for the best results, overnight. This `understanding your recipe schedule` helps you plan ahead, ensuring your `homemade treat` is perfectly set and ready to serve when you need it. While you can complete the active prep in about 45 minutes, remember that the true secret to a perfect `ice cream dessert` lies in patient freezing. For more delightful sweet creations, visit our desserts category.
Helpful Notes for Success
Storing Leftover Ice Cream Cake
To ensure your Buster Bar Ice Cream Cake is a resounding success, keep a few `helpful notes for success` in mind. Always use good quality ingredients; a premium vanilla ice cream truly makes a difference. When crushing cookies, ensure they are fine enough for a compact crust. Don’t skip the chilling times between layers, as this is vital for structural integrity. If you’re concerned about your fudge hardening too much in the freezer, you can add a tablespoon of corn syrup to your homemade fudge recipe to keep it softer when frozen. For `storing leftover ice cream cake`, wrap any remaining slices or the entire cake tightly in plastic wrap, then place it in an airtight container or a freezer-safe bag. This prevents freezer burn and helps maintain its fresh taste and texture for up to two weeks. Before serving leftovers, let them sit at room temperature for a few minutes to soften slightly. This `homemade treat` is perfect for making ahead of time for parties or enjoying over several days. With these tips, you’re well on your way to mastering this delightful `ice cream dessert`. Don’t forget to follow us for more amazing recipes on Instagram!
