
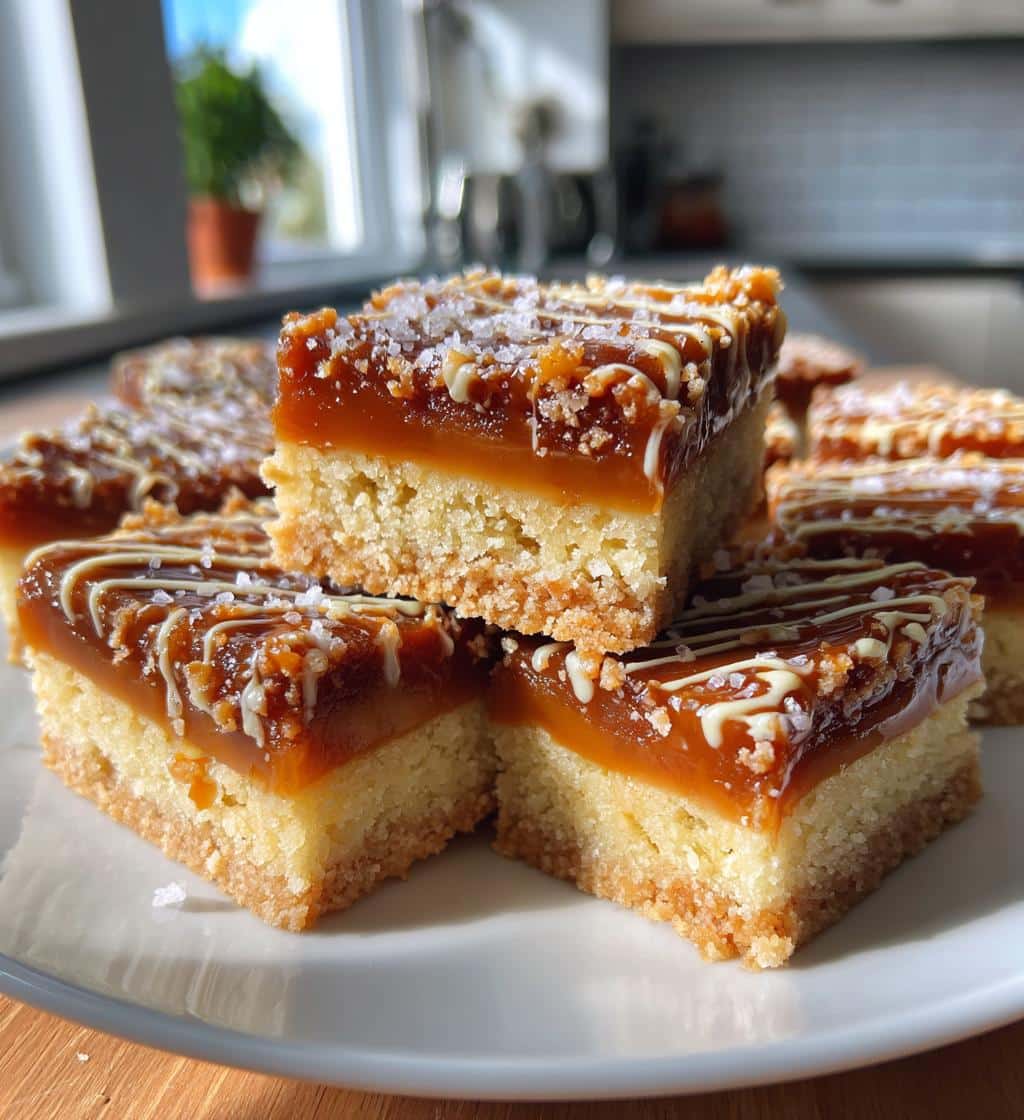
Salted caramel shortbread bars are a truly delightful and easy-to-make dessert. These sweet and salty treats combine a buttery shortbread base with a rich, homemade caramel topping, finished with a sprinkle of sea salt flakes. They are perfect for any occasion, offering a heavenly bite every time.
Key Takeaways
- Learn to bake perfect salted caramel shortbread bars.
- Create a simple yet delicious shortbread base from scratch.
- Master a rich, homemade caramel topping with sea salt.
- Discover essential tips for cooling, cutting, and storing your bars.
Baking these bars is simple. The sweet and salty balance is key. A soft base meets rich caramel. They are always a crowd-pleaser. Enjoy every single bite.
Taste Heavenly Salted Caramel Shortbread
Indulge in the exquisite pleasure of homemade salted caramel shortbread bars, a truly delicious dessert recipe that effortlessly combines classic textures with sophisticated flavors. These bars are a symphony for your taste buds, featuring a tender, buttery shortbread base that practically melts in your mouth, generously topped with a luscious, chewy homemade caramel. The grand finale is a delicate sprinkle of sea salt flakes, which not only enhances the sweet richness of the caramel but also provides that irresistible sweet and salty contrast we all crave. Imagine a dessert that feels both incredibly comforting and wonderfully decadent. This easy baking treat is designed to impress without demanding hours in the kitchen, making it a favorite for both novice and experienced bakers alike. The aroma alone as these bake will fill your home with warmth and anticipation, promising a truly memorable snack or dessert experience. Each bite delivers that perfect harmony of crisp, soft, and gooey, making these homemade caramel bars an instant classic in your recipe collection.
Creating these bars is more than just baking; it’s an act of culinary magic. From the moment you begin preparing the buttery shortbread, you’re on your way to a treat that will be loved by everyone. The simple ingredients transform into something extraordinary, proving that the best desserts often come from uncomplicated processes. So, get ready to experience the pure bliss of a perfectly balanced treat, where every element contributes to a heavenly eating experience.
Why Make These Delightful Bars?
There are countless reasons to add these delectable salted caramel shortbread bars to your baking repertoire. Beyond their incredible taste, they offer convenience and versatility that make them a standout choice for any occasion.
Quick and Easy Dessert
Don’t let the gourmet sound of “salted caramel shortbread bars” intimidate you. This recipe is surprisingly straightforward and incredibly forgiving, making it an ideal easy baking treat for anyone. The shortbread base comes together with minimal effort, requiring just a few basic ingredients and simple mixing techniques. The homemade caramel, while requiring a bit of attention on the stovetop, is also quite simple to achieve a perfect consistency. You won’t need any fancy equipment or advanced pastry skills to create these beautiful and delicious bars. The step-by-step instructions ensure a smooth baking process, allowing you to produce stunning results with confidence. It’s the kind of dessert you can whip up for an unexpected guest or when you’re craving something sweet but don’t want a complicated project. The satisfaction of creating such a luxurious treat so easily is incredibly rewarding.
Perfect for Any Occasion
These versatile homemade caramel bars are truly perfect for any occasion. Whether you’re hosting a sophisticated dinner party, contributing to a casual potluck, celebrating a holiday, or simply seeking a comforting treat for an afternoon tea, they fit right in. Their elegant appearance and universally loved flavor profile make them a crowd-pleaser. The individual bar format makes them easy to serve and enjoy, eliminating the need for plates and forks if you’re on the go. Imagine them beautifully arranged on a dessert platter, or individually wrapped as thoughtful gifts for friends and family. They travel well, making them an excellent choice for picnics or school bake sales. Plus, the combination of a buttery shortbread base and sweet and salty caramel appeals to almost everyone, ensuring they disappear quickly no matter where they’re served. They truly are a delightful addition to any gathering, big or small.
Gather Ingredients for Baking
Before you begin your journey to create these heavenly salted caramel shortbread bars, it’s essential to gather all your ingredients. Having everything measured and ready to go, a practice known as mise en place, will make the baking process smooth and enjoyable. Each ingredient plays a crucial role in achieving that perfect buttery shortbread base and the rich, luxurious caramel topping.
Shortbread Base Needs
The foundation of our delicious dessert recipe is the shortbread base, which requires just a few pantry staples. You will need:
- All-purpose flour: Provides the structure for the shortbread. Sifting it ensures a light and tender texture.
- Granulated sugar: Adds sweetness and contributes to the crispness of the shortbread.
- Unsalted butter: This is the star of the show. Use high-quality butter, as its flavor truly shines in shortbread. Ensure it’s cold and cut into small cubes to prevent overworking the dough, which can lead to a tough texture. The butter creates that signature melt-in-your-mouth richness of the buttery shortbread.
- A pinch of salt: Balances the sweetness and enhances the overall flavor of the shortbread.
The simplicity of these ingredients belies the incredible flavor and texture they produce when combined correctly. The key is to handle the dough minimally to maintain its tender crumb.
Caramel Topping Needs
The luxurious homemade caramel topping is what truly elevates these bars. For the caramel, you’ll need:
- Granulated sugar: The primary ingredient for our sweet caramel.
- Unsalted butter: Again, quality matters. It adds richness and helps create that smooth, creamy consistency. Cut it into cubes so it melts evenly.
- Heavy cream: Essential for achieving a velvety smooth and pourable caramel. It adds body and prevents the caramel from becoming too hard.
- Light corn syrup: While optional for some caramel recipes, it helps prevent sugar crystallization, ensuring a smooth, glossy caramel every time.
- Vanilla extract: A splash of vanilla enhances the overall flavor, adding warmth and depth to the caramel.
- Sea salt flakes: This is absolutely non-negotiable for salted caramel shortbread bars. The flakes provide bursts of savory flavor that brilliantly cut through the sweetness of the caramel, creating that irresistible sweet and salty balance. Don’t use regular table salt; the texture and intensity of sea salt flakes are crucial for the desired effect.
Having these ingredients prepped will allow you to transition smoothly from baking the shortbread to crafting the perfect caramel, ensuring your easy baking treat comes together beautifully.
Make the Shortbread Base
Creating the buttery shortbread base is the first, crucial step in crafting your salted caramel shortbread bars. This base provides the perfect sturdy yet tender foundation for the rich caramel topping. The simplicity of the ingredients is deceptive; the technique ensures a truly melt-in-your-mouth texture that is characteristic of classic shortbread.
Mix Butter and Sugar
Begin by ensuring your unsalted butter is very cold and cut into small cubes. This is important because cold butter creates pockets of steam during baking, resulting in a flakier, more tender shortbread. In a large mixing bowl, combine the cold butter cubes with the granulated sugar. Using an electric mixer on medium speed, cream the butter and sugar together until the mixture is light in color and fluffy. This process incorporates air, which contributes to the shortbread’s delicate texture. Scrape down the sides of the bowl frequently to ensure everything is evenly combined. Do not overmix; you’re aiming for a creamy consistency, not an airy one like whipped cream. This initial creaming sets the stage for a perfect buttery shortbread base.
Add Flour and Press
Once the butter and sugar are perfectly creamed, it’s time to add the all-purpose flour and a pinch of salt. Gradually add the flour to the butter-sugar mixture, mixing on low speed until just combined. Be careful not to overmix the dough once the flour is added, as this can develop the gluten, leading to a tough shortbread rather than a tender one. The mixture will appear crumbly, similar to wet sand, and that’s exactly what you want. Avoid the temptation to add extra liquid; the butter will bind it together. Transfer the crumbly dough into a prepared 9×13 inch baking pan (lined with parchment paper for easy removal). Press the dough evenly and firmly into the bottom of the pan, using your hands or the back of a measuring cup. Ensure it forms a compact, even layer from edge to edge. A uniform thickness is key for even baking and a consistent shortbread base. Once pressed, prick the entire surface of the dough with a fork several times. This prevents the shortbread from puffing up too much during baking, ensuring a flat, stable surface for your delicious homemade caramel topping.
Bake Shortbread Until Golden
Baking the shortbread base properly is a critical step to achieve the perfect texture for your salted caramel shortbread bars. A perfectly baked base will be lightly golden brown and firm, providing the ideal foundation for the rich homemade caramel topping. Patience and precision in this stage will ensure your easy baking treat lives up to its heavenly name.
Preheat Oven Properly
The importance of preheating your oven cannot be overstated, especially when baking shortbread. Preheat your oven to 350°F (175°C) at least 15-20 minutes before you plan to put the shortbread in. This allows the oven to not only reach the desired temperature but also to maintain it consistently throughout the baking process. An accurately preheated oven ensures that the shortbread begins baking immediately at the correct temperature, which is essential for achieving its characteristic crisp yet tender texture. Placing dough into a cold or insufficiently preheated oven can lead to uneven baking, a tougher consistency, and can also extend the baking time significantly. While the oven preheats, you can place your pressed shortbread dough into the refrigerator for about 10-15 minutes. This chilling step helps the butter firm up, which contributes to a more tender shortbread and helps prevent excessive spreading during baking. A well-preheated oven paired with chilled dough sets the stage for a beautifully baked buttery shortbread base.
Cook for 20 Minutes
Once your oven is properly preheated and your shortbread dough is chilled, it’s time to bake. Carefully place the baking pan with the shortbread base into the preheated oven. Bake for approximately 20-25 minutes. Baking time can vary slightly depending on your oven, so it’s always good to keep an eye on it. You’re looking for the edges of the shortbread to be lightly golden brown, while the center should appear set and slightly paler. The shortbread should smell wonderfully buttery, indicating it’s nearly done. It should feel firm to the touch when gently pressed in the center. Avoid over-baking, as this can make the shortbread dry and crumbly rather than tender. Once baked, remove the pan from the oven. Do not remove the shortbread from the pan at this stage. It needs to cool completely in the pan before you even think about adding the caramel. This allows the shortbread to firm up completely and become strong enough to support the caramel layer, ensuring your delicious dessert recipe has a stable and perfectly baked foundation.
Craft the Salted Caramel Topping
The homemade caramel topping is arguably the star of these salted caramel shortbread bars, delivering that rich, gooey, and irresistible sweetness that perfectly complements the buttery shortbread base. While making caramel might seem daunting, it’s a straightforward process that yields incredibly rewarding results when done correctly. Pay close attention to the details to achieve a smooth, flavorful caramel for your easy baking treat.
Combine Caramel Ingredients
To begin crafting your homemade caramel, you will need a heavy-bottomed saucepan. This type of pan distributes heat more evenly, which is crucial for preventing the sugar from burning in spots. Into the saucepan, combine the granulated sugar, unsalted butter (cubed), heavy cream, and light corn syrup. The corn syrup is a helpful addition as it prevents sugar crystallization, ensuring your caramel stays smooth and silky. If you omit it, be extra vigilant about not stirring the sugar once it starts to dissolve, and consider brushing down the sides of the pan with a wet pastry brush. The cubed butter helps it melt evenly into the mixture. Place all these ingredients together in the pan before heating, ensuring they are well-mixed before applying heat. The goal here is to create a homogenous mixture that will then transform into liquid gold. Don’t add the vanilla extract or sea salt flakes yet; these will be incorporated at the very end to preserve their delicate flavors and textures.
Cook Until Boiling
Once your ingredients are combined in the saucepan, place it over medium heat. Stir the mixture continuously with a heatproof spatula or wooden spoon. This initial stirring helps the sugar dissolve completely and prevents it from scorching on the bottom of the pan. Continue stirring until all the butter has melted and the sugar has fully dissolved. At this point, the mixture will become a smooth, light yellow liquid. Bring the mixture to a rolling boil, which means vigorous bubbling across the entire surface of the caramel. Once it reaches a rolling boil, reduce the heat slightly to medium-low and continue to boil for about 5-7 minutes, stirring occasionally. The key here is to cook the caramel until it reaches a beautiful golden-amber color and thickens slightly. If you have a candy thermometer, you’re aiming for a temperature of 235-240°F (113-116°C), which is the soft-ball stage. This temperature ensures a chewy yet soft caramel that won’t become too hard once cooled. Be very careful, as hot caramel can cause severe burns. Once it reaches the desired color and consistency, remove the pan from the heat. Stir in the vanilla extract, then set aside to cool for just a few minutes before pouring, allowing it to slightly thicken further but not set completely. This ensures it’s still pourable for assembling your delicious dessert recipe.
Assemble Heavenly Shortbread Bars
The moment has arrived to bring together your perfectly baked buttery shortbread base and your rich, homemade caramel topping. This assembly stage is where your salted caramel shortbread bars truly take shape, transforming into the irresistible sweet and salty treat everyone anticipates. Proper execution here ensures an even coating of caramel and the perfect distribution of sea salt flakes, vital for that signature flavor profile.
Pour Caramel Over Base
Ensure your shortbread base is completely cooled within its baking pan. A cool base is essential; pouring warm caramel onto a warm base can cause the caramel to seep into the shortbread, making it soggy and difficult to cut later. Once the shortbread is firm and cool to the touch, retrieve your still-warm (but not scorching hot) homemade caramel. The caramel should be warm enough to be pourable, but not so hot that it’s extremely runny. Gently and evenly pour the caramel topping over the cooled shortbread base. Use an offset spatula or the back of a spoon to carefully spread the caramel to cover the entire surface of the shortbread, reaching all the way to the edges. Work relatively quickly, as the caramel will begin to set as it cools. Aim for a smooth, uniform layer of caramel, ensuring every square of your future easy baking treat will have an equal share of that luscious, gooey goodness. This step creates the vibrant second layer that defines these delicious homemade caramel bars.
Sprinkle Sea Salt Evenly
Immediately after pouring and spreading the caramel, it’s time for the crowning glory: the sea salt flakes. This final touch is what transforms a simple caramel shortbread into a truly exceptional salted caramel shortbread bar. Generously sprinkle the sea salt flakes evenly over the entire surface of the warm caramel. The warmth of the caramel will help the salt adhere. The key is to use flakes, not fine table salt. Sea salt flakes provide bursts of intense, briny flavor and a delicate crunch that brilliantly contrasts with the sweet, chewy caramel and the rich, buttery shortbread base. This contrast is the essence of the sweet and salty appeal that makes these bars so addictive. Be mindful of how much you sprinkle – you want enough to taste the salt in every bite, but not so much that it overpowers the caramel. Once the salt is sprinkled, resist the urge to touch or move the bars. They now need time to cool and set completely before they can be enjoyed. The wait is the hardest part, but absolutely crucial for the final perfection of your delicious dessert recipe.
Cooling and Cutting Bars
After assembling your beautiful salted caramel shortbread bars, the cooling and cutting stages are perhaps the most important for achieving clean, professional-looking squares and the perfect texture. Patience is a virtue here, as rushing this step can lead to messy cuts and a sticky situation.
Allow Bars to Cool
Once the homemade caramel topping and sea salt flakes are on, the bars need ample time to cool and set. This is a non-negotiable step for any easy baking treat of this kind. First, allow the bars to cool at room temperature for at least 1-2 hours. This initial cooling allows the caramel to begin firming up gradually. After the initial room temperature cooling, transfer the pan to the refrigerator for a minimum of 2-4 hours, or even better, overnight. Refrigeration is crucial for the caramel to fully set and become firm enough to cut cleanly. If the caramel isn’t completely firm, attempting to cut the bars will result in a sticky, gooey mess where the caramel oozes out and makes it impossible to achieve neat squares. A fully chilled caramel will hold its shape beautifully, contrasting with the tender buttery shortbread base. Resist the temptation to speed up the process by putting them directly into the freezer for extended periods, as this can affect the texture of both the shortbread and the caramel. A slow, steady chill is key for the integrity of these delicious homemade caramel bars.
Get Ready to Cut
Once your salted caramel shortbread bars are thoroughly chilled and the caramel is firm, it’s time to cut them into individual servings. Remove the pan from the refrigerator and let it sit at room temperature for about 10-15 minutes. This slight warming helps prevent the shortbread from cracking excessively and makes the caramel slightly less brittle, allowing for cleaner cuts. Using the parchment paper lining, carefully lift the entire slab of shortbread bars out of the baking pan and transfer it to a cutting board. For the cleanest cuts, use a large, sharp knife. Heat your knife under hot water, wipe it dry, and then make your first cut. Reheat and wipe the knife before each subsequent cut. This prevents the caramel from sticking to the blade and dragging, ensuring smooth, precise edges. Cut the slab into even rows, then rotate and cut into squares or rectangles of your desired size. The contrast between the firm caramel and the tender shortbread will be evident with each clean slice. With proper cooling and cutting techniques, you’ll have beautiful, picture-perfect squares of this sweet and salty delight ready to serve and impress.
Serving Your Heavenly Shortbread Bars
After all your careful baking and patient cooling, the moment to enjoy your delicious salted caramel shortbread bars has finally arrived. These homemade caramel bars are versatile and can be served in several delightful ways, enhancing their sweet and salty charm and making them a truly memorable easy baking treat.
Enjoy Freshly Made
The most straightforward way to enjoy your salted caramel shortbread bars is simply as they are, freshly made and perfectly set. Once cut, arrange them on a platter for an impressive dessert presentation. The contrasting layers of golden shortbread, luscious caramel, and glistening sea salt flakes are visually appealing and incredibly inviting. Serve them alongside a cup of freshly brewed coffee or a soothing herbal tea for a perfect afternoon pick-me-up. They are also an excellent addition to any dessert table, potluck, or party, offering a sophisticated yet universally loved treat. The rich, buttery shortbread base combined with the chewy, sweet and salty caramel makes for a satisfying bite every time. Each bar is a self-contained masterpiece, requiring no additional accompaniments to be absolutely heavenly. Their portable nature also makes them ideal for packing into lunchboxes or taking on picnics.
Warm Up for Extra Delight
While delicious at room temperature or chilled, gently warming your salted caramel shortbread bars can elevate the experience to another level of indulgence. Place individual bars in the microwave for 10-15 seconds, or warm them in a preheated oven at 250°F (120°C) for about 5-7 minutes. This gentle warming softens the homemade caramel topping, making it even gooier and more luxurious, while slightly crisping up the buttery shortbread base. The warm, melted caramel combined with the warm shortbread creates an almost molten experience that is truly divine. For an extra special treat, serve warm salted caramel shortbread bars with a scoop of vanilla bean ice cream. The cold, creamy ice cream perfectly balances the warm, sweet, and salty bar, creating a delightful contrast in temperatures and textures. A drizzle of extra caramel sauce or a sprinkle of additional sea salt flakes could also add an extra touch of decadence. This warm version makes for an exceptional dessert, especially on a chilly evening, turning a simple bar into a truly gourmet experience.
Store Heavenly Shortbread Bars
Proper storage is key to maintaining the freshness, texture, and delicious flavor of your salted caramel shortbread bars. Whether you’re planning to enjoy them over a few days or want to extend their life, these tips will ensure your easy baking treat remains as heavenly as the day it was made.
Airtight Container Storage
Once your homemade caramel bars are completely cooled and cut, the best way to store them at room temperature is in an airtight container. Place the bars in a single layer, or separate layers with parchment paper to prevent them from sticking together. Storing them in an airtight container protects them from drying out and keeps the buttery shortbread base tender and the homemade caramel topping moist and chewy. When stored at room temperature in an airtight container, these delicious dessert recipe bars will remain fresh for up to 3-4 days. It’s important to keep them away from direct sunlight or heat sources, as this can cause the caramel to melt or soften excessively. This method is ideal if you plan to consume them relatively quickly and prefer the texture of the caramel at a slightly softer consistency. Always ensure the container is sealed tightly to maintain optimal freshness and prevent any odors from other foods from affecting their delicate flavor.
Refrigeration for Freshness
For extended freshness, or if you live in a warm climate, refrigerating your salted caramel shortbread bars is an excellent option. Place the cut bars in an airtight container, again, separating layers with parchment paper if stacking. Stored in the refrigerator, these bars can last for up to 1-2 weeks. Refrigeration helps the homemade caramel topping maintain its firm, chewy texture and prevents the buttery shortbread base from becoming stale. When you’re ready to enjoy a refrigerated bar, you can eat it cold, which provides a firmer, almost candy-like caramel experience. Alternatively, allow the bars to come to room temperature for about 15-20 minutes before serving, which will soften the caramel slightly. You can also gently warm them as suggested in the serving section for an extra gooey treat. Freezing is also an option for longer-term storage; individually wrap bars in plastic wrap, then place in an airtight freezer-safe container for up to 1-2 months. Thaw in the refrigerator overnight before serving. Proper storage ensures you can enjoy your sweet and salty creation whenever a craving strikes.
Tips for Perfect Shortbread
Achieving truly perfect salted caramel shortbread bars goes beyond just following the steps; a few key tips can elevate your easy baking treat from good to absolutely extraordinary. These insights focus on the critical elements that define both the buttery shortbread base and the overall aesthetic of your delicious dessert recipe.
Use Quality Butter
The importance of using high-quality butter cannot be overstated, especially when it comes to shortbread. Since butter is one of the primary ingredients in the shortbread base, its flavor profoundly impacts the final taste and texture of your bars. Opt for unsalted butter with a higher butterfat content, if possible. High-quality butter provides a richer, creamier flavor that truly shines through, contributing to that signature melt-in-your-mouth richness. It also has less water content, which results in a crisper, more tender crumb. Avoid using margarine or lower-fat butter spreads, as these will compromise both the flavor and texture, leading to a less authentic and less satisfying buttery shortbread. Furthermore, ensure your butter is cold and cut into cubes when you start creaming it with the sugar. Cold butter is essential for creating those pockets of air that give shortbread its delicate, crumbly texture. Room temperature or softened butter will yield a denser, tougher result. Investing in good butter is a small change that makes a huge difference in the overall quality and deliciousness of your homemade caramel bars.
Cool Completely for Clean Cuts
Patience is paramount when it comes to achieving beautifully neat and clean cuts for your salted caramel shortbread bars. It might be tempting to slice into them as soon as they’ve cooled enough to handle, but resisting this urge is crucial. The homemade caramel topping needs ample time to set up completely and firm. If you attempt to cut the bars while the caramel is still warm or even just slightly pliable, it will stick to your knife, drag, and create a messy, uneven edge. This compromises not only the appearance but also the ease of serving. As mentioned in the cooling section, allow the bars to cool at room temperature first, then transfer them to the refrigerator for several hours, or ideally, overnight. A well-chilled caramel will be firm enough to slice cleanly without sticking or tearing. Before cutting, let the chilled bars sit at room temperature for 10-15 minutes; this slight warming prevents the shortbread from cracking and makes the caramel slightly less brittle. Using a sharp, hot knife (warmed under hot water and wiped dry before each cut) will further ensure precision. These steps guarantee that each bar looks as incredible as it tastes, showcasing the distinct layers of your sweet and salty creation.
Nutritional Facts Per Bar
While these salted caramel shortbread bars are undoubtedly a delicious dessert recipe and an easy baking treat, it’s helpful to have a general understanding of their nutritional content. As with most indulgent homemade caramel bars, they are meant to be enjoyed in moderation. The exact nutritional values can vary significantly based on the specific brands of ingredients used, precise measurements, and the size of your cut bars. However, we can provide a general idea of what you might expect from this sweet and salty delight.
Calories Per Serving
Due to the rich ingredients like butter, sugar, and heavy cream in both the buttery shortbread base and the homemade caramel topping, these bars are generally calorie-dense. Each bar, depending on how large you cut them, could range anywhere from 200 to 350 calories. This makes them a treat best savored for special occasions or enjoyed as a satisfying indulgence. While specific values would require a precise recipe analysis, it’s safe to assume they are not a low-calorie option. Enjoying a smaller portion or sharing can be a great way to manage calorie intake while still enjoying the full flavor experience of this delicious dessert recipe.
Key Nutritional Values
Beyond calories, these salted caramel shortbread bars will also contain significant amounts of certain macronutrients. They will be high in total fats, primarily from the butter and heavy cream, including saturated fats. Carbohydrate content will also be high, largely due to the sugar in both the shortbread and the caramel. Fiber content will be minimal. Protein will be present in smaller amounts, coming from the flour and dairy. Micronutrients like vitamins and minerals will be present but not in significant quantities, as this is primarily an energy-dense treat. It’s important to remember that these bars are an enjoyable indulgence rather than a source of essential daily nutrients. Always consider these nutritional aspects within the context of your overall diet. The rich flavors and satisfying textures make every bite worth it, especially when savored mindfully as a delightful, easy baking treat.