
NO FUSS PIE CRUST is your answer for effortlessly delicious pies. This simple recipe ensures a consistently flaky, tender pastry without complicated steps. You’ll quickly master homemade pie making, impressing everyone with your baking skills. Perfect for sweet or savory creations, this crust delivers. You will enjoy baking more.
Key Takeaways
- Achieve a flaky, tender pie crust with minimal effort and no special equipment.
- Utilize common pantry ingredients for a quick, homemade pastry.
- Learn straightforward steps for mixing, pressing, and baking your crust.
- Explore creative variations to adapt the crust for various sweet and savory fillings.
- Benefit from make-ahead and freezing tips for convenient meal preparation.
- Understand the role of baking powder for a remarkably light texture.
Baking pies is a true joy. A great crust can make a difference. This recipe simplifies the process. Get consistently tender results. Enjoy your homemade goodness.
About This Easy No Fuss Pie Crust Recipe
The quest for the perfect pie often begins and ends with the crust. Many home bakers shy away from making their own, intimidated by tales of difficult techniques and fussy ingredients. This NO FUSS PIE CRUST recipe aims to change that perception, offering a straightforward approach to creating a genuinely delicious pastry that will become your go-to. Forget the rolling pins, the ice water baths, and the stress. This method is designed for simplicity, ensuring that anyone, regardless of baking experience, can achieve a beautifully golden, flaky, and tender crust. It’s perfect for everything from a hearty pot pie to a delicate fruit tart. The secret lies in a balanced ratio of ingredients and a technique that minimizes handling, preserving the butter’s coldness and creating those desirable layers. Understanding the basics of what makes a good pie crust (which you can learn more about on Wikipedia’s pie crust page) will only enhance your appreciation for this simplified version.
Why You Will Love It
You will absolutely adore this pie crust recipe because it truly lives up to its “no fuss” name. It eliminates common baking anxieties, delivering a consistent, high-quality result every time. The crust is wonderfully versatile, serving as an ideal foundation for both sweet and savory fillings. Its tender texture and rich, buttery flavor are simply irresistible, making any pie feel gourmet without the effort. Plus, the quick preparation means you can have a homemade pie ready faster than you might imagine, perfect for spontaneous baking or busy weeknights. It’s a recipe that builds confidence in the kitchen and encourages more pie-making adventures, transforming a potentially daunting task into a delightful one.
No Special Tools Needed
One of the greatest advantages of this recipe is its accessibility. You won’t need a stand mixer, a food processor, or even a pastry blender. All you truly need are your hands, a mixing bowl, and a measuring cup. This minimalist approach not only makes the process incredibly simple but also keeps cleanup to a minimum. The reliance on basic kitchen essentials means you can whip up a fresh pie crust anytime inspiration strikes, without having to hunt down specialized equipment. This focus on simplicity makes homemade pie crust achievable for everyone, reinforcing the idea that delicious baking doesn’t require a professional kitchen setup.
Simple Ingredients for Your Crust
Crafting a delectable pie crust doesn’t require an extensive shopping list. The beauty of this “no fuss” recipe lies in its reliance on staple pantry items, ensuring that you can often decide to bake a pie on a whim without a special trip to the grocery store. Quality ingredients, even simple ones, make a significant difference in the final product’s flavor and texture. Choosing good quality butter, for instance, will impart a richer taste and contribute to a flakier crust. Similarly, a dependable all-purpose flour provides the necessary structure. This simplicity means you can focus more on the technique and less on tracking down obscure components, making the entire baking process more enjoyable and less stressful.
What You Will Need
For this wonderfully simple pie crust, gather the following basic ingredients:
- All-Purpose Flour: The foundation of our crust, providing structure.
- Cold Butter: Cut into small cubes, this is crucial for flakiness. The colder the butter, the better.
- Baking Powder: A secret ingredient for a tender, light texture.
- Salt: Enhances flavor and balances the sweetness of fillings.
- Cold Water: Just enough to bring the dough together, keeping it pliable but not sticky.
Ensure your butter is genuinely cold, straight from the fridge, and ideally cut into small pieces. This helps create steam pockets during baking, which is the key to a flaky texture. Using cold water also prevents the butter from melting too early, maintaining its integrity within the dough. These simple ingredients, when combined correctly, yield a crust that’s both easy to make and delicious to eat.
Making the Easy No Fuss Pie Crust
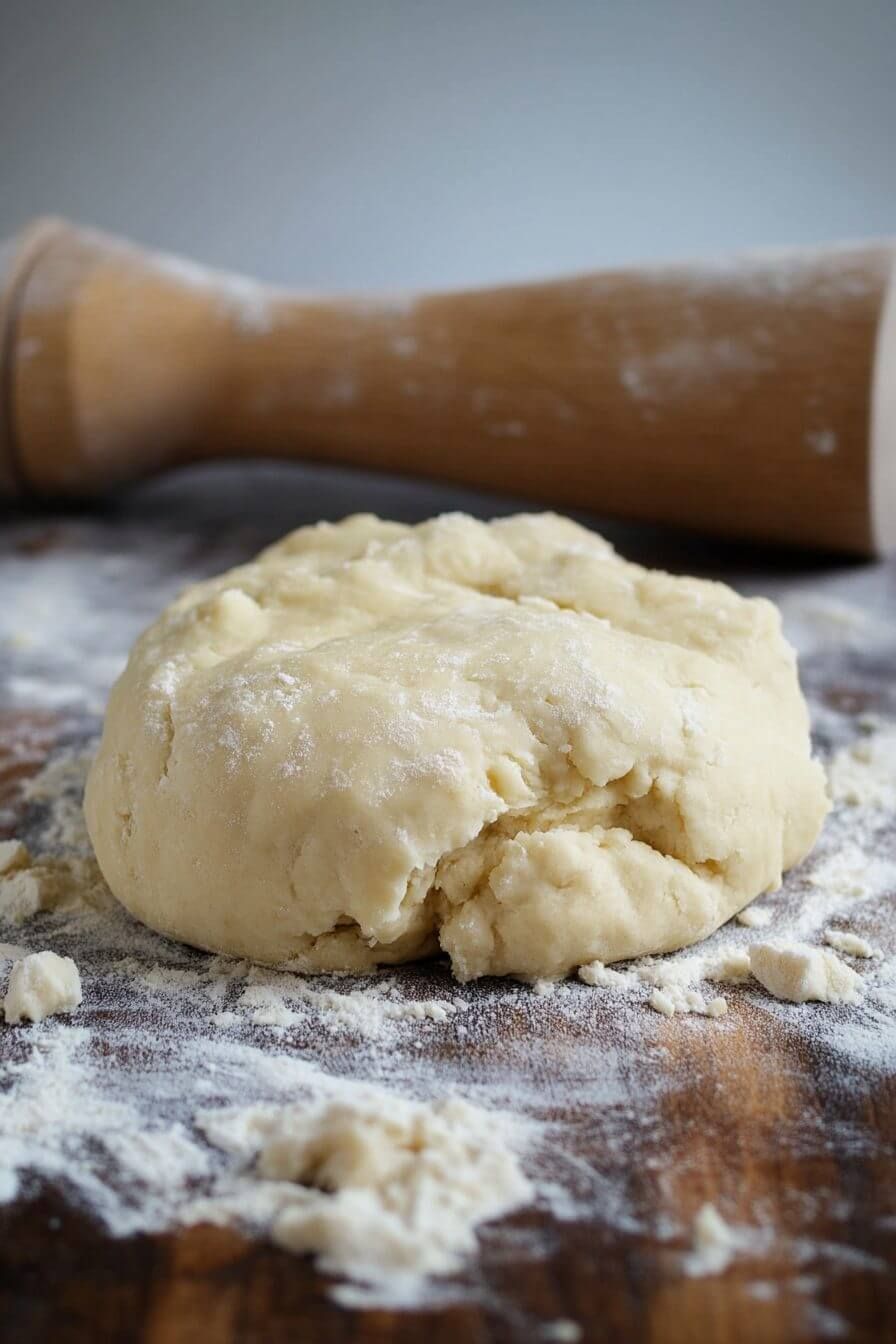
The journey to a perfect NO FUSS PIE CRUST is surprisingly straightforward. This section details the steps, emphasizing gentle handling and mindful technique to ensure your dough develops the ideal texture. The goal is to incorporate the ingredients just enough to form a cohesive dough without overworking the gluten, which can lead to a tough crust. Pay attention to the feel of the dough; it should be moist enough to hold together but not sticky. This process is about embracing simplicity and trusting the ingredients to do their work.
Step-by-Step Instructions
- Combine Dry Ingredients: In a large mixing bowl, whisk together the all-purpose flour, baking powder, and salt. Make sure these are well combined to distribute the leavening and seasoning evenly.
- Incorporate Butter: Add the cold, cubed butter to the dry ingredients. Using your fingertips or a pastry blender, quickly cut the butter into the flour until the mixture resembles coarse crumbs with some pea-sized pieces of butter remaining. This step is critical for a flaky crust; avoid overworking the butter.
- Add Water: Gradually add the cold water, one tablespoon at a time, mixing lightly with a fork or your hands until the dough just begins to come together. You might not need all the water. Stop adding water once the dough can be gently pressed into a ball.
- Form and Chill: Gently gather the dough into a disc, wrap it tightly in plastic wrap, and refrigerate for at least 30 minutes. Chilling allows the gluten to relax and the butter to firm up, making the dough easier to roll and contributing to a flakier texture.
- Roll Out Dough: On a lightly floured surface, roll the chilled dough into a 12-inch circle for a standard 9-inch pie plate. Roll from the center outwards, rotating the dough frequently to prevent sticking.
- Transfer to Pie Plate: Carefully transfer the rolled dough into your pie plate. Trim the edges, leaving about an inch of overhang. Fold the overhang under and crimp as desired.
For inspiration on what to fill your pie crust with, consider some delicious main course recipes from Carina Recipes.
Pressing the Dough
If you prefer an even simpler approach or want to avoid rolling altogether, this recipe lends itself beautifully to a pressed crust method. Instead of rolling, you can simply press the prepared dough directly into the pie plate. After chilling, take the dough and crumble it evenly across the bottom and up the sides of your pie plate. Use your fingertips or the bottom of a flat glass to gently and evenly press the dough into place, creating a uniform thickness. This method is particularly effective for rustic tarts or when working with softer doughs. Ensure there are no gaps and the crust is well-sealed, especially around the rim. This technique maintains all the delicious flavor and tenderness with even less effort, making it truly “no fuss.”
Baking Your Easy No Fuss Pie Crust
Baking the NO FUSS PIE CRUST correctly is just as important as preparing it. The right temperature and timing ensure a golden-brown, crisp, and fully cooked crust that complements any filling. Whether you’re blind baking or baking with a filling, understanding the nuances of your oven and the dough’s behavior is key. This section provides the essential guidelines to help you achieve a perfectly baked crust every time, preventing common pitfalls like soggy bottoms or burnt edges. Adjustments may be needed based on your specific oven and pie type.
Baking Times for Fillings
The baking time for your pie crust will vary significantly depending on whether you’re blind baking it (baking without a filling) or baking it with a specific filling. Here’s a general guide:
- For a fully baked (blind baked) crust: Preheat oven to 400°F (200°C). Line the chilled crust with parchment paper and fill with pie weights or dried beans. Bake for 15-20 minutes, then remove weights and parchment. Continue baking for another 10-15 minutes, or until golden brown. This is ideal for custard or cream pies.
- For a partially baked (blind baked) crust: Follow the same initial steps as for a fully baked crust, but only bake for 10-12 minutes with weights, and then 5-7 minutes without. The crust should be set but not deeply golden. This is great for pies with fillings that require a longer bake time, like a savory creamy chicken alfredo pie.
- For baking with a filling: The baking time will depend on the pie recipe itself. Typically, pies with fillings bake at varying temperatures, often starting higher (425°F/220°C for 15 minutes) and then reducing (350°F/175°C for 30-45 minutes or longer). Always refer to your specific pie filling recipe for precise instructions. Ensure the crust edges don’t burn by covering them with foil if needed.
Tips for Perfect Baking
- Keep it Cold: A cold crust entering a hot oven is vital for flakiness. Chill your prepared pie crust for at least 15-30 minutes before baking, even if just for a few minutes while the oven preheats.
- Prevent Shrinkage: Blind baking with pie weights helps prevent the crust from shrinking down the sides of the pie plate. Beans or rice work well as substitutes.
- Avoid Soggy Bottoms: For fruit pies, brush the bottom of a partially baked crust with an egg wash (beaten egg + a splash of water) or a thin layer of melted butter before adding the filling. This creates a barrier against moisture.
- Even Browning: Rotate your pie halfway through the baking time to ensure even browning. If the edges are browning too quickly, loosely tent them with aluminum foil.
- Watch and Learn: Every oven is different. Pay attention to how your crust bakes and adjust times or temperatures slightly for future bakes. A perfectly baked crust has a beautiful golden hue and crisp texture. For other crispy baking ideas, check out this recipe for crispy cauliflower.
Quick Prep and Total Time
One of the most attractive features of this NO FUSS PIE CRUST recipe is its efficiency. Designed for home bakers who appreciate both quality and speed, it streamlines the traditionally time-consuming process of pie crust preparation. The emphasis on minimal handling and basic tools contributes significantly to reducing both active working time and overall project duration. This means you can integrate homemade pie crusts into your baking routine without feeling overwhelmed by a lengthy commitment, making delicious, from-scratch pies a more frequent and enjoyable reality.
How Long to Prepare
The active preparation time for this easy pie crust is remarkably short, making it perfect for busy schedules:
- Mixing Ingredients: Approximately 5-7 minutes. This includes measuring flour, cutting butter, and combining everything until crumbly.
- Adding Water and Forming Dough: About 3-5 minutes. Gently bringing the dough together into a cohesive ball.
- Rolling/Pressing into Pie Plate: Roughly 5-10 minutes. This varies slightly depending on whether you’re rolling or simply pressing the dough.
Therefore, the active hands-on time for preparing your NO FUSS PIE CRUST is typically around 15-22 minutes. This brevity makes it an excellent choice for when you need a quick, reliable crust.
Overall Project Time
While the active prep time is minimal, the dough does benefit from a period of chilling. This rest time is crucial for both relaxing the gluten and firming up the butter, which directly impacts the flakiness and ease of handling. The total project time accounts for this:
- Active Preparation: 15-22 minutes (as detailed above).
- Chilling Time: A minimum of 30 minutes, but ideally 1 hour. This is passive time where you can focus on other tasks, like preparing your pie filling.
- Baking Time: Varies depending on whether you are blind baking or baking with a filling (refer to the “Baking Your Easy No Fuss Pie Crust” section). For a typical blind bake, add another 25-35 minutes.
Considering active prep and minimum chill time, you can have a pie crust ready to bake or fill in approximately 45 minutes to 1 hour. This overall efficiency demonstrates how truly “no fuss” this recipe is, offering homemade quality without a time-consuming commitment.
Serving Size and Yield
Understanding the yield of a recipe is crucial for planning your baking projects, whether you’re making a single pie for dinner or multiple tarts for a gathering. This NO FUSS PIE CRUST recipe is designed to be versatile, producing a standard amount that fits most common pie-making needs. Knowing the serving size also helps in estimating portion control and ensures you have enough crust for your intended purpose, preventing any last-minute shortages.
How Many Servings
This recipe yields enough dough for one standard 9-inch (23 cm) single pie crust. This is perfect for:
- A single-crust pie, such as a pumpkin pie, custard pie, or a quiche.
- The bottom crust of a double-crust pie (e.g., apple pie), with the understanding that you would need to double the recipe for the top crust.
- Several small tartlets, depending on their size.
When used for a typical 9-inch pie, the crust itself will contribute to a pie that generally serves 6-8 people, depending on slice size and the richness of the filling. If you plan on making a double-crust pie or multiple smaller items, simply scale the recipe up as needed.
Creative Pie Crust Variations
While the classic NO FUSS PIE CRUST is perfect on its own, it also serves as an excellent canvas for culinary creativity. By incorporating a few simple additions, you can dramatically alter its flavor profile, making it perfectly suited to complement specific pie fillings. These variations allow you to tailor your crust to savory dishes, sweet desserts, or add an interesting textural element, transforming a simple crust into an integral part of your pie’s overall character. Don’t be afraid to experiment and discover new favorites.
Savory Herb Options
To elevate your savory pies, quiches, or tarts, consider infusing your crust with aromatic herbs and spices. This works wonderfully for recipes like spinach feta quesadillas or a hearty chicken pot pie. Mix 1-2 tablespoons of finely chopped fresh herbs or 1-2 teaspoons of dried herbs into the flour mixture before adding the butter. Excellent choices include:
- Rosemary: Adds a pungent, woody flavor, great with lamb or root vegetables.
- Thyme: Earthy and slightly minty, pairs well with chicken or mushrooms.
- Sage: Strong, peppery notes, fantastic for poultry or sausage fillings.
- Italian Seasoning: A blend of oregano, basil, thyme, and rosemary, versatile for many savory dishes.
- Garlic Powder/Onion Powder: A half teaspoon of each can add a subtle savory base.
A pinch of black pepper or a dash of smoked paprika can also enhance the savory depth.
Sweet Spice Additions
For sweet pies and desserts, a hint of spice in the crust can make a world of difference, harmonizing beautifully with fruit or cream fillings. Incorporate 1-2 teaspoons of ground spices into the flour mixture:
- Cinnamon: Classic for apple, pumpkin, or pecan pies.
- Nutmeg: Warm and sweet, excellent with custards or dairy-based fillings.
- Cardamom: Exotic and aromatic, wonderful with pear or stone fruit pies.
- Ginger: Pungent and spicy, a lovely complement to apple or sweet potato.
- Pumpkin Pie Spice: A ready-made blend for fall-themed delights.
You can also add a tablespoon of granulated sugar to the flour mixture for a slightly sweeter crust, especially if you’re making a sweet tart or a dessert like peanut butter brownie swirl cookies, where the crust becomes a key flavor component.
Nutty Crunch Ideas
Adding finely ground nuts to your pie crust not only imparts a delightful nutty flavor but also creates an interesting, slightly crumbly texture. Replace 1/4 to 1/2 cup of the all-purpose flour with finely ground nuts. Good options include:
- Pecans: Rich and buttery, fantastic for pumpkin or chocolate pies.
- Walnuts: Slightly bitter, pairs well with dark chocolate or fruit.
- Almonds: Mild and versatile, great with berry or cherry pies.
- Hazelnuts: A robust, earthy flavor, excellent with coffee or chocolate.
Ensure the nuts are very finely ground to avoid large pieces that could affect the dough’s integrity. These variations provide endless opportunities to customize your NO FUSS PIE CRUST to perfectly match any filling you dream up.
Whole Wheat Pie Crust Swap
For those seeking a more wholesome and robust alternative to traditional white flour crusts, converting your NO FUSS PIE CRUST to whole wheat is a simple and rewarding adjustment. A whole wheat crust offers a distinct nutty flavor and a heartier texture, which can beautifully complement certain fillings, especially savory ones or those featuring robust fruits. While it requires a minor adjustment in the flour ratio, the process remains just as easy and “no fuss” as the original recipe, allowing you to enjoy a nutritious twist on a classic without added complexity.
For a Heartier Crust
To create a delicious and heartier whole wheat pie crust, you can substitute a portion of the all-purpose flour with whole wheat flour. A good starting point is to replace half of the all-purpose flour with whole wheat flour. For a single 9-inch crust:
- Use 1 cup (120g) all-purpose flour.
- Use 1 cup (120g) whole wheat flour.
- Keep the butter, baking powder, salt, and water measurements the same.
Whole wheat flour absorbs more liquid than all-purpose flour, so you might need to add an extra tablespoon or two of cold water to achieve the right consistency. The dough might feel a bit more rustic and less pliable, but it will still come together beautifully. The resulting crust will have a deeper, nuttier flavor and a slightly denser, yet still tender, texture. This variation is particularly excellent for savory pies, quiches, or fruit pies with robust fillings like apple or cherry, adding an extra layer of flavor and nutritional value to your homemade creations.
Storing Your Easy No Fuss Pie Crust
The convenience of this NO FUSS PIE CRUST extends beyond its simple preparation; it also shines in its make-ahead and storage capabilities. Being able to prepare the dough in advance or store extra portions means you’re always ready for spontaneous baking or can streamline your meal prep for future events. This flexibility significantly reduces stress on busy days, allowing you to enjoy homemade pies with minimal effort. Properly storing your dough ensures its freshness and texture are preserved, making it just as delicious as if it were made fresh on the day.
Make-Ahead Dough Tips
Preparing your pie crust dough in advance is a fantastic time-saver. Once you’ve mixed and formed the dough into a disc:
- Wrap Tightly: Wrap the disc securely in plastic wrap, ensuring no air can get in. You can then place it in an airtight container or a freezer-safe bag for extra protection.
- Refrigerate: The dough can be stored in the refrigerator for up to 3-5 days. This allows the flavors to meld and the gluten to relax even further, potentially resulting in a more tender crust.
- Bring to Temperature: Before rolling, let the chilled dough sit at room temperature for about 10-15 minutes. This makes it more pliable and easier to roll without cracking, while still keeping the butter cold enough for flakiness.
Freezing Pressed Crust
For ultimate convenience, you can also freeze a pressed (or rolled) pie crust. This is ideal for having a pie shell ready to go at a moment’s notice:
- Prepare and Press: Follow the instructions to make the dough and press it into your pie plate. Crimp the edges as desired.
- Freeze Until Solid: Place the pie plate with the unbaked crust directly into the freezer. Freeze for at least 2-3 hours, or until the crust is completely solid.
- Wrap and Store: Once solid, remove the frozen crust from the pie plate (it should pop out easily). Wrap the frozen crust tightly in plastic wrap, then again in aluminum foil. Label with the date.
- Store in Freezer: Store the wrapped crust in the freezer for up to 3 months.
- Baking from Frozen: When ready to use, unwrap the frozen crust and place it back into its original pie plate (or another similar-sized one). Blind bake from frozen, adding an extra 5-10 minutes to the baking time to account for thawing. You can find more freezer-friendly recipes like chicken bacon ranch tater tot casserole for inspiration.
Reheating Leftovers
If you’re lucky enough to have leftover pie, reheating the crust properly can help restore some of its original crispness:
- Oven Reheat: The best method for reheating slices of pie with a crust is in the oven. Preheat your oven to 300°F (150°C). Place pie slices on a baking sheet and heat for 10-15 minutes, or until warmed through and the crust is crisp again.
- Air Fryer: A quick option for single slices is an air fryer. Heat at 300°F (150°C) for 5-7 minutes.
- Avoid Microwave: While convenient, a microwave will soften the crust, making it less appealing. It’s best avoided if you want a crispy crust.
Common Questions About This Crust
Even with a “no fuss” recipe, questions can arise, especially for those new to pie making or looking to refine their technique. Addressing common queries helps clarify potential ambiguities and empowers you to make informed decisions about your ingredients and process. Understanding the ‘why’ behind certain choices, like butter versus oil, or the necessity of blind baking, demystifies the art of pie making and builds confidence in your baking abilities. This section aims to provide straightforward answers to ensure your success with this incredibly versatile crust.
Butter Versus Oil Choice
The choice between butter and oil significantly impacts the flavor, texture, and workability of your pie crust:
- Butter: This recipe specifically calls for cold butter, and for good reason. Butter provides unparalleled flavor and contributes to a flaky, tender texture. As the cold butter melts in the hot oven, it creates pockets of steam, which separate the layers of dough, resulting in that desirable flakiness. The solid fat structure is also key for creating a sturdy yet delicate crust.
- Oil: While oil can create a very tender crust, it generally results in a softer, more crumbly texture rather than true flakiness. This is because oil is liquid at room temperature and doesn’t create the same steam pockets as solid butter. Oil-based crusts are often easier to mix and roll but lack the rich, buttery flavor and crisp flakiness that butter provides. For this NO FUSS PIE CRUST, butter is preferred for its superior flavor and texture contribution.
If you are looking for other recipes that feature butter, perhaps a butter chicken recipe might be of interest.
Is Blind Baking Needed
Whether or not blind baking (pre-baking) your pie crust is necessary depends entirely on the type of pie you are making:
- Yes, for Wet Fillings: Blind baking is essential for pies with very wet fillings (like quiches, custard pies, or fresh fruit pies) or those with no-bake fillings (like cream pies). It prevents the crust from becoming soggy (the dreaded “soggy bottom”) by creating a barrier and ensuring the crust is fully cooked before the filling is added.
- Yes, for Short Bake Fillings: If your filling requires a very short bake time, blind baking ensures the crust has enough time to cook through and become golden.
- No, for Long Bake Fillings: For pies with fillings that require a long baking time (e.g., many fruit pies, savory meat pies), you often don’t need to fully blind bake. A partial blind bake might be beneficial to give the crust a head start, or you can skip it entirely, allowing the crust to bake alongside the filling.
Always check your specific pie recipe to determine if blind baking (fully or partially) is recommended for the best results.
Making Your Crust Gluten-Free
Adapting your favorite recipes to be gluten-free has become increasingly straightforward with the availability of excellent gluten-free flour blends. This NO FUSS PIE CRUST is no exception, proving that a delicious, flaky, and tender crust is achievable even without traditional wheat flour. Making this swap opens up the world of homemade pies to those with gluten sensitivities or dietary preferences, ensuring everyone can enjoy a slice of pie. The key lies in selecting the right flour blend and understanding minor adjustments to maintain the crust’s integrity and texture.
Using a GF Flour Blend
To make this easy pie crust gluten-free, the most effective approach is to use a high-quality, all-purpose gluten-free flour blend. These blends are specifically formulated to mimic the properties of wheat flour and typically contain a mix of different flours (like rice flour, potato starch, tapioca starch) and often a gum (like xanthan gum) to provide elasticity and structure. Simply substitute the all-purpose flour in the recipe cup-for-cup with your chosen gluten-free blend.
- Recommended Blends: Look for blends that are specifically marketed as “all-purpose” or “baking blend” and ideally contain xanthan gum. Popular brands like Bob’s Red Mill 1-to-1 Baking Flour or King Arthur Gluten-Free Measure for Measure Flour work wonderfully.
- Moisture Adjustment: Gluten-free flours can absorb liquids differently than wheat flour. You might find you need to add an extra tablespoon or two of cold water to achieve the desired dough consistency. The dough should still be pliable but not sticky.
- Chilling Time: Gluten-free doughs benefit greatly from a slightly longer chilling time, say 1 hour, as this helps the flours hydrate fully and the dough become more manageable.
- Handling: Gluten-free dough can sometimes be a bit more delicate or prone to cracking when rolled. If this happens, simply press the cracks back together or use the “pressing the dough” method described earlier.
With these minor adjustments, you can confidently create a fantastic gluten-free NO FUSS PIE CRUST that is just as flaky and delicious as its traditional counterpart, making homemade pies accessible to all.
The Secret of Baking Powder
The inclusion of baking powder in this NO FUSS PIE CRUST recipe might seem unconventional to those accustomed to traditional pie crusts, which typically rely solely on fat and flour for flakiness. However, this ingredient is one of the “no fuss” secrets, playing a crucial role in achieving a remarkably tender and light texture. It’s a simple addition that makes a significant difference, distinguishing this recipe from others and contributing to a pie crust that is a delight to eat rather than just a vessel for filling. Understanding its function highlights the clever engineering behind this easy recipe.
For a Tender, Light Crust
Baking powder is a leavening agent primarily used in cakes, muffins, and quick breads. In this pie crust, it serves a unique and beneficial purpose:
- Enhanced Tenderness: Baking powder reacts with moisture and heat to produce tiny carbon dioxide bubbles. These bubbles create small pockets of air throughout the dough. While butter is responsible for the large, visible flakes, baking powder works on a finer scale to ensure the overall texture of the crust is incredibly tender and not dense or chewy.
- Lighter Feel: The aeration provided by the baking powder makes the crust feel lighter in the mouth. This contrasts with some traditional crusts that can sometimes be heavy. The slight lift makes the crust more delicate and enjoyable.
- Subtle Rise: While not designed to puff up dramatically like a cake, the baking powder gives the crust a subtle rise, contributing to its overall appeal and preventing it from becoming too compact.
This small addition of baking powder works in harmony with the cold butter technique to create a pie crust that is both wonderfully flaky and delicately tender—a perfect balance for any pie. For more information on how baking powder works, check out the Wikipedia page on baking powder. We love seeing your baking creations! Share your NO FUSS PIE CRUST masterpieces with us on Pinterest and Instagram.