
Oreo brownies are a truly delightful dessert, combining rich chocolate fudge with crunchy cookie pieces. This detailed guide offers a straightforward approach to creating them in your own kitchen. You will learn expert tips for a perfect bake. Impress friends and family with these decadent, crowd-pleasing treats.
Key Takeaways
- Achieve perfectly fudgy brownies with precise baking and cooling techniques.
- Simplify your baking process with clear instructions for wet and dry ingredient mixing.
- Learn how to customize your Oreo brownies with various add-ins and toppings.
- Understand proper storage to keep your brownies fresh and delicious for longer.
Homemade brownies are simple to make. They offer pure chocolate bliss. These treats satisfy any sweet craving. Share them with loved ones. Baking brings joy to all.
Making Decadent Oreo Brownies
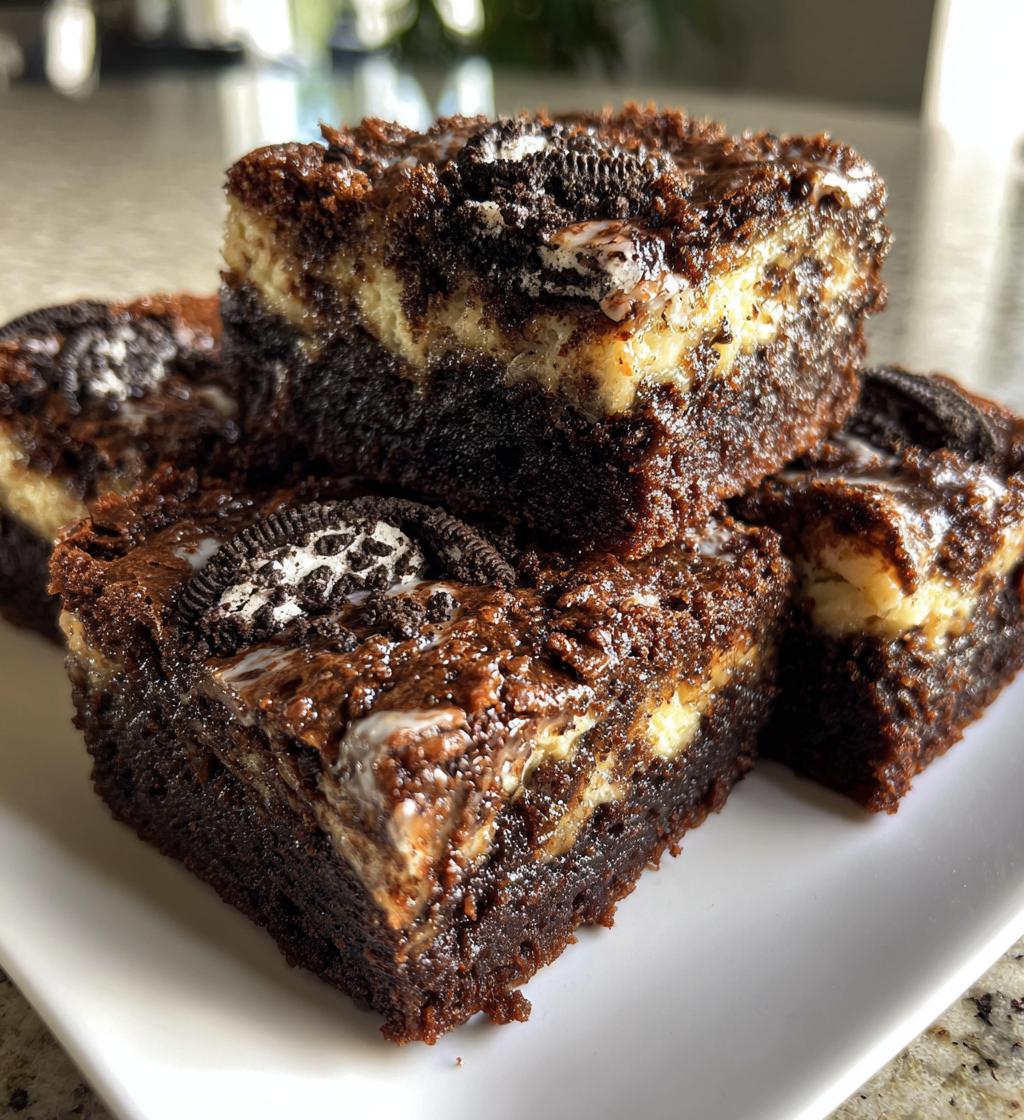
Crafting decadent Oreo brownies is a rewarding baking endeavor that brings together the best of both worlds: the rich, chewy goodness of a classic brownie and the iconic crunch of Oreo cookies. This recipe is designed to produce a batch of brownies that are not just sweet, but genuinely luxurious, with a deeply chocolatey flavor profile and delightful texture contrasts. Achieving truly “decadent” brownies means paying attention to ingredient quality and precise baking steps, ensuring a fudgy interior and slightly crisp edges, perfectly studded with crushed Oreo pieces.
Quick Total Prep Time
One of the most appealing aspects of this Oreo brownie recipe is its relatively quick total prep time. From gathering your ingredients to having the batter ready for the oven, you can expect to spend approximately 15-20 minutes. This makes it an ideal choice for busy weeknights or when you need a fantastic dessert without hours of kitchen work. The straightforward steps and minimal specialized equipment mean you can go from craving to baking in no time, leaving more time to anticipate the delicious results. Efficient preparation doesn’t compromise on flavor; it simply streamlines the path to a truly delicious dessert.
Yields Many Sweet Servings
This recipe is generously portioned, typically yielding 12-16 substantial brownie squares, depending on how you cut them. This makes it perfect for sharing at gatherings, potlucks, or simply ensuring you have plenty of treats for your family throughout the week. The high yield means there’s always enough to go around, and perhaps even some left over for a delightful snack the next day. Preparing a batch of these sweet servings guarantees everyone gets to enjoy the rich, chocolatey goodness, whether it’s for a special occasion or just a delightful everyday indulgence.
Gather Your Brownie Ingredients
Successful baking begins with carefully gathering all your ingredients. For these luscious Oreo brownies, you’ll need a combination of wet and dry components, plus the star of the show: Oreo cookies. Having everything measured and ready before you start mixing, often called “mise en place,” ensures a smooth and stress-free baking process. Accuracy in measurement is key to achieving the perfect fudgy texture and rich flavor. Don’t forget a little extra for decorating!
Wet Mix for Richness
The wet mix forms the luxurious base of your brownies, contributing to their signature fudgy texture and rich taste. You’ll typically need melted butter, granulated sugar, eggs, and vanilla extract. The butter provides moisture and richness, while sugar sweetens and helps create a desirable chewiness. Eggs act as a binding agent and contribute to the brownies’ structure and lift. Vanilla extract enhances the chocolate flavor, adding a warm, aromatic depth. Ensuring these ingredients are at the right temperature, especially the eggs, can significantly impact the final texture of your baked goods. For a similar rich base in another treat, consider making Peanut Butter Brownie Swirl Cookies.
Dry Mix for Structure
The dry mix provides the structural integrity of your brownies. It typically includes all-purpose flour, unsweetened cocoa powder, and a pinch of salt. The flour gives the brownies their body, while cocoa powder delivers the intense chocolate flavor. Using a good quality cocoa powder can make a world of difference in the depth of flavor. Salt, though used in small amounts, plays a crucial role in balancing the sweetness and enhancing all the other flavors. Sifting your dry ingredients together is often recommended to prevent lumps and ensure even distribution, leading to a smoother batter and a more uniform texture in the finished brownies. This blend is crucial for developing the proper chewy and fudgy consistency.
Oreo Add-ins and Toppings
The magic of Oreo brownies lies in the generous addition of crushed Oreo cookies. For the add-ins, coarsely chop a good portion of cookies; these will be folded directly into the batter, creating pockets of crunchy, creamy goodness throughout. For toppings, set aside some larger cookie pieces or even whole mini Oreos to press into the top of the batter before baking. This not only adds visual appeal but also provides an extra layer of texture and flavor. Some bakers also like to include chocolate chips or chunks alongside the Oreos for an even more intense chocolate experience. The combination of textures makes these brownies truly special.
Mixing Your Oreo Brownie Batter
Properly mixing your brownie batter is essential for achieving that coveted fudgy texture. Overmixing can lead to tough, cakey brownies, while undermixing might result in an inconsistent texture. The key is to combine ingredients just until they are incorporated, maintaining the integrity of the wet and dry components. This section will guide you through the process, ensuring your batter is perfectly prepared for baking. A well-mixed batter is the foundation for truly spectacular brownies, ready for the oven and ultimately, your enjoyment. Pay attention to each step for optimal results.
Melt Butter Smoothly
The first step in creating your brownie batter involves melting the butter. It’s crucial to melt the butter smoothly and completely, either in a microwave-safe bowl or in a saucepan over low heat. Be careful not to brown or burn it; you want it liquid and warm, but not scorching hot. Allowing the butter to cool slightly after melting prevents it from scrambling the eggs when they are added later. This smooth, melted butter provides a rich fat base that contributes significantly to the fudgy texture of the brownies, ensuring moisture and tenderness in every bite. Consider using unsalted butter for better control over the salt content.
Combine Wet Ingredients
Once your butter is melted and slightly cooled, it’s time to combine the wet ingredients. In a large mixing bowl, whisk together the melted butter and sugar until well combined and smooth. This step can take a few minutes and helps dissolve the sugar, leading to a glossier batter and a chewier brownie. Next, beat in the eggs one at a time, ensuring each egg is fully incorporated before adding the next. Finally, stir in the vanilla extract. This creates a homogeneous, rich base that is crucial for the brownies’ ultimate flavor and texture, setting the stage for the dry ingredients. You might find similar wet ingredient techniques when preparing Quick Italian Cream Cake.
Gently Fold in Goodies
After incorporating the dry ingredients into the wet mixture, the final step before baking is to gently fold in your Oreo add-ins and any other desired goodies like chocolate chips. The emphasis here is on “gently.” Use a spatula to fold the ingredients, stirring just until they are evenly distributed throughout the batter. Overmixing at this stage can develop the gluten in the flour too much, resulting in tougher, less fudgy brownies. The goal is to incorporate the chunks of Oreo cookies without crushing them entirely, leaving delightful pockets of crunchy texture that make these brownies so special. This careful folding preserves the delicate balance of your fudgy brownie base.
Preparing for Oven Baking
Proper preparation before baking is just as important as the mixing process. Taking a few extra minutes to correctly prepare your oven and baking pan can make all the difference in the outcome of your Oreo brownies. These steps ensure even baking, prevent sticking, and contribute to the overall success of your delicious chocolate treat. Skipping these foundational steps might lead to unevenly baked brownies or a frustrating experience when trying to remove them from the pan. A little foresight goes a long way towards a perfect batch. For more general baking insights, check out our baking method category.
Preheat Oven Correctly
Preheating your oven correctly is a critical step that many home bakers overlook. Always preheat your oven to the specified temperature for at least 15-20 minutes before placing your brownies inside, even if your oven indicates it’s reached the temperature sooner. This allows the oven’s internal temperature to stabilize and ensures consistent heat throughout the baking chamber. A properly preheated oven helps the brownies rise evenly and cook through consistently, preventing common issues like burnt edges with an undercooked center. It’s also a good idea to invest in an oven thermometer to verify your oven’s accuracy.
Grease Your Baking Pan
Greasing your baking pan properly is essential to prevent your brownies from sticking, ensuring they can be easily removed and cut into neat squares. There are several effective methods: you can spray the pan with non-stick cooking spray, grease it thoroughly with butter or shortening, or line it with parchment paper. For the best results and easiest removal, we recommend lining the pan with parchment paper, leaving an overhang on two sides to create “handles.” This way, you can simply lift the entire slab of brownies out of the pan once cooled, making cutting effortless. Always ensure the bottom and sides are well-covered.
Baking Your Perfect Oreo Brownies
Baking is where the magic truly happens, transforming your rich batter into fudgy, chocolatey perfection. The key to perfect Oreo brownies lies in understanding your oven and knowing when to pull them out. Under-baking can leave them too gooey, while over-baking results in dry, cakey brownies—a fate we definitely want to avoid for these dessert treats. This section will guide you through the process, from initial bake time to checking for doneness, ensuring every batch you make is wonderfully fudgy and irresistible.
Bake Until Just Right
Bake your Oreo brownies in the preheated oven for the recommended time, usually between 25-35 minutes, depending on your oven and the desired fudginess. Brownies are often best when slightly underbaked in the center, which contributes to their signature fudgy texture. The edges should appear set and slightly pulled away from the sides of the pan, while the center might still look a little soft or jiggly. Keep a close eye on them, especially during the last few minutes, as ovens can vary significantly. Baking until “just right” means achieving that perfect balance between gooey and set. For a similar baking precision, check out our recipe for Snickerdoodle Cobbler.
Check for Doneness Carefully
Checking for doneness in brownies requires a bit of finesse. Insert a toothpick or a thin knife into the center of the brownies. For fudgy brownies, you want the toothpick to come out with moist crumbs attached, but not wet batter. If it comes out clean, your brownies are likely overbaked and will be cakey. If it comes out with wet batter, they need more time. The key is to look for those moist crumbs, indicating that the brownies are set but still beautifully gooey in the middle. Remove them from the oven promptly once this stage is reached to prevent further cooking. Learning this technique ensures perfectly textured chocolate treats every time.
Cooling and Cutting Brownie Squares
Patience is a virtue, especially when it comes to cooling your baked Oreo brownies. Rushing this step can lead to messy cuts and a compromised texture. Proper cooling allows the brownies to fully set, making them easier to handle and ensuring neat, attractive squares. This section will guide you through the crucial cooling period and provide tips for achieving perfectly clean cuts, transforming your warm, gooey slab into individual, delectable brownie portions ready for serving or storage. A little wait time now will pay off with much better results.
Allow Brownies to Cool
Once your Oreo brownies are out of the oven, it’s absolutely crucial to let them cool completely in the pan on a wire rack. This cooling process can take anywhere from 1 to 2 hours, or even longer if your kitchen is warm. While it’s tempting to dive right into the warm, gooey goodness, cooling allows the brownies to fully set and firm up, preventing them from falling apart when cut. Attempting to cut warm brownies often results in crumbly, uneven pieces. For the cleanest cuts and best texture, some bakers even recommend chilling the brownies in the refrigerator for 30 minutes to an hour after they’ve cooled to room temperature. This patience ensures a superior final product.
Cut Neat Brownie Pieces
After your brownies have cooled completely, it’s time to cut them into neat, uniform squares. If you lined your pan with parchment paper, gently lift the entire slab of brownies out and place it on a cutting board. For clean cuts, use a large, sharp chef’s knife. For even neater slices, run the knife under hot water and wipe it clean between each cut. This technique prevents the knife from dragging crumbs and keeps the edges sharp. Decide on your desired size – small bites for a crowd or larger squares for a more indulgent serving. Careful cutting transforms your delicious homemade treat into perfectly presented portions, ready to be enjoyed.
Storing Your Delicious Brownies
Once you’ve baked and cut your delicious Oreo brownies, proper storage is key to maintaining their freshness, fudgy texture, and irresistible flavor. Whether you plan to enjoy them over a few days or save them for a later treat, understanding the best storage methods will ensure every bite is as good as the first. This section covers options for short-term and long-term storage, helping you keep your homemade brownies at their peak. Learning these techniques will extend the enjoyment of your baking efforts, making sure no delicious morsel goes to waste.
Room Temp or Fridge Storage
For short-term storage, Oreo brownies can be kept at room temperature for up to 3-4 days. Store them in an airtight container to prevent them from drying out. Placing a piece of parchment paper between layers can help prevent sticking if stacking. If you prefer your brownies slightly firmer or if your kitchen is particularly warm, you can store them in the refrigerator. In the fridge, they will last for about a week. Refrigeration can make them a bit denser, but they remain delicious. Just be sure to bring them back to room temperature or gently warm them before serving for the best texture. This helps keep your sweet treat perfectly preserved.
Freezing for Longer Keeping
If you’ve made a large batch or want to save some Oreo brownies for future cravings, freezing is an excellent option for longer keeping. To freeze, ensure the brownies are completely cooled. Cut them into individual squares, then wrap each piece tightly in plastic wrap, followed by a layer of aluminum foil. Place the wrapped brownies in a freezer-safe bag or container. They can be stored in the freezer for up to 2-3 months without significant loss of quality. To enjoy, simply thaw them at room temperature for a few hours, or gently warm them in the microwave for a fresh-baked feel. This method ensures you always have a delightful homemade dessert on hand.
Brownie Tips for Fudgy Texture
Achieving the perfect fudgy texture in your Oreo brownies is the ultimate goal for any baker. It’s that dense, moist, and slightly gooey center that makes a brownie truly irresistible. While the recipe itself provides a solid foundation, a few key tips and tricks can elevate your brownies from good to absolutely phenomenal. These simple techniques focus on careful handling of the batter and thoughtful preparation, ensuring every bite is the rich, decadent experience you’re hoping for. Master these tips for consistently exceptional results, and your baking will be a definite hit with anyone lucky enough to try them.
Don’t Overmix Batter
One of the most crucial pieces of advice for fudgy brownies is to avoid overmixing the batter. Once you add the dry ingredients to the wet mixture, mix them only until they are just combined. Overmixing develops the gluten in the flour, which leads to a tougher, more cake-like texture rather than the desired dense and fudgy consistency. Use a spatula for this step and fold the ingredients gently. A few streaks of flour are acceptable; they will disappear during baking. This careful approach to mixing ensures your brownies remain moist, tender, and wonderfully fudgy, making them a true homemade dessert. For other treats like Crispy Parmesan Chicken, mixing is less critical, but for baked goods, it’s paramount.
Clean Knife for Best Slices
For perfectly neat and clean brownie slices, a simple yet effective trick is to use a clean, sharp knife for each cut. After each slice, wipe the knife blade clean with a damp cloth or paper towel. The residual brownie crumbs and sticky chocolate can drag through the next cut, creating messy edges. For an even smoother cut, you can also run the knife under hot water for a few seconds before wiping it dry. The warm blade glides through the dense brownie more easily. This small effort makes a significant difference in the presentation of your homemade treat, ensuring every piece looks as appealing as it tastes.
Customize Your Oreo Brownie Recipe
While the classic Oreo brownie is undeniably delicious, one of the joys of home baking is the freedom to customize and experiment. Your Oreo brownie recipe can be a canvas for creative additions, allowing you to tailor the flavors and textures to your personal preferences or to suit a specific occasion. From adding extra crunch to drizzling on decadent sauces, there are countless ways to make this already fantastic dessert uniquely yours. This section explores a couple of popular options for customizing your brownies, transforming a simple recipe into an even more exciting baking adventure.
Add Nuts for Crunch
For those who love an extra textural element, adding nuts to your Oreo brownie recipe is a fantastic choice. Chopped walnuts or pecans are classic additions that provide a satisfying crunch and a subtle earthy flavor that complements the rich chocolate beautifully. You can fold them into the batter along with the crushed Oreos or sprinkle them on top before baking for a more pronounced nutty flavor and visual appeal. Toasting the nuts lightly before adding them can further enhance their flavor. This simple addition introduces a delightful contrast to the fudgy base and crispy Oreo pieces, making each bite even more interesting. It’s an easy recipe tweak for an enhanced experience.
Drizzle with Caramel
To take your Oreo brownies to an even more indulgent level, consider drizzling them with caramel sauce. Once the brownies have cooled, warm up some store-bought or homemade caramel and generously drizzle it over the entire slab or individual squares. The sweet, buttery notes of caramel pair wonderfully with the deep chocolate and crunchy Oreos, creating a truly irresistible flavor combination. You can also sprinkle a pinch of sea salt over the caramel for a trendy salted caramel effect. This elegant finishing touch not only adds a burst of flavor but also makes your homemade dessert look incredibly gourmet and appealing, perfect for special occasions or when you simply want to enjoy a little extra luxury. Find more delicious baking inspiration on our Instagram page.
Understanding Brownie Nutrition Facts
While Oreo brownies are undoubtedly a delightful indulgence, it can be helpful to have a general understanding of their nutritional content. Like most homemade desserts, they are calorie-dense and rich in macronutrients. Knowing these facts allows you to make informed choices about portion sizes and how these treats fit into your overall dietary pattern. This section provides a basic overview of what you might expect in terms of calories and macronutrients per serving, offering transparency without detracting from the joy of enjoying these fudgy chocolate treats. Remember, these are estimates and can vary based on exact ingredients and portion sizes.
Calories Per Serving
Oreo brownies, being a rich homemade treat, typically range from 250 to 400 calories per serving, depending on the size of the brownie square and the specific ingredients used (e.g., amount of butter, sugar, and add-ins). A standard serving usually refers to one 2×2 inch (5×5 cm) square. These figures are estimates, and the exact caloric content will vary based on your specific recipe and portion control. Enjoying them in moderation is key to balancing their deliciousness with your dietary goals. Understanding the calorie count helps in planning your treats, ensuring you can savor every bite responsibly.
Macronutrient Overview
Beyond calories, a serving of Oreo brownies provides a mix of macronutrients. They are generally high in carbohydrates, primarily from sugar and flour, contributing to their energy content. Fats, largely from butter and the Oreos themselves, are also significant, giving the brownies their rich, fudgy texture. Protein content is usually lower, mainly coming from the eggs and a small amount from the flour and cocoa. While not a primary source of vitamins or minerals, they offer pure satisfaction. This homemade treat provides a burst of energy and pleasure, making it a perfect occasional indulgence. For similar macro profiles in other dishes, consider exploring ground turkey and peppers for comparison, though they are very different types of foods.
Reheating for Gooey Brownie Warmth
There’s something uniquely comforting about a warm, gooey brownie, fresh from the oven. Even if your Oreo brownies have cooled down, you can easily recapture that delightful warmth and melt-in-your-mouth texture with a quick reheat. This simple step can transform a room-temperature brownie into an indulgent, almost “freshly baked” experience, perfect for a cozy evening treat. Reheating is especially great if you plan to serve them with a scoop of ice cream or a dollop of whipped cream, enhancing the entire dessert experience. Learn how to get that perfect gooey warmth back into your chocolate delight.
Microwave Individual Portions
The easiest and quickest way to bring your Oreo brownies back to gooey warmth is by using a microwave for individual portions. Place a single brownie square on a microwave-safe plate. Heat it on high for about 10-20 seconds. Start with less time and add more if needed, as microwave wattages vary. The goal is to warm it through and soften the chocolate and fudgy interior without making it tough or dry. Be careful not to overheat, as this can lead to a chewy, rubbery texture. A perfectly reheated brownie will be warm and soft, ideal for enjoying on its own or with a scoop of vanilla ice cream, making it a perfect homemade treat even days after baking.
Your Reasons to Bake Today
Baking is more than just following a recipe; it’s an act of creation, a sensory experience, and often a way to connect with others. Deciding to bake a batch of decadent Oreo brownies today offers a multitude of wonderful reasons, extending beyond just satisfying a sweet craving. It’s an opportunity for self-care, a gesture of kindness, and a chance to fill your home with an irresistible aroma. Embrace the joy of baking and let these reasons inspire you to get into the kitchen. The process itself can be incredibly therapeutic, a rewarding endeavor for any home cook.
Enjoy a Sweet Treat
Sometimes, the simplest reason is the best: to enjoy a truly delicious sweet treat. Oreo brownies are the epitome of indulgence, offering a rich chocolate flavor paired with the satisfying crunch of cookies. Baking a batch means you have immediate access to this delightful dessert whenever a craving strikes. It’s a fantastic way to reward yourself after a long week, celebrate a small victory, or simply add a little joy to an ordinary day. There’s a special satisfaction in eating something you’ve created with your own hands, especially when it’s as universally loved as a fudgy brownie. Indulge in this homemade dessert guilt-free.
Perfect for Sharing
Oreo brownies are inherently shareable, making them perfect for almost any social occasion. Whether you’re hosting a party, bringing a dish to a potluck, or simply want to treat your neighbors or colleagues, a tray of these homemade treats is always a welcome sight. Their crowd-pleasing appeal ensures they’ll be devoured quickly, sparking smiles and conversations. Baking for others is a thoughtful gesture that shows care and generosity. So, whip up a batch, invite some friends over, or surprise someone special with these decadent chocolate squares. They are a wonderful way to spread happiness and connect through delicious food.
