
Classic chocolate mousse is a truly delightful dessert, known for its rich flavor and airy consistency. This recipe breaks down the process into simple steps, allowing anyone to prepare a decadent treat. Achieve that coveted creamy texture and sweet delight, perfect for impressing guests or enjoying a special moment at home. Preparing this elegant dessert is more accessible than you think.
Key Takeaways
- Achieve classic chocolate mousse with straightforward instructions.
- Quality chocolate is crucial for a rich, decadent treat.
- Gentle folding techniques create the desired airy and creamy texture.
- Proper chilling ensures the mousse sets perfectly for serving.
Chocolate mousse is a timeless dessert. It delights with its luxurious taste. Achieving perfection is simple. Just follow gentle mixing steps. The reward is a light, sweet delight.
Get Ready for Classic Chocolate Mousse
Preparing a classic chocolate mousse might seem daunting, but this recipe simplifies the process, ensuring a smooth journey from kitchen to dessert table. This elegant dessert, known for its rich flavor and airy consistency, is a fantastic choice for any occasion, whether it’s a quiet evening at home or a dinner party with friends. The beauty of this particular chocolate mousse lies in its straightforward yet effective methodology, promising a truly decadent treat that will impress without requiring hours of complex work. The active preparation time is remarkably short, allowing the majority of the time to be dedicated to the crucial chilling phase, which perfects the creamy texture. For other delightful sweet options, consider a vanilla bean creme brulee cheesecake cupcakes recipe that also promises a sweet delight.
Prep Time: 30 Minutes
The hands-on effort required for this exquisite dessert is minimal, clocking in at just about 30 minutes. This makes it an ideal choice for busy individuals who appreciate homemade quality without sacrificing their precious time. Most of the active steps involve melting chocolate, whisking, and gentle folding, which are easily manageable even for novice cooks. This relatively short prep time allows you to focus on gathering quality ingredients, ensuring the best possible outcome for your classic chocolate mousse.
Total Time: 2 Hours 30 Minutes
While the prep time is brief, the total time does include a significant chilling period. This is absolutely critical for the mousse to set properly and develop its signature light, airy, and creamy texture. The full two and a half hours, including chilling, means this is a perfect dessert to make in advance. You can prepare it in the morning or the day before your event, allowing ample time for it to firm up perfectly. For more culinary inspiration and visual guides, check out our Instagram page where we share many delicious ideas.
Servings: 4 People
This recipe is perfectly portioned to serve four people, making it an intimate and satisfying sweet delight. The rich flavor and luxurious consistency ensure that even a modest serving feels incredibly indulgent. If you’re hosting a larger gathering, simply double the ingredients and use larger serving dishes or individual ramekins accordingly. It’s a wonderful way to offer an elegant dessert that caters to various dietary preferences if you plan your ingredients carefully. The generous portions make it a perfect celebratory treat.
Gather Ingredients for Decadent Mousse
The secret to a truly decadent chocolate mousse lies not just in the technique, but significantly in the quality of its components. Selecting the right ingredients ensures a rich flavor profile and that desirable creamy texture that defines this classic dessert. Each element plays a crucial role in building the overall structure and taste, so don’t cut corners here. Think of this as the foundation for your elegant dessert masterpiece. For other delightful sweet options, consider making funnel cake bites, a fun and easy dessert for any gathering.
Chocolate: Dark and Chopped
The star of the show is undoubtedly the chocolate. For a classic chocolate mousse, dark chocolate is highly recommended, ideally with a cocoa content between 60% and 75%. This range provides a deep, complex flavor without being overly bitter. High-quality baking chocolate bars are preferred over chocolate chips, as they melt more smoothly and contain fewer stabilizers. Ensure your chosen chocolate is finely chopped before melting; this helps it melt evenly and prevents scorching. A good quality dark chocolate contributes immensely to the “rich flavor” and “decadent treat” aspects of your finished mousse. You can learn more about the history and types of chocolate on Wikipedia’s chocolate page.
Eggs, Sugar, Cream, Vanilla
Beyond the chocolate, several other key ingredients come together to form the creamy, airy structure of the mousse. Large eggs are separated into yolks and whites, each playing a distinct role: yolks provide richness and emulsification, while whites are whipped to create airiness. Granulated sugar sweetens the mousse and stabilizes the egg whites. Heavy whipping cream, when whipped to soft peaks, contributes significantly to the creamy texture and lightness. Finally, a touch of pure vanilla extract enhances the overall flavor, adding a warm, aromatic depth that complements the chocolate beautifully. Together, these ingredients blend to form a harmonious “sweet delight” that makes this “homemade chocolate” creation stand out. Preparing these correctly sets you up for simple steps later on.
First Steps for Creamy Chocolate Mousse
With your quality ingredients at hand, it’s time to begin the actual preparation of your classic chocolate mousse. These initial stages are fundamental in building the base of your dessert, setting the tone for its ultimate creamy texture and rich flavor. Precision and care during these first steps will ensure a smooth, uniform foundation for the delicate additions that follow. Remember, the goal is to create a decadent treat that feels effortless in its creation but delivers extraordinary results. This initial care is part of the “easy preparation” process.
Melt Chocolate Gently
The first critical step is to melt the chopped dark chocolate. This must be done gently to prevent it from seizing or burning, which can drastically alter its flavor and texture. The best methods involve a double boiler or a microwave on low power, stirring frequently. If using a double boiler, place a heatproof bowl over a saucepan of simmering water, ensuring the bowl does not touch the water. Stir the chocolate continuously until it’s smooth and fully melted. In a microwave, heat in 15-20 second intervals, stirring well after each, until just melted. Overheating will result in grainy chocolate and a less palatable mousse. This careful melting is a key “simple step” for achieving a flawless “homemade chocolate” base.
Whisk Egg Yolks and Sugar
While your chocolate is melting or cooling slightly, turn your attention to the egg yolks and sugar. In a separate bowl, whisk the egg yolks with the granulated sugar until the mixture becomes pale yellow and thickens slightly. This process, often referred to as ‘ribboning,’ indicates that the sugar has largely dissolved into the yolks and air has been incorporated. This creates a stable base that will contribute to the richness and smooth consistency of the mousse. It’s also crucial for tempering the hot chocolate later, preventing the eggs from cooking prematurely. This combination is vital for the “creamy texture” and helps form the core of this “sweet delight.”
Mixing Chocolate and Egg Yolks Well
Once your dark chocolate is perfectly melted and slightly cooled, and your egg yolks and sugar are whisked to a pale ribbon, it’s time to bring these two foundational elements together. This step requires a gentle but thorough approach, as it creates the primary flavor and richness of your classic chocolate mousse. The careful integration ensures a homogenous and smooth chocolate base, essential for that irresistible creamy texture we’re aiming for. This is where the magic of “homemade chocolate” begins to truly shine, forming the heart of this “decadent treat.”
Combine Melted Chocolate Carefully
To combine, slowly pour the slightly cooled melted chocolate into the whisked egg yolk and sugar mixture. Do not add the chocolate when it is piping hot, as it could scramble the egg yolks. Instead, allow it to cool just enough so it’s still liquid but won’t cook the eggs on contact. As you pour, continuously whisk the egg mixture to fully incorporate the chocolate. The goal is a smooth, glossy, and uniform chocolate base without any streaks of egg yolk or unmixed sugar. This mixture will be thick and rich, forming the core flavor and body of your mousse. It’s important to scrape down the sides of the bowl to ensure everything is thoroughly combined. This careful combining ensures the “rich flavor” is distributed evenly throughout the entire “elegant dessert.”
Whipping Cream for Light Mousse Texture
After successfully combining your chocolate and egg yolk base, the next crucial component for achieving that signature light and airy consistency in your classic chocolate mousse is whipped cream. This step introduces much-needed lightness and a silky smooth mouthfeel, balancing the richness of the chocolate. Proper whipping technique is key to ensure the cream holds its structure without becoming grainy, contributing significantly to the overall “creamy texture” of this “sweet delight.” It transforms the dense chocolate base into a truly “airy consistency.”
Achieve Soft Peaks
To prepare the cream, pour very cold heavy whipping cream into a clean, chilled mixing bowl. Using a stand mixer with a whisk attachment or a hand mixer, begin whipping the cream on medium-high speed. As you whip, the cream will gradually thicken and increase in volume. Keep a close eye on it; you are aiming for soft peaks. Soft peaks are achieved when the cream holds its shape but the tip of the peak gently curls over when you lift the whisk. Be careful not to over-whip the cream into stiff peaks or, worse, butter, as this will make your mousse heavy and greasy rather than light and ethereal. The gentle softness of these peaks is paramount for an “easy preparation” and for integrating seamlessly into the chocolate base. For more dessert inspirations, including other elegant desserts, you can check out the desserts category on our website.
Folding Cream into Decadent Chocolate Base
With your rich chocolate base and delicate soft-peaked whipped cream ready, the art of folding becomes paramount. This step is about gently combining these two components without deflating the air you’ve carefully incorporated into the cream. The goal is to maintain the lightness while ensuring a uniform blend, resulting in the desired “creamy texture” and a genuinely “decadent treat.” This delicate process is a “simple step” that requires a gentle hand to preserve the “airy consistency.”
Mix Gently for Smoothness
Take about a third of your whipped cream and add it to the chocolate-egg yolk mixture. Use a rubber spatula to gently fold the cream into the chocolate. The initial addition can be a bit more robust, as it helps to lighten the heavier chocolate base, making it easier to incorporate the remaining cream. Once partially combined, add the rest of the whipped cream in two more additions. With each addition, use an over-and-under motion, drawing the spatula through the center of the bowl, then folding the mixture over itself. Rotate the bowl as you go. Stop folding as soon as no streaks of white cream remain, ensuring you don’t overmix. Overmixing will cause the cream to lose its volume and result in a dense mousse. The result should be a light, uniformly colored, and wonderfully smooth mixture, radiating a “rich flavor” that promises a true “sweet delight.” This careful folding technique is crucial for achieving the perfect “elegant dessert” consistency.
Beating Egg Whites for Airy Mousse
To truly achieve the signature “airy consistency” of a classic chocolate mousse, incorporating stiff-peaked egg whites is a non-negotiable step. This component acts as a natural leavening agent, providing lift and an incredibly light mouthfeel that contrasts beautifully with the rich chocolate base. The success of your mousse’s texture heavily relies on properly beaten egg whites. This process, while appearing straightforward, demands attention to detail to yield the desired volume and stability. It’s a critical part of ensuring your “decadent treat” has that perfect, delicate structure.
Create Stiff Peaks
Separate your egg whites carefully, ensuring absolutely no trace of egg yolk is present, as fat can prevent the whites from whipping properly. Use a very clean, grease-free bowl (preferably glass or metal) and whisk attachment. Begin whipping the egg whites on medium speed until they become foamy, then gradually increase the speed to high. Continue whipping until they form stiff peaks. Stiff peaks are achieved when the whites hold their shape firmly and stand straight up when you lift the whisk. The mixture should be glossy and smooth. If you tip the bowl, the whites should not slide. Be careful not to over-whip, which can make them dry and crumbly, difficult to fold, and prone to breaking down. This careful process is a “simple step” that greatly contributes to the lightness and “creamy texture” of the final “elegant dessert.” Consider making a similar light dessert like peanut butter brownie swirl cookies, which also requires careful mixing for its delightful texture.
Folding Egg Whites into Chocolate Mousse
The final crucial folding step involves integrating the delicate, stiff-peaked egg whites into your chocolate base. This is arguably the most important moment for achieving the characteristic “airy consistency” that defines a classic chocolate mousse. The goal is to incorporate the maximum amount of air from the egg whites into the mixture, creating a light and ethereal “decadent treat” without deflating the volume. Gentleness and patience are key here to ensure the mousse is perfectly light and delicate.
Incorporate Gently for Airiness
Take about one-third of your beaten egg whites and add them to the chocolate and whipped cream mixture. Use a rubber spatula to gently fold them in. This first addition helps to lighten the overall chocolate base, making it easier to integrate the remaining, more delicate egg whites without losing too much volume. Once that initial third is mostly incorporated, add the rest of the egg whites in two more additions. Use the same gentle folding motion: cut down through the center of the mixture, sweep across the bottom of the bowl, and fold over. Rotate the bowl as you fold. Continue until no white streaks are visible and the mixture is uniformly light and airy. Resist the urge to stir vigorously, as this will crush the air bubbles and result in a dense, heavy mousse. The outcome should be a wonderfully light, fluffy mixture that promises a “sweet delight” with every spoonful, embodying the perfect “homemade chocolate” creation. For more recipe ideas and to stay connected, follow us on Pinterest.
How to Chill Chocolate Mousse Properly
Once all components are beautifully folded together, the next crucial phase for your classic chocolate mousse is chilling. This period allows the mousse to set, firm up, and fully develop its rich flavor and desirable “creamy texture.” Proper chilling is not just about making the mousse cold; it’s about allowing the fats and proteins to stabilize, ensuring the airy consistency holds its shape and becomes truly spoonable. This step is vital for a perfect “elegant dessert” that is both stable and delicious, making it an excellent “make-ahead” option.
Spoon into Dishes
Carefully spoon the prepared chocolate mousse into individual serving dishes, ramekins, or small glasses. You can fill them almost to the top, as the mousse won’t expand significantly during chilling. Ensure each serving is neatly presented, as presentation is part of the “sweet delight.” Using a piping bag can help create a more elegant and uniform look if desired, but a simple spoon works perfectly well. Preparing individual portions also makes for “simple serving tips” later on, ensuring each guest receives a perfectly set “decadent treat.”
Chill for Two Hours
Cover the dishes loosely with plastic wrap to prevent a skin from forming or odors from the refrigerator affecting the mousse. Place them in the refrigerator to chill for a minimum of two hours. For the best results and a truly firm, stable mousse, chilling for four hours or even overnight is ideal. This extended chilling time allows the chocolate to fully solidify and the various components to meld together, deepening the “rich flavor” and perfecting the “airy consistency.” This “easy preparation” element makes it a convenient choice for meal planning. You can also explore the origins and types of mousse on Wikipedia’s mousse page to learn more about this beloved dessert.
Simple Serving Tips for Your Mousse
After patiently chilling, your classic chocolate mousse is ready to be presented. A beautifully served mousse enhances the overall “sweet delight” and makes it even more appealing as an “elegant dessert.” These “simple serving tips” are designed to elevate your homemade creation, ensuring it looks as good as it tastes and leaves a lasting impression on your guests. Presentation plays a key role in the perception of a “decadent treat.”
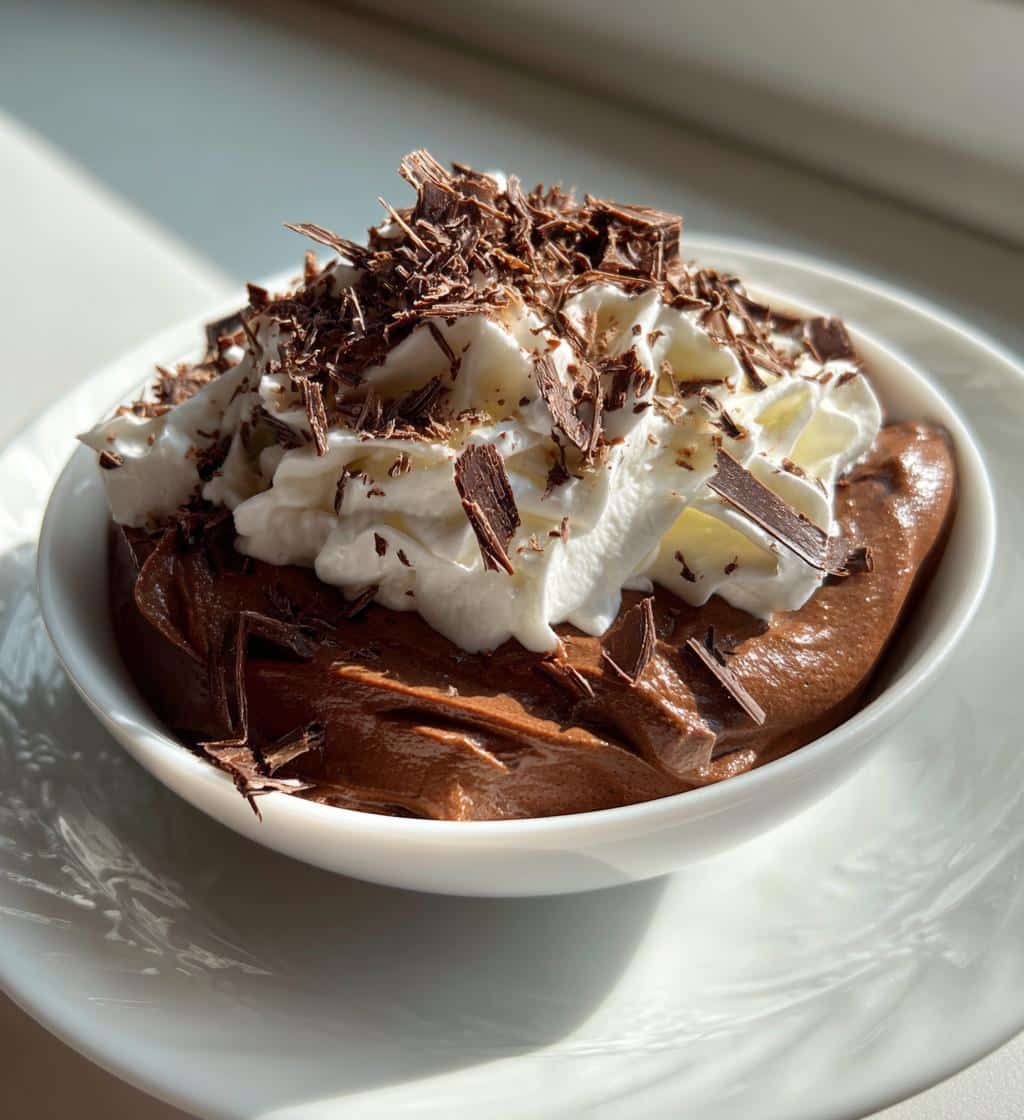
Add Whipped Cream
A dollop of freshly whipped cream is a classic and delightful accompaniment to chocolate mousse. The lightness and slight sweetness of the cream provide a wonderful contrast to the rich, intense chocolate flavor. Ensure the cream is freshly whipped just before serving for the best texture. You can pipe it elegantly onto each serving or simply spoon it on top for a more rustic, charming look. This addition further accentuates the “creamy texture” of the mousse and adds another layer of indulgence.
Garnish with Chocolate Shavings
For an extra touch of sophistication and to visually communicate the dessert’s main ingredient, garnish your mousse with delicate chocolate shavings. Use a vegetable peeler or a sharp knife to create thin curls from a block of dark chocolate. A sprinkle of cocoa powder, a few fresh raspberries, or a mint sprig can also add visual appeal and a refreshing counterpoint. These garnishes not only make your “homemade chocolate” mousse look professional but also hint at the “rich flavor” within, making it a truly appealing “party dessert.”
Prepare Day in Advance
One of the most convenient aspects of this classic chocolate mousse recipe is its suitability for being prepared ahead of time. As noted in the chilling section, the mousse benefits from extended refrigeration, making it an ideal “make-ahead” dessert. You can prepare the entire batch a day or even two days before you plan to serve it. Store the covered dishes in the refrigerator, and then simply add your garnishes just before serving. This “easy preparation” strategy frees up valuable time on the day of your event, allowing you to focus on other aspects of your meal or simply relax and enjoy the occasion.
Nutrition Facts for Classic Mousse Recipe
Understanding the nutritional profile of your classic chocolate mousse can be helpful for meal planning and dietary considerations. While often categorized as a “decadent treat,” knowing the approximate values for calories, macronutrients, sugar, and cholesterol allows for informed consumption. This section provides a general overview, keeping in mind that actual values can vary based on specific ingredients and portion sizes used in your “homemade chocolate” creation. This “nutritional info” helps you enjoy your “sweet delight” responsibly.
Calories and Macronutrients
A typical serving of classic chocolate mousse, made with full-fat ingredients, will generally be rich in calories, primarily due to the high fat content from the dark chocolate and heavy cream. It will also contain significant amounts of carbohydrates, mostly from sugar, and a moderate amount of protein from the eggs and dairy. For example, a single serving could range from 300 to 500 calories, depending on the exact quantities and types of chocolate and cream used. While offering a substantial energy boost, it is important to balance this rich dessert with other lighter components in your meal plan.
Sugar and Cholesterol Details
Given the inclusion of granulated sugar and the natural sugars in chocolate, a serving of chocolate mousse will typically contain a notable amount of sugar. This contributes to its “sweet delight” but should be considered by those monitoring their sugar intake. Similarly, the use of eggs and heavy cream means that the mousse will also be a source of dietary cholesterol. While current dietary guidelines have shifted focus from dietary cholesterol, it remains a factor for some individuals. Opting for high-quality dark chocolate with a lower sugar content can slightly modify these values, aligning with specific dietary preferences while still enjoying a truly “rich flavor.”
Important Notes for Perfect Mousse
Achieving a truly perfect classic chocolate mousse often comes down to a few key considerations that go beyond the basic steps. These important notes are designed to help you avoid common pitfalls and ensure your “homemade chocolate” creation consistently delivers that enviable “creamy texture” and “airy consistency.” Paying attention to these details will greatly contribute to the overall success and make your “decadent treat” stand out as a genuine “sweet delight.”
Use High-Quality Chocolate
As emphasized earlier, the quality of your chocolate cannot be overstated. It is the primary flavor driver of your mousse. Investing in a good quality dark chocolate, preferably a couverture chocolate or a premium baking bar with a cocoa content of 60-75%, will make a noticeable difference. Cheap chocolate chips often contain stabilizers that can prevent smooth melting and result in a less refined flavor. A superior chocolate will contribute to a deeper, more nuanced “rich flavor” and a smoother mouthfeel. Think of it as the soul of your “elegant dessert.” Avoid waxy or overly sweet chocolates that might detract from the authentic taste. The effort put into sourcing high-quality chocolate directly translates to a more satisfying and memorable mousse experience, validating all the “simple steps” you’ve taken.