
Decadent Black Forest Cheesecake is a delightful dessert combining rich chocolate with sweet cherries. This recipe walks you through crafting a perfect cheesecake, from its cookie crust to the luscious topping. Learn how to bake a truly memorable sweet treat today.
Key Takeaways
- Achieve a crack-free cheesecake with a water bath and gradual cooling.
- Room temperature ingredients ensure a smooth, creamy filling.
- Don’t overmix the batter to maintain its delicate texture.
- Layering chocolate, cherry, and cream creates a classic Black Forest flavor.
This cheesecake offers amazing flavors. Rich chocolate meets tart cherries. A creamy texture is truly wonderful. It’s a dessert everyone will love. Baking it is a rewarding process.
Decadent Black Forest Cheesecake Recipe Overview
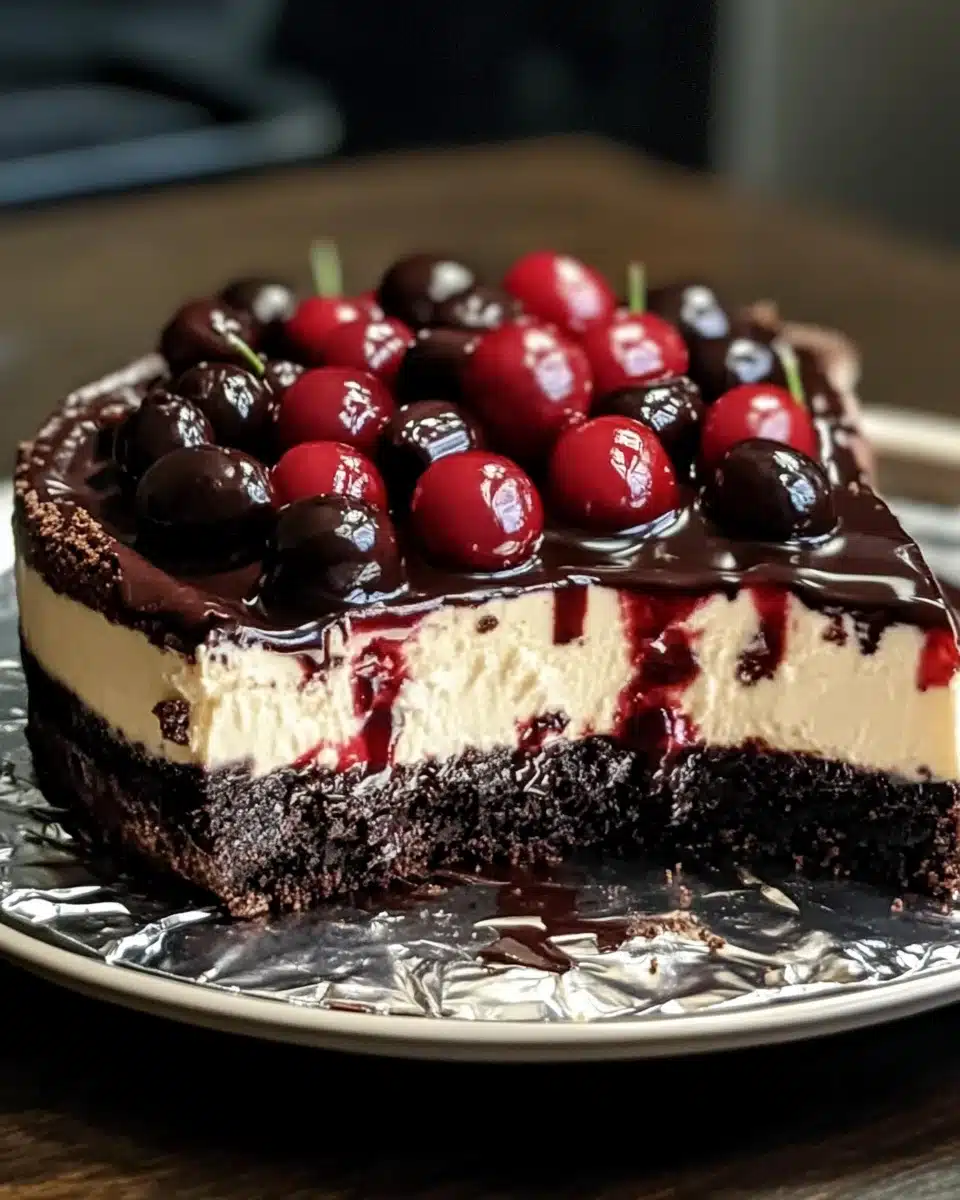
This Black Forest Cheesecake recipe takes a classic German cake and reimagines it as a creamy, dreamy cheesecake. It features a rich chocolate cookie crust, a luscious chocolate cheesecake filling, and is crowned with generous dollops of whipped cream, cherry pie filling, and delicate chocolate shavings. This decadent dessert is perfect for special occasions, holidays, or any time you crave a sophisticated sweet treat. The combination of deep chocolate and bright cherry flavors makes this a truly outstanding dessert, sure to impress your guests and satisfy any sweet tooth. Preparing it might seem involved, but following these steps will yield a stunning result. Consider exploring more delicious desserts on CarinaRecipes to broaden your baking repertoire.
Total Time and Servings
Crafting this elegant cheesecake requires a bit of time, but the effort is well worth it. Expect approximately 45-60 minutes for active preparation, followed by 60-75 minutes of baking time. The most crucial part is the chilling, which requires a minimum of 6 hours, ideally overnight, to achieve the perfect firm texture and allow the flavors to meld beautifully. This recipe yields 12 generous servings, making it an excellent choice for family gatherings or entertaining friends. Planning ahead is key, especially for the chilling phase, so make sure to factor that into your schedule when preparing this delightful black forest cheesecake.
Why You’ll Love This Recipe
You’ll absolutely adore this Decadent Black Forest Cheesecake for several compelling reasons. Firstly, it offers a sophisticated twist on the beloved Black Forest cake, translating its iconic flavors into a rich, creamy cheesecake format. The harmony between the dark chocolate crust, the velvety chocolate cheesecake filling, and the bright, fruity cherry topping is simply irresistible. This recipe is also surprisingly approachable, even for novice bakers, thanks to clear, step-by-step instructions that guide you through each stage. It’s a showstopper dessert that looks as impressive as it tastes, guaranteed to garner compliments and requests for seconds. If you enjoy rich, chocolatey desserts, you might also like our Peanut Butter Brownie Swirl Cookies for another delightful treat.
Gathering Ingredients for Your Cheesecake
Successful baking begins with having all your ingredients measured and ready. For this decadent black forest cheesecake, using high-quality components will significantly enhance the flavor and texture of your final product. Make sure to gather everything before you start to ensure a smooth and enjoyable baking process. Paying attention to detail here, especially with ingredients like cream cheese and eggs at room temperature, is one of the most important aspects for achieving that signature creamy cheesecake consistency. This section breaks down everything you’ll need, from the foundational crust to the finishing garnishes.
Crust Ingredients List
The foundation of our Black Forest Cheesecake is a sturdy and flavorful chocolate cookie crust. It provides a delightful counterpoint to the creamy filling. You’ll need:
- Chocolate Sandwich Cookies: About 24-28 cookies (roughly one standard package), crushed finely. These add deep chocolate flavor and a crisp texture.
- Unsalted Butter: 6 tablespoons, melted. The butter binds the cookie crumbs together, ensuring a firm crust that won’t crumble when sliced.
- Granulated Sugar: 2 tablespoons. This enhances the sweetness of the crust and helps with caramelization during pre-baking.
Ensure your cookies are completely crushed to a fine, sandy texture for the best crust. A food processor works wonders for this, but a Ziploc bag and a rolling pin can also do the trick.
Cheesecake Filling Essentials
The heart of this recipe is the lusciously creamy chocolate cheesecake filling. Each ingredient plays a vital role in achieving its rich flavor and smooth texture:
- Cream Cheese: 3 (8-ounce) packages, full-fat, softened to room temperature. This is the cornerstone of any great cheesecake, providing the signature tang and creaminess.
- Granulated Sugar: 1 ½ cups. Balances the tang of the cream cheese and the bitterness of the chocolate.
- Unsweetened Cocoa Powder: ½ cup. Use a good quality cocoa powder for a deep, rich chocolate flavor. Dutch-processed works especially well here.
- Large Eggs: 4, at room temperature. Eggs provide structure and help the cheesecake set.
- Sour Cream: ½ cup, full-fat, at room temperature. Adds moisture, richness, and a slight tang, contributing to the cheesecake’s velvety texture and helping prevent cracks.
- Vanilla Extract: 1 teaspoon. Enhances all the other flavors.
- Melted Chocolate: 4 ounces (about 1 cup) semi-sweet or dark chocolate, melted and slightly cooled. This is what truly infuses the cheesecake with its intense chocolate essence.
Remember, having all cold ingredients at room temperature is crucial for a smooth, lump-free batter.
Topping and Garnish Items
The toppings are where the Black Forest magic truly comes alive, adding color, texture, and a burst of cherry goodness:
- Heavy Whipping Cream: 2 cups, chilled. For making a fluffy, homemade whipped cream.
- Powdered Sugar: ¼ cup. Sweetens the whipped cream.
- Vanilla Extract: 1 teaspoon. Flavors the whipped cream.
- Cherry Pie Filling: 1 (21-ounce) can, or homemade cherry compote. This is the classic Black Forest fruit element.
- Chocolate Shavings or Curls: For garnish. You can make these by scraping a bar of chocolate with a vegetable peeler or simply using pre-made ones.
- Fresh Cherries: Optional, for additional garnish and a touch of elegance.
These elements complete the visual and flavor profile, making your cheesecake a true showstopper. For another cheesecake variation, you might enjoy these Vanilla Bean Creme Brulee Cheesecake Cupcakes.
Making the Perfect Chocolate Cookie Crust
A well-made crust is fundamental to any great cheesecake, providing structural integrity and a complementary flavor. For our Black Forest Cheesecake, a rich chocolate cookie crust sets the stage perfectly. This section guides you through creating a firm, flavorful base that holds up beautifully to the creamy filling. Taking your time with these steps ensures that your crust is even, sturdy, and ready to be topped with the luscious chocolate cheesecake batter. This simple yet crucial stage is key to a successful dessert, and it’s surprisingly quick to achieve a professional-looking result.
Mixing and Pressing Crumbs
To begin, finely crush your chocolate sandwich cookies. A food processor is ideal for this, transforming cookies into fine crumbs in seconds. If you don’t have one, place the cookies in a heavy-duty Ziploc bag and crush them with a rolling pin until uniformly fine. In a medium bowl, combine the cookie crumbs with the melted unsalted butter and granulated sugar. Mix these ingredients thoroughly until the crumbs are evenly moistened and resemble wet sand. This ensures that the crust will hold its shape. Transfer the mixture to a 9-inch springform pan. Using the bottom of a flat glass or your fingers, firmly and evenly press the crumb mixture into the bottom of the pan. Make sure it’s packed tightly across the entire base to prevent crumbling once the cheesecake is sliced. The more compact the crust, the better it will support the heavy filling.
Pre-baking the Crust
Pre-baking the crust is a critical step that helps create a crisp texture and prevents it from becoming soggy under the cheesecake filling. Preheat your oven to 350°F (175°C). Place the springform pan with the pressed crust into the preheated oven and bake for 8-10 minutes. Keep a close eye on it to prevent burning. The crust should appear lightly toasted and fragrant. Once baked, remove the pan from the oven and let it cool completely on a wire rack while you prepare the cheesecake filling. Allowing the crust to cool ensures it sets properly and doesn’t melt into the warm cheesecake batter when combined. This brief baking period makes all the difference in achieving a perfectly stable and delicious foundation for your decadent black forest cheesecake.
Crafting the Creamy Cheesecake Filling
The heart of this decadent black forest cheesecake is its exquisitely creamy filling. Achieving a smooth, lump-free batter with a rich, uniform texture is paramount for a truly impressive dessert. This process involves careful mixing and precise temperature control of your ingredients. Rushing these steps can lead to a less-than-perfect cheesecake, so take your time and follow each instruction to ensure a velvety, melt-in-your-mouth experience. This section will guide you through combining the essential elements that create the signature flavor and consistency of our chocolate cheesecake. Understanding the importance of each ingredient’s role is key here.
Softening Cream Cheese and Sugar
For the smoothest cheesecake filling, it is absolutely crucial that your cream cheese is at room temperature. This allows it to mix easily and evenly, preventing lumps. In a large mixing bowl, beat the softened cream cheese with an electric mixer on medium speed until it is smooth and creamy, about 2-3 minutes. Scrape down the sides of the bowl as needed to ensure all parts are incorporated. Gradually add the granulated sugar, beating on low speed until just combined, then increase to medium and continue beating until the mixture is light and fluffy, usually another 2-3 minutes. Overmixing at this stage can incorporate too much air, which can lead to cracks during baking. The goal is to achieve a uniform, creamy base before adding other ingredients.
Adding Eggs and Chocolate
Next, it’s time to incorporate the eggs and chocolate, which provide structure and deep flavor to your black forest cheesecake. Add the eggs one at a time, mixing on low speed until each is just combined. Be careful not to overmix; over-beating the eggs introduces too much air, which can cause the cheesecake to puff up in the oven and then fall, resulting in cracks. After the eggs, gently fold in the sour cream and vanilla extract. Finally, pour in the slightly cooled melted chocolate. Mix on the lowest speed or fold by hand until the chocolate is fully incorporated and the batter is uniform in color. Ensure the chocolate isn’t hot, as this could curdle the cream cheese or cook the eggs prematurely. The mixture should be a silky, consistent chocolate batter.
Mixing for Smoothness
After incorporating all ingredients, give the batter one final check for smoothness. Use a rubber spatula to scrape down the sides and bottom of the bowl, ensuring no unmixed cream cheese or sugar remains. Gently fold the batter a few times by hand to release any large air bubbles that might have been incorporated during mechanical mixing. The batter should be incredibly smooth and free of lumps. This attention to detail in mixing will pay off with a perfectly textured cheesecake that is dense, creamy, and crack-free. Remember, a smooth batter translates directly to a smooth, elegant final product. Once your batter is perfectly smooth, it’s ready for assembly.
Assembling the Decadent Black Forest Cheesecake
Assembling your decadent black forest cheesecake is a straightforward process, but two key steps are vital for success: pouring the batter correctly and setting up a water bath. These elements ensure an even bake and a beautifully smooth, crack-free surface. Taking your time during this phase will lay the groundwork for a truly professional-looking and tasting dessert. The water bath, in particular, is a technique that many bakers swear by for achieving the perfect cheesecake texture. Its importance cannot be overstated when aiming for a flawless finish. Let’s make sure every detail is covered to ensure your cheesecake turns out magnificent.
Pouring Batter over Crust
Once your chocolate cookie crust has cooled completely and your creamy chocolate cheesecake filling is ready, it’s time to combine them. Carefully pour the prepared cheesecake batter over the cooled crust in the springform pan. Use a rubber spatula to gently spread the batter evenly across the crust, ensuring it reaches all edges and creates a level surface. A smooth, even layer of batter is important for uniform baking and a visually appealing finished cheesecake. Gently tap the springform pan on your counter a few times to release any trapped air bubbles. This small step helps prevent air pockets in the finished cheesecake and contributes to its smooth texture. Now your cheesecake is ready for the water bath.
Setting Up the Water Bath
A water bath (or bain-marie) is essential for baking cheesecakes, as it provides a moist, even heat environment that prevents cracks and ensures a creamy texture. To set it up, wrap the exterior of your springform pan tightly with several layers of heavy-duty aluminum foil. Ensure the foil extends well above the rim of the pan to prevent any water from seeping in. Place the foil-wrapped springform pan into a larger roasting pan. Carefully pour hot water into the roasting pan, making sure the water level comes about halfway up the sides of the springform pan. Be cautious not to splash water into the cheesecake batter itself. This setup helps the cheesecake bake gently and slowly, resulting in a perfectly smooth and uniform final product, crucial for a truly classic cheesecake.
Baking Your Cheesecake Evenly with Water
Baking a cheesecake can be a delicate process, but using a water bath significantly improves the outcome, ensuring your decadent black forest cheesecake bakes evenly and avoids cracks. The controlled, moist heat environment helps the custard-like filling set perfectly, yielding a creamy, smooth texture that is the hallmark of a great cheesecake. This section covers the precise temperatures and timings needed, along with how to tell when your cheesecake is perfectly done. Mastering these steps will give you the confidence to bake cheesecakes like a pro, creating impressive desserts every time. Attention to detail here is key for preventing common baking mishaps and achieving a flawless result.
Oven Temperature and Bake Time
Preheat your oven to 325°F (160°C). Lowering the temperature slightly compared to other baked goods, combined with the water bath, ensures a gentle bake. Carefully transfer the roasting pan with the cheesecake and water bath to the preheated oven. Bake for approximately 60-75 minutes. The exact baking time can vary depending on your oven, so it’s important to monitor it closely. The goal is to cook the cheesecake just until the edges are set, but the center still has a slight jiggle. This subtle movement indicates that it is cooked through but will continue to set as it cools, preventing over-baking and a dry texture.
Checking for Doneness
To check if your cheesecake is done, gently jiggle the springform pan. The outer 2-3 inches of the cheesecake should appear set, while the very center (about 2-3 inches in diameter) should still have a slight, delicate jiggle, like gelatin. If the entire surface is firm and shows no jiggle, it might be slightly overbaked. Conversely, if more than the center jiggles, it needs more time. Avoid opening the oven door too frequently during baking, as sudden temperature changes can cause cracking. Once it reaches the desired doneness, turn off the oven but leave the cheesecake inside with the oven door ajar for gradual cooling, which is vital for preventing cracks.
Cooling and Chilling Your Cheesecake Perfectly
The cooling and chilling phases are just as crucial as the baking process for achieving a perfect, crack-free, and firm cheesecake. Patience during this stage is paramount. Rushing it can lead to fissures, a grainy texture, or a cheesecake that hasn’t fully set. Following these steps diligently will ensure your decadent black forest cheesecake develops its ideal creamy consistency and robust structure, making it a delight to slice and serve. Many bakers overlook the importance of gradual temperature changes, but it’s a secret to professional-looking results. Let’s make sure your cooling strategy is as flawless as your baking.
Gradual Cooling in the Oven
Once your cheesecake is baked and the center has a slight jiggle, turn off the oven. Critically, do not remove the cheesecake immediately. Instead, leave the springform pan within the water bath, inside the cooling oven, with the oven door propped open slightly (you can use a wooden spoon). Allow the cheesecake to cool gradually for at least 1 hour, or until the oven is cool to the touch. This slow reduction in temperature is vital for preventing the dramatic temperature shock that can cause cheesecakes to crack. The ambient heat allows the remaining moisture to evenly redistribute, resulting in a smoother, more stable surface. This step is a cornerstone for a flawless finish.
Refrigerating for Best Texture
After the gradual cooling period in the oven, carefully remove the springform pan from the water bath and the roasting pan. Remove the aluminum foil from around the springform pan. Let the cheesecake cool completely on a wire rack at room temperature for another 1-2 hours. Once it has reached room temperature, cover the springform pan loosely with plastic wrap and transfer it to the refrigerator. Chill the cheesecake for a minimum of 6 hours, but ideally overnight (12-24 hours). This extended chilling time allows the cheesecake to firm up completely, enhancing its creamy texture and ensuring clean slices. Do not attempt to serve the cheesecake before it is fully chilled, as it will be too soft. For more baking insights, check out CarinaRecipes on Pinterest.
Preparing the Whipped Cream Topping
No Black Forest Cheesecake is complete without a generous topping of freshly made whipped cream. This light, airy component perfectly complements the rich chocolate and tart cherries, adding a cloud-like texture and a touch of sweetness that balances the entire dessert. Making your own whipped cream is simple and yields a far superior result to store-bought varieties, both in flavor and texture. It adds that homemade touch which elevates the entire presentation and taste profile of your decadent black forest cheesecake. This quick step is the final layer of deliciousness before garnishing, so let’s ensure it’s fluffy and perfect.
To prepare your whipped cream, ensure your heavy whipping cream is well-chilled. For best results, you can even chill your mixing bowl and whisk attachment in the freezer for 10-15 minutes beforehand. In a cold mixing bowl, combine the chilled heavy whipping cream, powdered sugar, and vanilla extract. Beat with an electric mixer on medium-high speed until soft peaks form, then continue beating until stiff peaks are achieved. Be careful not to overbeat, as it can quickly turn into butter. The whipped cream should be light, fluffy, and hold its shape. Once prepared, keep the whipped cream refrigerated until you are ready to assemble and serve your decadent black forest cheesecake. This ensures it remains fresh and stable for your elegant presentation.
Serving and Garnish for Your Decadent Cheesecake
The final touches are what truly bring your decadent black forest cheesecake to life, transforming it into a stunning centerpiece. Thoughtful serving and garnishing elevate not only its appearance but also its flavor profile, adding complementary textures and visual appeal. This section guides you through dressing your cheesecake to impress, ensuring every slice is a masterpiece. From the luscious cherry topping to the delicate chocolate embellishments, these elements complete the classic Black Forest experience. A beautiful presentation is just as important as the taste, especially for a dessert meant to be celebrated. For another creamy and savory dish, try our Creamy Baked Mac and Cheese.
Cherry Pie Filling Option
Once your cheesecake is thoroughly chilled and you’re ready to serve, carefully remove it from the springform pan. For the classic Black Forest look and taste, a generous layer of cherry pie filling is essential. You can use a good quality canned cherry pie filling, or if you’re feeling ambitious, a homemade cherry compote made with fresh or frozen pitted cherries, sugar, and a touch of kirsch (cherry brandy), similar to how a traditional Black Forest gateau is made. Spoon the cherry pie filling over the top of the cheesecake, spreading it evenly but leaving a small border around the edge for the whipped cream. The vibrant red of the cherries against the dark chocolate provides a striking visual contrast and a burst of fruity flavor.
Chocolate Shavings and Fresh Cherries
To complete the iconic Black Forest presentation, pipe or dollop generous amounts of your freshly prepared whipped cream around the edges of the cheesecake, or across the top in an attractive pattern. Then, sprinkle a generous amount of chocolate shavings or curls over the whipped cream and around the exposed cherry filling. You can create your own elegant chocolate shavings by gently scraping a bar of chocolate with a vegetable peeler. For an extra touch of elegance and freshness, place a few fresh, stemmed cherries on top of the whipped cream. These garnishes not only add to the visual appeal but also enhance the overall flavor and texture experience of your exquisite cheesecake. Share your creations by tagging @carinarecipes20 on Instagram!
Essential Tips for Perfect Cheesecake
Baking a flawless cheesecake is a rewarding experience, and a few key techniques can elevate your results from good to truly spectacular. These tips address common cheesecake challenges, ensuring your decadent black forest cheesecake comes out creamy, crack-free, and utterly delicious every single time. Paying attention to these details can make a significant difference in the final texture and appearance of your dessert. Whether you are a seasoned baker or just starting, these insights will help you master the art of cheesecake making. Let’s dive into the fundamental principles that guarantee success.
Room Temperature Ingredients Matter
This cannot be stressed enough: ensure all your cold ingredients, especially cream cheese and eggs, are at true room temperature. This typically means letting them sit out for at least 1-2 hours before you start mixing. Room temperature ingredients blend much more smoothly and evenly, creating a homogenous, lump-free batter. Cold ingredients will resist mixing, leading to overmixing as you try to incorporate them, which in turn can introduce too much air into the batter. This excess air is a primary culprit for cracks in the cheesecake as it expands and contracts during baking and cooling. Plan ahead for this crucial step to achieve that signature silky-smooth cheesecake texture.
Avoiding Overmixing
While proper mixing is essential, overmixing is the enemy of a perfect cheesecake. Once the cream cheese and sugar are smoothly combined, add the remaining ingredients, especially the eggs, with minimal mixing. Beat on low speed until just incorporated. Overmixing introduces excess air into the batter, which causes the cheesecake to puff up significantly during baking. As it cools, this trapped air escapes, leading to a dramatic collapse and unsightly cracks on the surface. Focus on gentle, thorough blending rather than vigorous beating. A smooth, dense batter is your goal, not an airy one.
Importance of the Water Bath
The water bath (bain-marie) is a non-negotiable technique for baking cheesecakes, particularly for preventing cracks and achieving a moist, even texture. The hot water surrounding the springform pan creates a humid environment in the oven, preventing the cheesecake from drying out and baking too quickly around the edges. It also provides gentle, consistent heat, allowing the cheesecake to cook uniformly. This slow, steady cooking minimizes temperature fluctuations, which are a common cause of cracking. Investing the extra few minutes to properly set up a water bath will significantly improve the quality and appearance of your decadent black forest cheesecake, giving you a smooth, beautiful dessert every time.
Black Forest Cheesecake Prep and Cook Times
Understanding the timeline for your Decadent Black Forest Cheesecake is essential for successful baking and serving. While the active preparation might not be extensive, the passive cooling and chilling periods require significant foresight. This detailed breakdown will help you schedule your baking process effectively, ensuring that your cheesecake is perfectly set and ready to enjoy when you plan to serve it. Managing these various stages properly guarantees a high-quality dessert that meets expectations, both in terms of taste and presentation. Let’s make sure you’re fully prepared for the journey from ingredients to delicious slices.
Breakdown of Recipe Duration
Here’s a clear breakdown of the time commitment for your Black Forest Cheesecake:
- Active Prep Time: 45-60 minutes (crust, filling, whipped cream)
- Crust Pre-bake: 8-10 minutes
- Bake Time (with water bath): 60-75 minutes
- Cooling in Oven (door ajar): 1 hour
- Cooling at Room Temperature: 1-2 hours
- Chilling in Refrigerator: Minimum 6 hours (ideally overnight, 12-24 hours)
- Total Estimated Time: Approximately 10-12 hours, mostly passive chilling time.
This comprehensive view helps you manage your kitchen time efficiently, emphasizing that the bulk of the waiting is for chilling. This patient approach rewards you with an incredibly stable and flavorful cheesecake.
Planning Ahead for Chilling
Given the extensive chilling time required, strategic planning is crucial for this Black Forest Cheesecake. It’s highly recommended to start this recipe a full day before you plan to serve it. For example, if you want to serve the cheesecake on Saturday evening, aim to bake it on Friday afternoon or evening. This allows ample time for the gradual oven cooling, room temperature cooling, and the essential overnight refrigeration. Proper chilling not only sets the cheesecake to its ideal firm consistency but also allows the complex flavors of chocolate and cherry to fully meld and deepen, making for a truly spectacular dessert. Rushing the chilling process is the fastest way to an unset, crumbly cheesecake, so embrace patience for the best results. Planning ahead ensures stress-free dessert preparation for your next gathering.
Decadent Black Forest Cheesecake Nutrition Facts
When indulging in a rich and flavorful dessert like the Decadent Black Forest Cheesecake, it’s helpful to have an understanding of its nutritional content. While specific values can vary based on exact ingredient brands and portion sizes, this section provides a general overview of what you might expect per serving. This information can be useful for those tracking their intake or simply curious about the components of their favorite treats. It’s a reminder that while delicious, this is a special occasion dessert to be enjoyed thoughtfully. For those seeking other delightful recipes, check out Easy Honey Garlic Chicken for a savory option.
Per Serving Information
Please note that these are estimated values and can vary based on specific brands and modifications. A typical serving of this Decadent Black Forest Cheesecake (based on 12 servings from a 9-inch cheesecake) might contain the following approximate values:
- Calories: 450-550 kcal
- Total Fat: 30-40g
- Saturated Fat: 18-25g
- Cholesterol: 120-150mg
- Sodium: 200-250mg
- Total Carbohydrates: 40-50g
- Dietary Fiber: 1-2g
- Total Sugars: 30-40g
- Protein: 7-10g
These values highlight that this is indeed a rich and satisfying dessert, best enjoyed in moderation. The combination of cream cheese, chocolate, and sugar contributes to its caloric and fat content, making it a truly decadent treat for special moments. Adjusting ingredients like using reduced-fat cream cheese or less sugar could alter these numbers, but for the full indulgent experience, the original recipe delivers.