
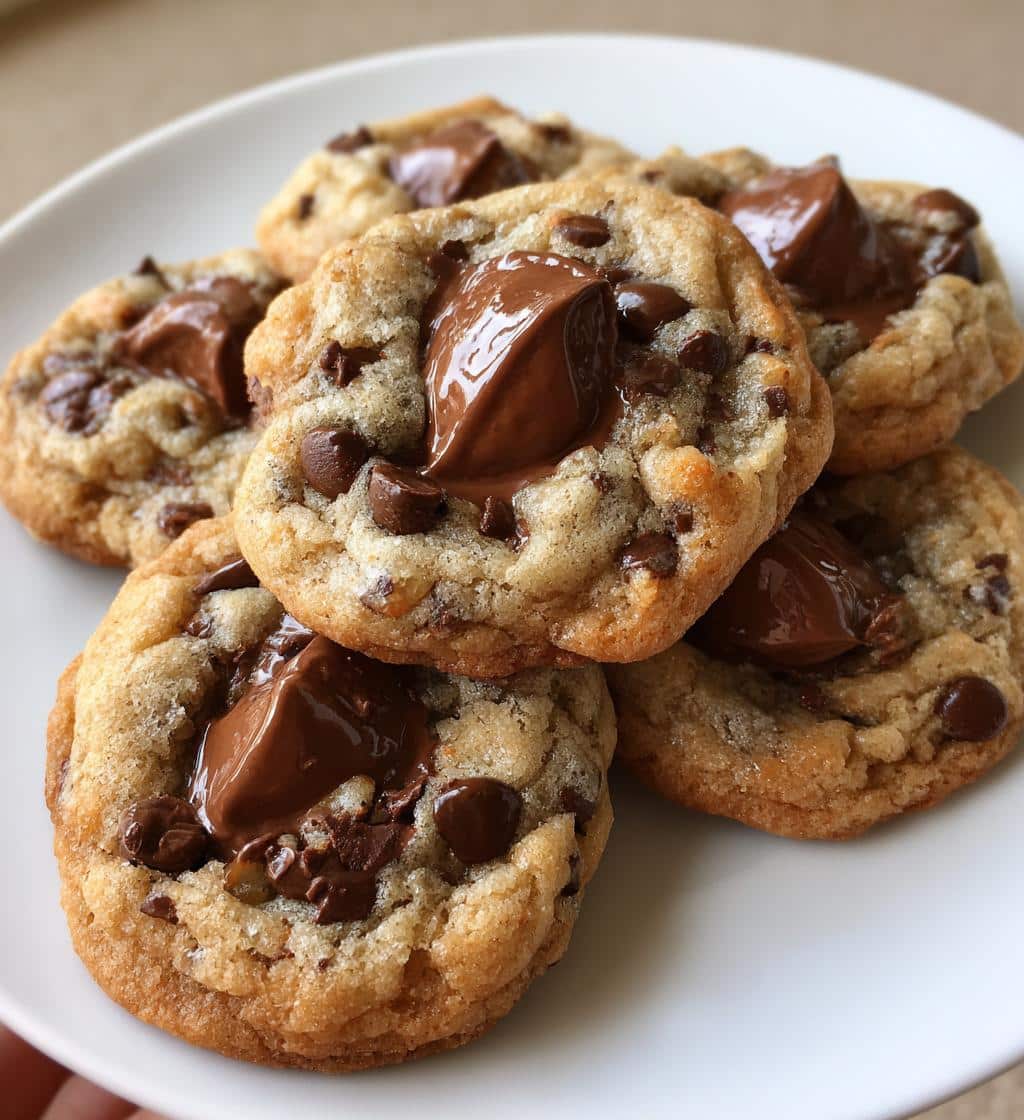
Chocolate Kiss Cookies are a truly delightful and easy cookie recipe that brings smiles. These homemade cookies, crowned with an iconic Hershey’s Kiss, are a sweet treat perfect for any occasion. Simple baking tips ensure a perfect batch every time, making them a family favorite.
Key Takeaways
- Follow precise ingredient measurements for consistent cookie texture.
- Cream butter and sugar properly for a fluffy, tender dough.
- Bake until edges are golden, then immediately press in Hershey’s Kisses.
- Store cookies in an airtight container for lasting freshness.
- Experiment with different Hershey’s Kiss flavors for variety.
Baking these cookies is pure joy. They offer a comforting aroma. Simple steps create perfect results. Everyone loves these sweet treats. Share smiles with family.
Enjoy Delicious Chocolate Kiss Cookies
There’s a special kind of warmth that fills your kitchen when chocolate kiss cookies are baking. These classic confections are more than just a dessert; they are a symbol of comfort, nostalgia, and shared moments. The rich, soft chocolate cookie base, perfectly complemented by the creamy, melty Hershey’s Kiss on top, creates an irresistible treat that appeals to all ages. Whether you’re an experienced baker or just starting, this easy cookie recipe offers a rewarding experience with delicious results.
The Pure Joy of Baking
Baking is often considered a therapeutic activity, and making these chocolate kiss cookies is no exception. The process, from mixing ingredients to placing the warm Hershey’s Kisses, is incredibly satisfying. It’s a wonderful way to relax, unleash creativity, and fill your home with an inviting aroma. The pure joy comes from seeing your loved ones light up with each bite of these homemade cookies. Consider trying other delightful desserts from our collection, like our popular peanut butter brownie swirl cookies, for another baking adventure.
Why You’ll Love These
You’ll fall in love with these chocolate kiss cookies for many reasons. First, they are incredibly simple to make, even for novice bakers. The ingredients are readily available, and the steps are straightforward. Second, the combination of the chewy chocolate cookie and the smooth, melting chocolate kiss is a textural and flavor masterpiece. Third, they are versatile; perfect for holiday gatherings, school events, or just a quiet evening at home as a sweet treat. They bring happiness and satisfy any craving for a rich, comforting dessert. They are truly a classic that everyone should have in their recipe repertoire.
Simple Ingredients for Your Cookies
Creating delicious chocolate kiss cookies begins with gathering a few simple ingredients. You likely have most of these pantry staples already, making this recipe incredibly convenient. Quality ingredients are key to the best flavor and texture, so always opt for fresh butter and good quality cocoa powder. This straightforward list ensures your baking process is smooth and enjoyable, leading to perfectly crafted cookies every time.
Wet Essentials You Need
The wet ingredients form the foundation of your cookie dough, contributing to its moisture, richness, and overall structure. You’ll need softened unsalted butter, which is crucial for creaming effectively with sugars, creating air pockets for a tender cookie. Large eggs provide binding and richness, while pure vanilla extract enhances the overall flavor profile, adding a warm, aromatic note that complements the chocolate beautifully. Make sure all wet ingredients are at room temperature for optimal blending and consistency.
Dry Pantry Staples
For the dry components, you’ll need all-purpose flour, the primary structural element of the cookie. Ensure it’s measured accurately (more on that later!) to avoid dense or crumbly cookies. Granulated sugar and packed light brown sugar both provide sweetness and contribute to the cookie’s texture – granulated for crispness, brown for chewiness and moisture. Unsweetened cocoa powder gives these cookies their deep, decadent chocolate flavor and rich color. Baking soda acts as a leavening agent, helping the cookies rise slightly and achieve a soft texture. A pinch of salt balances the sweetness and brings out the chocolate notes, making them even more pronounced.
The Iconic Hershey’s Kisses
No chocolate kiss cookie would be complete without the distinctive Hershey’s Kisses. These delightful, bite-sized chocolates are the signature element, adding a creamy, melting surprise right in the center of each warm cookie. Classic milk chocolate Kisses are traditional, but don’t hesitate to experiment with different varieties for fun twists. Unwrap them beforehand to save time when they come out of the oven. Having them ready ensures you can press them into the cookies while they are still hot, allowing them to melt slightly and adhere perfectly.
Mixing Your Perfect Cookie Dough
Properly mixing your cookie dough is crucial for achieving the desired texture and consistency. Each step contributes to the final outcome, ensuring your chocolate kiss cookies are soft, chewy, and perfectly balanced in flavor. Take your time with these stages; rushing can lead to dense or dry cookies. The goal is a cohesive, well-aerated dough that bakes beautifully.
Creaming Butter and Sugars
The first step in creating a fantastic cookie dough is creaming the softened butter with both granulated and brown sugars. This process, often done with an electric mixer, incorporates air into the mixture, resulting in a light and fluffy base. Beat them together on medium speed until the mixture becomes pale and fluffy, usually for 2-3 minutes. This aeration is vital for the cookies’ texture, making them tender rather than tough. Do not skimp on this step; it sets the stage for everything else.
Adding Eggs and Vanilla
Once the butter and sugars are perfectly creamed, it’s time to add the wet essentials. Incorporate the eggs one at a time, beating well after each addition until fully combined. This ensures that the eggs are evenly distributed throughout the dough, contributing to its structure and moisture. Follow with the pure vanilla extract, mixing until just combined. Overmixing at this stage can develop too much gluten, so mix until barely incorporated. This helps keep the cookies tender and prevents them from becoming tough.
Combining Wet and Dry
Finally, it’s time to bring together the wet and dry ingredients. Gradually add the dry pantry staples to the wet mixture, mixing on low speed until just combined. The key here is not to overmix. Overmixing flour develops gluten, which can make your chocolate kiss cookies tough and less tender. Stop mixing as soon as no streaks of dry flour remain. A slightly shaggy dough is perfectly acceptable and often preferred. This careful combining ensures a delicate texture. If you’re looking for another delightful sweet treat, check out our recipe for blueberry muffin cookies with streusel, which also benefits from careful mixing.
Baking Chocolate Hershey Kiss Cookies
Baking is where the magic truly happens, transforming your carefully prepared dough into warm, fragrant chocolate kiss cookies. Precision in temperature and timing is crucial for achieving that perfect balance of a soft, chewy center and slightly crisp edges. Pay close attention to your oven, as baking times can vary, and an overbaked cookie loses its tender quality. This stage brings together all your efforts into a delightful final product.
Preheat Oven and Prepare Pans
Before you even think about scooping dough, ensure your oven is preheated to the correct temperature, typically around 350°F (175°C). An oven that hasn’t reached its target temperature will affect the cookie’s spread and texture. While the oven preheats, line your baking sheets with parchment paper or silicone mats. This prevents sticking, promotes even baking, and makes cleanup a breeze. Having your pans ready means you can quickly transfer the dough once it’s mixed, ensuring a smooth baking process.
Spoon Dough onto Sheet
Using a small cookie scoop (about 1.5 tablespoons) or two spoons, drop rounded balls of dough onto the prepared baking sheets. Arrange them about 2 inches apart to allow for proper spreading during baking. Resist the urge to flatten the dough balls; they will naturally spread into perfect cookie shapes. The consistent size of each dough ball ensures even baking across the entire batch, giving you uniformly delicious chocolate kiss cookies. This step is key for presentation as well as texture.
Bake Until Golden Edges
Place the baking sheets into your preheated oven and bake for approximately 8-10 minutes. The exact timing will depend on your oven and the desired level of doneness. Look for edges that are slightly firm and set, just beginning to turn golden brown, while the centers still appear soft and slightly underbaked. They will continue to set as they cool on the hot baking sheet. Removing them at this stage ensures a wonderfully chewy interior. Once out of the oven, prepare for the next step immediately to add the signature Hershey’s Kiss.
Adding That Special Hershey Kiss
The moment your chocolate kiss cookies emerge from the oven, hot and fragrant, is the perfect time to add their signature crowning glory: the Hershey’s Kiss. This step is critical and needs to be done quickly to ensure the chocolate melts just enough to adhere to the cookie and create that iconic, slightly gooey center. Timing is everything here to achieve the perfect look and texture. It’s the step that truly transforms them into the classic sweet treat we all adore.
Press Kisses Immediately
As soon as you pull the baking sheets from the oven, immediately unwrap your Hershey’s Kisses and gently press one into the center of each warm cookie. The residual heat from the freshly baked cookie will cause the chocolate kiss to soften and melt slightly, creating a lovely, smooth top and ensuring it sticks firmly. Don’t press too hard; just enough to make an indentation. If you wait too long, the cookies will cool and harden, and the kisses won’t melt as effectively or adhere properly. This quick action is what makes the chocolate fuse perfectly with the cookie.
Let Cookies Cool Gently
After pressing in the Kisses, allow the chocolate kiss cookies to cool on the baking sheet for about 5-10 minutes. This initial cooling period helps them set further and prevents them from breaking apart when you transfer them. The Hershey’s Kiss will continue to melt and then begin to firm up as the cookies cool. After the initial cooling on the sheet, carefully transfer the cookies to a wire rack to cool completely. Cooling on a rack allows air circulation, preventing the bottoms from getting soggy and ensuring a perfectly set cookie and chocolate top. For another sweet project, consider our recipe for snickerdoodle cobbler, though it has different cooling requirements.
Top Tips for Great Cookies
Achieving consistently perfect chocolate kiss cookies requires attention to a few key details. These baking tips are universally applicable and can greatly improve the outcome of any cookie recipe. Mastering these techniques will elevate your baking skills and ensure every batch of homemade cookies is a resounding success, making you a confident baker.
Measure Flour Accurately
One of the most common pitfalls in baking is inaccurate flour measurement. Too much flour results in dry, dense cookies, while too little can make them spread too much and be too crumbly. The best method is to spoon the flour into your measuring cup and then level it off with the back of a knife. Avoid scooping directly from the bag, as this compacts the flour and leads to over-measurement. Precision here is a game-changer for the texture of your chocolate kiss cookies.
Consider Chilling Dough
While this recipe doesn’t strictly require chilling, it can significantly enhance the flavor and texture of your chocolate kiss cookies, especially if you have the time. Chilling the dough for at least 30 minutes, or even overnight, allows the flavors to meld and the fats to firm up. This prevents excessive spreading during baking, resulting in thicker, chewier cookies with a more concentrated flavor. It’s an extra step that makes a noticeable difference for many types of desserts.
Watch Baking Time Closely
Every oven is different, and baking times can vary. Instead of strictly adhering to the recipe’s suggested time, watch your cookies closely. You’re looking for edges that are set and lightly golden, with centers that still look slightly soft and unbaked. Overbaking will lead to dry, hard cookies, while underbaking can result in a gooey, unappetizing texture. Remove them from the oven at the first sign of readiness. This attentiveness ensures your chocolate kiss cookies reach their peak deliciousness.
Fun Twists for These Cookies
While the classic chocolate kiss cookie is undeniably delicious, there’s always room for a little creativity in the kitchen. Experimenting with variations can make this beloved sweet treat even more exciting and tailored to your personal preferences or seasonal themes. These simple changes can transform your familiar homemade cookies into something new and delightful, adding an extra layer of fun to your baking routine. Don’t be afraid to personalize your batch.
Try Different Kiss Flavors
The beauty of Hershey’s Kisses lies in their wide array of flavors. Beyond the traditional milk chocolate, consider using special dark chocolate, white chocolate, caramel-filled, or even seasonal varieties like peppermint Kisses during the holidays. Each different flavor will bring a unique dimension to your chocolate cookie base, offering a pleasant surprise with every bite. You could even use a mix of different Kisses on one baking sheet for an assortment of flavors. This simple switch can make your chocolate kiss cookies a memorable addition to any dessert table.
Storing Your Hershey Kiss Cookies
Proper storage is key to maintaining the freshness and deliciousness of your chocolate kiss cookies. Whether you plan to enjoy them over a few days or save some for later, knowing how to store them correctly ensures they remain soft, flavorful, and as enjoyable as they were fresh out of the oven. These simple steps help extend their shelf life and preserve their quality.
Keep Them Airtight
Once your chocolate kiss cookies have cooled completely, store them in an airtight container at room temperature. This prevents them from drying out and becoming stale. You can also place a slice of bread in the container to help keep them soft, though this is often not needed if the container is truly airtight. Proper storage ensures that the cookies retain their moisture and soft texture for several days. Avoid storing them in the refrigerator, as this can often dry out cookies and make them crumbly.
Freezing for Freshness
If you’ve baked a large batch or want to prepare ahead, chocolate kiss cookies freeze beautifully. Once completely cooled and the Kisses are fully set, arrange them in a single layer on a baking sheet and flash freeze for about an hour. Once firm, transfer them to a freezer-safe airtight container or heavy-duty freezer bag, layering with parchment paper to prevent sticking. They can be frozen for up to 2-3 months. Thaw at room temperature when ready to enjoy, or refer to our warming tips for a quicker method. Freezing is an excellent way to always have a sweet treat on hand.
Warm Up Your Delicious Cookies
While chocolate kiss cookies are delightful at room temperature, a gentle warming can bring out their fresh-baked aroma and create that wonderful melt-in-your-mouth experience again, especially for the Hershey’s Kiss. Reheating them properly can make them taste as if they just came out of the oven, enhancing their rich chocolate flavor and soft texture. It’s a quick way to savor that warm, gooey goodness once more.
Quick Microwave Reheating
The quickest way to warm up your chocolate kiss cookies is in the microwave. Place one or two cookies on a microwave-safe plate. Heat them on a medium power setting for about 10-15 seconds. Be careful not to overheat, as this can make the cookies tough or cause the chocolate Kiss to fully melt into a puddle. The goal is to just soften the cookie and slightly melt the chocolate, restoring that freshly baked feel without compromising the texture. This method is perfect for an instant craving satisfaction.
Quick Look at Cookie Nutrition
Understanding the nutritional values of your homemade chocolate kiss cookies can be helpful, especially if you’re mindful of your dietary intake. While these are undoubtedly a sweet treat, a quick overview provides context for enjoying them as part of a balanced diet. Remember that homemade recipes can have varying nutritional profiles based on exact ingredient brands and portion sizes. This information serves as a general guideline to help you make informed choices.
Calories Per Serving
Typically, one chocolate kiss cookie contains approximately 150-200 calories, depending on its size and the exact recipe proportions. This value accounts for the combination of butter, sugars, flour, cocoa, and the Hershey’s Kiss. This calorie count makes them a substantial snack or a satisfying dessert when enjoyed in moderation. Being aware of the serving size is key to managing your intake effectively.
Key Nutritional Values
Beyond calories, chocolate kiss cookies offer a mix of other nutritional components. They contain carbohydrates, primarily from sugars and flour, providing energy. They also have fats, largely from butter and the chocolate kiss, which contribute to richness and satiety. Protein content is usually low, mainly from the eggs. While not a significant source of vitamins or minerals, they provide a comforting experience. Enjoy them as a delightful indulgence rather than a health food, balancing them with nutrient-rich meals.
Common Questions About Cookies
When baking and enjoying homemade cookies, some questions frequently arise, particularly concerning their longevity and how best to preserve their quality. Knowing the answers to these common inquiries ensures you can plan your baking, storage, and enjoyment efficiently, minimizing waste and maximizing deliciousness. These practical tips help you handle your chocolate kiss cookies like a seasoned pro.
Shelf Life and Storage
Properly stored chocolate kiss cookies will maintain their freshness for about 3-5 days at room temperature in an airtight container. Beyond this, they may start to dry out or lose their optimal texture. If you notice them becoming crumbly or hard, they are likely past their prime for fresh enjoyment, though they can still be softened with a quick reheat. Always ensure they are completely cooled before storing to prevent condensation, which can make them soggy.
Best Way to Freeze
For longer storage, freezing is the best option. As mentioned earlier, flash freezing individual cookies on a baking sheet before transferring them to a freezer-safe bag or container prevents them from sticking together. This method allows you to grab just one or two at a time without thawing the entire batch. Frozen chocolate kiss cookies are best consumed within 2-3 months for optimal flavor and texture. Thaw them at room temperature or use the microwave reheating method for a warm treat.
Why These Cookies Make You Smile
There’s an undeniable magic about chocolate kiss cookies that goes beyond their delicious taste. They evoke feelings of warmth, comfort, and happiness, making them more than just a sweet treat—they are a source of genuine smiles. Whether it’s the simple act of baking them or sharing them with loved ones, these homemade cookies embody pure joy. This classic dessert consistently brings cheer to any gathering or quiet moment.
Perfect Daily Sweet Treat
Imagine unwinding after a long day with a cup of tea or coffee and a soft, chewy chocolate kiss cookie. It’s the perfect daily indulgence, a small moment of bliss that melts away stress. Their comforting flavor and texture make them an ideal pick-me-up, a little reward that brightens any afternoon or evening. These cookies are simple pleasures that consistently satisfy, making them a fantastic addition to your personal collection of favorite recipes.
Share Happiness with Family
Baking chocolate kiss cookies is a fantastic activity to share with family, creating lasting memories in the kitchen. The joy of giving and receiving these sweet treats is immense. They are perfect for holiday platters, bake sales, or simply as a thoughtful gesture for neighbors and friends. Sharing homemade cookies is an act of love, and these chocolate kiss cookies are particularly good at spreading happiness and fostering connections. For more shareable recipes, visit our recipe collection.