
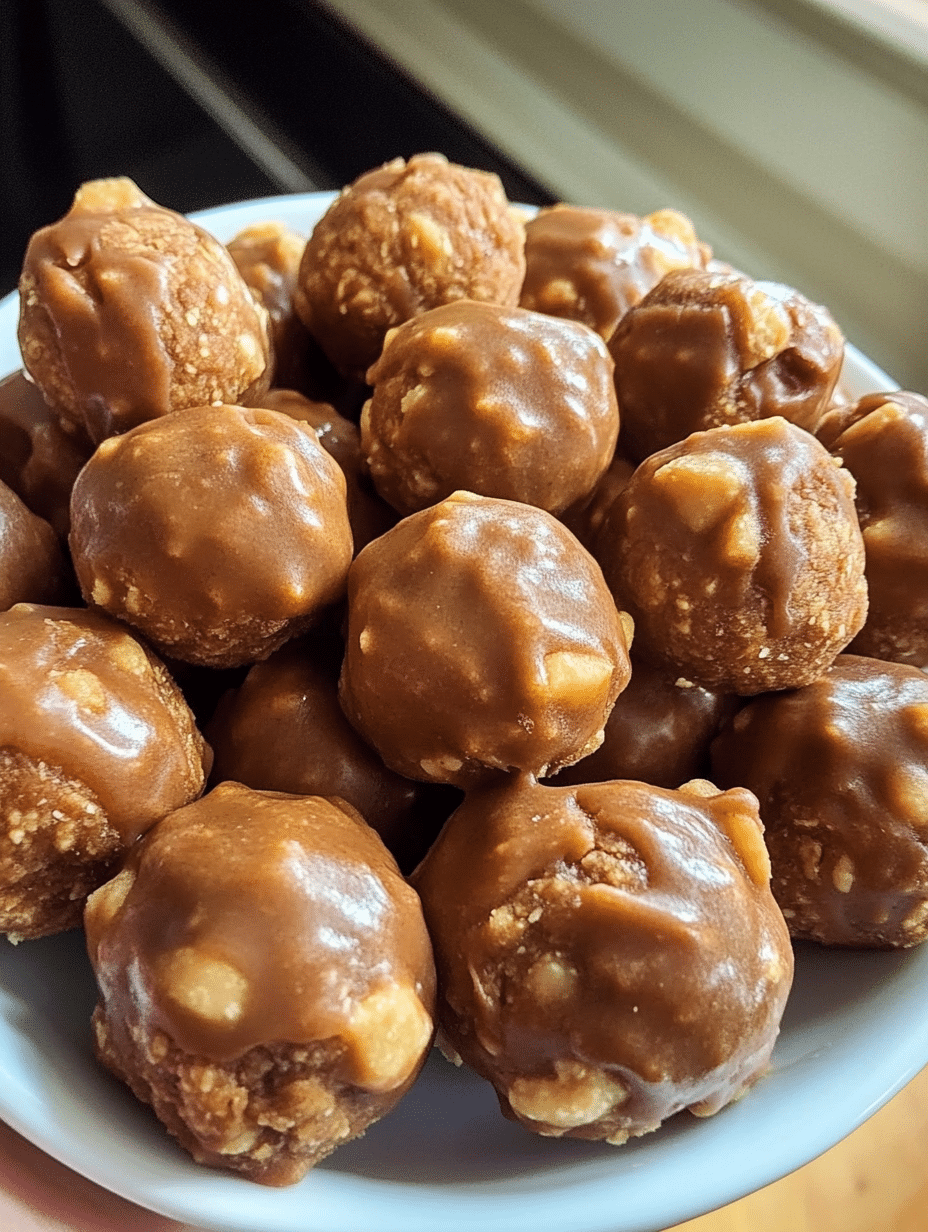
Butterfinger Balls are the perfect no-bake treat, featuring a crunchy, peanut buttery center coated in smooth chocolate. This easy-to-follow recipe is ideal for fast holiday prep and guarantees a crowd-pleasing dessert every single time.
What Exactly Are Butterfinger Balls?
Butterfinger Balls are a delightful dessert truffle made from a creamy peanut butter base, sweetened with powdered sugar, and studded with crushed Butterfinger candy pieces. They are similar to Buckeye candies, but with an added crispy, peanut-buttery crunch from the candy bar inclusion. These no-bake morsels are extremely popular for potlucks and holiday gatherings because they are simple to make.
You can call these bite-sized sweets a quick version of candy-making, as they do not require any baking time, only chilling. They offer a winning combination of creamy, crunchy, salty, and sweet flavors that appeal to nearly everyone. Once you try these, they will become your new go-to recipe for dessert platters.
Key Takeaways for Making Butterfinger Balls
- Always use creamy, conventional peanut butter for the best texture.
- Chill the dough for a minimum of 30 minutes to make rolling easier.
- Melt the chocolate carefully in 30-second increments to prevent burning.
- Use a skewer or toothpick for dipping to ensure a smooth, even coating.
You make perfect Butterfinger Balls by mixing creamy peanut butter, softened butter, vanilla, powdered sugar, graham cracker crumbs, and crushed Butterfinger bars into a dough. Roll the mixture into balls, chill until firm, and then dip each ball into melted chocolate bark. Let the chocolate set completely before serving them.
Why You Need to Use Creamy Peanut Butter
Why All-Natural Peanut Butter Should Be Avoided
When making these truffles, you need to use a conventional, processed creamy peanut butter brand, such as Jif or Skippy. Natural peanut butter, the kind that separates, contains too much oil and will result in a greasy dough that is difficult to roll into firm balls. The high oil content makes the mixture separate and prevents it from properly incorporating with the powdered sugar and butter mixture.
You want that stable, smooth texture that conventional peanut butter provides, which acts as a binder. This stability ensures your balls hold their shape beautifully after chilling, giving you a perfect base for dipping. If you use the wrong kind, you’ll end up with a sloppy mess that will not firm up correctly in the freezer.
The Secret to Getting the Right Crunch
Incorporating Crushed Graham Crackers
The graham cracker crumbs are one of the hidden secrets to the success of these Butterfinger Balls. They are not just filler; they absorb some of the moisture from the peanut butter and butter, giving the dough a drier, more pliable texture. This key ingredient makes the dough much easier to shape and prevents stickiness on your hands.
Furthermore, the crumbs add a subtle, satisfying texture that complements the crispy chunks of Butterfinger candy. You’ll want to use finely crushed crumbs to ensure they blend seamlessly into the peanut butter mixture. If you do not have graham crackers, you could use vanilla wafers or shortbread cookies as an alternative base.
Preparing the Butterfinger Candy Pieces
For the best results, you need to crush your Butterfinger candy bars into small, manageable pieces. Using a food processor works best for a uniform, fine crush, but you can also place them in a zip-top bag and crush them with a rolling pin. Make sure to crush enough to fold into the dough and to reserve extra for the final garnish.
The crushed pieces are responsible for the delightful, crunchy interior that gives these balls their signature flavor and texture. Do not forget to reserve a small amount of the crushed candy to sprinkle over the melted chocolate coating. This makes your treats look beautiful and lets people know exactly what flavor they are before they take a bite.
Techniques for Simple Chocolate Melting
Using Chocolate Bark vs. Chocolate Chips
You have a choice when it comes to the chocolate coating, and the right choice makes a big difference. Chocolate bark or candy melts are highly recommended because they contain added fats and stabilizers, making them melt smoother and set harder without needing to be tempered. This means a professional-looking, glossy finish for your truffles.
If you prefer to use chocolate chips, you can still achieve great results, but you may need to add a teaspoon of coconut oil or vegetable shortening to the chocolate chips before melting. This simple addition will thin out the chocolate and give you a much smoother coating. The extra fat helps the chocolate flow and drip easily off the ball, preventing thick, clumpy layers.
Best Method for Melting in the Microwave
The safest way to melt your chocolate is to use a microwave-safe bowl and heat it in short bursts. Start with 30 seconds at 50% power, stirring well after the timer goes off. Continue to microwave in 15- to 30-second increments at 50% power, stirring diligently after each. Always watch the chocolate closely as it can burn quickly.
You want to remove the chocolate from the microwave when a few small lumps remain in the bowl. The residual heat will melt these final pieces as you stir, giving you a perfectly smooth and glossy dipping consistency. This method prevents overheating, which can cause the chocolate to seize or become grainy and unusable for coating your treats.
Tips for Rolling and Chilling the Dough
Achieving Uniform Ball Size
For a consistent and attractive presentation, strive to make all your Butterfinger Balls the same size. Using a small cookie scoop or a measuring spoon (like a 1-tablespoon measure) is the easiest way to ensure uniformity. Scoop out the mixture, lightly compress it with your hands, and then roll it between your palms to achieve a smooth sphere. This will make sure they all look neat on the serving platter.
This attention to detail in sizing is especially important if you are packaging them for a gift or selling them at a bake sale. Uniform size also ensures that each truffle has the same ratio of filling to chocolate coating. For more helpful tips and recipes, be sure to follow us on Pinterest.
The Importance of a Quick Chill
The chilling phase is not optional; it is a critical step that you should not skip. Placing the rolled balls in the freezer for 30 minutes makes the peanut butter mixture completely firm. This firmness is essential because it prevents the balls from collapsing or falling apart when you dip them into the warm, melted chocolate.
Working with chilled dough also ensures that the warm chocolate sets up much faster, which significantly reduces your overall preparation time. You can even roll the balls days ahead of time and keep them in the freezer, ready to be dipped whenever you are ready. This makes party planning much simpler.
Coating and Decorating Your Butterfinger Balls
Dipping Techniques for a Smooth Finish
To get a thin, perfect layer of chocolate, you should drop a chilled ball directly into the melted chocolate. Use a fork or a special dipping tool to gently turn it over, fully submerging it in the chocolate mixture. Lift the ball out with the fork, letting the excess chocolate drip off completely back into the bowl. This technique is easier than trying to roll or spoon chocolate over the tops of your truffles.
The cold surface of the ball will help the chocolate set instantly, preventing those messy chocolate puddles on your parchment paper. You can also use a toothpick inserted into the center of the ball to hold it while dipping, but be sure to quickly cover the small hole with a bit of extra melted chocolate before it fully sets.
Creative Garnishing Ideas to Try
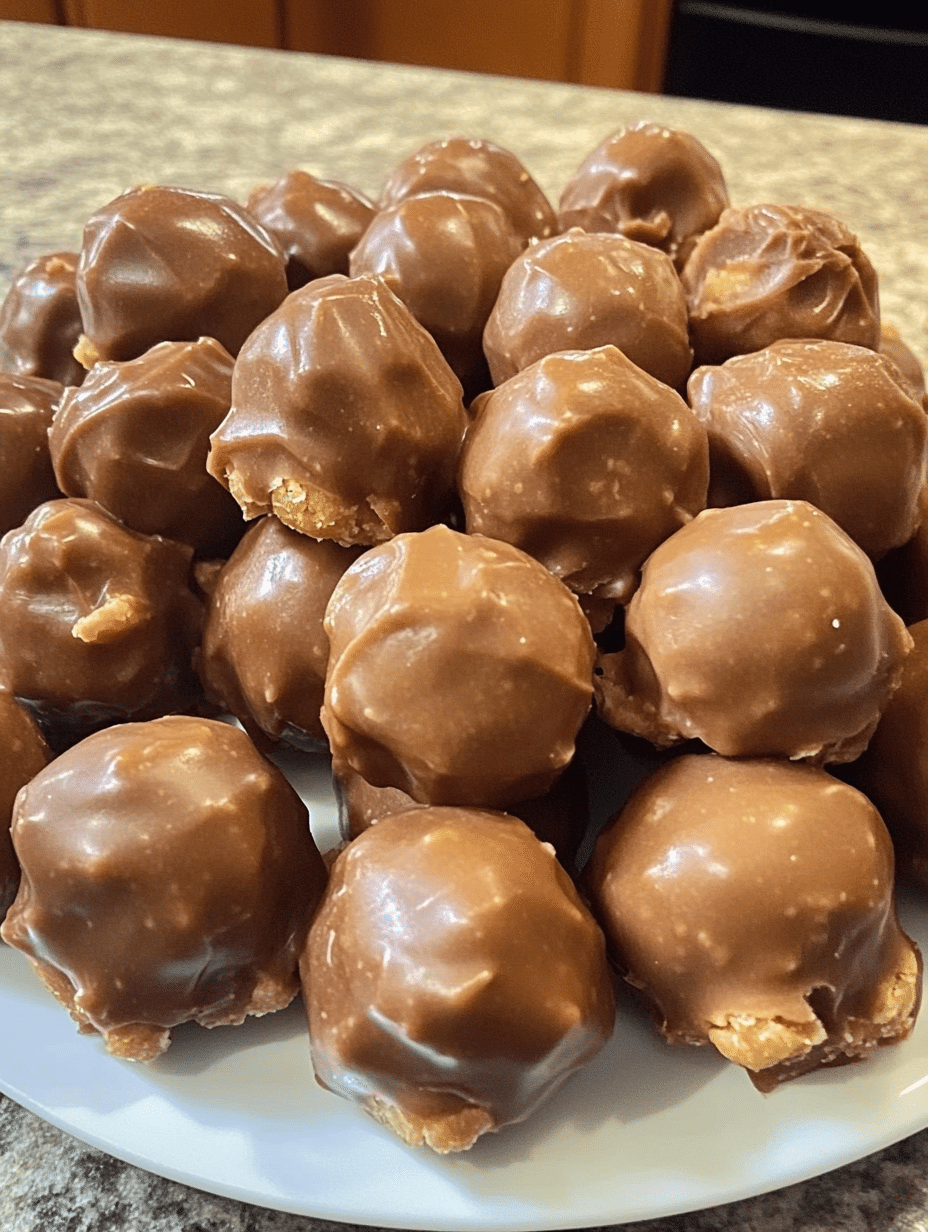
Once your chocolate coating is set, the fun begins with garnishing. The classic way is to sprinkle some extra crushed Butterfinger pieces on top while the chocolate is still wet. This not only looks great but reinforces the flavor of the treat. However, do not feel limited to just using the candy pieces as your only option.
You can also use different colors of festive sprinkles to match a holiday theme, or add a delicate sprinkle of coarse sea salt for a sophisticated salty-sweet contrast. A drizzle of white chocolate across the top of the dark chocolate coating is another beautiful touch. For more dessert inspiration, check out our guide on other sweet treats you can make.
Storage and Prep Ahead Tips
How to Properly Store Your Trumps
You need to store your finished Butterfinger Balls in an airtight container to keep them fresh and delicious. These truffles should always be refrigerated because of the butter and peanut butter filling, which softens quickly at room temperature. When stored correctly in the fridge, they will maintain their quality and flavor for up to one week after dipping.
If you need to store them for a longer period, such as a month or more, you can transfer the airtight container to the freezer. To prevent them from sticking together, layer the balls between pieces of parchment or wax paper inside the container. Simply let them thaw in the refrigerator for a few hours before you plan to serve them for the best flavor and texture.
Making the Dough in Advance
One of the best features of this no-bake recipe is how easily you can prepare the dough in advance. You can mix the entire dough, roll it into balls, and then store the un-dipped balls in the freezer for several weeks. This is a huge time-saver when you are preparing for a major holiday or a big party, such as a backyard barbecue or a birthday celebration.
Having the dough ready to go means you only need about 20 minutes to melt the chocolate and dip the balls on the day of your event. Just take them straight from the freezer and proceed to the melting and dipping step. This efficient prep allows you to serve a freshly coated dessert without any last-minute stress. Be sure to check out other no-bake snack ideas for your next party.
Addressing Potential Mistakes
Why Your Chocolate Might Seize Up
If your melted chocolate suddenly becomes thick, grainy, and unworkable, it means it has seized. This typically happens for two main reasons: either the chocolate was overheated, or a small amount of water or steam got into the bowl. Water is the number one enemy of melted chocolate, which is why a double boiler needs to be used with extreme caution. Always make sure your bowl and stirring tools are completely dry before you begin melting your chocolate.
If your chocolate seizes, you can try to rescue it by stirring in a teaspoon of warm shortening or vegetable oil. The extra fat sometimes re-emulsifies the mixture, making it smooth again. However, if the chocolate is badly scorched or clumpy, it is usually better to start over. For more details on safe melting, see this information on our social media pages.
Dealing with Balls That Are Too Soft
If you find that your dough balls are too soft to roll, it is likely because the butter was too warm or you used all-natural peanut butter. You should add a little extra powdered sugar, about a quarter cup at a time, until the dough reaches a consistency that is easier to handle. This will quickly soak up the excess oil and help the mixture firm up to the correct texture.
Another common mistake is not chilling the balls long enough. If the balls start to feel sticky or soft while you are dipping them, simply return them to the freezer for another 10 to 15 minutes. It is better to work with super-firm, chilled balls to ensure a quick and clean coating process. You can also work in smaller batches, keeping the unused balls frozen until you are ready to dip them.
Conclusion
Butterfinger Balls are truly the perfect, easy-to-make dessert for any occasion, combining a craveable mix of smooth peanut butter, crunchy candy, and a snappy chocolate shell. This no-bake recipe is a stress-free way to produce an impressive treat that everyone will ask you to make again. You now have all the tips and tricks you need to master the art of these delightful truffles, from choosing the right peanut butter to getting that ideal, smooth chocolate coating that looks professionally made.
You can easily prepare these ahead of time, making them a fantastic option for busy holiday seasons when you need a quick dessert or gift. Remember to keep them refrigerated to maintain their shape and freshness. Now you can get started creating your own batch of these incredible peanut butter and candy creations. Enjoy every single bite of this nostalgic treat that always disappears fast off any dessert table you put them on.
Print
Butterfinger Balls (No-Bake Bliss Balls)
- Total Time: 45minutes
Description
Indulge your taste buds with these irresistible Butterfinger Bliss Balls, where creamy peanut butter harmoniously melds with the crunch of graham crackers and Butterfinger candy bars, all cloaked in sumptuous melted chocolate. Perfect for social soirées and festive occasions, these heavenly morsels will vanish before you know it!
Ingredients
For the Dough
-
- 4 tablespoons softened butter (½ stick)
- 1 teaspoon vanilla extract
- 1 cup powdered sugar
- 1 cup peanut butter (avoid all-natural varieties)
- ¾ cup crumbs from graham crackers
- ½ cup Butterfinger bars (crushed)
For the Coating & Garnish
- 8 ounces chocolate bark or chocolate chips
- Optional garnishes: additional crushed Butterfinger bars, festive sprinkles, or coarse sea salt
Instructions
Prepare the Dough
-
- In a mixing bowl, combine the peanut butter and softened butter. Use an electric or stand mixer set to medium speed and blend until the mixture is creamy and uniform.
- Incorporate the vanilla extract and blend thoroughly.
- Gradually add the powdered sugar in increments, blending at a low speed. Don’t forget to scrape down the sides of the bowl to ensure even mixing.
- Gently fold in the graham cracker crumbs and crushed Butterfinger bars.
- Align a large cookie sheet with parchment paper. Scoop out approximately 1 to 1½ tablespoons of the dough, roll into neat balls, and place on the cookie sheet.
- Freeze the dough balls on the sheet for roughly 30 minutes until they are completely firm.
Melting the Chocolate
- Once the dough balls are chilled, proceed to melt the chocolate. Utilize a microwave-safe bowl and heat in 30-second spurts at 50% power, stirring in between each interval. Be cautious not to overheat; some lumps should remain and will melt as you stir.
- Submerge each chilled ball into the luscious melted chocolate. You can fully coat them or leave a bit of the peanut butter mixture exposed.
- Add a sprinkle of additional crushed Butterfinger bars, holiday-themed sprinkles, or a dash of flaky sea salt for that extra pop.
- Allow the chocolate to solidify completely before indulging in your Butterfinger Bliss Balls.
Notes
Storage Tips: Store these delights in an airtight container and refrigerate for up to a week.
Peanut Butter Note: Stick to conventional peanut butter brands like Jif or Skippy, as all-natural varieties can be too oily.
Chocolate Choice: For a smoother texture, chocolate bark is recommended. Alternatively, you can use a mix of chocolate bark and chocolate chips or opt for tempered chocolate chips. A double boiler can be used for melting chocolate at a low or medium-low heat setting if you prefer that method.
- Prep Time: 15minutes
Nutrition
- Serving Size: 20 Balls
Keywords: Butterfinger Balls, No-Bake, Peanut Butter, Chocolate, Holiday Treats
