
Butter Pecan Ice Cream is a classic sweet treat cherished for its rich, nutty flavor and creamy texture. This homemade recipe lets you create a delicious dessert right in your kitchen. Learn to toast pecans, churn the base, and freeze for perfect scoops, ensuring a delightful experience for all. Get ready to enjoy a fantastic sweet treat.
Key Takeaways
- Achieve the best flavor by toasting pecans in butter until golden.
- Chill your ice cream base completely before churning for optimal creaminess.
- Use an ice cream maker for a smooth, firm texture, following manufacturer instructions.
- Store homemade butter pecan ice cream in an airtight container for lasting freshness.
- Customize your recipe with dairy-free options or favorite mix-ins.
Homemade ice cream is truly special. It offers unparalleled freshness. Your effort yields wonderful flavor. The creamy texture is so rewarding. Enjoy this delightful dessert!
Butter Pecan Ice Cream Overview
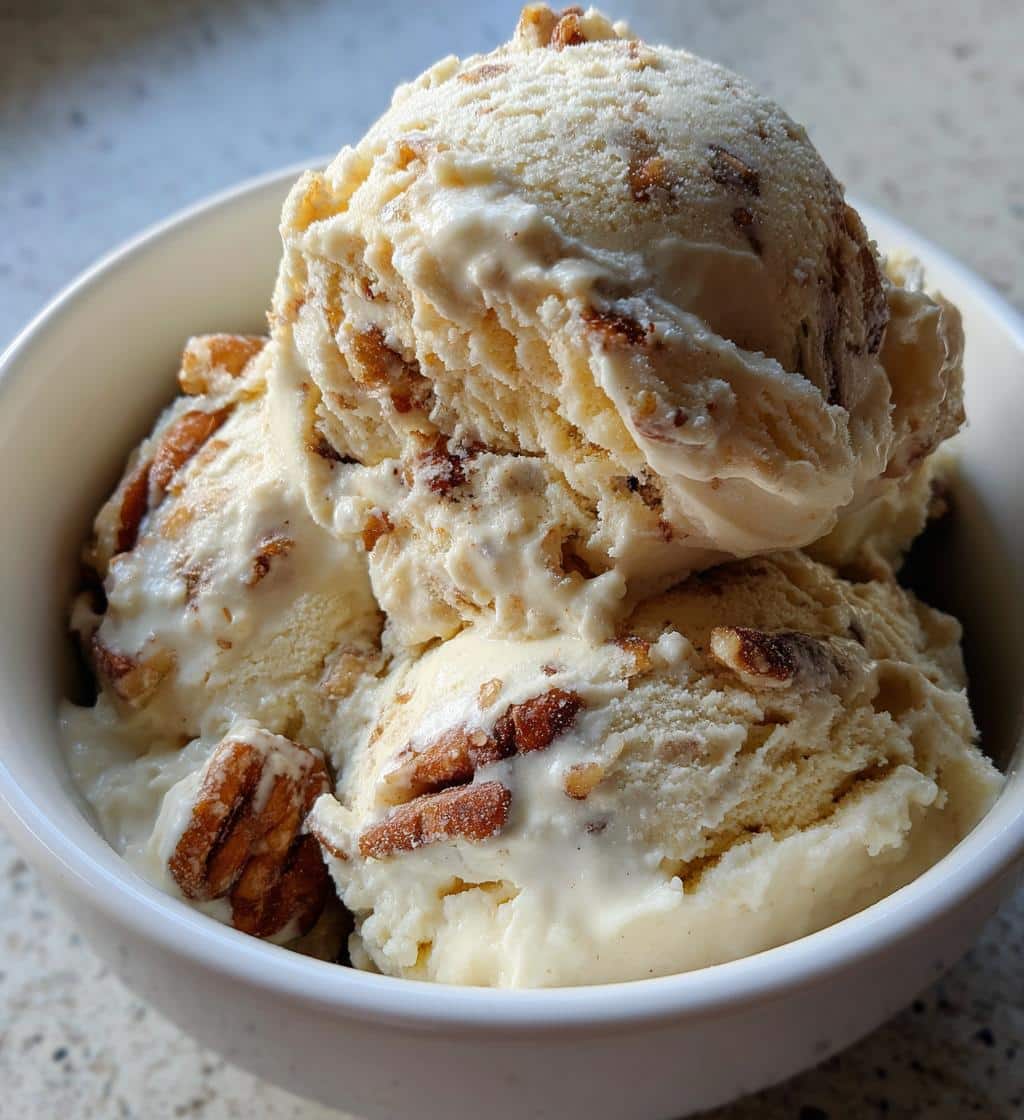
Butter Pecan Ice Cream is more than just a dessert; it’s a timeless comfort food that evokes feelings of nostalgia and pure indulgence. Characterized by its smooth, vanilla-infused cream base studded with crunchy, butter-toasted pecans, this sweet treat offers a delightful contrast in textures and a depth of flavor that appeals to nearly everyone. This recipe will walk you through creating a homemade version that rivals any gourmet scoop shop, ensuring you achieve that perfect balance of sweetness, creaminess, and nutty goodness. Making ice cream at home allows for control over ingredients, ensuring a fresher, more natural product free from artificial additives. The satisfying process of creating this classic makes the finished product even more enjoyable, turning a simple kitchen activity into a rewarding culinary experience.
Prep, Cook, Freeze Times
Understanding the time commitment is key to successful homemade ice cream. The preparation phase, including toasting the pecans and mixing the base, typically takes about 20-30 minutes. This is followed by a crucial chilling period of at least 4 hours, or preferably overnight, for the base. The actual churning in an ice cream maker usually takes 20-30 minutes. Finally, the freezing phase, where the ice cream hardens to a scoopable consistency, requires a minimum of 4 hours. While it seems like a lengthy process, much of it is passive chilling and freezing time, making it manageable for a weekend project or a make-ahead dessert.
Yields 1.5 Quarts
This butter pecan ice cream recipe is designed to yield approximately 1.5 quarts, which is perfect for serving a small gathering or enjoying over several days. This quantity fits most standard home ice cream makers and storage containers. A 1.5-quart batch provides ample servings, usually between 6 to 8, depending on portion size, making it an ideal sweet treat for sharing or keeping on hand for a spontaneous craving. Should you need more, the recipe can easily be doubled, though you might need to churn in batches depending on your ice cream maker’s capacity.
Ingredients for Your Creamy Treat
Crafting exceptional butter pecan ice cream begins with selecting quality ingredients. Each component plays a vital role in achieving the desired creamy texture and rich, nutty flavor. Using fresh, high-quality dairy and nuts will significantly impact the final taste, making your homemade ice cream truly stand out. This recipe focuses on simple yet effective ingredients that come together to create a luxurious dessert. For those interested in other sweet creations, consider trying a peanut butter brownie swirl cookie recipe for another delightful dessert option.
Dairy and Sweeteners Needed
For the ultimate creamy base, you’ll need a combination of heavy cream and whole milk. The heavy cream provides the richness and fat content essential for a smooth, luscious texture, while whole milk helps to thin the consistency slightly without sacrificing creaminess. Granulated sugar is the primary sweetener, dissolving easily into the dairy mixture to provide balanced sweetness. Some recipes also incorporate a touch of brown sugar for a deeper, more caramel-like note, which complements the pecans beautifully. Ensure your dairy products are fresh for the best results.
Pecans, Butter, Vanilla, Salt
The stars of the show are the pecans. Opt for good quality pecan halves or pieces. Unsalted butter is crucial for toasting the pecans, imparting a rich, buttery flavor that enhances their natural nuttiness. Pure vanilla extract is indispensable for the ice cream base, adding a warm, aromatic depth that marries all the flavors together. Always use pure vanilla for the best taste; imitation vanilla won’t achieve the same complexity. A pinch of salt is also essential, not just for seasoning but to balance the sweetness and elevate the overall flavor profile, making the ice cream taste even more vibrant and complex. These ingredients, though few, are mighty in their contribution to this classic dessert category.
Kitchen Tools for Ice Cream Making
To successfully make homemade butter pecan ice cream, a few key kitchen tools are necessary. Having the right equipment streamlines the process and helps ensure a professional-quality result. While some tools are essential, others simply make the experience more enjoyable and efficient. Preparing your workspace with these items before you start will make the cooking process much smoother and more enjoyable. These tools are commonly found in most kitchens, meaning you likely won’t need to purchase many specialized items, especially if you already enjoy baking and cooking.
- Ice Cream Maker: This is the most crucial tool. Whether it’s a compressor model, a freezer bowl model, or even an old-fashioned hand-crank machine, an ice cream maker is designed to churn the base while simultaneously freezing it, preventing large ice crystals from forming and creating that characteristic creamy texture. Ensure your freezer bowl is frozen solid (usually 12-24 hours prior) if you’re using that type.
- Heavy-Bottomed Saucepan: For melting butter and toasting pecans, as well as for gently heating the dairy if your recipe requires it. A heavy bottom prevents scorching.
- Large Mixing Bowl: To combine the ice cream base ingredients and for chilling the mixture. It’s often helpful to have a bowl with a lid or plastic wrap for covering.
- Whisk: Essential for thoroughly combining the sugar with the dairy and ensuring it dissolves completely, as well as for stirring in the vanilla and salt.
- Rubber Spatula: Useful for scraping down the sides of bowls and pans, ensuring no ingredients are left behind.
- Airtight Container: For storing the finished ice cream in the freezer. A shallow, wide container helps the ice cream freeze more evenly.
- Measuring Cups and Spoons: For accurate ingredient measurement, critical for consistency in baking and dessert making.
Having these tools ready will make your ice cream-making journey enjoyable and lead to a perfectly creamy and delicious butter pecan treat. For those interested in other desserts that might require similar tools, consider exploring a quick Italian cream cake recipe for another delightful kitchen adventure, or perhaps a snickerdoodle cobbler.
Toast Buttered Pecans Perfectly
The secret to outstanding butter pecan ice cream lies in perfectly toasted, buttered pecans. This step elevates the flavor of the nuts from merely good to absolutely irresistible, adding a depth and warmth that plain pecans simply can’t achieve. The butter creates a rich coating, and the toasting process brings out their natural oils, intensifying their nutty essence. This small effort makes a significant difference in the final product’s taste and texture, giving the ice cream its signature crunch and savory-sweet appeal. It’s a crucial step that shouldn’t be skipped for the best results.
Melt Butter, Add Pecans
Begin by placing a heavy-bottomed skillet over medium heat. Add the unsalted butter and allow it to melt completely. Once the butter is melted and slightly foamy, add your pecan halves or pieces to the skillet. Ensure the pecans are spread in a single layer as much as possible to allow for even toasting. The butter will coat each pecan, beginning the process of infusing them with a rich, savory flavor that complements their natural sweetness. Keep the heat at medium to prevent the butter from burning and to ensure the pecans toast slowly and thoroughly.
Toast Until Golden
Stir the pecans frequently as they toast, ensuring all sides get exposed to the heat. This prevents some pecans from burning while others remain raw. You’ll notice a distinct change in aroma—the kitchen will fill with a wonderful, nutty fragrance. The pecans will gradually darken, transitioning from a pale brown to a beautiful golden hue. This usually takes about 5-8 minutes, but keep a close eye on them as nuts can go from perfectly toasted to burnt very quickly. Once they reach that perfect golden color and smell intensely nutty, remove the skillet from the heat immediately and transfer the pecans to a plate lined with parchment paper or a paper towel to cool. This stops the cooking process and prevents them from over-browning. Allowing them to cool completely will also ensure they retain their crispness when mixed into the ice cream base.
Mix Your Cream Base Smoothly
Creating a smooth, well-mixed cream base is fundamental to delicious homemade ice cream. This step involves combining the liquid ingredients and sweeteners until they are fully integrated, forming the foundation for your rich dessert. A properly mixed base ensures a consistent flavor and texture throughout the ice cream. Take your time to whisk thoroughly, allowing the sugar to dissolve completely, which is crucial for preventing a grainy texture in the final frozen product. This stage also allows the flavors to meld before chilling, contributing to a more harmonious taste.
Combine Cream, Milk, Sugar
In a large mixing bowl, combine the heavy cream, whole milk, and granulated sugar. Using a whisk, stir these ingredients together vigorously. The goal here is to fully dissolve the sugar into the dairy mixture. Continue whisking for several minutes until you no longer feel any sugar crystals at the bottom of the bowl when you rub a small amount of the mixture between your fingers. This ensures a smooth, non-gritty ice cream texture. Some recipes might suggest gently heating the mixture to help the sugar dissolve, but for this recipe, thorough whisking at room temperature or slightly chilled is often sufficient.
Add Salt and Vanilla
Once the sugar is completely dissolved, add the pure vanilla extract and a pinch of salt to the cream base. The vanilla extract is key for imparting that classic butter pecan flavor, adding warmth and sweetness. The salt, though a small amount, is vital for balancing the sweetness and enhancing the overall flavor profile of the ice cream. Whisk these additions in until they are well incorporated. Taste a small amount of the base (before adding pecans) to ensure the flavor is to your liking; you can adjust sweetness or vanilla if necessary, though the provided measurements are typically well-balanced.
Stir in Pecan Mixture
Finally, gently fold in your cooled, butter-toasted pecans into the cream base. Ensure they are completely cool to prevent them from melting the base and introducing unwanted warmth. Stir just enough to evenly distribute the pecans throughout the mixture. This combination of the smooth, sweet cream base and the crunchy, buttery pecans is what gives butter pecan ice cream its signature appeal. Once thoroughly mixed, cover the bowl and refrigerate the mixture for at least 4 hours, or ideally overnight. Chilling the base completely is absolutely crucial for achieving the best, creamiest texture during churning. A well-chilled base freezes more efficiently and prevents the formation of large ice crystals.
Churning Butter Pecan Ice Cream
Churning is the transformative step where your liquid base becomes the creamy, soft-serve consistency we associate with ice cream. This process introduces air into the mixture while simultaneously freezing it, which prevents the formation of large, undesirable ice crystals. The effectiveness of your ice cream maker directly impacts the final texture, making this stage critical for achieving that smooth, velvety mouthfeel. Pay close attention to your machine’s instructions to ensure optimal results and a perfectly churned batch of butter pecan delight. For more information about the science behind ice cream, you can visit Ice Cream on Wikipedia.
Pour into Ice Cream Maker
Before you begin, ensure your ice cream maker’s freezer bowl has been frozen for the recommended time (typically 12-24 hours) or that your compressor model is pre-cooled. Remove the chilled ice cream base from the refrigerator. Give it a final stir to ensure everything is well combined. Carefully pour the entire mixture into the frozen canister or bowl of your ice cream maker. Do not overfill the canister; most machines have a maximum fill line to allow for expansion as the ice cream freezes and air is incorporated. Place the lid and dasher (paddle) onto the machine as per the manufacturer’s instructions.
Follow Maker Instructions
Turn on your ice cream maker and allow it to churn. The churning time will vary depending on your specific model, but it generally takes between 20 to 30 minutes. During this time, the mixture will gradually thicken and increase in volume as air is incorporated and it freezes. The ice cream will reach a soft-serve consistency, which is ideal for transferring to a freezer for final hardening. Avoid churning for too long, as this can sometimes lead to a less creamy texture. If your machine is struggling or the mixture is too firm to churn effectively, it might be an indication that the freezer bowl wasn’t cold enough or the mixture wasn’t sufficiently chilled. Once churning is complete, turn off the machine and carefully remove the dasher, scraping off any delicious ice cream clinging to it.
Freezing for a Firm Texture
After churning, your butter pecan ice cream will have a soft, almost soft-serve consistency. While delicious, most people prefer a firmer scoop. This final freezing stage is essential for achieving the classic, scoopable texture. Proper freezing also helps the flavors mature and settle, resulting in a more integrated and satisfying taste experience. This step requires patience, but the wait is well worth it for that perfect, firm scoop of nutty, creamy goodness. Understanding this process is key for any homemade ice cream enthusiast, similar to the process of creating various frozen desserts.
Transfer to Container
Once your ice cream has reached a soft-serve consistency in the churner, carefully transfer it to an airtight freezer-safe container. Glass or plastic containers with tight-fitting lids work best. If possible, choose a shallow, wide container rather than a deep, narrow one, as this allows the ice cream to freeze more evenly and quickly. Press a piece of parchment paper or plastic wrap directly onto the surface of the ice cream before securing the lid. This helps to prevent ice crystals from forming on top, which can lead to a less appealing texture. Make sure the container is completely sealed to protect the ice cream from freezer burn and absorption of other freezer odors.
Freeze for Four Hours
Place the sealed container of butter pecan ice cream into the coldest part of your freezer. Allow it to freeze for at least four hours, or preferably overnight, for the best firm texture. During this time, the ice cream will harden completely, transforming from its soft-serve state into a solid, scoopable dessert. If you are eager to serve it sooner, you can check after two to three hours, but it might still be slightly softer. For the ideal consistency, four hours to overnight is recommended. When ready to serve, if the ice cream is too hard, let it sit at room temperature for 5-10 minutes to soften slightly before scooping, making it easier to enjoy.
Recipe Times and Servings
Understanding the overall time commitment and expected yield of a recipe is crucial for planning your dessert creation. This section breaks down the active and passive times involved in making your homemade butter pecan ice cream, along with the generous serving size you can expect. Knowing these details helps you fit the recipe into your schedule and manage expectations for your culinary endeavors. It’s perfect for meal prepping or preparing for a social event, ensuring you have enough sweet indulgence for everyone.
Quick Prep and Cook
The “active” hands-on time for this butter pecan ice cream recipe is surprisingly quick, making it an accessible project even on a moderately busy day. You’ll spend about 20-30 minutes on preparation, which includes melting butter, toasting pecans, and mixing your cream base ingredients. The actual churning process in the ice cream maker is also relatively fast, typically taking another 20-30 minutes. While there are significant chilling and freezing periods involved, these are largely passive times where the refrigerator and freezer do the work, allowing you to focus on other tasks. This makes the recipe ideal for preparing in stages, perhaps starting the base the night before you plan to churn and serve.
Serves 1.5 Quarts
This recipe consistently yields a generous 1.5 quarts of delicious butter pecan ice cream. This quantity is ample for serving approximately 6 to 8 people, depending on portion sizes. It’s an ideal amount for a family dessert, a small dinner party, or simply to keep on hand for a few indulgent servings throughout the week. The yield is also perfectly suited for most standard home ice cream makers, ensuring you get a full batch without overfilling. If you’re looking to feed a larger crowd or simply desire more of this incredible nutty treat, the recipe can easily be scaled up, though you might need to churn in multiple batches depending on your equipment’s capacity.
Nutrition Details for Each Scoop
While homemade butter pecan ice cream is undoubtedly a delightful indulgence, many people appreciate understanding the nutritional content of their treats. Providing these details allows for informed choices and helps maintain dietary awareness. Although specific values can vary based on exact ingredient brands and portion sizes, this section offers a general overview of what you can expect in terms of calories, macronutrients, and key components like sugar and sodium. This transparency helps you enjoy your dessert responsibly while still savoring every creamy, nutty bite. Always remember to check specific labels for precise figures, but this serves as a good estimation for home cooks.
Calories and Macronutrients
A typical serving of homemade butter pecan ice cream (approximately half a cup) is generally calorie-dense, reflecting its rich dairy and nut content. You can expect a serving to contain around 250-350 calories, primarily derived from fats and carbohydrates. The fat content is significant, coming from the heavy cream, butter, and pecans, contributing to its luscious texture and satiety. Carbohydrates mainly come from the sugar, providing sweetness. Protein content is usually moderate, derived from the dairy. While it’s a treat, it offers energy and flavor in abundance, perfect for a special occasion. For more great recipes, check out Carina Recipes on Pinterest and Instagram.
Sugar and Sodium Content
Sugar is a prominent component in ice cream, contributing both to its sweetness and texture. A half-cup serving typically contains 20-30 grams of added sugar. This provides the characteristic sweetness and helps keep the ice cream scoopable by lowering its freezing point. The sodium content is usually relatively low, often less than 100mg per serving, with most of it coming from naturally occurring sodium in dairy and the small pinch of salt added to balance the flavors. Individuals monitoring their sugar or sodium intake should consider these figures, adjusting portion sizes or exploring alternative sweeteners if necessary. Remember, it’s a treat meant for enjoyment!
Tips for Best Butter Pecan
Achieving the perfect butter pecan ice cream involves a few key techniques that can elevate your homemade batch from good to extraordinary. These tips focus on enhancing flavor, ensuring optimal texture, and maximizing the overall enjoyment of your dessert. Paying attention to these small details can make a significant difference in the final product, helping you create an ice cream that’s truly unforgettable. Incorporate these pointers into your process for consistently excellent results every time you churn.
Chill Mixture Before Churning
This is perhaps the most critical tip for perfectly creamy ice cream. After you’ve mixed your cream base and added the pecans, the mixture must be thoroughly chilled in the refrigerator for at least 4 hours, or ideally overnight. A well-chilled base (around 40°F / 4°C or colder) will freeze faster in the ice cream maker. Rapid freezing helps prevent the formation of large ice crystals, which can make ice cream taste grainy or icy. The colder the base, the quicker it freezes, resulting in a smoother, more luscious texture. Don’t rush this step!
Toast Pecans for Flavor
Never skip toasting the pecans! Raw pecans, while edible, lack the depth and complexity of their toasted counterparts. Toasting them in butter brings out their natural nutty oils, intensifies their flavor, and adds a delightful crunch. The butter infuses them with a rich, savory note that beautifully complements the sweet cream base. Be sure to cool the toasted pecans completely before stirring them into the chilled base; adding warm nuts could compromise the temperature of your base and negatively impact the churning process.
Use Quality Ingredients
The quality of your ingredients directly correlates to the quality of your finished ice cream. Use full-fat heavy cream and whole milk for the creamiest texture and richest flavor. Opt for pure vanilla extract over imitation vanilla for a truly authentic and aromatic taste. Fresh, good-quality pecans will provide the best crunch and nutty essence. While it might be tempting to cut corners, investing in high-quality ingredients will pay dividends in the superior taste and texture of your homemade butter pecan ice cream, making every scoop a true delight.
Storing Homemade Ice Cream Right
Proper storage is just as important as the recipe itself when it comes to homemade ice cream. Incorrect storage can lead to freezer burn, ice crystals, and a diminished flavor and texture. Following a few simple guidelines ensures that your butter pecan ice cream remains as delicious as the day it was churned, allowing you to enjoy its creamy, nutty goodness for weeks to come. This attention to detail will help maintain its quality and prevent waste.
Airtight Container Is Key
After churning, transfer your soft-serve ice cream immediately to an airtight, freezer-safe container. This is crucial for preventing freezer burn, which occurs when air comes into contact with the ice cream, leading to ice crystals and a dry, unpleasant texture. Glass containers with rubber seals or high-quality plastic containers with tight-fitting lids are excellent choices. For an extra layer of protection, press a piece of plastic wrap or parchment paper directly onto the surface of the ice cream before sealing the lid. This creates an additional barrier against air and helps maintain freshness.
Enjoy Within 2-3 Weeks
While homemade ice cream is incredibly delicious, it typically doesn’t contain the stabilizers and preservatives found in commercial varieties. For the best flavor and texture, it’s recommended to enjoy your butter pecan ice cream within 2 to 3 weeks of making it. Beyond this timeframe, it may start to develop ice crystals, lose its creamy texture, and the flavors might dull. Storing it in the back of the freezer, where temperatures are more consistent and less prone to fluctuations from opening the freezer door, can help prolong its optimal quality.
Customizing Your Butter Pecan Treat
One of the joys of homemade ice cream is the ability to customize it to your preferences or dietary needs. This allows for creativity and ensures that everyone can enjoy a delicious scoop, regardless of their equipment or restrictions. Whether you’re looking for an alternative churning method, dairy-free options, or simply want to add a personal touch with extra mix-ins, there are many ways to make this butter pecan treat uniquely yours. These customizations make the recipe versatile and fun to experiment with, encouraging you to make it your own.
No Ice Cream Maker Option
Don’t have an ice cream maker? You can still make delicious butter pecan ice cream! While it requires a bit more effort, the “no-churn” method is a viable alternative. This typically involves using a base of whipped heavy cream and sweetened condensed milk. After mixing the base and folding in the toasted pecans, you freeze the mixture in a shallow pan, stirring it every 30-45 minutes for the first few hours to break up ice crystals and achieve a creamy texture. This manual stirring is crucial to replicate the aeration and crystal prevention of an ice cream maker, leading to a surprisingly good result.
Dairy-Free Substitutions
For those with dairy sensitivities or following a vegan diet, this recipe can be adapted. Substitute the heavy cream with full-fat coconut cream (chilled overnight to separate the solid cream) or a high-quality, full-fat dairy-free creamer. Whole milk can be replaced with full-fat canned coconut milk or your favorite dairy-free milk alternative (like almond or oat milk). Be aware that the texture might be slightly different, often a bit less rich, but still wonderfully creamy and flavorful. Ensure all other ingredients, like butter for toasting pecans, are also dairy-free (e.g., vegan butter).
Favorite Mix-Ins for Fun
While classic butter pecan is perfect on its own, feel free to get creative with additional mix-ins. Consider adding a swirl of caramel or butterscotch sauce to the base before freezing for an extra layer of sweetness. A sprinkle of flaky sea salt can enhance the buttery, nutty notes even further. Chocolate chips or chunks, particularly white chocolate, could also complement the pecans nicely. Some might even enjoy a touch of maple extract for a different dimension of flavor. Experiment with what you love to make this butter pecan ice cream truly your signature sweet treat.